Advertisement
Quick Links
Advertisement

Related Manuals for ausdom TW01


Summary of Contents for ausdom TW01
- Page 1 User’s Manual MODEL:TW01 TRUE WIRELESS EARPHONE...
-
Page 2: Package Contents
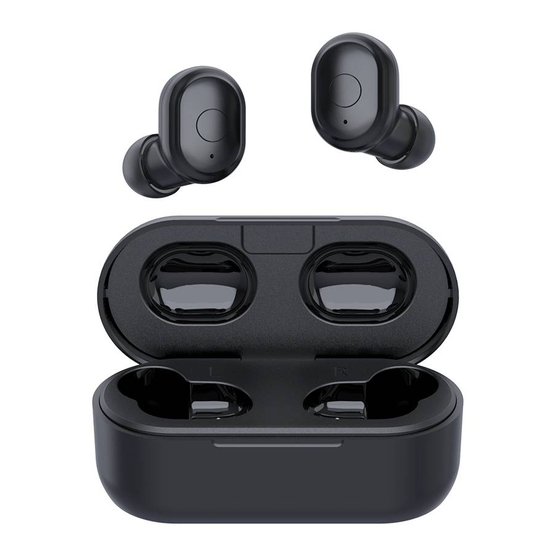
Introduction Thank you for purchasing the AUSDOM TW01 wireless earphone. The earphone provides light-weight, rich sound and soft-comfortable earbuds construction. The feature friendly buttons design that makes it easy to operate the play, stop and skip audio functions and answer a call with hands-free. - Page 3 OVERVIEW Choose Ear Tips Small Middle Large Pogo Pins It is recommended you try middle EarTips first, it fits most people...
- Page 4 The earphones was worn as shown Right ear Micro USB interface for charging...
-
Page 5: How To Pair
Put both Earphones into charging case to activate them then take out, both Earphones will auto power on and pair with each other. After the LED for left Earphones turns blue and red, right Earphones turns blue. Search TW01 on mobilephone and connect it. - Page 6 Two Earphones will auto pair with each other. When LED on left Earphone turns blue and red, right Earphone turns blue, it means both sides connected successfully Search for TW01 on mobilephone and connect it...
- Page 7 Dual earphone usage mode: Take the left and right earphones directly from the charging compartment and put on the ear, the earphone will automatically connect and enter the pairing state. Single earphone (drive) usage mode: Take the left (L) earphone directly from the charging compart- ment and put it on the ear to use it directly (provided that the dual earphones are successful- ly paired with the mobile phone).
- Page 8 FUNCTIONS Power-on Method 1: take earphones out from the charging case and they will auto power on (LED solid blue) (Make sure there has power in charging case) Method 2: Power off earphones and hold MFB for 2s to power on (LED glows solid blue) Hold 1.
- Page 9 Reject Call Press and Hold MFB for 2s to reject the incoming call Hold Answer Call Press MFB to answer the incoming call and press again to end it Short Press Switch Audio Output During calling, press and hold MFB for 2s to switch audio output between mobilephone and earphones Hold...
- Page 10 During calling, double press MFB to switch mute on/off Double Press Play/ Pause When listening to music, press MFB once to play / pause. Short Press Skip Track Forward /backward During playing, double press MFB on right Earphone to next song, double press MFB on left Earphone to last song Double Press...
- Page 11 Voice Assistant When standby, press and hold MFB for 2s to activate voice assistant (like siri) Hold Charge the Earphones Insert the earphones into the charging case LED will be solid red when charging, after full charged,turn to blue for 1min then turn off Charge the case Please charge the case via USB cable, Red LED flashes when charging, turn to solid...
-
Page 12: Product Parameter
PRODUCT PARAMETER Model: T W 0 1 Operation Range: 10m (with no obstacle) Bluetooth version: V5.0 Charging time: approx 2hr Music time: approx 5hr Battery type: Li-ion Bluetooth profiles: HFP/HSP/A2DP/AVRCP Battery capacity (earphones): 3.7V/ 50mAH Battery capacity (charging case): 3.7V/ 600mA Input parameter (charging case): 5V 600mAh (All technical data shall be subject to practical performance.) - Page 13 TIPS 1. Before using the Earphones, please read the manual carefully and keep it for future references.. 2. The Earphones need to be fully charged prior to first-time use. 3. If the Earphones is left unused for over two weeks, please recharge it periodically. 4.
- Page 14 WARNING 1. Never disassemble or modify your Earphones for any reasons to avoid any damages and danger. 2. Do not store the Earphones in extreme temperatures (under 0 to 45 ) 3. Avoid using the indicator close to the eyes of children or animals.
-
Page 15: Warranty Card
WARRANTY CARD ATTENTIONS: - Please read the return procedures and warranty policy carefully on https://www.ausdom.com/CustomeCare/Warran- ty.html before sending items back to point-of-purchase. - Please fill the card and send it to your reseller together with the product if your product's warranty is valid. - Page 16 For more information, please visit our official website www.ausdom.com Your valuable comments and suggestions on improving AUSDOM products are welcomed!
Need help?
Do you have a question about the TW01 and is the answer not in the manual?
Questions and answers