Table of Contents
Advertisement
Advertisement
Table of Contents

Related Manuals for MEDICORE SA-3000P


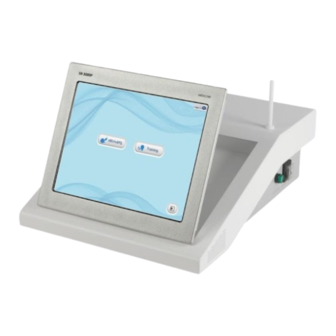
Summary of Contents for MEDICORE SA-3000P
- Page 1 SA-3000P Operation Manual Ver.2.0.0...
-
Page 2: Table Of Contents
2.3 Maintenance and Cleaning .................... 13 2.4 Cautions for Measurement ..................... 15 Description of SA-3000P ..................17 3.1 The features of SA-3000P ....................17 3.2 Theoretical background of SA-3000P ................17 3.4 Description of Equipment symbols ................. 19 Installation of SA-3000P ................... 20 4.1 Installation ........................ -
Page 3: General
Introduction General Thank you for using SA-3000P. Please read this User’s Manual carefully before operating this equipment for proper handling and maintenance, and get familiar with all the functions and features of this equipment for safe handling and reliable performance. - Page 4 Do not alter or modify the products. Do not use the product other than normal purpose. Medicore Co., Ltd. is not liable for damage caused by the use of the persons without appropriate medical license or education.
-
Page 5: Service Request
SA-3000P Operation Manual Service Request Only people of Medicore Service Center or authorized distributor can carry out warranty repair or after-sales-service. If an unauthorized person tries to warranty repair, warranty is void. Medicore Service Center or authorized distributor is obligated to perform warranty repair or after-sales service for the service requested by user. -
Page 6: How To Contact For Customer Service
SA-3000P Operation Manual How to contact for customer service In the event of a malfunction or failure, contact Service Dept. of Medicore Co., Ltd along with the model name, serial number, date of purchase and the detail description of technical failure. -
Page 7: How To Use This Manual
Chapter 1 How to use this manual 1.1 Contents of Manual This manual contains all the information needed to operate our SA-3000P and it further provides exact information on the conditions of the patients including the measured parameter analysis. -
Page 8: Manual Construction
SA-3000P Operation Manual 1.2 Manual Construction Users have to carefully read this Manual before operating the Equipment. This Manual consists of various Chapters as follows. Chapter 1 How to use this Manual. Chapter 2 Operational Dos and Don’ts... -
Page 9: Meaning Of Symbols Used In This Manual
SA-3000P Operation Manual 1.3 Meaning of Symbols used in this Manual Symbols are used to specially emphasize the agreed details as follows. Users need to follow all the cautions and notes listed in this manual. In the event that the product is damaged to misuse or negligence by a user, the manufacturer or the authorized dealers shall not be responsible for any damage or system failure thereof. -
Page 10: Operational Dos And Don'ts
SA-3000P Operation Manual Chapter 2 Operational Dos and Don’ts 2.1 Don’ts in Operational Environment Do not operate or store the equipment under the following environments. Avoid the damp locations, and do not Location where exposed direct operate the equipment with wet hands. - Page 11 SA-3000P Operation Manual Make sure to prevent dust and Locations exposed to chemical or explosive especially metal debris. gas. The disassembling of equipment should be Do not plug in the power, until the done by the authorized personnel. installation is completed. Otherwise, it Otherwise, we will not be liable for any can cause damage to the equipment.
-
Page 12: Cautions For Electrical Safety
When these devices are placed close to the equipment, it can produce inaccurate measurements. For SA-3000P, both independent circuit and stable grounding are essentially required. In the event that same power source is shared with other electronic equipment, it can also produce inaccurate output. -
Page 13: Maintenance And Cleaning
The level of electrical energy discharged from a system user or patient to the SA-3000P can be significant enough to cause damage to the system or probes. The following precautions can help to reduce ESD: anti-static spray on carpets; anti-static spray on linoleum;... - Page 14 SA-3000P Operation Manual Caution When you finish cleaning up the device, please check the main body and the sensor. If the device is outworn or damaged, please do not use it. At least once a month, clean and wipe off the frame by using the soft cloth after wetting it in lukewarm water or alcohol.
-
Page 15: Cautions For Measurement
SA-3000P Operation Manual 2.4 Cautions for Measurement 2.4.1 Things to remember in measurement Please do not behave to cause the fluctuation of heartbeat just before measuring. For example, taking a significant workload, taking drugs or smoking shall be refrained. 2.4.2 Preparation of the patient before measuring Patient shall maintain the fully stable condition to allow it to reflect the condition of the patient as much as possible. - Page 16 SA-3000P Operation Manual Arterial Node). In other words, repeatedly testing effected of internal and external environmental factors (mental stress, emotional changes, breathing, blood pressure, body temperature or hormone, etc.) make a change of result value. People with diseases or older people are not able to respond immediately to changes in internal and external environments.
-
Page 17: Description Of Sa-3000P
3.2 Theoretical background of SA-3000P SA-3000P HRV quantify the full extent of the patient's heart rate variability during the measurement time. The healthy individual with excellent ability to regulate autonomic function has bigger variability of heart rate but a person under any disease or stressed state has reduced variability. - Page 18 SA-3000P Operation Manual 3.3 Composition of Equipment Be sure to check the following product and accessories are available: The list of components ① SE-3000P Main Unit : 1 EA ② Operation Manual : 1 EA ③ PPG Sensor : 1 EA ④...
-
Page 19: Description Of Equipment Symbols
SA-3000P Operation Manual 3.4 Description of Equipment symbols Type BF Type CF Power “ON” Power “OFF” Attention Photo-PlethysmoGraphy Heart Rate Variability Ground LAN/USB RAD-13-023-12- R27(E) How to Use this Manual... -
Page 20: Installation Of Sa-3000P
4.1 Installation Check point for installation While installing SA-3000P, observe the following points. SA-3000P has to be used under the ambient temperature of 10℃~40℃ and humidity of 80%. Check the connection with power cord. Do not plug in the cords into the same port of other equipment. - Page 21 SA-3000P Operation Manual 4.1.1 Power Connection Plug the power cable into power port of SA-3000P. Please check if each signal input and output is properly connected. If the connection is not correct, problems may occur. 4.1.2 The connection of accessories ...
-
Page 22: Operation
5.1.2 In case a user changes the setting values during the test, use the menu and then alter the setting. 5.1.3 If you connect the sensor with patient, SA-3000P indicates the patient’s data with figure and wave shape on the screen. -
Page 23: Main Window Of Software
SA-3000P Operation Manual 5.3 Main window of software FIG 5.1 is the Main Window of the SA-3000P. The functions and settings of each button is as follows: FIG 5.1 MAIN WINDOW OF SA-3000P HRV+APG : Perform the program for HRV & APG measurement. - Page 24 SA-3000P Operation Manual The figures below are initial screen after executing each function of SA-3000P program. FIG 5.2 Setup Window of Program FIG 5.3 HRV INITIAL SCREEN (3M, 5M) RAD-13-023-12- R27(E) How to Use this Manual...
- Page 25 SA-3000P Operation Manual FIG 5.4 INIITIAL SCREEN FOR TRAINING RAD-13-023-12- R27(E) How to Use this Manual...
-
Page 26: Data Backup
Figure 5.1. If you click on the Transfer button, the original patient data is backed up to the backup DB path. Figure 5.5 SA-3000P BACKUP screen NOTE Medical records should be retained until legal limit time. We recommend periodic DATA backup to prepare for any problems in the product's database. - Page 27 SA-3000P Operation Manual 5.5 HRV+APG 5.5.1 HRV+APG Initial Screen FIG 5.6 HRV INITIAL SCREEN Patient : Insert the new patient or import the current data from the list. Print : Print the result after the measurement or saved data.
- Page 28 SA-3000P Operation Manual 5.5.2 SETUP Mode When you click the “SETUP” button on HRV+APG (PPG) screen, the popup as below will be appeared. FIG. 5.7 SETUP On SETUP screen, you can make the setting as follows. ① Measurement time has 4 modes to be selected such as 25beat, 1M 30S, 3M and 5M.
- Page 29 SA-3000P Operation Manual ⑤ When you finish all marks, you shall press “OK” button while, if you click “CANCEL”, it will not be saved. 5.5.3 Measurement with HRV +APG (PPG) Mode 1) Patient Registration & Import of Current Patient. FIG. 5.8 SELECTION FROM THE CURRENT PATIENT DB 2) Measurement for Patient ①...
- Page 30 SA-3000P Operation Manual be different. - 25Beat, 1M 30S (APG Screen): APG Report only available - 3M, 5M (HRV Screen): APG Report, HRV Report available FIG. 5.9 MEASUREMENT SCREEN (1M 30S, 3M) RAD-13-023-12- R27(E) How to Use this Manual...
- Page 31 SA-3000P Operation Manual 3) Storage of Measured Data ① When the measurement is completed, the result will be automatically analyzed and it will be saved in the DB. 5.5.4 Management of Patient and Result Data You can manage the patient list and measured data conveniently.
- Page 32 SA-3000P Operation Manual FIG. 5.10 RESULET SCREEN (3M Mode) ③ You can see the activated box at the top of right side on REPORT screen. D ata will be displayed as following the Measurement Date and Time. You can select one of them to see the result.
- Page 33 SA-3000P Operation Manual see the result. ⑤ When you click the button for HRV, DDR, APG History, you can see the result history for each data. RAD-13-023-12- R27(E) How to Use this Manual...
- Page 34 SA-3000P Operation Manual FIG. 5.11 RESULT HISTORY RAD-13-023-12- R27(E) How to Use this Manual...
- Page 35 SA-3000P Operation Manual 2) Delete the Measured Result of Patient ① Select the date of result record and time on HRV Report/ DDR Report screen from the top right side. ② Click “Delete” button at the right side. ③ When the small window of “Do you want to remove current record permanently?” is appeared, you can click “Y”...
-
Page 36: Rsa Training
SA-3000P Operation Manual 5.6 RSA TRAINING 5.6.1 Initial Screen of RSA TRAINING Below is the main screen when you click the “TRAINING” button. FIG. 5.13 INITIAL SCREEN OF TRAINING REGISTRATION : Insert the new patient or import the current data from the list. - Page 37 SA-3000P Operation Manual 5.6.2 CIRCUMSTANCES When you click the SETUP button on the TRAINING screen, it will be seen as below screen. FIG 5.14 CIRCUMSTANCES (Left: Biofeedback, Right: Free) It is possible to set the function on SETUP as seen below.
- Page 38 SA-3000P Operation Manual 5.6.3 Breathing Training Method After selecting the patient, the user can measure the test as following process. FIG 5.15 MEASUREMENT SCREEN OF TRAINING (Trial Test) ① Make the patient comfortable and wear the PPG finger sensor. ② Click “Preview”. (After clicking Preview button, it will be activated in 10 seconds.) ③...
- Page 39 SA-3000P Operation Manual FIG 5.16 TRIAL TEST SCREEN OF TRAINING 2) Biofeedback Mode ① The Biofeedback is to do training with the target breathing numbers obtained by the Trial Test. (Without self-targeting breathing number, it cannot start the Biofeedback.) ② After wearing the sensor in comfort, follow the training method as above 5.7.3 Breathing Training method.
- Page 40 SA-3000P Operation Manual FIG 5.17 TRAINING SCREEN OF TRAINING (Biofeedback) 3) Free Mode ① At this mode, it is to do training by selecting the free target breathing numbers at the SETUP. (In this case, without the Trial Test, you can do training.) ②...
- Page 41 SA-3000P Operation Manual 5.6.4 Management Method of Patient & Dada 1) Management Method 5.5.3 Patient’s measurement method & Management – As same as 2). 2) When the data is selected ① Select the patient. ② Click “Report” at the top of TAB button. At the initial screen, all TABs are already pressed.
- Page 42 SA-3000P Operation Manual 3) Delete Measured Data of Patient ① Select the date or time to be deleted that was measured from the top right side of HRV Report/ DDR Report. ② Click “Delete” button at the right side. ③ If the message of “Do you want to remove current record permanently?” were appeared, would click “Y”...
-
Page 43: Trouble Shooting
① Pulse wave is not shown during preview. Check the connection between the probe and main body. ② Do not measuring during executing print-out; SA-3000P shows and records the real- time data, so if operator performs measurement and print at the same time, serious malfunction occurs. -
Page 44: Use Of Finger Sensor
SA-3000P Operation Manual Chapter 7 Use of Finger Sensor 7.1 Attachment of the PPG Probe ① Clean the applicable areas with alcohol. ② Place probe to the index finger (2nd finger) of left hand as illustrated in the picture below. -
Page 45: Description Of Terms
Chapter 8 Description of Terms Bio-Signal processing: Bio-signal refers to all signals we can get from a body. Medicore Co., Ltd. Co., Ltd. device is interested in obtaining signal through blood volume in the capillary vessel of tip of fingers. Analysis of above waveform is possible, but to obtain more specific and precise information we process signals. -
Page 46: Certificate Of Quality And Warranty
Medicore Co., Ltd. warrants its product against defects in material and workmanship for one year. During the warranty period, Medicore will, at its option, repair or replace product which proves to be defective. Product that is installed by Medicore or its authorized distributor carries a warranty from the installation date, all others from the shipment date.
Need help?
Do you have a question about the SA-3000P and is the answer not in the manual?
Questions and answers