
Related Manuals for clare CVP-B3DB50-ODIW


Summary of Contents for clare CVP-B3DB50-ODIW
- Page 1 Clare Video Doorbell v3 Installation and User Guide Model CVP-B3DB50-ODIW Last modified: 12/10/19 DOC ID - 1890 • Rev 02 1 / 59...
- Page 2 Clare Controls, LLC., except where specifically permitted under US and international copyright law. Trademarks The Clare Video Doorbell v3 name is a trademark and patents of Clare Controls, LLC Other trade names used in this document may be...
-
Page 3: Table Of Contents
Content Wi-Fi signal strength requirements...6 Power kit installation...7 Clare Video Doorbell (CVD) installation...9 Doorbell camera name...28 Time Zone...29 DST...30 Date Format...30 Receive Call from Doorbell...32 Chime Type...32 Indicator...34 Alarm Notifications...35 Record Audio...46 Network Signal...46 Configure Network...47 Storage Status...49 Device Version...51 Image and Video Encryption...51... - Page 4 Introduction Thank you for choosing Clare Controls. In today’s competitive marketplace, we can appreciate that you have many choices for your home automation needs. This document is intended as a quick-start guide, not a full product guide. For more information, view the full ClareVision Plus Camera User Guide (DOC ID 1430).
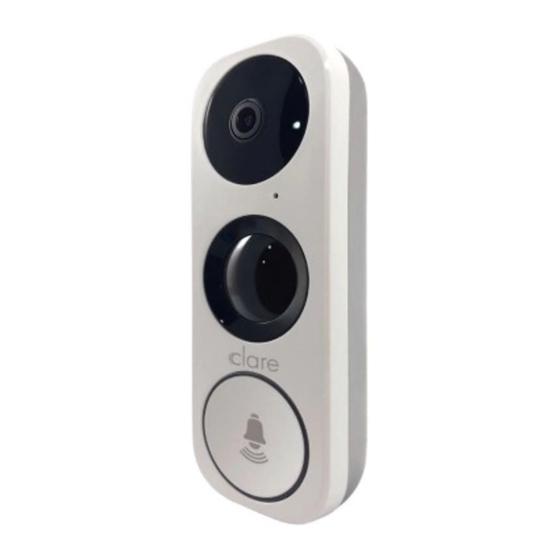
- Page 5 Package contents The below items are included with the Clare Video Doorbell v3. DOC ID - 1890 • Rev 02 5 / 59...
-
Page 6: Wi-Fi Signal Strength Requirements
Clare Video Doorbell. Figure 2: Mechanical versus digital doorbell Wi-Fi signal strength requirements The Clare Video Doorbell v3 can be connected to either a 2.4GHz or 5GHz Wi-Fi network and requires a minimum -60dBm Wi-Fi signal strength at the installation location. -
Page 7: Power Kit Installation
Installation Before starting installation, make sure to shut off the doorbell’s power supply at the breaker panel. Installation notes • You may need a pencil and power drill. • Install the Power Kit on the chime. All chimes require power kit installation. If no chime is installed, skip power kit installation and install the doorbell following option B on page 9. - Page 8 2. Insert one end of the wire harness into the power kit. 3. Remove the mechanical chime’s cover. 4. Remove the existing chime wires from the terminals labeled TRANS and FRONT. 5. Connect the wire harness to the chime’s terminals labeled TRANS and FRONT.
-
Page 9: Clare Video Doorbell (Cvd) Installation
7. Mount the power kit to the side of the chime. 8. Replace the chime cover. Clare Video Doorbell (CVD) installation Follow these instructions to ensure that the doorbell is installed correctly. Serious injury or death may occur if any of the warnings are ignored. Injury or equipment damage may occur if any of the cautions are neglected. - Page 10 2. Remove the existing doorbell and disconnect the wires to the screws on the back. 3. (Optional) If the wall is uneven, paste the foam plate to the mounting plate. 4. Insert the mini-level into the mounting plate, and then mark the drill points when the level’s bubble stays in the center.
- Page 11 6. Fix the mounting plate to the wall. Make sure to pull the doorbell wires through the center of the wedge. 7. Remove the doorbell’s faceplate by firmly holding the doorbell and gently pressing down on the doorbell button and edge of the camera lens. 8.
- Page 12 9. Use the doorbell screws to affix the doorbell to the mounting plate. 10. Restore the electricity at the breaker, and then follow the instructions to setup the doorbell in the ClareVision Plus app. Note: Do not replace the faceplate until after you have added to the doorbell to the ClareVision Plus (CVP) app.
- Page 13 Creating a ClareVision Plus account To access live doorbell video and recorded footage from anywhere in the world, you must first create a CVP account for the customer on their phone. Use their phone and account to complete the activation process. To setup the ClareVision Plus account using an iOS device: 1.
- Page 14 To setup the ClareVision Plus account using an Android device: 1. Download and install the ClareVision Plus app. – Google Play ClareVision Plus for Android 2. Launch the app, then tap ALLOW. 3. Tap Select Country or Region. DOC ID - 1890 • Rev 02 14 / 59...
- Page 15 4. Select your country/region, and then tap the Checkmark icon in the top-right corner. 5. Tap Login. DOC ID - 1890 • Rev 02 15 / 59...
- Page 16 6. Tap Register. Follow the registration steps below. Note: The ClareVision Plus account used must be that of the homeowner. a. Read the Privacy Policy, and then tap Agree. b. The Mobile Phone Number option is selected by default. Enter the mobile device’s number.
- Page 17 – or – Tap Register by Email Address at the bottom of the screen, and then enter your email address. Tap Get Verification Code. A verification code is sent to the email/phone. d. Check the SMS or email message for the verification code, copy the code, and then return to the ClareVision Plus app.
- Page 18 7. Tap Login, and then enter your set credentials. Note: Android users with a device that supports fingerprint authentication are presented with a fingerprint authentication pop-up. If desired enable the fingerprint usage. a. Tap Settings. The CVP Account Management settings display. b.
- Page 19 c. Follow the displayed instructions, pressing the desired finger over the fingerprint reader on the mobile device. Note: Once finished, Fingerprint Authentication is required to access the app. 8. Battery optimization pop-up displays. Android may attempt to restrict notifications to allow phone battery optimization.
- Page 20 Once the camera is installed, follow the steps below to complete doorbell setup and final installation. Note: When adding a Clare Video Doorbell v3, we recommend turning off the phone’s cellular data before initiating the add doorbell process. Turning off the cellular ensures that the phone properly switches networks.
- Page 21 d. After connecting to network, return to CVP app, CVD should now join the target network. The following voice prompts should be heard during this process: “Connecting to Wi-Fi, please wait.” “Platform registration successful.” “Configuration complete.” 9. Select the Time Zone. 10.
- Page 22 11. Enable Audio, and then text Next. Note: This is off by default. 12. Select the Chime Type. DOC ID - 1890 • Rev 02 22 / 59...
- Page 23 Mechanical a. Tap Mechanical, read and configure the mechanical chime as displayed. b. Tap Finish. – or – DOC ID - 1890 • Rev 02 23 / 59...
- Page 24 Electronic a. Tap Electronic, read and configure the chime as displayed, and then tap Next. b. Select the ring duration, and then tap Finish. DOC ID - 1890 • Rev 02 24 / 59...
- Page 25 – or – Not Installed a. Read and follow the displayed instructions. b. Tap Finish. 13. Select the Alarm Areas (blue is active), and then tap Save. DOC ID - 1890 • Rev 02 25 / 59...
- Page 26 The CVP app home page displays. 14. Put the doorbell’s faceplate back, and then insert two security screws into the bottom of the doorbell to secure the faceplate. DOC ID - 1890 • Rev 02 26 / 59...
- Page 27 Understanding the CVP app icons The below icon guide helps navigate and configure settings in the ClareVision Plus app. Table 1: Live and recorded video settings Icon Icon description 2-way audio This icon enables 2-way audio. Take photo This icon saves a snapshot to the app’s pictures and videos section. Record video This icon saves a recorded video the apps gallery.
-
Page 28: Doorbell Camera Name
v3 Doorbell CVP settings Customize the doorbell settings for user preferences and notifications. Doorbell camera name The doorbell camera name is displayed at the top of the Settings page. To modify the doorbell’s name: 1. Tap the 3 dots in the upper-right corner of the doorbell’s name field. 2. -
Page 29: Time Zone
Time Zone The doorbell’s time zone defaults to the location set in the CVP app. Use this feature to adjust the time zone as needed. To modify the doorbell’s time zone: 1. Tap the 3 dots in the upper-right corner of the doorbell’s name field. 2. -
Page 30: Dst
DST allows the user to toggle the daylight savings time setting. To toggle DST: 1. Tap the 3 dots in the upper-right corner of the doorbell’s name field. 2. Tap the DST slider to toggle the setting to On/Off. Date Format This setting changes the date format displayed on the camera stream. - Page 31 2. Tap the Date Format field. 3. Select the desired format. DOC ID - 1890 • Rev 02 31 / 59...
-
Page 32: Receive Call From Doorbell
Receive Call from Doorbell Receive call from doorbell allows 2-way calling from the doorbell to the user’s smartphone when the doorbell is pressed. To change toggle the receive calls setting: 1. Tap the 3 dots in the upper-right corner of the doorbell’s name field. 2. - Page 33 2. Tap the Chime Type field. 3. Select the desired chime type. Note: Selecting the incorrect chime type may damage the doorbell. Verify chime type before changing this setting. Refer to Mechanical versus digital doorbells on page 6. 4. Tap to save the selection.
-
Page 34: Indicator
Indicator The indicator is the ring of light around the doorbell button. This settings illuminates or turns off the light around the button. To toggle the indicator: 1. Tap the 3 dots in the upper-right corner of the doorbell’s name field. 2. -
Page 35: Alarm Notifications
Alarm Notifications The alarm notifications allow the user to control the type of alarms they receive from the doorbell using the ClareVision Plus app. Here the user can enable alarm notifications, set a notification schedule, silence the notifications, change the sound for notifications, and adjust the motion detection area. - Page 36 3. Tap the Alarm Notification slider to enable notifications. Notification Schedule The notification schedule allows the user to create set times to receive push notifications from the doorbell. Notes • Schedules cannot overlap. For example, if a schedule is set from 03:00 to 04:30, another schedule cannot start in that time frame.
- Page 37 2. Tap Alarm Notification. 3. Tap Enable > for the Notification Schedule. 4. Tap the slider to turn on notification schedules. DOC ID - 1890 • Rev 02 37 / 59...
- Page 38 5. Tap + Set a Time Schedule. 6. Select the start and end time, the days to apply the schedule, and then tap the Save icon Note: Schedules cannot overlap. 7. Repeat steps 5 through 6 for each additional desired schedule. Once saved, the user is returned to the schedule page.
- Page 39 Silenced Silenced allows the user to cease push notifications on their phone. The notifications are saved in the app and can be accessed easily. To silence notifications: 1. Tap the 3 dots in the upper-right corner of the doorbell’s name field. 2.
- Page 40 3. Tap the Silenced slider to turn on the silence setting for the doorbell. The doorbell is now silenced. DOC ID - 1890 • Rev 02 40 / 59...
- Page 41 To view silenced notifications: 1. Access the ClareVision Plus app. 2. Tap Notifications. All notifications, including silenced notifications, display. DOC ID - 1890 • Rev 02 41 / 59...
- Page 42 Notification Sound Mode Notification sound controls the doorbell’s audio when motion is sensed. When this feature is enabled and something sets off the motion sensor, the doorbell emits sound. There are 3 sound modes: Intensive: The doorbell emits a siren sound. Soft: The doorbell emits a beep.
- Page 43 3. Tap Mute >. 4. Select the desired sound mode, and then tap the Save icon DOC ID - 1890 • Rev 02 43 / 59...
- Page 44 Detection Area Settings Detection area settings allow the user to customize the doorbell’s motion detection area. To detection area: 1. Tap the 3 dots in the upper-right corner of the doorbell’s name field. 2. Tap Alarm Notification. DOC ID - 1890 • Rev 02 44 / 59...
- Page 45 3. Tap Detection Area Settings. 4. Tap the desired motion detection areas in the doorbell’s field of view, and then tap Save. Note: The active motion detection areas are blue, other areas in the field of view are greyed out. DOC ID - 1890 •...
-
Page 46: Record Audio
Record Audio Record audio controls the doorbell’s audio recording. When on, the doorbell records audio with all footage. To toggle Record Audio: 1. Tap the 3 dots in the upper-right corner of the doorbell’s name field. 2. Tap the Record Audio slider to toggle the setting to On/Off. Network Signal Network signal displays the doorbell’s current network signal. -
Page 47: Configure Network
Configure Network Configure network allows the user to change the doorbell’s connected network. To change the configured network: 1. Tap the 3 dots in the upper-right corner of the doorbell’s name field. 2. Tap the Configure Network field. DOC ID - 1890 • Rev 02 47 / 59... - Page 48 3. A pop-up displays, read it and then tap OK. 4. Access the Reset Key on the doorbell, and then follow the displayed on- screen prompts. DOC ID - 1890 • Rev 02 48 / 59...
-
Page 49: Storage Status
Storage Status Storage status allows the user to see the status of the doorbell’s SD card. To format the SD card: 1. Tap the 3 dots in the upper-right corner of the doorbell’s name field. 2. Tap the Storage Status field. 3. - Page 50 4. Tap Initialize. 5. Read the pop-up, and then tap OK to continue. Wait for the card to initialize. DOC ID - 1890 • Rev 02 50 / 59...
-
Page 51: Device Version
Device Version Device version displays the doorbell’s current firmware. Image and Video Encryption Image and video encryption allow the user to add a secondary level of encryption to their doorbell stream. When enabled, this setting requires that a user enter the doorbell’s verification code to view the doorbell’s stream from another smartphone. -
Page 52: Change Verification Code
2. Tap the Image and Video Encryption slider to toggle the setting to On/Off. Change Verification Code Change verification code allows the user to change the doorbell’s verification code. This may be used to prevent doorbell access to people the original code was shared with, such as guest or technicians who have serviced the doorbell. - Page 53 2. Tap the Change Verification Code field. 3. Enter the previous Verification Code, and then tap Next. Note: The code is case sensitive. DOC ID - 1890 • Rev 02 53 / 59...
- Page 54 4. Enter the desired new verification code, and then tap Finish. Note: Do not forget the new code. If the code is lost, the doorbell cannot be re-added or altered. 5. Read the pop-up, and then tap OK. Pop-up notice text: Remember the new verification code. Verification code cannot be recovered once forgotten, and you cannot view the encrypted pictures and videos.
-
Page 55: Ir Light
IR Light The IR light controls the doorbell’s infra-red settings. When it is on, infra-red is available at night. To toggle encryption: 1. Tap the 3 dots in the upper-right corner of the doorbell’s name field. 2. Tap the IR Light to toggle the setting to On/Off. DOC ID - 1890 •... -
Page 56: Delete Device
Delete Device Delete device removes the doorbell from the CVP app and the account to which it is attached. It does not remove it from the Wi-Fi network. The stream is no longer accessible. DOC ID - 1890 • Rev 02 56 / 59... -
Page 57: Basics
Appendix Basics Table 2: LED indicator Flashing Doorbell is ready for Wi-Fi configuration Blue light Steady on Doorbell is working Flashing fast Device exception Red light Steady on Doorbell is powering on SD card management 1. In the app, tap the Storage Status in the Devices Settings interface to check the SD card status. -
Page 58: Frequently Asked Questions
8 devices viewing the camera simultaneously. Q: Can the doorbell camera get wet? A: The Clare Video Doorbell is IP54 rated for direct rain and water. It is not recommended to pressure wash the doorbell. Q: Why does my camera have a fisheye view? A: The Clare Video Doorbell has a vertical view of 180°... -
Page 59: Warranty Information
Warranty information Clare Controls offers a three (3) year limited warranty on original Clare Controls components, from the date of shipment from Clare Controls. To view complete limited warranty details, including limitations and exclusions, www.clarecontrols.com/warranty. Scan the code to view...
Need help?
Do you have a question about the CVP-B3DB50-ODIW and is the answer not in the manual?
Questions and answers