Advertisement
Quick Links
620744
483004
624476
627514E3
627514M
XIM620744 -R5 6/12
www.littletikes.com
www.littletikes.co.uk
www.littletikes.fr
www.littletikes.nl
www.littletikes.pl
Look for video of assembly at
www.littletikes.com/videoinstructions
ENGLISH
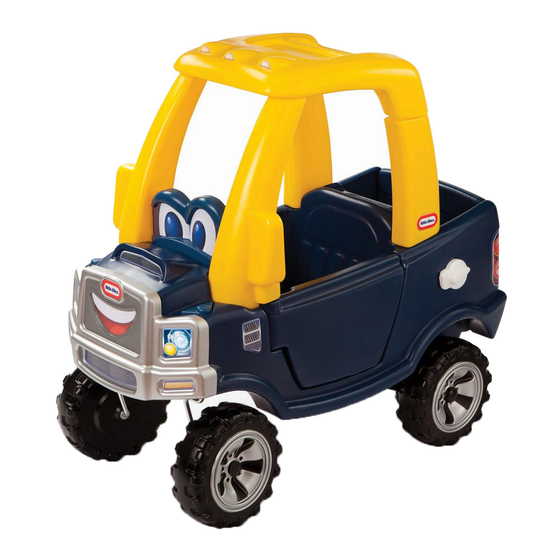
COZY TRUCK
Ages over 1 1/2 - 5 years
Please save sales receipt for proof of purchase.
WARNING:
ADULT ASSEMBLY REQUIRED.
• Keep these instructions for future reference.
• Prior to assembly, this package contains small parts:
hardware which is a choking hazard and may contain
sharp edges and sharp points. Keep away from children
until assembled.
• Adult supervision required. Do not leave children
unattended.
• Ride-on toys should not be used near swimming pools,
on or near steps, hills, roadways, or inclines.
• Shoes must be worn at all times.
• Only one rider at a time.
• Maximum weight limit: 50 lbs. (23 Kg)
• This product is intended for use by childrens ages over 1
1/2 - 5 years.
• This product is intended for outdoor domestic family use
only.
• Protect your eyes. Always wear safety glasses when using
a hammer.
• When temperatures fall below 0°F/-18°C, outdoor use
of this product is not recommended. In extreme cold,
plastic materials lose resilience and may become brittle
and crack upon impact. Store product in a warmer,
protected place.
BATTERY SAFETY INFORMATION:
• Keep these instructions for future reference.
• Replace with 2 "LR44" button cell batteries (not
included).
• The voltage of a fully-charged, rechargeable battery
is often lower than that of a fresh alkaline battery.
Therefore, it is recommended that alkaline batteries
be used instead of rechargeable batteries for best
performance and longer play time.
• Install batteries with the correct polarity (+ and -).
• To avoid battery leakage:
1. Follow the toy and battery manufacturer's installation
instructions.
Adult assembly required / Le montage devra être effectué par un adulte /
Debe ser armado por un adulto
Tools required:
(2) Top hat tools
Outils Requis:
(included in hardware pack). Discard after use.
Herramientas
(2) Outils pour capuchon de vis (incluses dans le sac de
Requeridas:
visserie). À jeter après utilisation.
(2) Dispositivos para remate (incluidos con las
piezas para montaje). Descártelos después de
utilizarlos.
Parts List / Liste des Pieces / Lista de Partes
A
B
C
F
L
L
M
M
O
Left
Right
O. Right & Left front axles
Q. Door latch / Verrou de portière
Seguro
Essieux avant droit et gauche
Ejes delanteros derecho e
R. Gas cap / Bouchon de réservoir
izquierdo
d' e ssence / Tapa de gasolina
P. Horn / Klaxon / Bocina
X
Y
DD x2
EE x6
/
" Screw
1
2
1" Screw / Vis de 2.54 cm (1 po)
Vis de 1.27 cm (
/
po)
1
2
Tornillo de 2.54 cm (1")
Tornillo de 1.27 cm (
/
")
1
2
1
A.
Body / Carrosserie / Cuerpo
B.
Tailgate / Hayon arrière
Puerta trasera
E
D
G
H
I
L
L
M
M
P
Q
R
S
T
V
U
W
S. Logo / Logo / Logotipo
T. Center caps (4)
Bouchons centraux (4)
Tapas centrales (4)
Z x 6 AA x 4 BB x 2 CC x 6
FF x4
1
/
" Screw / Vis de 3.81 cm (1
1
2
Tornillo de 3.81 cm (1
(Recommended)
(Recommandé)
(Recomendado)
C. Door / Portière / Puerta
D. Floorboard / Plancher / Suelo
E. Roof / Toit / Techo
F. Grill / Gril / Parrilla
G. Front right roof support
Support avant droit du toit
Soporte delantero derecho del techo
H. Front left roof support
Support avant gauche du toit
Soporte delantero izquierdo del techo
I.
Rear right roof support
Support arrière droit du toit
Soporte trasero derecho del techo
J. Rear left roof support
Support arrière gauche du toit
J
Soporte trasero izquierdo del techo
K. Eyes / Yeux / Ojos
L. Wheels (4) / Roues (4)
K
Ruedas (4)
M. Hubcaps (4) / Enjoliveurs (4)
Tapacubos (4)
N
N. Steering wheel / Volant
Volante
U. Top hat corners (2)
Y. Steering O ring
Coins de chapeau
Joint torique de
de vis (2)
direction
Cubiertas de remates (2)
Anillo del volante
V. Floorboard buttons (2)
Z. Top hat (6)
Écrou borgne (6
Boutons de plancher (2)
Remate (6)
Botones del suelo (2)
AA. Bushing (4)
W. Rear axle
Bague (4) / Buje (4)
Essieu arrière
Eje trasero
BB. Rear Axle Bushing (2)
Bague d'axe arrière (2)
X. Steering clip
Buje del eje trasero (2)
Clip de direction
Abrazadera del volante
CC. Washer (6)
Roundelle (6)
Arandela (6)
Also included 1 decal sheet.
1 feuille d'autocollants également incluse.
También se incluye 1 hoja de calcomanías.
GG x2
/
" Screw (1.9 cm)
3
4
/
po)
1
2
Vis de 1.9 cm (
/
3
4
/
")
1
2
Tornillo de 1.9 cm (
po)
/
")
3
4
Advertisement

Related Manuals for Little Tikes 620744


Summary of Contents for Little Tikes 620744
- Page 1 (included in hardware pack). Discard after use. Herramientas (2) Outils pour capuchon de vis (incluses dans le sac de Requeridas: visserie). À jeter après utilisation. (2) Dispositivos para remate (incluidos con las 620744 piezas para montaje). Descártelos después de (Recommended) utilizarlos. (Recommandé) (Recomendado)
- Page 2 Au titre de la présente garantie, exclusion may not apply to you. la seule responsabilité de The Little Tikes Company et le seul recours se limitent au Bandai España S.A. remplacement des pièces défectueuses du produit ou au remboursement du prix FRANÇAIS...
- Page 3 Door Latch & Door Assembly / Assemblage du verrou de portière et de la portière / Montaje de la puerta y del seguro DD x1 - " (1.27 cm) Place door (C) onto body. Fit post into opening as shown. Place door latch (Q) onto door (C).
- Page 4 Roof Assembly / Assemblage du toit / Montaje del techo Slide eyes (K) between front right and left roof supports. Insert front roof supports into roof (E). Press one corner of roof into support. Faites glisser les yeux (K) entre les supports avant droit et gauche du toit. Insérez les supports avant du toit dans le toit (E).
- Page 5 Flip truck upright. Snap Little Tikes logo (S) into grill. (EE) x3 as shown. EE x3 - Remettez le camion en position verticale. Emboîtez le logo Little Tikes (S) dans le gril. 1" (2.54 cm) Fixez l’avant du gril en place au moyen de Enderezca el camión.
- Page 6 Rear Wheel Assembly / Assemblage des roues arrière / Montaje de las ruedas de trasero 1. Place top hat (Z) into top hat tool as shown. 2. Hammer rear axle (W) into top hat. 1. Placez le capuchon de vis (Z) dans l'écrou borgne comme indiqué.
- Page 7 1. Place top hat (Z) into top hat tool as shown. 2. Place assembled top hat tool onto rear axle. 3. Hold in place and hammer top hat (Z) onto axle. 1. Placez le capuchon de vis (Z) dans l'écrou borgne comme indiqué. 2.
-
Page 8: Right Side
Installation of Front Right & Left Wheels / Ensemble de roues avant / Montaje de las ruedas delanteras Insert bushings (AA) into Slide in order, washer (CC) opening located at the front then bushing (AA) onto Right corner of the body. Push axle of wheel assembly. - Page 9 IMPORTANT! IMPORTANT ! ¡IMPORTANTE! IMPORTANT! Check axle positions before installing top hat - axles should be equal distance from bushing. IMPORTANT ! Vérifiez les positions des essieux avant d’installer l’écrou borgne : les essieux doivent être équidistants de la bague. ¡IMPORTANTE! Verifique las Correct axle position Incorrect axle position posiciones de los ejes antes de...
- Page 10 Secure using screws (GG) x2 in locations shown. Match right "R" and left "L" top hat covers (U) to the correctly marked sides of the truck. Insert and press into place as shown. GG x2 Fixez l’ensemble au moyen des vis (GG) x 2 dans les emplacements indiqués.
- Page 11 Before installing steering wheel (N), apply decals 3 & 4 to Squeeze steering clip (X) and insert into steering column (N) as shown. Steering clip should snap into the hole on each side of the steering column. dashboard. Pressez ensemble le clip de direction (X) et insérez-le dans la colonne de direction (N) Le clip de direction doit s’emboîter dans l'orifice sur la colonne de direction.
- Page 12 WARNUNG: © The Little Tikes Company, ein Unternehmen von MGA Entertainment. LITTLE 1. Anleitungen des Spielzeug- und des Batterieherstellers TIKES® ist ein Markenzeichen von Little Tikes in den USA und anderen Ländern. ZUSAMMENBAU DURCH ERWACHSENE genau befolgen. Alle Logos, Namen, Gestalten, Abbilder, Images, Slogans und Verpackungsdesigns MINIMUM SIZE allowed is .2”...
- Page 13 UWAGA: Jeżeli urządzenie przestanie działać lub nie działa door elkaar. Alleen aanbevolen of equivalente batterijen un marchio di fabbrica di Little Tikes negli USA e altri Paesi. Tutti i logo, i nomi, i caratteri, le rassomiglianze, le immagini, gli slogan e i tipi di confezionamento sono mogen worden gebruikt.
- Page 14 • Opladning af genopladelige batterier må kun foretages © The Little Tikes Company, onderdeel van MGA Entertainment. LITTLE TIKES® is www.amo.fi een handelsmerk van Little Tikes in de V.S. en andere landen. Alle logo’s, namen, af en voksen. symbolen, gelijkenissen, afbeeldingen, slogans en verpakkingsvormen zijn het Importör: Amo Oy, Vanda...
- Page 15 • Virranlähdeterminaaleihin ei saa aiheuttaa oikosulkua. enten utskiftning av den defekte delen av produktet eller refusjon av kjøpsprisen uma marca comercial da Little Tikes nos EUA e em outros países. Todos os logotipos, for produktet, kun etter Little Tikes Company’s skjønn. Denne garantien gjelder nomes, identidades visuais, imagens, slogans e aparência das embalagens são de...
- Page 16 GARANCIA SLUŽBY ZÁKAZNÍKOM MAGYAR A Little Tikes cég magas minőségű, vidám játékokat gyárt. A vásárló a vásárlás napjától számított egy éves* időtartamra garanciát kap tőlünk arra, hogy a www.littletikes.com termékünkben nincs anyag- vagy gyártási hiba ( a vásárlást igazoló bizonyítékként MGA Entertainment Poland Sp.
- Page 17 © The Little Tikes Company, společnost skupiny MGA Entertainment. LITTLE TIKES® данного изделия. προστατευμένο χώρο. je obchodní známkou společnosti Little Tikes v USA a jiných zemích. Všechna 6. Правильно утилизируйте разряженные батареи; не loga, názvy, symboly, vyobrazení, obrázky, slogany a vzhled balení jsou majetkem ΠΛΗΡΟΦΟΡΙΕΣ...
- Page 18 ‰ÂÓ i· ¤¯ÂÈ ÂÏ·ÙÙÒÌ·Ù· Ô‡Ù ˘ÏÈÎÒÓ Ô‡Ù ηٷÛ΢‹˜ › ¤Ó· ¯ÚÓÔ* · ÙËÓ ËÌÂÚÔÌËÓ›· ·ÁÔÚ¿˜ (¯ÚÂÈ¿˙ÂÙ·È ¯ÚÔÓÔÏÔÁË̤ÓË ·‰ÂÈÍË ÒÏËÛ˘ ˆ˜ ÙÂÎÌ‹ÚÈÔ ·ÁÔÚ¿˜). ∫·Ù¿ ÙËÓ ·ÔÎÏÂÈÛÙÈ΋ ÎÚ›ÛË Ù˘ LittLe tikes Company, ÔÈ ÌÓ˜ ·Ô˙ËÌÈÒÛÂȘ Ô˘ ·Ú¤¯ÔÓÙ·È Ì ÙËÓ ·ÚÔ‡Û· ÂÁÁ‡ËÛË i· Â›Ó·È Â›Ù Ë...
Need help?
Do you have a question about the 620744 and is the answer not in the manual?
Questions and answers