Table of Contents
Advertisement
Operating and Installation Instructions
with adapter for series 485/486
1.0 General information on operating instructions............................................................................................. 2-3
2.0 Notes on possible dangers ............................................................................................................................. 2-3
2.1 Significance of symbols ........................................................................................................................... 2-3
2.2 Explanatory notes on safety information ................................................................................................... 2-4
3.0 Storage and transport ..................................................................................................................................... 2-4
4.0 Description ....................................................................................................................................................... 2-5
4.1 Field of application .................................................................................................................................... 2-5
4.2 Method of functioning................................................................................................................................ 2-5
4.2.1 D Version ......................................................................................................................................... 2-5
4.2.2 Y Version ......................................................................................................................................... 2-6
4.3 Diagram .................................................................................................................................................... 2-7
4.4 Parts list .................................................................................................................................................... 2-8
4.5 Technical data ........................................................................................................................................... 2-9
4.6 Voltage versions........................................................................................................................................ 2-9
4.9 Dimensions ..............................................................................................................................................2-11
5.0 Installation ..................................................................................................................................................... 2-12
5.1 General installation data ......................................................................................................................... 2-12
5.2 Manual operation .................................................................................................................................... 2-13
0040506004 0919 english (englisch)
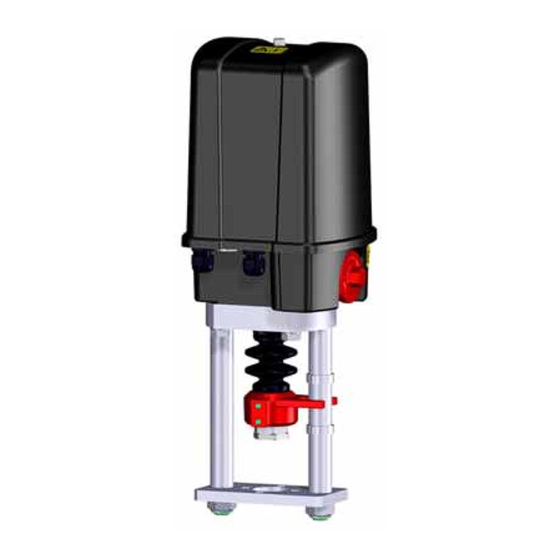
Thrust actuator
®
ARI-PACO
Contents
®
2G 1,6D .......................................................................................................... 2-10
®
2G 1,6Y........................................................................................................... 2-10
2G 1,6D/Y
with adapter for series 022
- Translated original instructions -
Advertisement
Table of Contents

Subscribe to Our Youtube Channel
Related Manuals for ARI-Armaturen ARI-PACO 2G 1,6 D


Summary of Contents for ARI-Armaturen ARI-PACO 2G 1,6 D
-
Page 1: Table Of Contents
Operating and Installation Instructions Thrust actuator ® ARI-PACO 2G 1,6D/Y with adapter for series 022 with adapter for series 485/486 Contents 1.0 General information on operating instructions..................... 2-3 2.0 Notes on possible dangers ..........................2-3 2.1 Significance of symbols ........................... 2-3 2.2 Explanatory notes on safety information .................... - Page 2 5.3 Installation instructions for mounting to valves..................2-14 5.3.1 BR 485/486 ........................... 2-14 5.3.2 BR 022 ............................2-15 5.4 ARI-PACO ® 2G 1,6D..........................2-16 5.4.1 Electrical connection ........................2-16 5.4.1.1 Connection ............................2-16 5.4.1.2 Wiring diagram ...........................2-17 5.4.2 Installation Options ........................2-18 5.4.2.1 Trip slide and setting of S3........................2-18 5.4.2.2 Additional travel switches and setting ....................2-20 5.4.2.3 Potentiometer............................2-21...
-
Page 3: General Information On Operating Instructions
Operating and installation instructions ® Thrust actuator ARI-PACO 2G 1,6D/Y 1.0 General information on operating instructions These operating instructions provide information on mounting, handling and maintaining the thrust actuators. Please contact the supplier or the manufacturer in case of problems which cannot be solved by reference to the operating instructions. -
Page 4: Explanatory Notes On Safety Information
Operating and installation instructions ® Thrust actuator ARI-PACO 2G 1,6D/Y 2.2 Explanatory notes on safety information In these Operating and Installation Instructions dangers, risks and items of safety information are highlighted to attract special attention. Information marked with the above symbol and “ATTENTION ! ” describe practices, a failure to comply with which can result in serious injury or danger of death for users or third parties or in material damage to the system or the environment. -
Page 5: Description
Operating and installation instructions ® Thrust actuator ARI-PACO 2G 1,6D/Y 4.0 Description 4.1 Field of application ® Actuating or shut-off valves are operated with the ARI-PACO 2G linear actuators which have a linear nominal path of up to 40 mm and require a thrust force of 1,6 kN. The linear actuators are adjusted to the thrust forces denoted in the technical data. -
Page 6: Y Version
Operating and installation instructions ® Thrust actuator ARI-PACO 2G 1,6D/Y 4.2.2 Y Version The motor and spindle can be moved up and down in manual mode by means of the switch positions. The valve final positions and the type of control (3-point or analogue) are automatically determined by the electronics in an initialization run. -
Page 7: Diagram
Operating and installation instructions ® Thrust actuator ARI-PACO 2G 1,6D/Y 4.3 Diagram ® PACO 2G 1,6D ® ® PACO 2G 1,6Y 24VAC/DC PACO 2G 1,6Y 90-264VAC Fig. 1 0040506004 0919 Page 2-7... -
Page 8: Parts List
Operating and installation instructions ® Thrust actuator ARI-PACO 2G 1,6D/Y Parts list Pos. Designation Pos. Designation 50.1 Gearbox 50.42 Board support, complete (incl. board) Cable gland 2 x M16x1,5 Shift lever 50.2 50.45 Sealing plug 1 x M16x1,5 50.46 Spring washer 50.4 50.6 Hood... -
Page 9: Technical Data
Operating and installation instructions ® Thrust actuator ARI-PACO 2G 1,6D/Y 4.5 Technical data ® ® Type ARI-PACO 2G 1,6D ARI-PACO 2G 1,6Y Thrust force 1,6 kN 1,6 kN Operating speed mm/sec. 0,25 / 0,38 / 0,47 / 1,0 mm/s 0,25 / 0,30 mm/s adjustable Travel distance max. -
Page 10: Accessories Ari-Paco ® 2G 1,6D
Operating and installation instructions ® Thrust actuator ARI-PACO 2G 1,6D/Y ® 4.7 Accessories ARI-PACO 2G 1,6D ® Type ARI-PACO 2G 1,6D Required for acutating ... • the travel switch S3 / retracting spindle Trip slide ( the travel switch S3 exists already in the standard version of the actuator ) •... -
Page 11: Dimensions
Operating and installation instructions ® Thrust actuator ARI-PACO 2G 1,6D/Y 4.9 Dimensions 1,6 kN (mm) (mm) (mm) ØD1 (mm) (mm) (mm) (mm) h (Nominal (mm) max. 40 stroke) ® ® ARI-PACO 2G 1,6D/Y ARI-PACO 2G 1,6D/Y ® ® for ASTRA DC 022 for STEVI H 485/486... -
Page 12: Installation
Operating and installation instructions ® Thrust actuator ARI-PACO 2G 1,6D/Y 5.0 Installation ATTENTION ! - Work on electrical systems or equipment must only be carried out by qualified electricians or by trained individuals under the guidance and supervision of a qualified electrician in compliance with regional electrical safety requirements and regulations. -
Page 13: Manual Operation
Operating and installation instructions ® Thrust actuator ARI-PACO 2G 1,6D/Y 5.2 Manual operation ATTENTION ! - The manual operating device always rotates during motor-driven operation (running indicator). Never activate the manual operating device while the motor is running. Injury hazard! - In the manual operating mode pay careful attention in the final positions that the manual operating device is only turned to the point where the torque switch trips (audible click) as otherwise damage will be caused to the thrust actuator! -
Page 14: Installation Instructions For Mounting To Valves
Operating and installation instructions ® Thrust actuator ARI-PACO 2G 1,6D/Y 5.3 Installation instructions for mounting to valves 5.3.1 BR 485/486 • The adapter parts are mounted in the torsion safety • Mount the adapter parts flush onto the spindle (2). feature. -
Page 15: Br 022
Operating and installation instructions ® Thrust actuator ARI-PACO 2G 1,6D/Y 5.3.2 BR 022 4 x M = 16Nm • Build up actuator (1) and fasten it with 4x M8x12 • Move driving spindle onto the valve spindle (3). threaded pins (2). M=16Nm 3 x M = 10Nm •... -
Page 16: Ari-Paco ® 2G 1,6D
Operating and installation instructions ® Thrust actuator ARI-PACO 2G 1,6D/Y ® 5.4 ARI-PACO 2G 1,6D 5.4.1 Electrical connection ATTENTION ! - Work on electrical systems or equipment must only be carried out by qualified electricians or by trained individuals under the guidance and supervision of a qualified electrician in compliance with regional electrical requirement and regulations. -
Page 17: Wiring Diagram
Operating and installation instructions ® Thrust actuator ARI-PACO 2G 1,6D/Y 5.4.1.2 Wiring diagram Fig. 4 0040506004 0919 Page 2-17... -
Page 18: Installation Options
Operating and installation instructions ® Thrust actuator ARI-PACO 2G 1,6D/Y 5.4.2 Installation Options 5.4.2.1 Trip slide and setting of S3. 1. Groove for spring 2. Groove for spring Grooves for springh Fig. 5: Spindle and trip slide installation Pos. Designation Pos. - Page 19 Operating and installation instructions ® Thrust actuator ARI-PACO 2G 1,6D/Y - Insert mains connection plug in jack strip (pos. 50.43.3) provided for the purpose. - Carefully place hood onto gearbox and mount firmly on thrust actuator with collar nut. 5.4.2.1.2 Setting Installing the thrust actuator on a straight through valve, the travel switch S3 needs to be set as follows: - Move valve out of the lowest position so as to run valve-lift to up position.
-
Page 20: Additional Travel Switches And Setting
Operating and installation instructions ® Thrust actuator ARI-PACO 2G 1,6D/Y 5.4.2.2 Additional travel switches and setting ® Fig. 6: Switchgear and indicating feature ARI-PACO 2G 1,6D Pos. Designation Pos. Designation 50.38 Guide spindle 50.52 Setting spindle for switch S4 50.42 Board support 50.53 Setting spindle for switch S5... -
Page 21: Potentiometer
Operating and installation instructions ® Thrust actuator ARI-PACO 2G 1,6D/Y 5.4.2.3 Potentiometer ® Fig. 7: Switchgear and indicating feature ARI-PACO 2G 1,6D Pos. Designation Pos. Designation 50.42 Board support 50.68 Connecting cable for option: potentiometer 50.46 Spring washer 50.69 Self-tapping screw 50.47 Wiring diagram sticker 50.70... - Page 22 Operating and installation instructions ® Thrust actuator ARI-PACO 2G 1,6D/Y 5.4.2.3.1 Installation procedure If retrofitting the potentiometer, proceed as follows: - Switch-off mains voltage and safeguard to prevent it from being switched back on again accidentally. - Loosen collar nut on hood, carefully remove hood. - Insert the potentiometer into the guide in the way that the pinion (pos.
-
Page 23: Ari-Paco ® 2G 1,6Y
Operating and installation instructions ® Thrust actuator ARI-PACO 2G 1,6D/Y ® 5.5 ARI-PACO 2G 1,6Y 5.5.1 Electrical connection ATTENTION ! - Work on electrical systems or equipment must only be carried out by qualified electricians or by trained individuals under the guidance and supervision of a qualified electrician in compliance with regional electrical requirement and regulations. -
Page 24: Wiring Diagram
Operating and installation instructions ® Thrust actuator ARI-PACO 2G 1,6D/Y 5.5.1.2 Wiring diagram Fig. 8 Page 2-24 0040506004 0919... -
Page 25: Handling - Settings
Operating and installation instructions ® Thrust actuator ARI-PACO 2G 1,6D/Y 5.5.2 Handling - Settings ATTENTION ! - The thrust actuator may only be operated for a short time without the hood for unavoidable setting operations to the electronics, the relay board and the electrical options. -
Page 26: Leds
Operating and installation instructions ® Thrust actuator ARI-PACO 2G 1,6D/Y 5.5.2.2 LEDs Colour Meaning Description / explanation Green Power The electronics are connected to the power supply Failure The actuator cannot reach the setpoint / desired position Blockage, manual mode Orange Function check (handwheel or slide switch) - Page 27 Operating and installation instructions ® Thrust actuator ARI-PACO 2G 1,6D/Y Switch Meaning Description / explanation Stufe ® ARI-PACO 2G 1,6kN 2600 U/min 1,00 mm/sec Rpm / operating speed 1250 U/min 0,47 mm/sec adjustment 1000 U/min 0,38 mm/sec 660 U/min 0,25 mm/sec (default) Configuration switches for the analogue control signal This slide switch Y can be used to select a 0 to 10 V or 2 to 10 V Voltage...
-
Page 28: Special Functions
Operating and installation instructions ® Thrust actuator ARI-PACO 2G 1,6D/Y 5.5.3 Special functions 5.5.3.1 "Y-in"- signal failure With analogue control, an interrupted control signal is detected by the electronics (both 2 to 10 V and 0 to 10 V). If the control signal fails for longer than ten seconds, the red "Failure" LED is set and the actuator is switched to "Stop".. -
Page 29: Relay Card
Operating and installation instructions ® Thrust actuator ARI-PACO 2G 1,6D/Y 5.5.4.1 Relay card Scope of suply: Pcs. Designation Relay card 3-pole connector, 2,5mm² 6-pole connector, 1,5mm² Fig. 10 5.5.4.1.1 Operating principle control electronics. It has four relays for signalling system states and positions digitally to a higher-level control or for connecting relays 1 and 2 to local power consumers (pumps, butterfly valves, etc.). - Page 30 Operating and installation instructions ® Thrust actuator ARI-PACO 2G 1,6D/Y 5.5.4.1.2 Technical data Relay Type 1 Position 2 Position 3 Warning 4 Failure 250V~ Switching capacity: U 30V AC/DC~ 2A 6A inductive load / 3A ohm resistive load Type Floating changeover contacts Max.
- Page 31 Operating and installation instructions ® Thrust actuator ARI-PACO 2G 1,6D/Y 5.5.4.1.5 Operation – Programming / clearing positions "Relay 1" LED (up) "Relay 1" button (up) "Relay 2" button (down) "Relay 2" LED (down) Fig. 14 Programming Procedure - Approach the spindle position. - Press "Relay 1 button (up)"...
-
Page 32: Power Supply
Operating and installation instructions ® Thrust actuator ARI-PACO 2G 1,6D/Y 5.5.4.2 Power supply ® Fig. 15: Installtation and connection of the power supply ARI-PACO 6.0 Putting the actuator into operation ATTENTION ! All local safety instructions must be observed! Before putting a new plant into operation or restarting a plant after repair or modification, always make sure that: - The power supply, control signal and ambient temperature coincide with the technical data of the electronics. - Page 33 Operating and installation instructions ® Thrust actuator ARI-PACO 2G 1,6D/Y ® 6.2 Putting the actuator ARI-PACO 2G 1,6Y into operation 6.2.1 Configuring the control signal The corresponding control signal (3-point or analogue, 0 to 10 V or 2 to 10 V) must be connected to the electronics prior to initializing the actuator (refer to 6.2.3 Initialization) 0-10V or 2-10V at Y LED for 3-point control signal /...
- Page 34 Operating and installation instructions ® Thrust actuator ARI-PACO 2G 1,6D/Y 6.2.3 Initialization NOTE ! Automatic mode cannot be activated unless the actuator has been initialized! ® After the ARI-PACO 2G 1,6Y actuator has been mounted on a valve, it must be initialized in order to determine the full lift and the type of control (3- point or analogue).
- Page 35 Operating and installation instructions ® Thrust actuator ARI-PACO 2G 1,6D/Y 7.0 Care and maintenance NOTE ! The power supply cable must be disconnected from the mains (i.e. deenergised) prior to cleaning the electronics. Suitable precautions must be taken to prevent the mains voltage from being re-connected inadvertently.
- Page 36 Operating and installation instructions ® Thrust actuator ARI-PACO 2G 1,6D/Y ® 9.1 ARI-PACO 2G 1,6D Fault Possible Causes Remedy Thrust actuator fails to move Power failure Ascertain and eliminate cause Fuse has blown Replace fuse Thrust actuator not properly Rectify connection on thrust actuator connected in accordance with wiring diagram Short circuit due to:...
- Page 37 Operating and installation instructions ® Thrust actuator ARI-PACO 2G 1,6D/Y ® 9.2 ARI-PACO 2G 1,6Y Fault Possible Causes Remedy Green LED does not lit Power failure Check the mains power supply Operating voltage is incorrect Connect the operating voltage indicated on the rating plate Elektronics have burnt out Make sure the mains voltage coincides with the value indicated...
- Page 38 Operating and installation instructions ® Thrust actuator ARI-PACO 2G 1,6D/Y Fault Possible Causes Remedy There is AC voltage due to - Don't lay the signal line directly Actuator not moved into end induction voltages on the control adjacent to main lines position by 0 V control signal signal - Use shielded cables for the...
-
Page 39: Led-Failure Signals According To Namur Ne107
Operating and installation instructions ® Thrust actuator ARI-PACO 2G 1,6D/Y 9.2.1 LED-Failure signals according to Namur NE107 Warnings and information messages (blue, yellow or orange LEDs) do not interrupt the control mode! ® NE 107 Colour Namur description ARI-PACO 2G 1,6kN Y Maintenance required Blue Urgent maintenance required... -
Page 40: Dismantlement Of Thrust Actuator
Technology for the Future. GERMAN QUALITY VALVES ARI-Armaturen Albert Richter GmbH & Co. KG, D-33750 Schloß Holte-Stukenbrock Telephone (+49 5207) 994-0 Telefax (+49 5207) 994-158 or 159 Internet: http://www.ari-armaturen.com E-mail: info.vertrieb@ari-armaturen.com... -
Page 41: Translated Declaration Of Incorporation And Conformity
• ARI-PREMIO • ARI-PREMIO-Plus 2G inclusive accessories ARI-Armaturen GmbH & Co. KG as facturer herewith declares, that the products mentioned above meet the following basic requirements of the Machinery Directive (2006/42/EC): Annex I, articles 1.1.2, 1.1.3, 1.1.5, 1.2.1, 1,2,2, 1.2.6, 1.3.2, 1.3.4, 1.3.7, 1.3.8, 1.5.1, 1.5.2, 1.5.3, 1.5.4, 1.5.5, 1.5.6, 1.7.1, 1.7.3, 1.7.4...
Need help?
Do you have a question about the ARI-PACO 2G 1,6 D and is the answer not in the manual?
Questions and answers