Advertisement
Quick Links
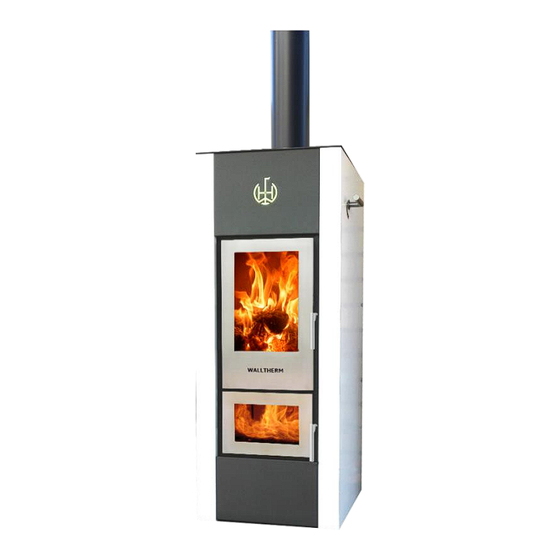
OPERATING MANUAL:
Instructions for use & maintenance of the
....Walltherm
Vajolet....
®
.
.
Version 01
first
wood gasification
The
water heating
boiler stove.
Dear stove-owner,
you have made an excellent choice purchasing the Walltherm
boiler stove for
®
your living room. Especially in connection with a heat storage tank, it offers you
all the advantages of a radiant heat stove for the living room and furthermore,
an economical heating system for your whole house. Please study this manual, it
explains how the boiler stove works, how you should operate it and how the
Walltherm has to be maintained.
For further information, please contact the manufacturer or any authorized
Walltherm dealer.
Fam. Wallnöfer
1/64
Walltherm
®
Vajolet V01
walltherm.com
Advertisement

Related Manuals for Wallnofer Walltherm Vajolet


Summary of Contents for Wallnofer Walltherm Vajolet
- Page 1 OPERATING MANUAL: Instructions for use & maintenance of the ….Walltherm Vajolet…. ® Version 01 first wood gasification water heating boiler stove. Dear stove-owner, you have made an excellent choice purchasing the Walltherm boiler stove for ® your living room. Especially in connection with a heat storage tank, it offers you all the advantages of a radiant heat stove for the living room and furthermore, an economical heating system for your whole house.
- Page 2 WALLTHERM ® produced and developed by The manual can be used for the following models: Model: Kind of fireplace: Norm: Performance class: Walltherm ® Vajolet Boiler stove EN13240 10 KW Walltherm ® Vajolet Basic Insert boiler EN13229 10 KW stove Usage: The Walltherm was developed for an optimal combustion of air-dried, untreated logs, wood chips and (partly) briquettes.
- Page 3 WALLTHERM ® produced and developed by This operation manual is directed to the owner of the Walltherm ® boiler stove, the tradesman who installs it, the operators, and the service personal. In any case of doubt or for further information concerning the manual, please contact the producer or any authorized Walltherm ®...
- Page 4 WALLTHERM ® produced and developed by Index: 1 Introduction 6 Cleaning 1.a Purpose and contents of the manual 6.a Cleaning the boiler stove 1.b Symbols 6.b Cleaning the glass (doors) Intended use / combustion technique 1.d Delivery of the boiler stove 7 Maintenance 2 Safety Precautions 7.a Doors...
- Page 5 WALLTHERM ® produced and developed by 1. Introduction Purpose and contents of the manual Purpose The purpose of the manual is to provide the operator with the fundamental knowledge to allow the user to take the necessary precautions and to have all the human and material resources required for its correct, safe and lasting use.
- Page 6 WALLTHERM ® produced and developed by Intended use / combustion technique The Walltherm ® is the first wood boiler stove using the gasification technique. Walltherm is an innovative, technologically advanced boiler stove for heating, burning fuels like firewood and wood briquettes providing a healthy and safe way of heating. This boiler stove features the dual primary and secondary combustion system with positive effects both on efficiency and on emission of “cleaner smoke”.
- Page 7 WALLTHERM ® produced and developed by Double combustion: What exactly do we mean by clean double combustion and how does it work? By controlling the flow of primary air and by adding secondary air, secondary combustion, or post-combustion, takes places. This is indicated by a second characteristically clearer and stronger flame.
- Page 8 WALLTHERM ® produced and developed by 2 Safety Precautions Instructions for installers comply with the indications given in this manual check that the flue and air intake are suitable for the type of installation opted for (12-15 pa draft – max 25 pa) ...
- Page 9 WALLTHERM ® produced and developed by Instruction for maintenance personal comply with the indications given in this manual always use individual safety devices and other protection means before embarking on any maintenance work the boiler stove must be completely cold ...
- Page 10 WALLTHERM ® produced and developed by 3 The Walltherm® Vajolet wood boiler stove Parts Chimney connection Open = exhaust fume flap open „Lighting period – produce Exhaust fume flap ember“ Closed = exhaust fume flap closed „gasification flame activated" Lever door superior combustion chamber Lever secondary air Adjustment screw of...
- Page 11 WALLTHERM ® produced and developed by Area for different sensors and the air bleeder Internal parts upper combustion chamber Iron cast grids (2 pz per side) Return flow ¾“ Forward flow ¾“ Drain Cold water inlet (thermal process safeguard valve) (thermal process safeguard valve) Air intake backside...
- Page 12 WALLTHERM ® produced and developed by Pump unit: forward flow return flow boiler stove Filling and drain valve (optional)* Thermometer return flow to boiler stove Thermometer forward flow storage tank Thermometer return flow storage tank High efficiency pump (6b) Thermal mixing valve Thermostatic head for adjustments from pos.
- Page 13 WALLTHERM ® produced and developed by 3.c Overview off all important components Walltherm ® Vajolet V01 walltherm.com 13/64 (Link Index)
- Page 14 WALLTHERM ® produced and developed by 3.d Dimensions Walltherm ® Vajolet and Vajolet Basic Walltherm ® Vajolet: (boiler stove) front side backside left side right side Walltherm ® Vajolet V01 walltherm.com 14/64 (Link Index)
- Page 15 WALLTHERM ® produced and developed by top view: bottom: Walltherm ® Vajolet V01 walltherm.com 15/64 (Link Index)
- Page 16 WALLTHERM ® produced and developed by Walltherm ® Vajolet Basic: (insert boiler stove) front side backside left side right side Walltherm ® Vajolet V01 walltherm.com 16/64 (Link Index)
- Page 17 WALLTHERM ® produced and developed by top view: bottom: 3.e Technical data: Model: Kind of fireplace: Norm: Performance class: Walltherm ® Vajolet Boiler stove EN13240 10 KW Walltherm ® Vajolet Basic Insert boiler EN13229 10 KW stove Technical data for the boiler stoves Walltherm Vajolet and Vajolet Basic: ®...
- Page 18 WALLTHERM ® produced and developed by 3.f Label with serial number The label with serial number is attached on the boiler stoves backside. If you have to order spare parts please send us your serial number. Label Walltherm ® Vajolet Label Walltherm ®...
- Page 19 WALLTHERM ® produced and developed by 4 Installation 4.a Safety precautions The responsibility for any work done in the space where the boiler stove is to be installed is, and remains, the users. The user is also entrusted with carrying out the checks regarding the proposed installation solutions.
- Page 20 WALLTHERM ® produced and developed by The chimney system After having found an appropriate place for installing the stove, please try to install the exhaust pipe, while taking into consideration paragraph 4.c. For the smoke outlet use rigid, varnished steel pipes (min. 1,5 mm) or high-grade stainless steel pipes (min.
- Page 21 WALLTHERM ® produced and developed by Install an external or internal rain water protection to avoid contact between rain water and the stove body. The connection of more furnaces to one chimney is just allowed after agreement of the producer and chimney sweeper and a positive result of the draft calculation. In any case the combustion air inlet of the second heat source (furnace) has to be completely closed if it isn`t operating.
- Page 22 WALLTHERM ® produced and developed by 4.c Distance to flammable and non-flammable material The figures below (fig. 4.c.1 and 4.c.2) show the minimum distances to flammable materials and other items which have to be kept when installing the boiler stove. Please put install also a floor protection sheet if you have to protect a flammable floor.
-
Page 23: Combustion Air
WALLTHERM ® produced and developed by 4.d Combustion air Combustion air from the room: When working, the boiler stoves takes from the room in which he is installed a certain, small amount of air. Therefore air has to be supplied from outside through an opening to houses that possess controlled airing and ventilation systems. - Page 24 WALLTHERM ® produced and developed by The combustion air mustn`t be taken through an air channel from the roof. If necessary ask for permission from Wallnöfer and the chimney sweeper. The lighting phase of the boiler stoves would need much more time!! The external air channel Ø...
- Page 25 WALLTHERM ® produced and developed by The function of the electrical air flap: Before lighting the boiler stove you push the “start” button on the controller WAL03 which opens the air flap for minimum 2 hours. Now combustion air can stream to the stove. After the 2 hours the flap remains open if the water temperature (heat exchanger) in the boiler stove is higher than 40°C.
- Page 26 WALLTHERM ® produced and developed by The water connections The Walltherm ® Vajolet and Vajolet Basic have to be connected on 4 pipes: Forward flow, return flow, cold water and drain and discharge of the thermal process safeguard valve. Return flow ¾“ Forward flow ¾“...
- Page 27 WALLTHERM ® produced and developed by The water connections: Legend: a) Cold water inlet with thermal process safeguard valve Pressure safety valve 3 bar Filling and drain valves Manometer (pressure) (not visible on the picture) Expansion vessel (not visible on the picture) Non return valve Discharge Information for the water connection:...
- Page 28 WALLTHERM ® produced and developed by forward flow return flow INFO: If necessary the pump boiler stove unit can be turned for 180 Grad, in this case the connection to the Walltherm ® boiler stove are below The return flow and the storage tank get connected temperature displayed on on the top.
- Page 29 WALLTHERM ® produced and developed by Thermal process safeguard valve (Emergency cooling): For the security the Walltherm ® boiler stove is provided with a thermal process safeguard and it´s security heat exchanger. In case of an interruption in the water circuit, to avoid it´s overheating, the thermal process safeguard opens at 95°C and let pass cold water to the security heat exchanger to cool down the heating water inside the stove.
- Page 30 WALLTHERM ® produced and developed by Further security systems in the water circuit: Pressure safety valve 3 bar: As an additional security we mount a pressure safety valve in the heating circuit of the boiler stove (between pump unit and boiler stove) which opens when the pressure raises over 3 bar.
-
Page 31: Installation Scheme
WALLTHERM ® produced and developed by Installation scheme with Walltherm ® boiler stove, kombi storage tank and solar system. Attention: Scheme not complete! Concept without safety fittings like expansion vessel, pressure safety valve, thermal process safeguard, domestic hot water mixing valve…. Key: 1 Thermal solar panels 2 Electric heating element (above hot domestic water, below heating water) - Page 32 WALLTHERM ® produced and developed by Advice for regulation heating circuit (radiators, floor heating) If the heating system is based on solar plant and the Walltherm boiler stove, it’s important to use a heating controller* adapted for the system. The floor heating and radiators can be activated only if there is enough hot heating water in the storage tank.
- Page 33 WALLTHERM ® produced and developed by Electrical installation of the controller WAL03 or thermostat, grounding For the pump start you can work with a simply thermostat which start´s the pump when the water inside the heat exchanger raises over 60°C or you work with the comfortable controller WAL03.
- Page 34 WALLTHERM ® produced and developed by T4 =Sensor exhaust gas Start button (upper arrow) El. air flap function (push 2 sec.) Start button el. air flap (upper arrow) Pushed for 2 seconds El. air flap function: T1 = sensor water Before the Walltherm ®...
- Page 35 WALLTHERM ® produced and developed by Security: If the water temperature in the Walltherm ® reaches a temperature higher than 90°C the el. air flap closes automatically and remain closed until the water temperature cools down to 80°C. In this case the screen becomes red and you can read the information: Water temp.
- Page 36 WALLTHERM ® produced and developed by Wiring of a system with Walltherm ® , storage tank and a solar system A1 – solar field B1 – storage tank F1 – Walltherm ® boiler stove R1 – pump solar system (without PWM) R2 –...
- Page 37 WALLTHERM ® produced and developed by Thermostat: For the pump start you can work with a simply thermostat which start´s the pump when the water inside the heat exchanger raises over 60°C. Only authorized personal are allowed to do the maintenance for the fittings (water system) and electric parts.
- Page 38 WALLTHERM ® produced and developed by Advice: If you install a flexible pipe between the thermal process safeguard valve and it`s water connection on the boiler stove you can make maintenance from the side. A) Keep at least 20 mm of distance between the wall/housing and the stoves body.
- Page 39 WALLTHERM ® produced and developed by 5 Using the boiler stove First activation and description of the boiler stove Walltherm ® Vajolet & Vajolet Basic: The first activation must be done by specialists and the installation protocol needs to be filled out and sent to the producer.
- Page 40 WALLTHERM ® produced and developed by 5.b Lighting Before the lighting turn the exhaust fume flap lever to the position OPEN (lever pointing down) that the smoke is taken up gradually through the flue. First the chimney system and the Walltherm ®...
- Page 41 WALLTHERM ® produced and developed by B) Control the stove get supplied with combustion air: Lever secondary air Lever primary air Open the primary air: Pull the primary air lever completely to direction +: Lever primary air (+ -) Function: Push in direction - = less or no primary air Pull in direction + = primary air open If the Walltherm...
- Page 42 WALLTHERM ® produced and developed by Settings secondary air: Behind/below the upper door you find the lever for the secondary air. Settings: Turn in direction - = less secondary air Turn in direction + = secondary air open Advice: For the nominal heat output the secondary air has to be completely open.
- Page 43 WALLTHERM ® produced and developed by Firebricks without soot is an indeed that the firebricks absorbed the heat. Depending on the chimney the exhaust gas temperatures can reach about 400 °C during the lighting phase. Important: It’s necessary to have a layer about 3 –...
- Page 44 WALLTHERM ® produced and developed by Then close the exhaust fume flap: (Activation gasification flame) Turn the lever of the exhaust fume flap to position CLOSED: (lever in horizontal position - CLOSED) By closing the exhaust fume flap, the gasification starts. Info: If the gasification flame stops (or gets smaller) after some time you need to reopen the exhaust fume flap to heat up more the chimney system and to create more ember.
- Page 45 WALLTHERM ® produced and developed by Slowly there should be the following operating condition. forward flow return flow boiler stove The return flow temp. has to be ca. at 60°C The high efficiency pump works continuously. Thermostat head of the mixing valve on pos.
- Page 46 WALLTHERM ® produced and developed by 5.c Loading wood logs Turn the lever of the exhaust fume flap to position OPEN: (lever has to pointing down - position OPEN) Just open the door of the upper combustion chamber, if the wood is burned down and there is only ember.
- Page 47 WALLTHERM ® produced and developed by 5.d Adjustment of the exhaust gas temperature (flue damper system) During wood gasification exhaust temperature is about 130 – 160 °C. Due to the low exhaust gas temperature, somebody might be thinking about a sootiness of the chimney. This is not the case, because during the lighting phase the chimney is being heated up and dried due to the temperatures of the lighting phase (300 –...
- Page 48 WALLTHERM ® produced and developed by 5.e Permissible fuels Important preconditions: The fuels’ water content should be maximum 20 % (15 % would be the best). The wood logs have to be dry. The natural drying process lasts 1 ½ - 2 ½ years. This process can occur outdoors (covered up) and should be continued in an appropriate shed.
-
Page 49: Daily Cleaning
WALLTHERM ® produced and developed by Cleaning 6.a Cleaning the boiler stove The reactance of the Walltherm ® stove is not very hard, but must done faithful and careful to guaranty an efficient power output, an uninterrupted running an a long lifetime. Daily cleaning: Always remove the ash from the injector block and the grids before firing up the stove. -
Page 50: Monthly Cleaning
WALLTHERM ® produced and developed by Monthly cleaning: remove the ash under the grids. The grids need to be tilt up. The removing of the ash under the grids is very important for the combustion air, because the combustions air streams through the grids into the upper combustion chamber. - Page 51 WALLTHERM ® produced and developed by After cleaning the cover of the internal air channel, the injector block (attention on its direction!!) and the grids are to put into the upper combustion chamber. IMPORTANT: Right direction injector block: The openings on the injector block has to show to the doorside !! Look picture below Injector block (Openings on the front/doorside) Protection stone lower combustion chamber:...
- Page 52 WALLTHERM ® produced and developed by The cleaning of the flame wall is very important to guaranty a proper work. Keep the flame wall free of ash! A dirty flam wall reduce the draft of the chimney and the performance of the stove. The gaps need to be free! If necessary to put out the flam wall, you need to lift the injector block and then take it out with the fireplace poker! Flam wall with gaps...
- Page 53 WALLTHERM ® produced and developed by Cleaning of the flue way channels every 2- 3 months: The cleaning of the flue way channels of the heat exchanger should be done every 2- 3 months! If the draft and the wood quality isn’t so good, the cleaning should be done more often.
- Page 54 WALLTHERM ® produced and developed by Important: Every brush must hit the bottom of the lower combustion chamber to make sure every channel is completely cleaned! Repeat until the channels are free of ash remnants. The brush can be seen in the lower combustion chamber, when the brush hits the bottom and the flame wall is removed.
- Page 55 WALLTHERM ® produced and developed by Edge/stop for correct position Flame wall After the cleaning, put the flame wall into the lower combustion chamber. Push till to the stop at the top of the combustion chamber. The upper bevel must point to the heat exchanger. The injector block should be cleaned as well.
- Page 56 WALLTHERM ® produced and developed by Protection stone lower combustion chamber: To protect the door glass of the gasification flame and it´s high temperatures (up to 1000°C) we position the protection stone behind the door in the lower combustion chamber. In the lower combustion chamber you find an edge (stop) which indicates the protection stones position: edge (stop)
- Page 57 WALLTHERM ® produced and developed by 7.b Seals Please check the seals of both doors (upper and lower door), the warming plate and the smoke channels. There should be no out coming of smoke in order to avoid that smouldering gases can reach your living room.
- Page 58 WALLTHERM ® produced and developed by 8 Recognizing errors and taking measures against faults Error Possible cause Measure Very high exhaust Exhaust fume flap opened Close the exhaust fume flap. temperature Exhaust fume flap leaking Check the seals and if necessary change. >200 °C The fire goes out, to less Electrical air flap closed (if...
- Page 59 WALLTHERM ® produced and developed by Thermal process Air in the system. Close the primary air (Push the primary air level to safeguard opened: Pump hanged up. - ). A valve in the circuit is closed. If installed: The WAL03 controller will close the el. air flap when the water temperature raises up to Controller with false settings or 90°C.
-
Page 60: Extraordinary Maintenance
WALLTHERM ® produced and developed by Extraordinary maintenance Extraordinary maintenance must be carried out by personnel qualified to work on the stove model to which this manual refers. Responsibility for installation It is not the manufacturer’s responsibility to carry out the works needed to install the stove. -
Page 61: Glass Doors
WALLTHERM ® produced and developed by Injector block and grids: The injector block and the grids are in contact with high temperatures (up to 1000°C) and therefore depending on the working hours they will have attrition. To extend the durability use only allowed fuels. -
Page 62: Manufacturer's Liability
WALLTHERM ® produced and developed by 9.c Manufacturer´s liability The manufacturer declines all civil and penal liabilities, direct or indirect, due to: an installation that fails to comply with the laws in force in the country and with the safety rules and regulations;... - Page 63 WALLTHERM ® produced and developed by 9.e Technical assistance Wallnöfer GmbH is able to solve any technical problem concerning the use and maintenance of the appliance’s whole life cycle. The main office will help you find the nearest authorized assistance center. 9.f Spare parts Use genuine spare parts only! Do not wait until the components are worn from use before changing them.
- Page 64 WALLTHERM ® produced and developed by Notes: ____________________________ ____________________________ ____________________________ ____________________________ Address plumber/installer: _______________________________________ _______________________________________ _______________________________________ _______________________________________ Address Walltherm® specialist dealer: _______________________________________ _______________________________________ _______________________________________ Thank you very much and a South Tyrolean „HERZLICHES VERGELT`S GOTT“ Thank you very much for having chosen the Walltherm ®...
Need help?
Do you have a question about the Walltherm Vajolet and is the answer not in the manual?
Questions and answers