Advertisement
Assembly Instructions
GW Universal Gravity Feed Tube
Style FSGWSF1011 (HU2103002-GW)
Please keep this instruction manual for future reference
Customer Service: (888) 837-1380, 8:00am to 5:00pm, Pacific Standard Time,
Monday thru Friday
Email: customerservice@rankam.com
-------- OR --------
Customer Service: (888) 922-2336, 7:00am to 12:00am CST daily
Live Chat at: www.academy.com
Email: customerservice@academy.com
(Made in China)
HU2103002-GW – ENG
Pg.1
20160310-V2.1
Advertisement

Related Manuals for Game Winner FSGWSF1011


Summary of Contents for Game Winner FSGWSF1011
- Page 1 Assembly Instructions GW Universal Gravity Feed Tube Style FSGWSF1011 (HU2103002-GW) Please keep this instruction manual for future reference Customer Service: (888) 837-1380, 8:00am to 5:00pm, Pacific Standard Time, Monday thru Friday Email: customerservice@rankam.com -------- OR -------- Customer Service: (888) 922-2336, 7:00am to 12:00am CST daily Live Chat at: www.academy.com...
-
Page 2: Table Of Contents
Table of Contents Page Warnings ----------------------------------------------------------------------------------- Tools Required (Not included) -------------------------------------------------------- Parts List ------------------------------------------------------------------------------------ Hardware List ------------------------------------------------------------------------------ Assembly Instructions ------------------------------------------------------------------- 8-12 Care and Maintenance ------------------------------------------------------------------ Warranty Information --------------------------------------------------------------------- NOTE: Before beginning assembly of product, make sure all parts are present. Compare parts with package content list and hardware contents. -
Page 3: Warnings
Warnings Pay attention to these statements when reading this manual and the information contained can save your life. Danger: Indicates an imminently hazardous situation which, if not avoided, will result in death or serious injury. Warning: Be alert to the possibility of serious bodily injury if the instructions are not followed. -
Page 4: Tools Required (Not Included)
Tools Required (Not Included) Wrench HU2103002-GW – ENG Pg.4 20160310-V2.1... -
Page 5: Parts List
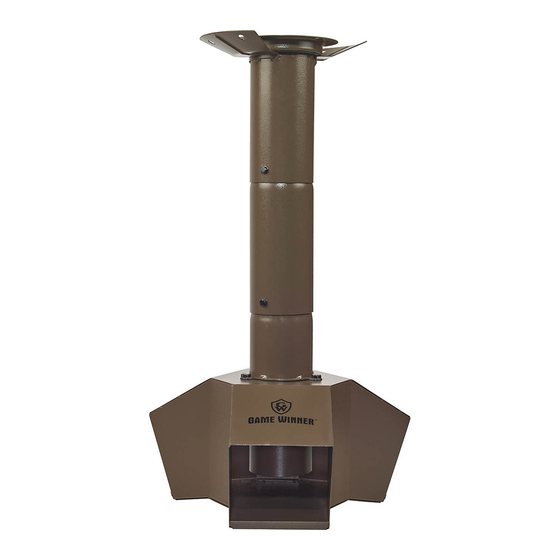
Parts List Adapter Feed Tube Body - Top Feed Tube Body - Middle Feed Tube Body - Bottom For assembly assistance, missing or damaged parts, please call customer service 1-888-837-1380 DO NOT RETURN TO RETAILER HU2103002-GW – ENG Pg.5 20160310-V2.1... - Page 6 Parts List Ring Bracket 2pcs Seal Ring Feed Tube Port HU2103002-GW – ENG Pg.6 20160310-V2.1...
-
Page 7: Hardware List
Hardware M8X25 Bolt 2pcs M8X15 Bolt 3pcs M6X20 Bolt 12pcs Flat Washer 4pcs M6 Flange Nut 4pcs HU2103002-GW – ENG Pg.7 20160310-V2.1... - Page 8 Product Diagram HU2103002-GW – ENG Pg.8 20160310-V2.1...
-
Page 9: Assembly Instructions
Assembly Instructions Step 1: Attach the Feed Tube Body Bottom (#4) and Seal Ring (#6) to the Feed Tube Port (#7) using bolts (B, M8 X 15). Hardware : #B – 3pcs Step 2: Attach the Feed Tube Body Middle (#3) to the assembly in Step #1 using bolts (C, M6 X 20). - Page 10 Assembly Instructions Step 3: Attach the Feed Tube Body Top (#2) to the assembly in last step using bolts (C, M6 X 20). Tips: Make sure the holes align. If the holes do not align, turn the Feed Tube Body Top (#2) 180 degrees and re-try.
- Page 11 Assembly Instructions Step 5: Assembly is complete. Step 6: Attach the GW Universal Gravity Feed Tube to the bottom of a feeder. For example GW 100 Gal BIG "A" VP Feeder using bolts (C, M6 X 20) and washers (D). Attention: When using this GW Universal Gravity Feed Tube in conjunction with other feeders with flat bottom hoppers, use the adapter (#1)
- Page 12 Assembly Instructions Step 7: Affix Adapter (#1) to the bottom of the hopper then attach GW Universal Gravity Feed Tube to the hopper bottom covering the Adapter using bolts (C, M6 X 20) and nuts (E, M6). Note: Consumers must make sure there are holes at the bottom of the flat bottom feeder and these holes align with the holes on the components included.
-
Page 13: Care And Maintenance
Care and Maintenance • Clean inside and outside of Feed Tube by wiping off with a damp cloth. • Check for condensation. With the changes of temperature from hot to cool, feeders collect condensation. Particles of chaff from the feed can collect on the inside walls and bottom of the feeder, which will restrict the feed flow and also reduce the amount of feed the feeder will hold. -
Page 14: Warranty Information
Warranty Information Manufacturer warrants this Product to be free from defects in workmanship and materials for a period of 90 days from the date of purchase, PROVIDED claims are submitted, in writing, with proof of purchase. If any part of this item fails because of a manufacturing defect within the Limited Warranty Period, Manufacturer offers to replace such part(s) provide that such parts have not been improperly repaired, altered, or tampered with or subject to misuse, abuse or exposed to corrosive conditions.
Need help?
Do you have a question about the FSGWSF1011 and is the answer not in the manual?
Questions and answers