Table of Contents
Advertisement
Quick Links
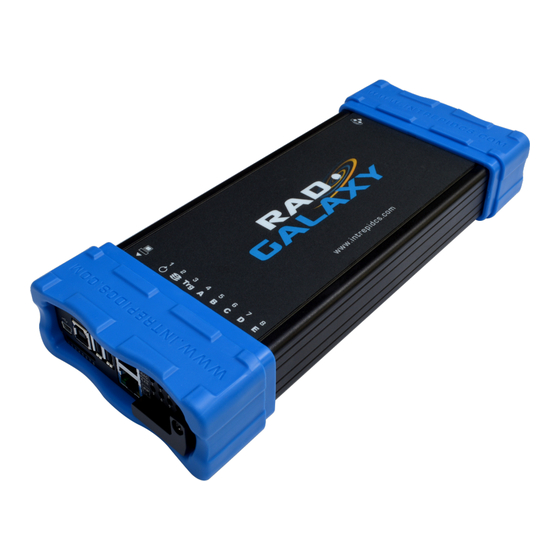
RAD-Galaxy
Intrepid Control Systems, Inc.
31601 Research Park Drive Madison Heights, MI 48071 USA
(ph) +1-586-731-7950 (fax) +1-586-731-2274
www.intrepidcs.com
Network Interface for Automotive Ethernet and CAN FD
User's Guide
Version 1.2 - November 28, 2017
Multi Active Tap, Media Converter and
www.aeta-rice.com
Advertisement
Table of Contents

Related Manuals for Intrepid Control Systems RAD-Galaxy

Summary of Contents for Intrepid Control Systems RAD-Galaxy
- Page 1 Multi Active Tap, Media Converter and Network Interface for Automotive Ethernet and CAN FD User’s Guide Version 1.2 - November 28, 2017 Intrepid Control Systems, Inc. 31601 Research Park Drive Madison Heights, MI 48071 USA (ph) +1-586-731-7950 (fax) +1-586-731-2274 www.intrepidcs.com...
- Page 2 Description / Major Changes Number 2016/12/23 Initial release. Corrected problem with pinout diagram for DB-25M connector on neoVI FIRE 2 2017/05/16 Ethernet Cable Adapter. 2017/11/28 Corrected incorrect specification. Version 1.2 - November 28, 2017 © 2016 Intrepid Control Systems, Inc.
-
Page 3: Table Of Contents
FIRE/RED J1939 Cable Connector Pinouts and Signal Mapping ..........91 neoVI FIRE 2 OBD Cable with DoIP Support Connector Pinouts and Signal Mapping ......93 Signal Flow Map for Attachment of RAD-Galaxy Ethernet Cable Adapter and neoVI FIRE 2 Ethernet Cable Adapter ..........................96 Version 1.2 - November 28, 2017... - Page 4 RAD-Galaxy User’s Guide Signal Flow Map for Attachment of RAD-Galaxy Ethernet Cable Adapter and neoVI FIRE 2 OBD Cable with DoIP Support .......................... 98 Support Contact Information ........................ICS United States Headquarters ......................99 7.2 ICS International Offices .......................... 99 Version 1.2 - November 28, 2017...
-
Page 5: Introduction And Overview
Introduction and Overview Introduction Thank you for purchasing an Intrepid Control Systems RAD-Galaxy multi active tap and media converter for Automotive Ethernet (AE). The RAD-Galaxy allows you to seamlessly monitor communications between 6 IEEE 802.3 100BASE-T1 Ethernet nodes and a switch, or between 6 pairs of nodes. - Page 6 Automotive Ethernet poster. Figure 1: Contents of the RAD-Galaxy Package. Top, various cables in plastic wrappers; lower left, the Nano MQS plug housings and contacts in bubble wrap; lower center, the RAD-Galaxy device and software/driver CD.
-
Page 7: Operational Overview
6 active taps. These can be interposed between 6 pairs of BroadR-Reach nodes, or 6 nodes and 6 switch ports. The Gigabit Ethernet port of the RAD-Galaxy is connected to a laptop PC or similar conventional Ethernet device. - Page 8 PC, so it can be viewed and analyzed within Vehicle Spy. The interface provided by the RAD-Galaxy is full-duplex and bidirectional. This means that in addition to using the PC to monitor messages sent by the Automotive Ethernet nodes attached to it, you can create and send custom messages from the PC to the nodes as well.
- Page 9 Automotive Ethernet nodes 1 to 6 were directly connected to the switch at top left. Each connection was broken and the pairs connected to the appropriate ports on the RAD-Galaxy (black lines). Every transmission continues to be sent to its prior destination (blue arrow lines following the physical connections and the “virtual”...
- Page 10 Figure 3: Using the RAD-Galaxy as an Active Tap Between AE Node Pairs. In this application, 12 nodes were formerly connected to each other in pairs: Node 1 to Node 2, Node 3 to Node 4, and so on. The RAD-Galaxy has been inserted between each pair, allowing the pair connections to continue in virtual fashion (gray connecting lines) while allowing all traffic to be monitored by the PC, and additional messages from the PC to be sent to the nodes.
- Page 11 Node 4 Node 12 Figure 4: Using the RAD-Galaxy as a Media Converter. The RAD-Galaxy allows a PC to interact with up to 12 Automotive Ethernet nodes. Each node can send to the PC, and vice-versa, simultaneously. Mixed Topology Operation If the RAD-Galaxy is in active tap configuration, it is possible to connect a node to only one of the two connections of any of its six pairs.
- Page 12 Timestamping and Frame Wrapping The RAD-Galaxy records the time that each message is received on any of its Automotive Ethernet ports. This hardware-level timestamp is then transmitted in a special wrapper frame over its conventional Ethernet links, encapsulating the original message. The wrapper frame contains its own Ethernet header and Frame Check Sequence (FCS) field, along with an extra header containing information specific to the RAD-Galaxy.
-
Page 13: Block Diagram
ECUs. Standalone Logging The RAD-Galaxy can be used both as a bench tool and as a standalone logger. Vehicle Spy’s powerful logging features allow you to easily describe exactly what data you want to record, and then automatically generate the appropriate CoreMini scripts for download to the RAD- Galaxy. You can install the device in a vehicle for independent capture and filtering of up to 128... -
Page 14: Summary Of Key Features
Automotive Ethernet networks. To give you an idea of how much you can do with the RAD-Galaxy, here’s a summary of the device’s most important design, construction, operational and performance features. - Page 15 • All DW CAN channels have CAN FD support. • Listen-only mode support. • High Speed Mode, Test Tool Resistor, and High Voltage Wakeup support for SW CAN. Version 1.2 - November 28, 2017 © 2016 Intrepid Control Systems, Inc.
-
Page 16: Hardware And Software Requirements
• Logged data quantity limited only by the size of the installed SD card. Hardware and Software Requirements You will need a small amount of support hardware to make use of your RAD-Galaxy: • A vehicle network, either within an actual vehicle or in a test bench environment. - Page 17 RAD-Galaxy User’s Guide The only software needed to make full use of your RAD-Galaxy is Intrepid’s Vehicle Spy Professional, which is included with the product. Installation instructions can be found in Chapter 3. Please refer to the Vehicle Spy documentation for its more specific PC hardware and operating system requirements and recommendations. Note, however, that Vehicle Spy will run on most modern Windows-based PCs.
-
Page 18: Tour Of Rad-Galaxy Hardware
RAD-Galaxy User’s Guide A Tour of RAD-Galaxy Hardware Let’s now take a quick tour of the RAD-Galaxy. We’ll examine the device from all sides, showing its external components and explaining what each does. This will help you become more familiar with the unit so you can more easily set up, configure and use it. Like many Intrepid products, the RAD-Galaxy is designed so that all of its connectors are located on its sides, making the device easier to use in cramped quarters. - Page 19 The bottom of the RAD-Galaxy contains useful reference information, including the device serial number, pinouts of its HD-26 and Nano MQS BroadR-Reach connectors, and Intrepid’s contact information (Figure 8). Pinouts for all RAD-Galaxy connectors and cables can be found in Chapter 6.
-
Page 20: Left Side Indicators And Connectors
Figure 8: RAD-Galaxy Bottom View Showing Connector Pinouts. Left Side Indicators and Connectors The left side of the RAD-Galaxy contains several components: a set of USB connectors, a pair of RJ-45 Ethernet jacks, two LED arrays and a covered slot for the device’s SD card (Figure 9). - Page 21 A VehicleScape logging script is running and actively logging Flashing Flashing data; the flash rate of LED #2 indicates how rapidly data is being logged. Table 1: RAD-Galaxy Red LED #1 and #2 Flash Patterns. Version 1.2 - November 28, 2017 © 2016 Intrepid Control Systems, Inc.
-
Page 22: Right Side Connectors
12-LED 100BASE-T1 (BroadR-Reach) Link/Activity LED Array On the right is a set of 12 green LEDs arranged in a 4x3 matrix and labeled from 1 to 12. Each LED lights up solid to indicate that the corresponding 100BASE-T1 channel in the RAD-Galaxy has made a connection to another node. While a connection is active the LED will flash, with the flash speed proportional to the rate at which data is being transferred. -
Page 23: Included Cables And Cable Assembly
Nano MQS socket plugs and crimp contacts. Each connector interfaces 3 pairs (6 channels) of Automotive Ethernet to the RAD-Galaxy. The channels and pairs are distributed as follows: • Connector 1: Pair 1 (Channels 1+2), Pair 4 (Channels 6+7), Pair 6 (Channels 11+12). - Page 24 RAD-Galaxy’s HD-26M connector, these Ethernet signals do not go through it; this is discussed further in Section 3.3. DC input power is provided to the RAD-Galaxy through this cable, carried on pin 19 of the HD- 26F and HD-26M connectors.
- Page 25 Adapter. The other three connectors are used as follows: • DB-25M: The primary connection to conventional (non-Ethernet) vehicle networks, and the source of DC power to the RAD-Galaxy. This connector can also be used to attach an OBD-II cable if needed.
- Page 26 RAD-Galaxy. Section 3.3 contains hookup diagrams that show you how these cables fit together, as well as step-by-step instructions for connecting them to the RAD-Galaxy and your vehicle or bench. neoVI-OBD-1 Cable This cable, which has a red OBD-II connector, is used primarily for General Motors vehicles. It can be seen in Figure 13.
- Page 27 This is the same as the neoVI-OBD-MULTI cable but terminates with a right-angled OBD II connector for vehicles where this is required. A picture of the cable is shown in Figure 15. Figure 15: neoVI-OBD-MULTI Right Angle Cable. Version 1.2 - November 28, 2017 © 2016 Intrepid Control Systems, Inc.
- Page 28 Figure 16: neoVI FIRE/RED J1939 Cable. neoVI FIRE 2 OBD Cable with DoIP Support This special cable attaches to the HD-26M connector on the RAD-Galaxy Ethernet Cable Adapter in place of the regular neoVI FIRE 2 Ethernet Cable Adapter. It contains DB-25M and...
- Page 29 RAD-Galaxy is 2177367-3, while the matching female plugs (supplied) are TE Connectivity part number 2177588-1. The crimp contacts that fit into the plugs are TE part number 2-2112449-1; 28 of these are provided with the RAD-Galaxy (the 24 required for the 12 channels, plus 4 spares).
- Page 30 Figure 18: Nano MQS Plug with Attached Cables. Ethernet Cables Two standard Ethernet cables are provided to connect the RAD-Galaxy to the PC and to the DoIP jack on the RAD Galaxy Ethernet Cable Adapter. You will need to provide a third Ethernet cable of the appropriate length to connect to your vehicle or bench for DoIP use, if required by your application.
-
Page 31: Hardware And Software Setup
RAD-Galaxy User’s Guide Hardware and Software Setup In this chapter we will explain the steps necessary to set up your RAD-Galaxy to work with vehicle networks. This will include explaining how to install the required software and drivers, connect cables between the RAD-Galaxy and your vehicle networks, and link the unit to a PC. - Page 32 The Vehicle Spy 3 setup wizard will now start, displaying a welcome screen as shown in Figure 20 (though the exact version number is likely to differ from the one seen here). Figure 20: Vehicle Spy 3 Setup Wizard Welcome Screen. Version 1.2 - November 28, 2017 © 2016 Intrepid Control Systems, Inc.
- Page 33 Select Destination Location: Choose where you want to install Vehicle Spy 3 (Figure 22). We normally recommend using the default location. Click Figure 22: Choosing the Destination Location. Version 1.2 - November 28, 2017 © 2016 Intrepid Control Systems, Inc.
- Page 34 You have now provided all of the information the wizard needs to install Vehicle Spy 3. Your selected options will be displayed in a review box, as shown in Figure 24. Figure 24: Installation Options Review. Version 1.2 - November 28, 2017 © 2016 Intrepid Control Systems, Inc.
- Page 35 Figure 26. Click to complete this initial driver installation process. Figure 26: Hardware Driver Installation Complete. Version 1.2 - November 28, 2017 © 2016 Intrepid Control Systems, Inc.
- Page 36 The setup wizard will now install SMSC LAN9500 device drivers. This only takes a few seconds and requires no user intervention; you may see a dialog box on the screen like the one in Figure 29. Version 1.2 - November 28, 2017 © 2016 Intrepid Control Systems, Inc.
- Page 37 Once installation begins, it will take only a few moments, and when completed, a message will appear like the one in Figure 31. 15. Complete Port Driver Installation: Click to exit this part of the install. Figure 31: Port Driver Installation Complete. Version 1.2 - November 28, 2017 © 2016 Intrepid Control Systems, Inc.
-
Page 38: Driver And Api Support File Installation And Setup
16. Exit the Setup Wizard: Click Congratulations, you’re done! Driver and API Support File Installation and Setup If you plan to use the RAD-Galaxy without Vehicle Spy 3, you will need to install drivers and support files to allow the hardware to be accessed via its API. Please follow the steps below. All of these files are installed automatically with Vehicle Spy 3, so if you followed the instructions in Section 3.1, you can skip the directions here. - Page 39 The setup wizard for the ICS API and driver kit will now start, displaying a welcome screen as shown in Figure 34. (The version number you see may be different from the one shown here.) Figure 34: API and Driver Setup Wizard Welcome Screen. Version 1.2 - November 28, 2017 © 2016 Intrepid Control Systems, Inc.
- Page 40 Select Destination Location: Choose where you want to install Vehicle Spy 3 (Figure 36). We normally recommend keeping the default location. Click Figure 36: Choosing the API Kit Destination Location. Version 1.2 - November 28, 2017 © 2016 Intrepid Control Systems, Inc.
- Page 41 The wizard will now begin installing Vehicle Spy 3. A window will appear showing you the progress of the installation (Figure 38). Figure 38: Installing API and Drivers. After completing the basic setup, the wizard will automatically install various drivers required by the RAD-Galaxy. The first install will be done by the Hardware Driver Installer. Version 1.2 - November 28, 2017 © 2016 Intrepid Control Systems, Inc.
- Page 42 ICS port drivers. If you see a Windows dialog like the one in Figure 41, click to authorize installation. Figure 41: Windows Security Dialog Box. Version 1.2 - November 28, 2017 © 2016 Intrepid Control Systems, Inc.
- Page 43 You will now see a dialog box like the one shown in Figure 43, indicating that the setup process is complete. Figure 43: Vehicle Spy 3 Setup Complete. 12. Exit the Setup Wizard: Click Congratulations, you’re done! Version 1.2 - November 28, 2017 © 2016 Intrepid Control Systems, Inc.
-
Page 44: Hardware Hookup Diagrams
RAD-Galaxy User’s Guide Hardware Hookup Diagrams The hookup diagrams below show you at a glance how to physically connect your RAD-Galaxy to vehicle networks and your PC. There are three possible configurations depending on which OBD cable you are using, if any. Basic Hardware Hookup Diagram (No OBD Cable) Figure 44 illustrates the basic hookup of components for the RAD-Galaxy without an OBD cable. - Page 45 BR 1 BR 2 Figure 45: RAD-Galaxy Hookup Diagram with OBD (Most OBD Cables). OBD Hardware Hookup Diagram (neoVI FIRE 2 OBD Cable with DoIP Support) As mentioned earlier in the manual, when the neoVI FIRE 2 OBD Cable with DoIP Support is used it replaces the neoVI FIRE 2 Ethernet Cable Adapter.
- Page 46 Figure 46: RAD-Galaxy Hookup Diagram with OBD (neoVI FIRE 2 OBD Cable with DoIP Support). Vehicle Network DoIP Ethernet Data Paths A special path is used for the DoIP Ethernet connection on the RAD-Galaxy. It passes through the neoVI FIRE 2 Ethernet Cable Adapter (or neoVI FIRE 2 OBD Cable with DoIP Support if that is being used) and the RAD-Galaxy Ethernet Cable Adapter. However, data flows into and...
- Page 47 DoIP Support Vehicle Networks CAN / MISC BR 1 BR 2 Figure 48: RAD-Galaxy Basic Hookup Diagram Showing DoIP Ethernet Data Path (When Using neoVI FIRE 2 OBD Cable with DoIP Support). Version 1.2 - November 28, 2017 © 2016 Intrepid Control Systems, Inc.
-
Page 48: Conventional Vehicle Network And Power Connections
Conventional Vehicle Network and Power Connections Let’s start our hardware connections by attaching the conventional vehicle network cables to the RAD-Galaxy and our vehicle networks. This will also power up the device, since power input is provided via the HD-26M conventional vehicle network connector. - Page 49 RAD-Galaxy User’s Guide Figure 50: Connecting the neoVI FIRE 2 Ethernet Cable Adapter to the RAD-Galaxy Ethernet Cable Adapter. (Optional) Attach the DB-25F Connector of the OBD Cable to the neoVI FIRE 2 Ethernet Cable Adapter: If you are using an OBD cable other than the neoVI FIRE 2 OBD Cable with DoIP Support, attach its DB-25 connector to the mating connector on the neoVI FIRE 2 Ethernet Cable Adapter (which you connected in Step 2).
-
Page 50: 100Base-T1 (Broadr-Reach) Network Connections
Nano MQS cable assemblies to your vehicle network. The exact means of doing this will depend on how the wires are terminated. If you are planning to use the RAD-Galaxy as an active tap, remember to interpose the RAD- Galaxy connections between node and switch, or between two nodes, using matched pairs: 1+2, 3+4, 5+8, 7+6, 9+10 or 11+12. -
Page 51: Pc Connection
The RAD-Galaxy should now be fully connected to your vehicle or bench network. PC Connection Now we will connect the RAD-Galaxy to the PC. Since all data is conveyed over the same Ethernet link, this is actually very simple. Note: The RAD-Galaxy was designed to be connected directly to a PC Ethernet port. - Page 52 Attach the Ethernet Cable to the PC: Attach the other end of the Ethernet cable to your PC’s Ethernet port. If the supplied Ethernet cables are too short for your application, you can use a longer one, as long as it is certified for Gigabit Ethernet operation. Version 1.2 - November 28, 2017 © 2016 Intrepid Control Systems, Inc.
-
Page 53: Device Configuration
Explorer, or remain online and return to Vehicle Spy. Starting neoVI Explorer as a Standalone Program If you want to work with your RAD-Galaxy without opening Vehicle Spy, you can launch neoVI Explorer directly. Open the Start Menu, navigate to the IntrepidCS folder, then under the Vehicle Spy 3 subfolder, select neoVI Explorer (Figure 54). - Page 54 Connecting to the RAD-Galaxy When neoVI Explorer loads, it will start up with the first hardware device it can find selected in the menu pane on the left. You should see your RAD-Galaxy listed here, along with its serial number, which begins with “RG”. If you don’t see the RAD-Galaxy, but do see other Intrepid devices, be sure to scroll down to look for it. If it is still not visible, this means its drivers have not been installed correctly, it is not powered properly, or it is not connected to the PC’s...
- Page 55 RAD-Galaxy User’s Guide To manage your RAD-Galaxy, click on its entry in the navigation pane (if it is not already highlighted) and then press the Connect button. After successfully connecting to the device, you will see a “thumbs up” icon next to the device’s name, and checkmarks will appear next to currently-enabled networks in the explorer area on the left.
-
Page 56: System Settings And Firmware Updates
• Enable Low Latency: This is an advanced setting for applications where fast response is needed after transmission. Version 1.2 - November 28, 2017 © 2016 Intrepid Control Systems, Inc. - Page 57 This is an informational page that shows which firmware versions are available in this version of neoVI Explorer for various Intrepid products. Some devices have multiple firmware programs that control different aspects of their operation; in the case of the RAD-Galaxy, there is only one, called ZynQ Core. You normally won’t need to look in this area, because as we’ll see in Section , neoVI Explorer shows you the current and available firmware versions for your RAD-Galaxy when you connect to it.
- Page 58 When the process is complete the dialog box will disappear and another message will appear in neoVI Explorer to confirm that the update has finished. If you receive any error messages or experience any other problems updating your RAD- Galaxy’s firmware, please contact Intrepid for assistance (see Chapter 7). Figure 59: RAD-Galaxy Firmware Update Message Box. Version 1.2 - November 28, 2017 © 2016 Intrepid Control Systems, Inc.
-
Page 59: General Settings And Product Details
• A current readout of the RAD-Galaxy’s real-time clock. Figure 60: neoVI Explorer RAD-Galaxy General Settings This information can be displayed again at any time by clicking the RAD-Galaxy’s name in the explorer navigation window, or the General Settings entry immediately below it. -
Page 60: Standard Can Networks (Hs Can 1-5 And Ms Can)
PC. Product Details This is an informational area that provides technical data on the RAD-Galaxy’s hardware and internal setup. You will generally only need this if requested by Intrepid in order to facilitate support or troubleshooting. - Page 61 Transceiver The operating mode of the CAN transceiver: • Auto: The transceiver is automatically controlled by the CAN logic for the channel (default). Version 1.2 - November 28, 2017 © 2016 Intrepid Control Systems, Inc.
-
Page 62: Selectable Can Networks
Check this box to enable ISO-compliant CAN FD operation. Selectable CAN Networks The 7th and 8th of the RAD-Galaxy’s CAN channels are user-selectable: they can be set as additional High Speed (dual wire) CAN channels (HS CAN6 and HS CAN7) or as Single Wire CAN channels (SW CAN and SW CAN 2). - Page 63 • No CAN FD section (CAN FD is not supported on these channels). • The default baud rate is 33333. Figure 65: neoVI Explorer SW CAN Parameters with Default Settings. Version 1.2 - November 28, 2017 © 2016 Intrepid Control Systems, Inc.
-
Page 64: Lin Network (Lin1)
Galaxy’s Ethernet channels (see Figure 67). Figure 67: neoVI Explorer One Pair Ethernet (BroadR) General Parameters. BroadR Port Function Use this dropdown box to swap the RAD-Galaxy between tap and media converter operation. Version 1.2 - November 28, 2017 © 2016 Intrepid Control Systems, Inc. - Page 65 This is present only when the parameter above is set to Tap. It is reserved for future functionality and currently does not affect the operation of the device. (Note specifically that this does not cause the RAD-Galaxy to behave as an Ethernet switch.) OP (BR) ETH1 - OP (BR) ETH12 Each of these entries contains the same parameters and controls the corresponding 100BASE-T1 channel on the RAD-Galaxy (Figure 68).
-
Page 66: Network Enables
This area provides more options for controlling the enabling and disabling of individual networks within the RAD-Galaxy (Figure 69). The main display contains a scrollable list with checkboxes that can be set or unset to enable or disable each network. These are equivalent to the Enable checkboxes found in the parameter areas for the corresponding networks. -
Page 67: Core Feature Operation
Core Feature Operation Now that we have completed installing and configuring our hardware and software, we are ready to use the RAD-Galaxy. As discussed at the start of this guide, you can do a lot with this little box, and in this chapter we show you just some of the unit’s many applications. - Page 68 To actively tap this communication, we disconnect the client and server nodes from each other, and then attach the client node to BroadR-Reach channel 1 of the RAD-Galaxy and the server node to BroadR-Reach channel 2. We could of course do this the opposite way (client to channel 2 and server to channel 1) and it would work the same.
- Page 69 Set Network Filters: In the left hand column, click in the boxes next to OP (BR) ETH01 and OP (BR) ETH02 so that a checkmark appears for each. You should now see only the messages on RAD-Galaxy channels 1 and 2, arriving in pairs (Figure 71).
- Page 70 14. Rename the Signal: Double-click “Signal 22” and change it to “Request Counter”. This message is now fully defined. The program window should now appear similar to Figure 72. Figure 72: Vehicle Spy Receive Message Definition for Client Request on Channel 1. Version 1.2 - November 28, 2017 © 2016 Intrepid Control Systems, Inc.
- Page 71 The server only transmits when it is responds to client requests it receives. The fact that this continues to happen with the RAD-Galaxy tap in place demonstrates that messages are still being sent between the two nodes even as they are copied over to Vehicle Spy.
-
Page 72: Transmitting To A Node On A Tapped Ethernet Link
RAD-Galaxy User’s Guide Figure 73: Decoding Tapped Message Traffic in Vehicle Spy with the RAD-Galaxy. Transmitting to a Node on a Tapped Ethernet Link The RAD-Galaxy not only allows you to monitor the two-way traffic on a link that it is tapping, but to participate in the discussion by transmitting to either of the nodes. We’ll now continue with the example from the previous section, extending it by creating a custom message within Vehicle Spy that we’ll send to the device acting as a server. - Page 73 Copy the Client Request Message: Click on the Client Request message, then right- click it and select “Copy” from the context menu that appears. Select RAD-Galaxy Channel 2 Network: Select “OP (BR) ETH2” from the on Network drop-down box. Switch to the Transmit Side of the Messages Editor: Click the button, which will change to have blue highlighting.
- Page 74 16. Change the Server Response Message to Be Specific to Ethernet Node Requests: Change the name of the message to “Node Server Response”. Now change Destination Address from “X.X.X.X” to “10.0.0.1” and Destination Port from blank to “60001”. Version 1.2 - November 28, 2017 © 2016 Intrepid Control Systems, Inc.
- Page 75 Your Vehicle Spy should show a display similar to that seen in Figure 75. Notice that the Client Request messages continue to come into the RAD-Galaxy from the connected client node, and each receives a Node Server Response from the server node. About every 250 ms, a VSpy Client Request is sent from Vehicle Spy on the PC, and the node acting as server responds to that as well with a VSpy Server Response.
-
Page 76: Using The Rad-Galaxy As An Ethernet Media Converter
It only sees the VSpy Client Request messages from the PC. Monitoring Conventional Vehicle Network Traffic The RAD-Galaxy can be easily used to view all of the messages on your conventional CAN networks, and support for LIN will be forthcoming in a future firmware update. If you’ve used Intrepid vehicle network tools before, the process will be very familiar, and requires very little setup. - Page 77 That’s all that is required: Vehicle Spy will automatically switch to Messages View and show the messages coming into the RAD-Galaxy. However, let’s add a couple of additional steps to make it easier to see what we are interested in here.
-
Page 78: Transmitting On Conventional Vehicle Networks
RAD-Galaxy User’s Guide Figure 76: Monitoring CAN and CAN FD Messages in Vehicle Spy Using the RAD-Galaxy. Transmitting on Conventional Vehicle Networks We can transmit on CAN networks almost as easily as we can receive on them. All that is necessary is to create a transmit message and then tell Vehicle Spy to send it. - Page 79 You will now see your message being transmitted on the HS CAN network, approximately every 100 ms, as shown in Figure 77. Note the green circle in the Tx column that marks it as a transmitted message. Version 1.2 - November 28, 2017 © 2016 Intrepid Control Systems, Inc.
-
Page 80: Standalone Logging
RAD-Galaxy User’s Guide Figure 77: Transmitting CAN Messages Using Vehicle Spy and the RAD-Galaxy. Standalone Logging This section will be detailed in a future version of this manual. Using the RAD-Galaxy with DoIP This section will be detailed in a future version of this manual. -
Page 81: Reference: Connector Pinouts And Cable Signal Mappings
RAD-Galaxy Connector Pinouts In this section we provide a complete list of the pinouts for the connectors on the RAD-Galaxy, as well as those on the network interface cables used to attach to it. - Page 82 Table 2: BroadR-Reach Connector 1 Pinout Details. Figure 78: BroadR-Reach Ethernet Connector 1 with Pin Assignments. RAD-Galaxy Nano MQS 100BASE-T1 (BroadR-Reach) Connector 2 Pinout Details See Table 3 for the details on 100BASE-T1 (BroadR-Reach) Ethernet connector 2, and refer to Figure 79 for a close-up of the connector and its pin assignments.
- Page 83 Table 3: BroadR-Reach Connector 2 Pinout Details. Figure 79: BroadR-Reach Ethernet Connector 2 with Pin Assignments. RAD-Galaxy HD-26M Conventional Network Interface Connector Pinout Details The details for the conventional network (CAN/MISC) DB-26M connector are shown in Table 4 and Figure 80.
-
Page 84: Rad-Galaxy Ethernet Cable Adapter Connector Pinouts And Signal Mapping
This cable, which is described and illustrated in Section 2.4, is the RAD-Galaxy’s primary attachment cable for all networks except 100BASE-T1. Its HD-26F connector attaches to the HD-26M on the RAD-Galaxy, and thus has the same pinout. Below are the pinouts for the Version 1.2 - November 28, 2017... - Page 85 High Speed CAN channel 7, high / SWCAN Single Wire CAN channel 1 Table 5: RAD-Galaxy Ethernet Cable Adapter DB-26M Connector Pinout. DB-9F Connector Table 6 shows the pin assignments for the DB-9F connector, with pin numbering illustrated in Table 19.
- Page 86 Table 6: RAD-Galaxy Ethernet Cable Adapter DB-9F Connector Pinout. Figure 81: RAD-Galaxy Ethernet Cable Adapter DB-9F Connector with Pin Assignments. The pin numbers are printed right on this connector, but may be hard for some to see. Pin 1 is top right and the numbers increase going left in the top row to pin 5 top left.
- Page 87 For easy reference, Table 8 shows the mapping of signals for the RAD-Galaxy Ethernet Cable Adapter, by pin order on the HD-26F that connects to the RAD-Galaxy. Note that DoIP Ethernet signals are not carried on that connector and so have been added at the bottom of the table.
-
Page 88: Neovi Fire 2 Ethernet Cable Adapter Connector Pinouts And Signal Mapping
Section 2.4. Its HD-26F connector attaches to the HD-26M on the RAD-Galaxy Ethernet Cable Adapter, and thus has the same pinout as shown in Table 5. Below are the pinouts for the other connectors on this cable (DB-25M, DB- 9M and RJ-45F) as well as cable signal mapping table. - Page 89 Figure 83: neoVI FIRE 2 Ethernet Cable Adapter DB-9M Connector with Pin Assignments. RJ-45F Connector This is another standard Ethernet socket and uses the same pinout as that shown in Table 7. Version 1.2 - November 28, 2017 © 2016 Intrepid Control Systems, Inc.
-
Page 90: Neovi-Obd-1 Cable Connector Pinouts And Signal Mapping
RAD-Galaxy User’s Guide Cable Signal Mapping Table 11 shows the mapping of signals for the neoVI FIRE 2 Ethernet Cable Adapter, by pin order on the HD-26F that connects to the RAD-Galaxy Ethernet Cable Adapter. HD-26F DB-25M DB-9M RJ-45F Signal Name... - Page 91 Table 13 contains the standard pinout for the OBD-II / J1962 connector on this cable. Note that not all of the default signals are actually present when used with the RAD-Galaxy, such as J1850, but they are included for completeness.
- Page 92 Unswitched Vehicle Battery Positive Table 13: neoVI-OBD-1 Cable OBD-II / J1962 Connector Pinout. The table shows standard signals for the OBD-II connector; this includes protocols such as J1850 that are not supported by the RAD-Galaxy. Cable Signal Mapping Table 14 contains the mapping of signals for the neoVI-OBD-1 cable when used with the RAD- Galaxy.
-
Page 93: Neovi-Obd-Multi (Regular And Right Angle) Cable Connector Pinouts And Signal Mapping
LIN channel (also Ethernet Activation for DoIP) Do not connect Do not connect Do not connect Do not connect Ground HS CAN 1 H High Speed CAN channel 1, high Version 1.2 - November 28, 2017 © 2016 Intrepid Control Systems, Inc. - Page 94 Unswitched Vehicle Battery Positive Table 16: neoVI-OBD-MULTI Cable OBD-II / J1962 Connector Pinout. The table shows standard signals for the OBD-II connector; this includes J1850, which is not supported by the RAD-Galaxy. Version 1.2 - November 28, 2017 © 2016 Intrepid Control Systems, Inc.
-
Page 95: Neovi Fire/Red J1939 Cable Connector Pinouts And Signal Mapping
FIRE/RED J1939 Cable Connector Pinouts and Signal Mapping This cable converts the neoVI DB-25 connector to a 9-pin Deutsch connector for use in commercial vehicles. DB-25 Connector Pinout Table 18 contains the pinout of the DB-25 connector when used with the RAD-Galaxy. Pin # Name Description... - Page 96 Table 18: neoVI FIRE/RED J1939 Cable DB-25 Connector Pinout. Deutsch 9-Pin Connector Pinout The pinout for the Deutsch connector on this cable is found in Table 19. All signals are again included for completeness but note that J1708 is not supported on the RAD-Galaxy. Pin # Name...
-
Page 97: Neovi Fire 2 Obd Cable With Doip Support Connector Pinouts And Signal Mapping
DB-25 Connector Pinout Table 21 lists the pins of the DB-25 connector on this cable when used with the RAD-Galaxy. Note that the LIN channel pin does not need to be used for DoIP Ethernet Activate on this cable, though they are electrically connected. - Page 98 LIN channel Ground Do not connect Do not connect Do not connect Do not connect Table 22: neoVI FIRE 2 OBD Cable with DoIP Support DB-9 Connector Pinout. Version 1.2 - November 28, 2017 © 2016 Intrepid Control Systems, Inc.
- Page 99 High Speed CAN channel 6, low ETH TX- Ethernet transmit channel, negative Ground ETH RX+ Ethernet receive channel, positive HS CAN 4 H High Speed CAN channel 4, high Version 1.2 - November 28, 2017 © 2016 Intrepid Control Systems, Inc.
-
Page 100: Signal Flow Map For Attachment Of Rad-Galaxy Ethernet Cable Adapter And Neovi Fire 2 Ethernet Cable Adapter
Signal Flow Map for Attachment of RAD-Galaxy Ethernet Cable Adapter and neoVI FIRE 2 Ethernet Cable Adapter The RAD-Galaxy Ethernet Cable Adapter and neoVI FIRE 2 Ethernet Cable Adapter are both somewhat complex due to the number of connectors and signals they use. Table 10 is intended to help make the signal flow across these connectors easier to understand. It shows... - Page 101 ETH TX+ ETH TX- ETH RX+ ETH RX- Table 25: Signal Flow Map for Attachment of RAD-Galaxy Ethernet Cable Adapter and neoVI FIRE 2 Ethernet Cable Adapter. Color / Description RAD-Galaxy CAN/MISC connector Direct attachment to RAD-Galaxy CAN/MISC connector and...
- Page 102 ETH TX+ ETH TX- ETH RX+ ETH RX- Table 27: Signal Flow Map for Attachment of RAD-Galaxy Ethernet Cable Adapter and neoVI FIRE 2 OBD Cable with DoIP Support. Version 1.2 - November 28, 2017 © 2016 Intrepid Control Systems, Inc.
- Page 103 • Phone: +49 721 6633703 -4. • Fax: +49 721 6633703 -9. • Email: icsgermany@intrepidcs.com Japan Office Intrepid’s office in Yokohama can be reached as follows: • Phone: +81-(0)45- 263-9294. • Mobile Phone: 080-8884-0111. • Fax: 045-263-9296. • Email: kharukawa@intrepidcs.com Version 1.2 - November 28, 2017 © 2016 Intrepid Control Systems, Inc.
- Page 104 • Phone: +91 +97 66 44 55 33. • Email: sbhagwat@intrepidcs.com Australia Office Our Australian office can be reached as follows: • Phone: 03 9466 4948 (international callers: +61 3 9466 4948). • Email: icsaustralia@intrepidcs.com Version 1.2 - November 28, 2017 © 2016 Intrepid Control Systems, Inc.
Need help?
Do you have a question about the RAD-Galaxy and is the answer not in the manual?
Questions and answers