Table of Contents
Advertisement
Advertisement
Table of Contents

Subscribe to Our Youtube Channel
Related Manuals for Ryobi EXPAND-IT ACT05


Summary of Contents for Ryobi EXPAND-IT ACT05
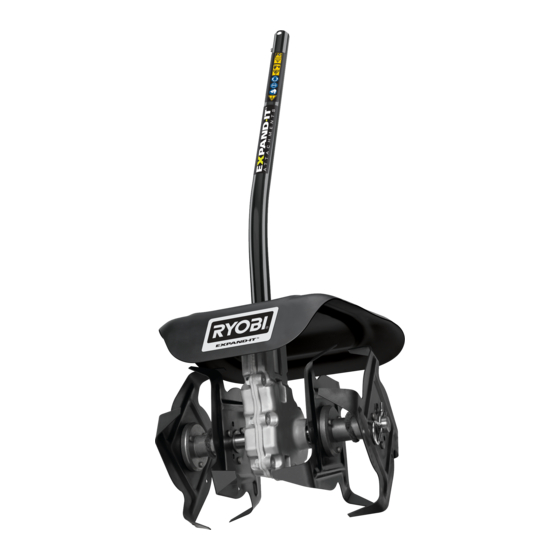
- Page 1 ORIGINAL INSTRUCTIONS Cultivator Attachment ACT05...
- Page 2 Important! It is essential that you read the instructions in this manual before assembling, operating, and maintaining the product. Subject to technical modification.
- Page 3 Secure long hair so it is above shoulder level to prevent RLT254SDSO, RBC254SESO, and RBC254SBSO; and entanglement in moving parts. battery-driven powerheads, RPH3600, RLT36X33S, and RLT36B33S. The product is not compatible with RYOBI ■ Before use and after any impact, check that there are corded powerheads.
-
Page 4: Operating Tips
battery packs. Use of any other battery packs may ● checking for any damage after hitting an object create a risk of injury and fire. ● checking for any damage if the product starts to vibrate abnormally ■ When battery pack is not in use, keep it away from other metal objects, like paper clips, coins, keys, nails, ●... -
Page 5: Transportation And Storage
allow time for the water to penetrate the ground and for maintenance or cleaning work. the excess to drain away before attempting to cultivate. ■ You may only make adjustments or repairs described in this manual. For other repairs, contact the authorised service centre. -
Page 6: What's In The Box
WHAT’S IN THE BOX SYMBOLS IN THIS MANUAL ■ Cultivator attachment x1 ■ Top clamp x1 Parts or accessories sold separately ■ “J” handle x1 ■ Shield x1 ■ Operator’s manual x1 Note ■ Flat washer x2 ■ Hitch pin x2 ■... - Page 7 WHAT’S IN THE BOX...
-
Page 8: Know Your Product
KNOW YOUR PRODUCT 1. Hanger cap 6. Inner tine 2. Cultivator attachment shaft 7. Hitch pin 3. Shield 8. Flat washer 4. Gear box 5. Outer tine... - Page 9 GETTING STARTED GETTING STARTED GETTING STARTED Always wear safety goggles or safety glasses with side Release the hook. Install the metal cover. Install and tighten the screw onto the metal cover. Place tine B on the tine shaft to the right of the gear box. Place tine C on the tine shaft to the left of the gear box.
- Page 11 OVERVIEW p.10 p.12 p.14 p.16...
-
Page 12: Operation
OPERATION FOUR-TINE OPERATION WARNING: Keep hands and feet away from the rotating tines at all times. CAUTION: The product must be adequately controlled by using two-handed operation at all times. 1. Attach the powerhead. 2. Hold down the throttle lock and then squeeze the throttle trigger to start using the product. - Page 13 OPERATION 3. Pull and/or push the cultivator while it is digging in the soil’s surface. NOTE: For cultivating ease and safety, use a forward and backward motion when using the product. WARNING: Never operate the product on rocky surfaces.
- Page 14 OPERATION TWO-TINE OPERATION WARNING: Keep hands and feet away from the rotating tines at all times. CAUTION: The product must be adequately controlled by using two-handed operation at all times. 1. Remove the powerhead. 2. Remove the hitch pin, tine A and felt washer.
- Page 15 OPERATION 4. Attach the powerhead. 5. Hold down the throttle lock and then squeeze the throttle trigger to start using the product. 6. Pull and/or push the cultivator while it is digging in the soil’s surface. NOTE: For cultivating ease and safety, use a forward and backward motion when using the product.
- Page 16 MAINTENANCE CLEANING THE TINES WARNING: Do not use water to clean the tines. 1. Turn off the product and remove the powerhead. 2. Remove the hitch pin, tine A and felt washer. 3. Remove the hitch pin, tine D and felt washer.
- Page 17 MAINTENANCE 4. Clean the product with a soft, dry cloth, and clean the debris from the tines with a stiff brush.
- Page 18 STORAGE STORING THE CULTIVATOR NOTE: Clean all foreign materials from the product. 1. Turn off the product and remove the powerhead. 2. Loosen knob and remove the lower shaft. 3. Install the hanger cap.
- Page 19 STORAGE 4. Store the product in a cool, dry, and well- ventilated place that is inaccessible to children and well away from sources of ignition.
-
Page 20: Product Specifications
PRODUCT SPECIFICATIONS VIBRATION LEVEL Cultivator attachment WARNING Model ACT05 The declared vibration value has been measured with a standard test method and may be used to compare one Maximum working width 25.7 cm tool with another. Maximum working depth 20.3 cm The declared vibration value may be used in a Weight 6.6 kg... - Page 24 Imported by: Techtronic Industries Australia Pty Ltd 31 Gilby Road, Mount Waverley, VIC 3149 Melbourne, Australia Techtronic Industries N.Z. Limited 2 Landing Drive, Mangere Auckland, 2022, New Zealand 961478174-01...
Need help?
Do you have a question about the EXPAND-IT ACT05 and is the answer not in the manual?
Questions and answers