
Related Manuals for FrontRow ezRoom ICR-01


Summary of Contents for FrontRow ezRoom ICR-01
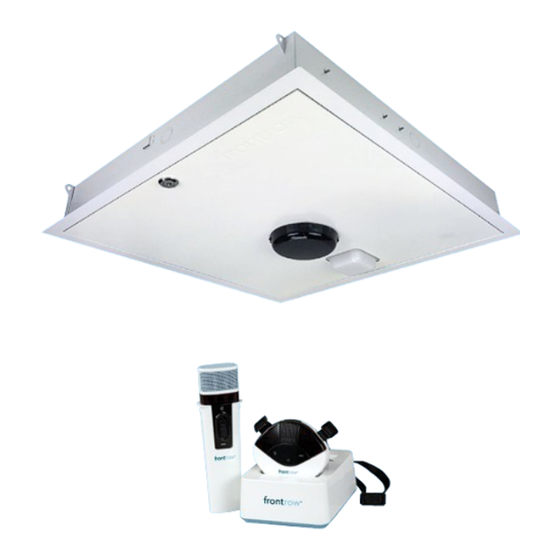
- Page 1 USER GUIDE ICR-01 Smart Receiver ITM-02 Pendant Microphone ISM-02 Pass-Around Microphone IMC-01 Microphone Charger...
-
Page 2: Table Of Contents
CONTENTS Important Safety Instructions . . . . . . . . . . . . . . . . . . . . . . . . . . . . . . . . . . . . . . . . . . . . . . . . . . . . . . . . . . . . . . . . . . . . . . . . . . 1 Electrical Warnings . -
Page 3: Important Safety Instructions
Important Safety Instructions 1. Read these instructions . 2. Keep these instructions . 3. Heed all warnings . 4. Follow all instructions . 5. Do not use this apparatus near water . 6. Clean only with dry cloth . 7. Do not block any ventilation openings . Install in accor- dance with the manufacturer’s instructions . -
Page 4: Electrical Warnings
. DO NOT disassemble the power supply . Return the appa- ratus to FrontRow for qualified service and repair if required . Incorrect reassembly may result in a risk of electric shock or fire . -
Page 5: Itm-02 Pendant Microphone
ITM-02 Pendant Microphone Front 1 Amazing Sound Quality With FrontRow's digital synthesis technology, the ITM-02 uses a single cardioid microphone element to deliver superb pickup and audio quality . And combined with a high-isolation, low- noise, open air microphone suspension, the ITM-02 minimizes noise from friction against clothing, buttons or jewelry . -
Page 6: Ism-02 Pass-Around Microphone
. 9 Charging/Programming Jack For charging via USB cable or for configuring settings using the FrontRow Microphone Settings application . 10 Portable Audio Interface 3 .5mm audio input jack lets you use the Pass-Around Microphone to transmit audio from any secondary... -
Page 7: Volume
Your ezRoom audio settings can be restored to factory defaults if necessary using the Teacher Edition software . NOTE: If using a FrontRow wall controller or software to control your ezRoom, user guides for those products are available at gofrontrow .com/guides-resources . -
Page 8: Voice Command
PowerFlex Voice Command Your ezRoom System lets you remotely control parameters using a few simple voice commands . Voice Command To issue a voice command: 1 . Press and hold the Smart Button on the Pendant Microphone . 2 . Wait for Voice Command tone and LED on the ceiling to turn to flashing green . 3 . -
Page 9: Playing Audio Over Bluetooth
2 . ezRoom will play a tone if using the CB55 wallplate . The button will also flash blue . 3 . Go to the Bluetooth settings on your computer, phone, or tablet and look for FrontRow ezRoom xxxx (a 4-digit number), then pair with the device . Once device is paired: 1 . - Page 10 Bluetooth Button functions Puts ezRoom in pairing mode so that you can pair your devices . If using the CB55 wallplate, the Short press button will flash when in pairing mode . ezRoom will remain in pairing mode for 60 seconds . Press and hold for “Reboots”...
- Page 11 Bluetooth on iOS (iPhone and iPad): To pair or forget devices: Go to the Settings app and select Bluetooth You can forget the device by tapping the Info Once paired, you can also connect or disconnect icon then selecting Forget This Device . by tapping the device .
- Page 12 Bluetooth on Chromebook: To pair or forget devices: Click on the status icons in the lower right, then make sure Click on the settings icon to access the Bluetooth settings . Bluetooth is enabled . You can pair, forget, connect, and disconnect devices in the settings window .
- Page 13 Bluetooth on Android: To pair or forget devices: You can pair or forget the device by tapping Go to the Settings app and select the FrontRow ezRoom device from the list Bluetooth. of Bluetooth devices . To connect and disconnect:...
- Page 14 Bluetooth on Windows 10: To pair or forget devices: Select Devices . Go to the Settings app. In the Bluetooth window you can pair, remove, connect and disconnect from devices . You may need to right click to see options .
- Page 15 To connect and disconnect: You can connect and disconnect by going to the action center, then selecting Connect, and selecting the ezRoom . Bluetooth Specifications Standard: Bluetooth 4 .1 Frequency Range: 2402-2480 MHz Maximum RF Power: +4dBm...
- Page 16 Troubleshooting If, for some reason, you cannot get your device to connect to ezRoom even though you had previously been able to stream audio, it is easy to “re-pair” the device to ezRoom . Simply go to your device settings and select the ezRoom, then “Forget” the device (may be a right-click, or another button to access this ability) .
-
Page 17: Beacon Led Status Indicator
Green When used with Intercom call active Blue FrontRow Conductor Page/Bell/Pre-recorded When used with Purple message active FrontRow Conductor When used with Recording active FrontRow Teacher Edition Flashing Red Recording paused Alternating Contact your system System re-boot required Yellow/White administrator... -
Page 18: Itm-02 Pendant Microphone
ITM-02 Pendant Microphone Using 1 . Place the microphone around your neck and connect clasp . 2 . Adjust the neck straps to position the microphone approximately 5in (14cm) from your mouth . 3 . Press the Smart Button to wake the microphone . The power 5in/14cm indicator should be green . -
Page 19: Battery
5 . For best performance, charge the battery in the microphone overnight before initial use . NOTE: When the battery is removed, it will take 2-3 charge/ discharge cycles for the battery to report accurate status to the FrontRow Teacher Edition application . Moisture Charge Battery Safety... -
Page 20: Charging
USB port on your computer . The ITM-02 microphone will not charge unless you have first installed the software drivers as part of the FrontRow Desktop, Teacher Edition or Microphone Settings software application . To download the application, visit gofrontrow.com/ guides-resources. -
Page 21: Ism-02 Pass-Around Microphone
ISM-02 Pass-Around Microphone Using 1 . Turn the microphone on by sliding the Power Switch up . 2 . Note Power Indicator (chair icon) . Green = On and transmitting Emitter diodes Power Off = Power is off indicator NOTE: In order to conserve battery life, if the power switch is left on, your microphone will automatically go into Standby Power/ Battery... -
Page 22: Labeling
Labeling Your Pass-Around Microphone includes a location for adding a name or room number for easy identification . clear window 1 . Place the microphone on a stable surface with the battery door facing up . 2 . Remove the battery door using the supplied Phillips screwdriver . -
Page 23: Battery
Battery Installing the battery 1 . Unscrew the battery door on the back of the microphone using the supplied Phillips head screwdriver . 2 . Locate the charge contacts on the battery and on the microphone . Pass-Around 3 . Insert the battery into the compartment - battery contacts first, Microphone then push the battery into place . -
Page 24: Charging
IMPORTANT! To ensure top performance and avoid equipment damage, batteries should be charged at room temperature . IMPORTANT! To ensure top performance, FrontRow recommends replacing rechargeable batteries every three years . IMPORTANT! Store the battery properly if it will be unused for a period of more than 2 weeks . -
Page 25: Microphone Configuration
. Increase battery life when you need more talk time from your microphone . Restore defaults – Restore the microphone settings to factory defaults . Firmware updates – From time to time, FrontRow may make improvements or enhancements to your microphone's firmware . Use this function to periodically check for updates . -
Page 26: Using Multiple Microphones
. Programming and switching the microphone channels 1 . Use a USB cable to connect the microphone to a computer with the FrontRow Microphone Settings software application** installed . 2 . Open the Microphone Settings software application . - Page 27 6 . Unscrew battery door using the supplied Phillips screwdriver . 7 . Using the channel indicator labels included with your microphones, label the switch positions you've just reprogrammed . Pendant Microphone 8 . Move the selection switch to the channel you want to use – ideally, the one indicated in the shaded column in the table on page 16 .
-
Page 28: Imc-01 Microphone Charger
IMC-01 Microphone Charger Charger setup 1 . Insert microphones in either of the two charge pockets . 2 . Find the power plug that is appropriate for the power outlet style in your country . 3 . Slide power plug onto the power supply . 4 . -
Page 29: Troubleshooting
• Verify that you have the microphone drivers installed . To install • Check that the microphone is not muted (see page 8) the drivers, you will need to install the FrontRow Microphone (ITM-02 only) . Settings application or Teacher Edition application . * You may •... - Page 30 • Make sure you are following the correct sequence when issuing command (see page 6) . PrioriTeach not working • Adjust the drop down level from the FrontRow Teacher Edition software application . • Verify that PrioriTeach is turned on using the FrontRow Teacher Edition software application .
-
Page 31: Regulatory
FrontRow Calypso LLC in writing, could void the user's author- ity to operate those elements of the system . This product conforms with the essential requirements of European Union Directive /EU Directive 2004/108/EC EMC Directive and 2002/95 ROHS Directive . -
Page 32: Batteries
Declaration of Conformity Hereby, FrontRow Calypso, LLC declares that the readio equipment type, Juno Tower receiver with Bluetooth, model number ITR-02 is in compliance with Directive 2014/53/EU . Visit https://www .gofrontrow .com/sites/default/files/how-to/ classroom-audio-juno-itr-02-declaration-of-conformity .pdf the full text of the EU Declaration of Conformity . - Page 33 . g ofrontrow .com © 2018 FrontRow Calypso LLC Phonic Ear, FrontRow, Calypso and the names of Phonic Ear, Calypso, and FrontRow products are trademarks or registered trademarks of FrontRow Calypso LLC in the U .S . and other countries . Bluetooth is a registered trademark of Bluetooth SIG, Inc .
Need help?
Do you have a question about the ezRoom ICR-01 and is the answer not in the manual?
Questions and answers