Table of Contents
Advertisement
Quick Links
Advertisement
Chapters
Table of Contents

Related Manuals for Royal garden River Oak FCS70438RNRGDS


Summary of Contents for Royal garden River Oak FCS70438RNRGDS
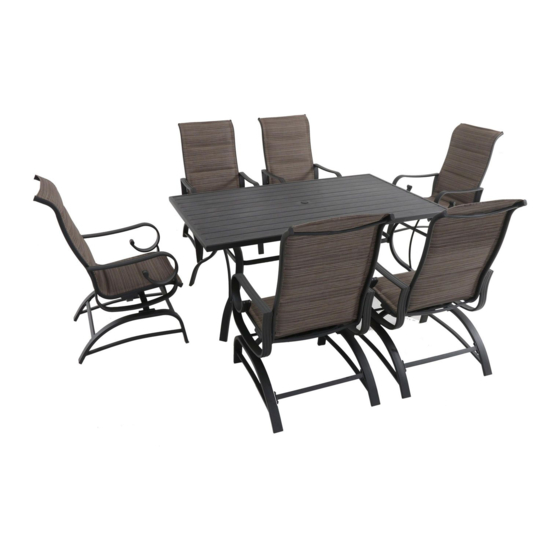
- Page 1 Assembly Instructions Model No. FCS70438RNRGDS 7pc Steel Sling Padded Dining Set - Chair Questions, problems, or missing parts? Before returning to the store, call Customer Service. 1-866-988-3300 8 a.m. - 5 p.m., PST Monday - Friday Retain this manual for future use.
-
Page 2: Table Of Contents
Contents Safety Instructions Parts List Assembly Cleaning & Maintenance Warranty IMPORTANT: RETAIN FOR FUTURE REFERENCE, AND READ CAREFULLY. FCS70438RNRGDS... -
Page 3: Safety Instructions
Safety Instructions WARNING Please keep children out of the assembly area before assembly. WARNING Never use this product as support. Do not shake, lean, or climb on the product at any time. WARNING Do not place heavy objects on the chair. WARNING When not in use, secure the product in a cool and covered location. -
Page 4: Parts List
Parts List Chair Bucket - 6 M6x30 Combination Bolt - 36+1 Left Arm - 6 M6x15 Combination Bolt - 48+1 Right Arm - 6 M8x28 Combination Hex Bolt - 24+1 Support Bar - 6 M8x20 Combination Hex Bolt - 24+1 Left Leg - 6 Hex Wrench - 1 Wrench - 1... -
Page 5: Assembly
Assembly STEP 1 Requires: AA, EE, A, C Connecting the right arm to the chair bucket Attach the right arm (C) to the chair bucket (A) using M6x30 combination bolts (AA). Do not fully tighten the bolts at this step. Connecting the right arm to the chair bucket NOTE: Loosely tighten the bolts using the hex wrench (EE). - Page 6 Assembly STEP 2 Requires: AA, EE, A, B Connecting the left arm to the chair bucket Attach the left arm (B) to the chair bucket (A) using M6x30 combination bolts (AA). Do not fully tighten the bolts at this step. Connecting the left arm to the chair bucket NOTE: Loosely tighten the bolts using the hex wrench (EE).
- Page 7 Assembly STEP 3 Requires: DD, FF, A, D Connecting the support bar to the chair bucket Attach the support bar (D) to the chair bucket (A) using M8x20 combination hex bolts (DD). Do not fully tighten the bolts at this step. NOTE: Loosely tighten the bolts using the wren ch (FF).
- Page 8 Assembly STEP 4 Requires: CC, FF, D, E Connecting the left leg to the support bar Attach the left leg (E) to the support bar (D) using M8x28 combination hex bolts (CC). Do not fully tighten the bolts at this step. NOTE: Loosely tighten the bolts using the wrench (FF).
- Page 9 Assembly STEP 5 Requires: CC, FF, D, F Connecting the right leg to the support bar Attach the right leg (F) to the support bar (D) using M8x28 combination hex bolts (CC). Do not fully tighten the bolts at this step. NOTE: Loosely tighten the bolts using the wrench (FF).
- Page 10 Assembly STEP 6 Requires: BB, EE, E, F, G Connecting the connection bar Attach the connection bar (G) to the front of the left leg (E) and the right leg (F) using M6x15 combination bolts (BB). Do not fully tighten the bolts at this step. NOTE: Loosely tighten the bolts using the hex wrench (EE).
- Page 11 Assembly STEP 7 Requires: BB, EE, E, F, G Connecting the connection bar Attach the connection bar (G) to the rear of the left leg (E) and the right leg (F) using M6x15 combination bolts (BB). Do not fully tighten the bolts at this step. NOTE: Loosely tighten the bolts using the hex w rench (EE).
- Page 12 Assembly STEP 8 Checking the chair Once all of the bolts are in place, fully tighten the bolts. Turn the assembled chair right side up. Ensure all connections are secure before use. FCS70438RNRGDS...
-
Page 13: Cleaning & Maintenance
Cleaning & Maintenance Frames Considered the most durable material for outdoor furniture, metal can last a lifetime if you take care of it properly. Most metal outdoor furniture is finished with paint, varnish, or powder coating to prevent rust. While aluminum doesn’t rust–it can oxidize (causes pitting & dulls the finish). -
Page 14: Warranty
Warranty Outdoor Furniture IMPORTANT If you have any problems with this product (missing or damaged parts, assembly issues, etc.), PLEASE DO NOT RETURN TO THE RETAILER/STORE from where you purchased the product. Please call our Toll-Free Customer Service Hotline at: 1-866-988-3300 To expedite any future warranty claims, please retain the instruction sheet, warranty card and receipt for future use. - Page 15 Warranty Outdoor Furniture 1-YEAR LIMITED WARRANTY PROGRAM For a period of one (1) year after date of purchase, the Manufacturer will either repair or replace defective components in accordance with this Limited Warranty. This warranty is between the Manufacturer and the original purchaser and is valid only when accompanied by the original purchaser’s sales receipt showing original date of purchase and location of purchase.
- Page 16 Assembly Instructions Model No. FCS70438RNRGDS 7pc Steel Sling Padded Dining Set - Table Questions, problems, or missing parts? Before returning to the store, call Customer Service. 1-866-988-3300 8 a.m. - 5 p.m., PST Monday - Friday Retain this manual for future use.
- Page 17 Contents Safety Instructions Parts List Assembly Cleaning & Maintenance Warranty IMPORTANT: RETAIN FOR FUTURE REFERENCE, AND READ CAREFULLY. FCS70438RNRGDS...
-
Page 18: Safety Instructions
Safety Instructions WARNING Please keep children out of the assembly area before assembly. WARNING This table unit is heavy, and may require two adults for safe assembly. WARNING Do not locate the product near any heat source. FCS70438RNRGDS... -
Page 19: Parts List
Parts List Table Top - 1 M6x30 Combination Bolt - 12+1 Leg Connector - 1 M6x25 Combination Bolt - 12+1 Table Leg - 4 Hex Wrench - 1 Support Tube - 2 Umbrella Ring - 1 FCS70438RNRGDS... -
Page 20: Assembly
Assembly STEP 1 Requires: AA, A, C, D Attaching The Table Legs And The Support Tubes To The Table Rim Place the table rim (A) upside down on a soft surface. Attach the table legs (C) and the support tubes (D) to the table top (A) using M6x30 combination bolts (AA). - Page 21 Assembly STEP 2 Requires: BB, B, C, D Attachng The Leg Connector To The Table Legs And The Support Tubes Attach the leg to leg connector (B) to the table legs (C) and the support tubes (D) using M6x25 combination bolts (BB). Do not fully tighten the bolts at this step.
- Page 22 Assembly STEP 3 Requires: A, E Adding The Umbrella Ring Once all of the bolts are in place, tighten all bolts completly. Turn the table right side up. Carefully place the umbrella ring (E) onto the table top (A). Ensure all connections are secure before use. FCS70438RNRGDS...
-
Page 23: Cleaning & Maintenance
Cleaning & Maintenance • For best results, clean the frame and fabric with a damp cloth and dry thoroughly. This will help prevent mildew by removing dirt particles that may accumulate. • Do not clean with abrasive materials, bleach, or solvents. •... -
Page 24: Warranty
Warranty Outdoor Furniture IMPORTANT If you have any problems with this product (missing or damaged parts, assembly issues, etc.), PLEASE DO NOT RETURN TO THE RETAILER/STORE from where you purchased the product. Please call our Toll-Free Customer Service Hotline at: 1-866-988-3300 To expedite any future warranty claims, please retain the instruction sheet, warranty card and receipt for future use. - Page 25 Warranty Outdoor Furniture 1-YEAR LIMITED WARRANTY PROGRAM For a period of one (1) year after date of purchase, the Manufacturer will either repair or replace defective components in accordance with this Limited Warranty. This warranty is between the Manufacturer and the original purchaser and is valid only when accompanied by the original purchaser’s sales receipt showing original date of purchase and location of purchase.
Need help?
Do you have a question about the River Oak FCS70438RNRGDS and is the answer not in the manual?
Questions and answers