Sign In
Upload
Download
Table of Contents
Contents
Add to my manuals
Delete from my manuals
Share
URL of this page:
HTML Link:
Bookmark this page
Add
Manual will be automatically added to "My Manuals"
Print this page
×
Bookmark added
×
Added to my manuals
Manuals
Brands
Duplo Manuals
Disc Duplicator
DP-S Series
Service manual
Duplo DP-S Series Service Manual
Duprinter
Hide thumbs
1
2
3
4
5
6
7
8
9
10
11
12
13
14
15
16
17
18
19
20
21
22
23
24
25
26
27
28
29
30
31
32
33
34
35
36
37
38
39
40
41
42
43
44
45
46
47
48
49
50
51
52
53
54
55
56
57
58
59
60
61
62
63
64
65
66
67
68
69
70
71
72
73
74
75
76
77
78
79
80
81
82
83
84
85
86
87
88
89
90
91
92
93
94
95
96
97
98
99
100
101
102
103
104
105
106
107
108
109
110
111
112
113
114
115
116
117
118
119
120
121
122
123
124
125
126
127
128
129
130
131
132
133
134
135
136
137
138
139
140
141
142
143
144
145
146
147
148
149
150
151
152
153
154
155
156
157
158
159
160
161
162
163
164
165
166
167
168
169
170
171
172
173
174
175
176
177
178
179
180
181
182
183
184
185
186
187
188
189
190
191
192
193
194
195
196
197
198
199
200
201
202
203
204
205
206
207
208
209
210
211
212
213
214
215
216
217
218
219
220
221
222
223
224
225
226
227
228
229
230
231
232
233
234
235
236
237
238
239
240
241
242
243
244
245
246
247
248
249
250
251
252
253
254
255
256
257
258
259
260
261
262
263
264
265
266
267
268
269
270
271
272
273
274
275
276
277
278
279
280
281
282
283
284
285
286
287
288
289
290
291
292
293
294
295
296
297
298
page
of
298
Go
/
298
Contents
Table of Contents
Troubleshooting
Bookmarks
Table of Contents
Table of Contents
Introduction
Using the Service Manual
Safety Instructions
Cautions Regarding the Installation Location
Cautions for Installation Work
Cautions for Maintenance, Inspection and Servicing
Locations of Warning Labels
Table of Contents
Chapter 1 Introduction
Specifications
Dimensions
Specifications
System Setup
Part Names and Their Functions
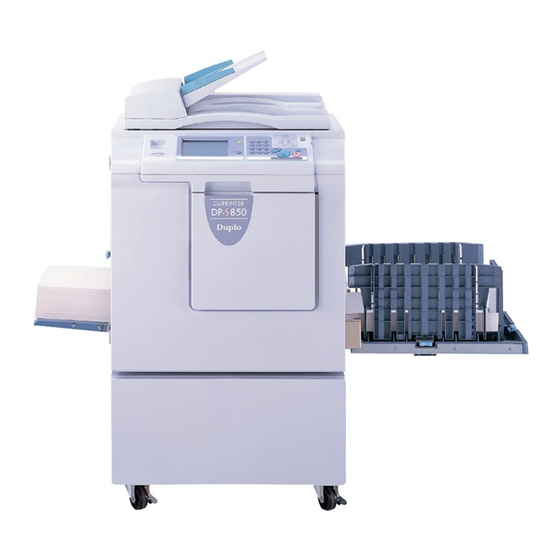
Machine Exteriors
Sectional (Structural) View of the Machine
Control Panel
Chapter 2 Description of the Operation
Scanner Section
Scanner Section
Sequence of Operation
Sequence of the Scanner Operation
Sequence of the Scanner Operation (S3-ADF)
Operation with the Document Cover Open / Closed
Reading the Document Darkness
Reading the Document Size
2Platemaking Area for the Book Shadow Erasing Mode
2Platemaking Area for the Selected Paper
Function of Parts and Circuit
Slider Limit Sensors 1, 2
Document Size Sensor
Document Cover Open/Close Sensor
CCD / Lamps
Scanner Unit Open / Close Detection
Platemaking/Master Feed/Ejection Section
Platemaking / Master Feed / Ejection Section
Description
Platemaking / Master Feed Section
Operation When the Master Set
Sequence of Operation
Platemaking / Master Feeding
Function of Parts
Thermal Head
End Mark Sensor
Master End Detection
Master Setting Error Detection
Master Top Sensor
Drum Master Sensor
Cutter Unit
Master Feed Clutch(Electromagnetic Clutch)
Circuit
Description
Master Ejection Section
Function of Parts
Master Ejection Error Detection
Master Ejection Sensor
Rotation Control of the Eject(Roll-Up) Motor
Description
Master Clamp Opening/Closing Section
Operation of Master Clamp Open / Close Lever
Structure
Master Attach / Detach Operation
Clamp Opening / Closing Lever Position (B / C Mode)
B / C Mode Detect Sensor
Function of Parts
Returning Operation Flowchart When the Power Is Cut off Accidentally
Paper Feed Section
Description
Operation
Rotation of the Paper Feed Roller and Timing Roller
Paper Feed Roller Drive
Driving of the Timing Roller
Escape the Guide Roller
Paper Feed Length
Function of Parts
Printing Position Adjustment Mechanism
Double Feed Detect Mechanism
Elevator Top Limit Sensor
Elevator Lower Limit Switch
Paper Sensor
Drum Driving Section
Description
Drum Position 1 Sensor
Function of Parts
Drum Position 2 Sensor
Drum Removal Button/Led
JOG Switch
Control of the Main Motor
Rotation Speed Control by Encoder Sensor
Press Section
Description
Press Roller Timing & Printing Area
Function of Parts
Press Roller Sensor
Switching the Contact Pressure
Contact Pressure Position Sensing
Paper Ejection Section
Description
Function of Parts
Paper Stripper Finger
Top Fan
Paper Eject Jam Sensor
Paper JAM Detection Timing
Paper Ejection Belt
Drum Section
Description
Circuit
Function of Part
Ink Detection
LED Display and Output Signal on the Ink Detection PCB Unit
INK" Display Timing
Ink Roller Up/Down Mechanism
Ink Pump
Drum Switch
Fine Start Mode
Front Cover Detection Switch
Chapter 3 Mechanism
Exterior
Removal of the Document Cover
Removal of
Removal of the Scanner Outer Cover
Removal of Rear Cover
Switching Power Supply 24V/5V
Removal of Control Panel
Removal of Control Panel PCB
Removal of Battery PCB Unit
Removal of Main Motor PCB Unit
Scanner Section
Removal of Glass
Removal of Inverter PCB Unit
Removal of Reading Cover
Removal of Lamp Unit
Removal of Wire (Lamp)
Removal of Slider a
Removal of Slider B
Removal of Scanner Unit
Platemaking/Master Feed/Ejection Section
Platemaking / Master Feed and Ejection Section
Master Feed Section
Removal of Cutter Unit
Removal of End Mark Sensor PCB Unit
Removal of Thermal Head
Removal of Master Feed Stepping Motor
Removal of Master Feed Unit
Master Ejection Section
Removal of Eject Motor(Roll-Up Motor)
Removal of Master Ejection Box
Master Clamp Opening/Closing Section
Removal of Clamp Motor
Removal of Master Clamp Opening / Closing Unit
Removal of Timing Belt
Paper Feed Section
Removal of Feed Tray Unit
Removal of Horizontal Reg. Motor
Removal of Elevator Lower Limit Switch
Removal of Paper Feed Roller
Double Feed Detect,Signal Sensor
Removal of Timing Roller
Drum Driving Section
Removal of Sub-Frame
Removal of Drum Gear and Driving Assy
Paper Ejection Section
Removal of Paper Stripper Finger / Sub Paper Stripper Finger
Removal of Paper Ejection Belt
Removal of Paper Ejection Jam Sensor
Removal of Fan
Removal of Top Blow Fan Unit
Removal of Press Motor
Removal of Pressure Adjustment Unit
Drum Section
Removal of Screen
Removal of Base Unit
Removal of Master Clamp
Removal of Outer Frame (Right) Unit
Removal of Outer Frame (Left) Assy
Removal of Inner Frame
Removal of Ink Pump
Removal of Ink Pump Motor
Removal of Ink Detection PCB Unit
Removal of Ink Roller Up/Down Motor
Chapter 4 Standards / Adjustment
Scanner Section
Attaching the Rear Wire
Attaching the Front Wire
Platemaking/Master Feed/Ejection Section
Platemaking / Master Feed / Ejection Section
Adjusting the Timing Belt Tension
Platemaking / Master Feed Section
Position Adjustment of Thermal Head Up/Down Motor
Attaching the Spring
Master Ejection Section
Adjusting the Timing Belt Tension
Adjusting the Timing Belt Tension
Master Clamp Opening/Closing Section
Positioning the Master Clamp Opening / Closing Levers
Adjusting the B / C Modes
Paper Feed Section
Adjusting the Paper Separator Unit Clearance
Adjusting the Elevator Top Limit Sensor
Adjusting the Elevator Lower Limit Switch
Adjusting the Double Feed Detection Sensors
Adjusting the G Roll Escape Amount / Timing
Drum Driving Section
Adjusting the Drum Stop Position
Adjusting the Master Attach Position
Press Section
Press Section
Adjusting the Printing Area (Press off Timing)
Paper Ejection Section
Adjusting the Paper Stripper Finger Clearance
Drum Section
Adjusting the Ink Amount
Adjusting the Squeegee Gap
Adjusting the Drum Rail Gap
Adjusting the Master Clamp Margin
Electrical System
Adjusting Reduction / Enlargement
Adjusting M-Mark Feed Volume Magnification
Adjusting M-Mark Speed Magnification
Adjusting Scan Horizontal Magnification
Adjusting Scan Vertical Magnification
Master Making Start Position
Reading Start Position
Adjusting the Lateral (Operation Side) Reading Start Position
Adjusting the Top End Reading Start Position Adjustment Procedure
Adjusting the Master Making Start Position
When in Online
When the Scanner Is in Use
Adjusting the Document Reading Darkness
Adjusting the Scan Level : Text Mode
Adjusting the Scan Level : Text/Photo, Photo/Text, Photo Mode
Adjusting of Printer Unit's Printing Speed
Adjusting the M-Mark Speed
Adjusting the Pre-Stop Speed
Adjusting the Jog Speed
Adjusting the Print Speed
Adjusting Paper Eject Speed
Chapter 5 Maintenance/Check
Cleaning and Oiling
Guaranteed Periodical Maintenance
Periodical Maintenance
Chapter 6 Troubleshooting
Troubleshooting Guide
Countermeasures for the Defective Operation
Lamp Does Not Light up
Optical System Dose Not Move Forward/Backward.173
E001" Is Displayed
E002" Is Displayed
E005" Is Displayed
E006" Is Displayed
E009" Is Displayed
E011" Is Displayed
E012" Is Displayed
E013" Is Displayed
E015" Is Displayed
E016" Is Displayed
E020" Is Displayed
E021" Is Displayed
Malfunction of Master Feed Clutch
Malfunction of Master Stepping Motor
MASTER SET ERROR" Is Displayed
Malfunction of Eject Motor
PAPER" Is Displayed
CLOSE FRONT COVER" Is Displayed
CLOSE SCANNER" Is Displayed
MASTER" Is Displayed
INK" Is Displayed
PLEASE INSERT CARD" Is Displayed
PAPER JAM on the EJECTION SIDE" Is Displayed
USED MASTER CORE" Is Displayed
Paper Jams in the Paper Feed Side
Error Display
Chapter 7 HELP Mode
HELP Mode List
Overview
HELP Mode Functions and Operation Procedures
Accessing HELP Modes
HELP Mode Descriptions
Others
Electrical Parts Layout and Their Functions
Switches/Clutches/Solenoids
Sensors 1
Sensors 2
Motors/Fans
Overall Wiring Layout
Advertisement
Quick Links
Download this manual
Table of
Contents
Previous
Page
Next
Page
1
2
3
4
5
Advertisement
Chapters
Table of Contents
10
Chapter 2 Description of the Operation
25
Chapter 3 Mechanism
97
Chapter 4 Standards / Adjustment
135
Chapter 6 Troubleshooting
172
Table of Contents
Troubleshooting
Chapter 6 Troubleshooting
172
Troubleshooting Guide
173
Need help?
Do you have a question about the DP-S Series and is the answer not in the manual?
Ask a question
Questions and answers
Related Manuals for Duplo DP-S Series
Disc Duplicator Duplo DP-440 Instruction Manual
(154 pages)
Disc Duplicator Duplo DP-S550 Service Manual
Duprinter (298 pages)
Disc Duplicator Duplo DP-S520 Service Manual
Duprinter (298 pages)
Disc Duplicator Duplo DP-A100 II Installation Manual
Duprinter (12 pages)
Disc Duplicator Duplo DP-A120 II Installation Manual
Duprinter (12 pages)
Disc Duplicator Duplo DP-A125 II Installation Manual
Duprinter (12 pages)
This manual is also suitable for:
Dp-s850
Dp-s650
Dp-s620
Dp-s550
Dp-s520
Dp-s510
Table of Contents
Save PDF
Print
Rename the bookmark
Delete bookmark?
Delete from my manuals?
Login
Sign In
OR
Sign in with Facebook
Sign in with Google
Upload manual
Upload from disk
Upload from URL


Need help?
Do you have a question about the DP-S Series and is the answer not in the manual?
Questions and answers