Table of Contents
Advertisement
Available languages
Available languages
Wall Mounted Air-Conditioning Unit
Aer Conditonat model Split de Perete
NBKU2VI32-09WFR/NBKU2VO32-09B
MODELS/
NBKU2VI32-12WFRB/NBKU2VO32-12B
ΜΟΝΤΕΛΑ/
NBKU2VI32-18WFR/NBKU2VO32-18
MODELE:
NBKU2VI32-24WFR/NBKU2VO32-24
Επιτοίχια Μονάδα Κλιματισμού
Manual de utilizare
For correct use of this unit, please read this manual carefully and keep it for future reference.
Για τη σωστή χρήση της μονάδας, παρακαλούμε διαβάστε προσεκτικά το εγχειρίδιο
Pentru o utilizare corecta, va rugam sa cititi cu atentie acest manual
Remote Controller
User's Manual
Τηλεχειριστήριο
Εγχειρίδιο Χρήσης
English/Ελληνικά/Romana
και φυλάξτε το για αναφορά στο μέλλον.
si sa il pastrati pentru o consultare ulterioara.
Telecomanda
Advertisement
Chapters
Table of Contents

Related Manuals for Nobu RG57B/BGE


Summary of Contents for Nobu RG57B/BGE
- Page 1 Wall Mounted Air-Conditioning Unit Επιτοίχια Μονάδα Κλιματισμού Aer Conditonat model Split de Perete NBKU2VI32-09WFR/NBKU2VO32-09B MODELS/ NBKU2VI32-12WFRB/NBKU2VO32-12B ΜΟΝΤΕΛΑ/ NBKU2VI32-18WFR/NBKU2VO32-18 MODELE: NBKU2VI32-24WFR/NBKU2VO32-24 Remote Controller User’s Manual Τηλεχειριστήριο Εγχειρίδιο Χρήσης Telecomanda Manual de utilizare English/Ελληνικά/Romana For correct use of this unit, please read this manual carefully and keep it for future reference. Για...
-
Page 2: Table Of Contents
CONTENTS Remote controller Specifications ..................3 Operation buttons ....................... 4 Indicators on LCD ......................... 7 How to use the buttons ....................... 8 Auto operation ........................8 Cooling/Heating/Fan operation ..................8 Dehumidifying operation ....................9 Adjusting air flow direction ....................9 Timer operation ......................... -
Page 3: Remote Controller Specifications
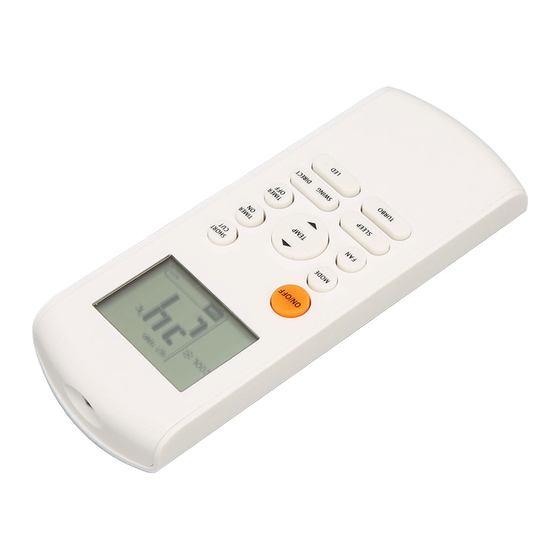
Remote Controller Specifications Model RG57B/BGE Rated Voltage 3.0V (Dry batteries R03/LR03X2) Signal Receiving Range Environment -5°C~60°C ON/OFF SHOR T TIMER MODE TEMP TIMER SLEEP SWING DIRECT TURBO TURBO RG57B/BGE... -
Page 4: Operation Buttons
Operation of buttons ON/OFF Button This button turns the air conditioner ON and OFF. MODE Button Press this button to modify the air conditioner mode in a sequence of following: ➝ AUTO ➝ COOL ➝ DRY ➝ HEAT ➝ FAN NOTE: Please do not select HEAT mode if the machine you purchased is cooling only type. - Page 5 Operation of buttons UP Button( Push this button to increase the indoor temperature setting in 1°C increments to 30°C. DOWN Button( Push this button to decrease the indoor temperature setting in 1°C increments to 17°C. NOTE: Temperature contol is not available in Fan mode. SHORTCUT Button •...
- Page 6 Operation of buttons SWING Button Used to stop or start horizontal louver auto swing feature. DIRECT Button Used to change the louver movement and set the desired up/down air flow direction. The louver changes 6° in angle for each press. LED Button Disable/Active indoor screen Display.
-
Page 7: Indicators On Lcd
Indicators on LCD Mode display Information are displayed when the remote controller is AU TO COOL powered up. HE AT Displayed when data transmitted. Displayed when remote controller is ON. Battery display (low battery detection) Not available for this unit Displayed when TIMER ON time is set. -
Page 8: How To Use The Buttons
How to use the buttons Auto operation Ensure the unit is plugged in and power is available. The OPERATION indicator on the display panel of the indoor unit starts flashing. 1. Press the MODE button to select Auto. 2. Press the UP/DOWN button to set the desired temperature. -
Page 9: Dehumidifying Operation
How to use the buttons Dehumidifyinq operation Ensure the unit is plugged in and power is available. The OPERATION indicator on the display panel of the indoor unit starts flashing. 1. Press the MODE button to select DRY mode. 2. Press the UP/DOWN buttons to set the desired temperature. -
Page 10: Timer Operation
Timer operation Press the TIMER ON button can set the auto-on time of the unit. Press the TIMER OFF button can set the auto-off time of the unit. To set the Auto-on time. 1. Press the TIMER ON button. The remote controller shows TIMER ON, the last Auto-on setting time and the signal “H”... - Page 11 CAUTION • When you select the timer operation, the remote controller automatically transmits the timer signal to the indoor unit for the specified time. Therefore, keep the remote controller in a location where it can transmit the signal to the indoor unit properly. •...
- Page 12 TIMER OFF (Auto-off Operation) The TIMER OFF feature is useful when you want the unit to turn off automatically after you go to bed. The air conditioner will stop automatically at the set time. Example: To stop the air conditioner in 10 hours. Stop 1.
- Page 13 TIMER ON ➝ TIMER OFF (Off ➝ Start ➝ Stop operation) This feature is useful when you want to start the air conditioner before you wake up and stop it after you leave the house. Start Example: To start the air conditioner 2 hours after setting, and Stop stop it 5 hours after setting.
-
Page 14: Handling The Remote Controller
Handling the remote controller Location of the remote controller. • Use the remote controller within a distance of 8 meters from the appliance, pointing it towards the receiver. Reception is confirmed by a beep. CAUTIONS • The air conditioner will not operate if curtains, doors or other materials block the signals from the remote controller to the indoor unit. - Page 15 Replacing batteries The following cases signify exhausted batteries. Replace old batteries with new ones. • Receiving beep is not emitted when a signal is transmitted. • Indicator fades away. The remote controller is powed by two dry batteries (R03/LR03X2) housed in the back rear part and protected by a cover.
- Page 16 ΠΕΡΙΕΧΟΜΕΝΑ Χαρακτηριστικά του Ασύρματου Τηλεχειριστηρίου ............3 Λειτουργίες Πλήκτρων ....................... 4 Ενδείξεις στην LCD Οθόνη ....................7 Χρήση των πλήκτρων ......................8 Αυτόματη Λειτουργία ......................8 Λειτουργίες Ψύξης/Θέρμανσης/Ανεμιστήρα ..............8 Λειτουργία Αφύγρανσης ..................... 9 Λειτουργία Timer ....................... 10 Χειρισμός του Ασύρματου Τηλεχειριστηρίου ............... 14 Σημείωση: •...
- Page 17 Χαρακτηριστικά Ασύρματου Τηλεχειριστηρίου Μοντέλο RG57B/BGE Ονομαστική Τάση 3.0V (Μπαταρίεςστεγνού τύπου R03/LR03X2) Εμβέλεια Σήματος Λήψης Εύρος θερμοκρασίας -5°C~60°C περιβάλλοντος ON/OFF SHOR T TIMER MODE TEMP TIMER SLEEP SWING DIRECT TURBO TURBO RG57B/BGE...
-
Page 18: Λειτουργίες Πλήκτρων
Λειτουργίες Πλήκτρων Πλήκτρο ON/OFF Με αυτό το πλήκτρο γίνεται η εκκίνηση και η διακοπή της λειτουργίας της κλιματιστικής μονάδας. Πλήκτρο MODE Με αυτό το πλήκρο ρυθμίζετε την λειτουργία της κλιματιστικής μονάδας όπως παρακάτω: ➝ AUTO ➝ COOL ➝ DRY ➝ HEAT ➝ FAN ➝... - Page 19 Λειτουργίες Πλήκτρων Πλήκτρο ( Πιέστε αυτό το κουμπί για να αυξήσετε την εσωτερική ρύθμιση της θερμοκρασίας σε βήματα 1°C έως 30°C. Πλήκτρο ( Πιέστε αυτό το κουμπί για να μειώσετε την εσωτερική ρύθμιση της θερμοκρασίας σε βήματα 1°C έως 17°C. Σημείωση: Η...
- Page 20 Λειτουργίες Πλήκτρων Πλήκτρο SWING Χρησιμοποιείται για να διακόψει ή να εκκινήσει την αυτόματη λειτουργία αλλαγής θέσης της οριζόντιας περσίδας Πλήκτρο DIRECT Χρησιμποιείται για να αλλάξει τη κίνηση της περσίδας και να ρυθμίσει την επιθυμητή θέση για τη διάχυση του αέρα. Η περσίδα αλλάζει 6 μοίρες υπό γωνία με κάθε...
-
Page 21: Ενδείξεις Στην Lcd Οθόνη
Ενδείξεις στην LCD οθόνη Ενδείξεις λειτουργιών Οι ενδείξεις εμφανίζονται όταν το τηλεχειριστήριο είναι AU TO COOL ενεργοποιημένο HE AT Ένδειξη μετάδοσης εντολών Εμφανίζεται όταν το τηλεχειριστήριο είναι ενεργοποιημένο Ένδειξη μπαταρίας (ανίχνευση χαμηλής μπαταρίας) Δεν είναι διαθέσιμο σε αυτή τη μονάδα Εμφανίζεται... -
Page 22: Χρήση Των Πλήκτρων
Χρήση των πλήκτρων Αυτόματες λειτουργίες Βεβαιωθείτε πως η κλιματιστική μονάδα είναι συνδεδεμένη με την παροχή ρεύματος. Η ενδεικτική λυχνία OPERATION (λειτουργίας) στην οθόνη της εσωτερικής μονάδας είναι αναμμένη. 1. Πιέστε το πλήκτρο MODE και επιλέξτε Auto. 2. Πιέστε το πλήκτρο UP/DOWN για να ορίσετε την επιθυμητή... -
Page 23: Λειτουργία Αφύγρανσης
Χρήση των πλήκτρων Λειτουργία Αφύγρανσης Βεβαιωθείτε πως η κλιματιστική μονάδα είναι συνδεδεμένη με την παροχή ρεύματος . Η ενδεικτική λυχνία OPERATION (λειτουργίας) στην οθόνη της εσωτερικής μονάδας θα είναι αναμμένη. 1. Πιέστε το πλήκτρο MODE για να επιλέξετε την λειτουργία ΟΚΥ. 2. -
Page 24: Λειτουργία Timer
Λειτουργία Timer Με το πλήκτρο TIMER ON μπορείτε να ρυθμίσετε την αυτόματη ενεργοποίηση της μονάδας και με το πλήκτρο TIMER OFF την αυτόματη απενεργοποίηση της μονάδας. Ρύθμιση της ώρας της αυτόματης ενεργοποίησης της μονάδας. 1. Πιέστε το πλήκτρο TIMER ON. Στην οθόνη του ασύρματου... - Page 25 ΠΡΟΣΟΧΗ • Οταν επιλέξετε την λειτουργία ΤΙΜΕΚ, το τηλεχειριστήριο μεταδίδει αυτόματα το σήμα χρονδιακόπτη στην εσωτερική μονάδας για το καθορισμένο χρόνο. Ως εκ τούτου το τηλεχειριστήριο θα πρέπει να βρίσκεται σε θέση όπου μπορεί να μεταδίδει το σήμα στην εσωτερική μονάδα σωστά. •...
- Page 26 TIMER OFF (Αυτόματη απενεργοποίηση της μονάδας) Η λειτουργία TIMER OFF είναι χρήσιμη όταν θέλετε να απενεργοποιηθεί η μονάδα όταν πέσετε για ύπνο. Η κλιματιστική μονάδα θα απενεργοποιηθεί αυτόματα την ώρα που έχει επιλεγεί. Τερματισμός Παράδειγμα: λειτουργίας Διακοπή λειτουργίας της κλιματιστικής μονάδας μετά Εκκίνηση...
- Page 27 Εκκίνηση λειτουργίας ➝ Διακοπή λειτουργίας Αυτή η λειτουργία είναι χρήσιμη όταν θέλετε η κλιματιστική μονάδα να ενεργοποιηθεί πριν ξυπνήσετε και να διακόψει τη λειτουργία της όταν φύγετε από το σπίτι. Εκκινήση Λειτουργίας Παράδειγμα: Απενερ- Τερματισμός γοποίηση Ενεργοποίηση της κλιματιστικής μονάδας 2 ώρες μετά λειτουργίας...
-
Page 28: Χειρισμός Του Ασύρματου Τηλεχειριστηρίου
Χειρισμός του Ασύρματου Τηλεχειριστηρίου Θέση του Ασύρματου Τηλεχειριστηρίου • Να χρησιμοποιείτε το ασύρματο τηλεχειριστήριο εντός 8μ από την κλιματιστική μονάδα στοχεύοντας στον δέκτη σήματος. Η αποδοχή της εντολής συνοδεύεται από ένα ήχο. ΠΡΟΣΟΧΗ • Η κλιματιστική μονάδα δεν θα λειτουργεί αν... - Page 29 Αντικατάσταση μπαταριών Αντικαταστήστε τις μπαταρίες όταν δεν ακούτε τον αντίστοιχο ήχο από την εσωτερική μονάδα ή όταν η ένδειξη εντολής στο ασύρματο τηλεχειριστήριο δεν ανάβει. Το ασύρματο τηλεχειριστήριο χρειάζεται 2 ξηρού τύπου μπαταρίες (R03/LR03X2) που βρίσκονται στην πίσω πλευρά του. (1) Αφαιρέστε...
- Page 30 CUPRINS Specificaţiile telecomanzii ....................3 Tastele de funcţionare ....................... 4 Indicaţiile afisajului ......................7 Cum sa folosim tastele ......................8 Funcţionarea Auto ....................... 8 Răcire / încălzire / Ventilare ....................8 Funcţia de dezumidificare ....................9 Funcţia de programare ..................... 10 Fixarea de perete a telecomanzii ..................
- Page 31 Specificaţiile Telecomenzii Model RG57B/BGE Tensiune nominală 3.0V (Dry batteries R03/LR03X2) Interval primire semnal Mediu ambiental -5°C~60°C ON/OFF SHOR T TIMER MODE TEMP TIMER SLEEP SWING DIRECT TURBO TURBO RG57B/BGE...
- Page 32 Funcţiile tastelor Tasta PORNIT/OPRIT Aceasta tasta porneşte sau opreşte aparatul de aer condiţionat. Apasati aceasta tasta pentru a modifica modul de funcţionare al aparatului după cum urmeaza: ➝ AUTO ➝ COOL ➝ DRY ➝ HEAT ➝ FAN NOTĂ: Vă rugăm să nu selectaţi modul ÎNCĂLZIRE dacă aparatul achiziţionat este doar cu mod de RĂCIRE.
- Page 33 Funcţiile tastelor Tasta SUS ( Apăsaţi aceasta tasta pentru a mări setarea temperaturii interioare în trepte cu 1 °C pana la 30°C. Tasta SUS ( Apăsaţi aceasta tasta pentru a scadea setarea temperaturii interioare în trepte cu 1°C pana la 17°C. NOTA: Controlul temperaturii nu este disponibil in Modul Ventilare Tasta SHORTCUT...
- Page 34 Funcţiile tastelor Tasta de mişcare a flapsurilor Se foloseşte pentru a porni sau opri mişcarea automată pe orizontală a flapsurilor. Tasta DIRECT Se foloseşte pentru a schimba mişcarea flapsurilor şi pentru a seta direcţia fluxului de aer sus/jos. Flapsurile se schimbă cu 6 grade la fiecare apăsare.. Tasta AFISAJ Activează...
- Page 35 Indicatori pe atisaj Mod afisaj Indicatorii sunt afişaţi când telecomanda este activata. AU TO COOL HE AT Se afiseaza când se trimite semnalul. Se afiseaza când telecomanda este pornita Afisaj baterie (detectare baterie descarnata) Nu este disponibil pentru acest aparat Se afiseaza când Pornirea Programata este activata.
- Page 36 Cum sa folosiţi tastele Funcţionare auto Asiguraţi-vă că aparatul este conectat şi alimentat cu energie electrica. Indicatorul de funcţionare de pe panoul de afişaj al unităţii interioare începe să clipească. 1. Apăsaţi butonul MODE pentru a selecta Auto. 2. Apăsaţi butonul sus / jos pentru a seta temperatura dorită.
- Page 37 Cum sa folosiţi tastele Funcţionarea in Dezumidificare Asiguraţi-vă că aparatul este conectat şi alimentat cu energie electrica. Indicatorul de funcţionare de pe panoul de afişaj al unităţii interioare începe să clipească. 1. Apăsaţi butonul MODE pentru a selecta modul DEZUMIDIFICARE. 2.
- Page 38 Funcţia de Programare Apăsaţi tasta TIMER ON si aceasta poate seta programarea auto in timp a unităţii. Apăsaţi butonul TIMER OFF si aceasta poate seta oprirea programarea a unităţii. Setare pornirii programate 1. Apăsaţi tasta TIMER ON. Telecomanda va afişa TIMER ON, si ultima programare Auto şi semnalul “H”...
- Page 39 ATENTIE • Când selectaţi operaţiunea timer, telecomanda transmite automat semnalul de programare la unitatea interioară pentru timpul specificat. Prin urmare, plasaţi telecomanda într-un loc în care sa poata sa transmită semnalul la unitatea interioară in mod corect. • Timpul efectiv de funcţionare stabilit de telecomanda pentru funcţia de programare este limitat la următoarele setări: 0,5, 1,0, 1,5, 2,0, 2,5, 3,0, 3,5, 4,0, 4,5, 5,0, 5,5, 6,0, 6,5, 7,0, 7,5, 8,0, 8,5, 9,0, 9,5, 10, 11, 12, 13, 14, 15,16,17, 18, 19, 20, 21, 22, 23 şi 24.
- Page 40 OPRIRE PROGRAMATA (Oprire Auto) Funcţia TIMER OFF este utilă atunci când doriţi ca aparatul să pornească automat, după ce va culcaţi. Aparatul de aer condiţionat se va opri automat la ora setată. Exemplu: Oprit Pentru a opri aparatul de aer condiţionat in 10 ore. Pornit 1.
- Page 41 PORNIRE OPRIRE PROGRAMATA ➝ PROGRAMATA (Oprit ➝ Pornire ➝ Oprire funcţionare) Această caracteristică este utilă atunci când doriţi să porniţi aparatul de aer condiţionat, înainte de a vă trezi şi sa se oprească după ce ieşiţi din casă. Pomire Exemplu: Oprit Oprit Pentru a porni aparatul de aer condiţionat la 2 ore...
- Page 42 Manevrarea telecomenzii Poziţionarea telecomenzii • Folosiţi telecomanda de la o distanta maxima de 8 m de aparatul de aer condiţionat, indreptand-o spre acesta. Receptarea semnalului este confirmata de un beep sonor. ATENTIE • Instalaţia de aer condiţionat nu va funcţiona dacă sunt perdele, uşi sau alte materiale care blochează...
- Page 43 The folloînlocuirea bateriilor Următoarele simptome indica baterii consumate, înlocuiţi bateriile vechi cu unele noi. • Nu este emis un semnal sonor atunci când un semnal este transmis către unitatea interioara. • Afisajul de pe telecomanda dispare. Telecomanda este alimentata de două baterii (R03 / LR03X2) aşezate în partea din spate a telecomenzii şi protejate de un capac.
- Page 44 Wall Mounted Air-Conditioning Unit Επιτοίχια Μονάδα Κλιματισμού Aer Conditonat model Split de Perete...
Need help?
Do you have a question about the RG57B/BGE and is the answer not in the manual?
Questions and answers