Advertisement
These instructions and the images herein are proprietary. Any unauthorized reproduction is prohibited.
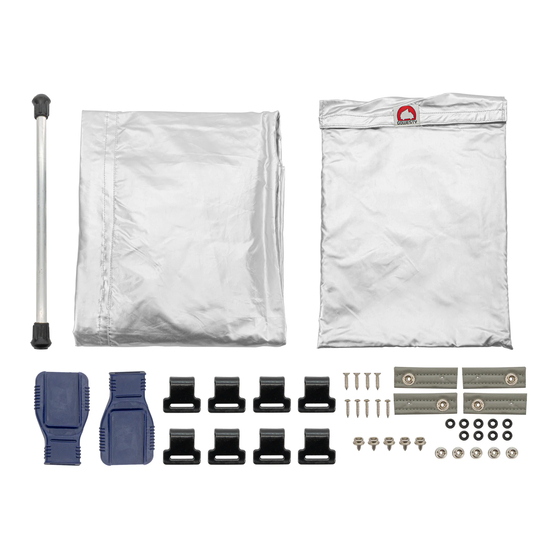
Front Snap Attachments
1. Raise your pop-top to the locked upright position or prop it up with the prop-rod. Install snaps
on the vertical lip at the front edge of the pop-top. Find the exact center (from left to right)
and drill the first 1/8" hole about ½" up from the bottom edge of the lip. Screw a male snap
into the hole and attach the center female snap on the rainfly to the pop-top (Fig. A).
On early-model vans, the lip has a metal angle bracket that spans the top; you may need to
enlarge the hole to 5/32" through the metal to install the snap without stripping the screw.
2. Next, pull the rainfly taut and mark where the corner rainfly snaps line up on the fiberglass
lip. Drill and install these corner snaps like you did the center snap. Finally, install the
remaining male snaps. Secure the rainfly to the snaps. (Figs. B and C).
3. If you haven't already done so, raise your pop-top completely and secure the front edge of
the rainfly in position. Attach the long hook straps to the ends of the rainfly straps to secure
them to the bumper (see notes at end regarding these straps). Alternatively, you can run each
long strap through the door openings, and clip the buckles together (Fig. E). Adjust the straps
to pull the fly down and forward into position as shown (Fig. D and F). Don't overtighten or
you may rip the lightweight fly material. The front panel should now be tensioned and
smooth.
GoWesty Camper Products • 1119 Los Olivos Ave, Los Osos, CA 93402 • 888-469-3789 • www.gowesty.com
GVW-RAINFLY
Wasser-Stopper Pop-Top Rainfly [Vanagon]
INSTALLATION
Page 1 of 3
NOTE:
Advertisement
Table of Contents

Related Manuals for GOWESTY GVW-RAINFLY

Summary of Contents for GOWESTY GVW-RAINFLY
- Page 1 (Fig. D and F). Don’t overtighten or you may rip the lightweight fly material. The front panel should now be tensioned and smooth. GoWesty Camper Products • 1119 Los Olivos Ave, Los Osos, CA 93402 • 888-469-3789 • www.gowesty.com Page 1 of 3...
- Page 2 Your initial installation is now complete. GoWesty Camper Products • 1119 Los Olivos Ave, Los Osos, CA 93402 • 888-469-3789 • www.gowesty.com Page 2 of 3...
- Page 3 If you anticipate a strong driving rain, position the rear of your camper into the wind for optimum rainfly performance. Let it rain! Dry people. Dry parts. Good times! GoWesty Camper Products • 1119 Los Olivos Ave, Los Osos, CA 93402 • 888-469-3789 • www.gowesty.com Page 3 of 3...
Need help?
Do you have a question about the GVW-RAINFLY and is the answer not in the manual?
Questions and answers