Table of Contents
Advertisement
Quick Links
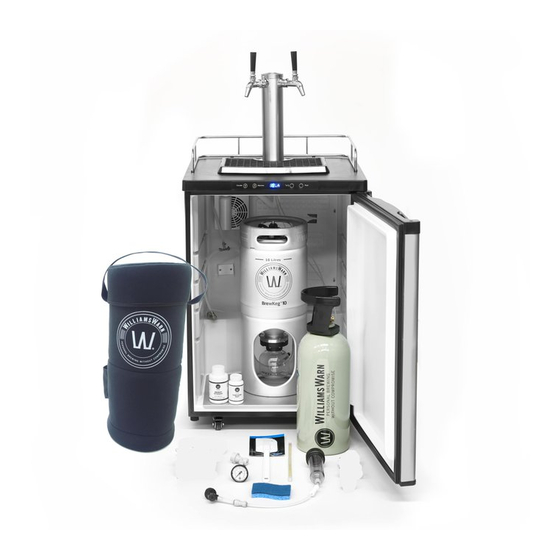
Kegerator
User Manual
FOR BREWKEGS
WATCH OUR HELPFUL
INSTRUCTION VIDEOS
For instructional videos on installing and
using your WilliamsWarn Kegerators check
out www.williamswarn.com/how-to-videos/
© 2019 WilliamsWarn NZ Ltd
01
02
04
06
07
10
11
11
Advertisement
Table of Contents

Summary of Contents for WILLIAMSWARN BrewKeg Series
-
Page 1: Table Of Contents
D-SANKE KEGS INSTALLATION INSTRUCTIONS SETTING UP YOUR KEGERATOR MINIMUM CLEARANCES TROUBLE SHOOTING KEGERATOR FAULT FINDING KEGERATOR CALLIBRATION INSTRUCTIONS WATCH OUR HELPFUL INSTRUCTION VIDEOS For instructional videos on installing and using your WilliamsWarn Kegerators check out www.williamswarn.com/how-to-videos/ © 2019 WilliamsWarn NZ Ltd... - Page 2 VERSION 6...
-
Page 3: Safety Instructions
SAFETY WARNINGS SAFETY FIRST gas can be dangerous. Make sure to always use in a well-ventilated place. Never exceed 40psi on your keg system. Flush out chemicals from your beer line completely before tapping keg. Always thoroughly check for gas leaks once you have set up your system. -
Page 4: Fermenting & Dispensing
BrewKeg™ products. If you are using a WilliamsWarn Brewsnug™ there is no need to use your Kegerator for fermentation which gives you the advantage of not waiting the 4-7 days between finishing one brew and having the next ready to go. - Page 5 KEGERATOR Figure 1: Two BrewKeg10™ Figure 2: One BrewKeg25™ Figure 3: Three 19L Cornelius Kegs Figure 4: One 20L and One 30L D-Sanke Keg Figure 5: One 50L D-Sanke Keg...
-
Page 6: Typical Single Tap Installation
USER MANUAL TYPICAL SINGLE TAP INSTALLATIONS The following diagrams illustrate a single typical single tap installation. FOR BREWKEG™ AND CORNELIUS KEGS Beer Font Beer Line Ball Lock Disconnect Gas Line Regulator Cornelius Kegs Ball Lock Disconnect Gas Cylinder... - Page 7 KEGERATOR CORNELIUS KEGS BREWKEGS™ The beer line that is attached to the beer font The beer line that is attached to the beer font connects to the ‘Out’ port on your Cornelius connects to the ‘Liquid Out’ (marked L) port on Kegs.
-
Page 8: D-Sanke Kegs
USER MANUAL D-Sanke Kegs To use Sanke Kegs you will need to purchase a D-type Coupler, Liquid D-type adapter and a Gas D-type adapter. The Gas line connects onto the side port of the coupler (reads Gas In) and the beer tube connects to the top port on the coupler. -
Page 9: Installation Instructions
INSTALLATION INSTRUCTIONS Setting up Your Kegerator Image 2 Watch the Kegerator installation video on www.williamswarn.com/how-to-videos You will require 1 x Philips screwdriver Carefully remove all products from packaging. If not required, remove shelf from inside the Kegerator. If you are wanting to fit the wheels now is the... - Page 10 USER MANUAL Image 4 Image 5 Place the CO cylinder onto the bracket at Image 4A the back of the Kegerator. Thread the velcro belt supplied through the holes at each end – ensure it is tightly in place. Unscrew the black cap on the back of the Kegerator and remove the small bung (see image 5).
- Page 11 For a more in depth analysis on dispense pressures and temperatures refer to the back of any WilliamsWarn Brewkeg™ manual where you will find a page dedicated to this. Plug in and set temperature to the desired dispense temperature.
-
Page 12: Minimum Clearances
USER MANUAL Minimum Clearances Around the Kegerator The Series 4 Kegerator has radiators in the left and right hand wall of the Kegerator in the outside skin. These radiators need to be well ventilated so heat can escape from the Kegerators. -
Page 13: Trouble Shooting
Kegerator Calibration instructions: For any questions contact Tape a thermometer to the inside of the Kegerator wall next to the temperature service@williamswarn.com probe. This is located on the right-hand side about halfway up the wall. Leave your Kegerator cooling for a minimum of 2 hours without opening the door.


Need help?
Do you have a question about the BrewKeg Series and is the answer not in the manual?
Questions and answers