
Related Manuals for Lenoxx ES70BL


Summary of Contents for Lenoxx ES70BL
- Page 1 Model no: ES70BL / ES71R Batch no: PR3853 PLEASE READ AND RETAIN THESE INSTRUCTIONS FOR FUTURE REFERENCE.
-
Page 2: Safety And Warnings
The illustrations used in this manual are to illustrate the operation method and product structure of the product. Where there is a small difference between the physical item and the illustrations, please take the physical as the standard. SAFETY AND WARNINGS: Riding an electric scooter can be a dangerous activity. - Page 3 Keep this scooter away from small children and remember that it is intended for use only by persons who are, at a minimum, completely competent and comfortable while operating this product. RIDING PRACTICES AND CONDITIONS Check and obey any local laws or regulations which may affect the locations where the electric scooter may be used.
-
Page 4: Using The Charger
USING THE CHARGER The charger should be regularly examined for damage to the cord, plug, enclosure and other parts. In the event of such damage, if any is found, the scooter should not be charged until the charger has been repaired or replaced. -
Page 5: Before You Start
BEFORE YOU START: WARNING: Remove all packing and items from the display box. Make sure that the power switch is turned "OFF" before assembling the scooter. Estimated Assembly Time: • Allow up to 25 minutes for assembly, not including initial charge time. •... - Page 6 ASSEMBLY: Handlebar Steer Tube Assembly Tools required: 5 mm hex wrench, 10 mm wrench 1. Depress the push button located on the rear of the fork and insert the handlebar steer tube onto the fork. The push button should align with the locator hole in the handlebar steer tube and lock the steer tube securely in place.
- Page 7 Charging the battery WARNING: Batteries must be fully charged before you ride your electric scooter. Required components: Charger • Initial battery charge time- 8 hours • Recharges after initial charge- Up to 6 hours • When scooter is not in regular use batteries need to be charged on a monthly basis to maximize performance Make sure power switch in the OFF position before plugging in the...
-
Page 8: Hardware Maintenance
HARDWARE MAINTENANCE: Brake Check the brakes for proper function. When you squeeze the lever, the brake should provide positive braking action. When you apply the brake with the speed control on, the brake cut off switch should stop the motor. Make sure that the brakes are not rubbing. Frame, Fork and Handlebars Check for cracks or broken connections. -
Page 9: Before You Ride
BEFORE YOU RIDE: Before you ride, always check for the following: Safety Gear Always wear proper protective gear such as: • Approved safety helmet. (Helmet may be legally required by local law or regulation in your area.) • Elbow pads and knees pads •... -
Page 10: Repair And Maintenance
REPAIR AND MAINTENANCE: WARNING: Turn the power switch "OFF" before conducting any maintenance procedures. Adjusting the Brakes Tools required: 10mm wrench 1. To adjust the brake cable thread clockwise (loosen) or counterclockwise (tighten) the adjuster barrel on the brake lever. Only tum the barrel in small increments until the desired adjustment is reached. - Page 11 REPAIR AND MAINTENANCE: Belt and rear wheel replacement Tools required: 4mm hex wrench, 5mm hex wrench, two 13mm wrenches, 10mm wrench, Phillips screwdriver 1. Using a 4mm hex wrench remove the 4 bolts from the rear axle cover on both sides of the scooter. Loosen brake cable pinch nut with 10mm wrench.
- Page 12 REPAIR AND MAINTENANCE: Belt and rear wheel replacement continued 7. Ensure adjustment washers are seated correctly against the frame. After tightening axle nuts with a 13mm wrench check wheel alignment and the tracking of the belt by rotating the wheel counterclockwise with your hand.
- Page 13 REPAIR AND MAINTENANCE: Adjusting the belt Tools required: 4mm hex wrench, two 13mm wrenches, 10mm wrench, Phillips screwdriver Using a 4mm hex wrench remove the 4 protective cover bolts on both sides of the scooter. Loosen the brake arm bolt with a Phillips screwdriver & 8mm wrench.
- Page 14 REPAIR AND MAINTENANCE: Front Wheel Replacement Tools required: Two 5mm hex wrenches Using two 5mm hex wrenches loosen and remove the front axle by turning the wrenches counter clockwise. Reinstall new replacement wheel ensuring to note the order and location of all components. Reinstall hardware and tighten clockwise with a 5mm hex wrench Battery care and disposal Do not store the battery in temperatures above 21°C (70°F) or below 0°C...
- Page 15 Charger Only use the supplied battery charger. If charger damaged discontinue use immediately and replace with a Lenoxx recommended charger. Wheels Wheels and drive system components are subject to normal wear and tear. It responsibility of the user to regularly...
-
Page 16: Troubleshooting
The average rechargeable battery life is 1 to 2 years depending on scooter conditions and use. Replace only with Lenoxx recommended replacement batteries. Brakes are not adjusted Refer to the instructions on adjusting the brakes. -
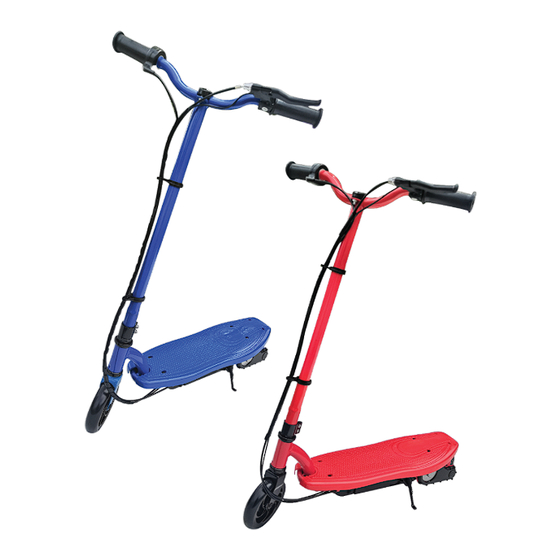
Page 17: Scooter Components
SCOOTER COMPONENTS:...
Need help?
Do you have a question about the ES70BL and is the answer not in the manual?
Questions and answers