AVS Bugflector Installation Instructions Manual
Hide thumbs
Also See for Bugflector:
- Installation manual ,
- Installation instructions manual (10 pages) ,
- Installation instructions (2 pages)
Table of Contents
Advertisement
Available languages
Available languages
Quick Links
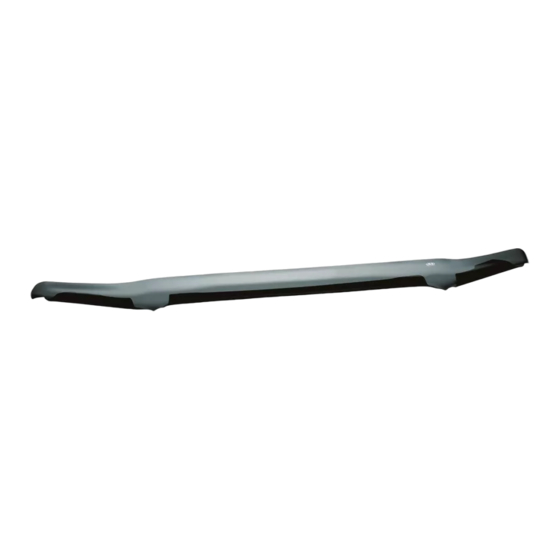
Bugflector
For proper installation and best possible fit, please read all instructions BEFORE you begin.
For technical assistance or to obtain missing parts, please call Customer Relations at 1-800-241-7219.
Important Safety Information
• CAUTION - Before driving, ensure that the hood shield is properly secured to vehicle.
• Do not use automatic "brush-style" car washes.
• Do not use cleaning solvents of any kind.
• Periodically check all components for tightness.
Contents
NOTE: Actual product may vary from illustration.
Tools Required
Car Wash Supplies
Preparation Before Painting / Installation
• A trial fit is recommended to ensure proper positioning and fit.
• Check fit of parts before painting as we will not accept the return of modified or painted parts.
• Wash and dry your vehicle to remove any debris and/or dirt from the installation area.
Installation Steps
Open hood and locate the hood latch assembly, behind
1
Installation Instructions
- Bugflector II
®
Hood shield
Clean Towel
Phillips Screwdriver
NOTE: Actual application may vary slightly from illustrations.
the front grill.
- Carflector
®
Bump On x4
Screw x2
10 mm
Socket Wrench
Disconnect the latch assembly from the hood by
2
Page 1 of 3
I - Sheet Number BF33 Rev.B
®
Washer x2
Wrench
removing (2) screws with wrench.
Well Nut x2
Advertisement
Table of Contents

Related Manuals for AVS Bugflector


Summary of Contents for AVS Bugflector
- Page 1 Installation Instructions I - Sheet Number BF33 Rev.B Bugflector - Bugflector II - Carflector ® ® ® For proper installation and best possible fit, please read all instructions BEFORE you begin. For technical assistance or to obtain missing parts, please call Customer Relations at 1-800-241-7219.
-
Page 2: Installation Steps
Installation Steps NOTE: Actual application may vary slightly from illustrations. Locate and remove (8) nuts that secure front grill to the Insert (2) well nuts into the existing holes on each side hood. Set grill aside. in the underside of hood. 10 mm Position hood shield onto hood and align hood shield Install (1) washer and (1) screw to secure. -
Page 3: Care And Cleaning
We have made every effort to ensure that your product is top quality in terms of fit, durability, finish and ease of installation. Lund International 800-241-7219 • Visit us at lundinternational.com © 2012 Lund International, Inc. All rights reserved. ™ Auto Ventshade , the Auto Ventshade logo and the AVS logo are trademarks of Lund International, Inc. Page 3 of 3... -
Page 4: Instructions D'installation
Instructions d’installation I- Feuille numéro BF33 Rév.B Bugflector - Bugflector II - Carflector ® ® ® Pour obtenir une installation correcte et le meilleur ajustement possible, lire toutes les instructions AVANT de commencer. Pour toute assistance technique ou obtention de pièces manquantes, appeler le service des relations avec la clientèle au 1- 800-241-7219. -
Page 5: Étapes D'installation
Étapes d’installation REMARQUE : La méthode d’application peut être légèrement différente de celle représentée par les illustrations. Localiser et retirer les (8) écrous qui retiennent la Insérer (2) écrous Well-Nut dans les trous qui se calandre avant au capot. Mettre la calandre de côté. trouvent de chaque côté... -
Page 6: Entretien Et Nettoyage
Lund International 800-241-7219 • Visitez notre site lundinternational.com © 2012 Lund International, Inc. Tous droits réservés. ™ Auto Ventshade , le logo Auto Ventshade et le logo AVS sont des marques déposées de Lund International, Inc. Page 3 de 3... -
Page 7: Instrucciones De Instalación
Instrucciones de instalación Hoja informativa N.° BF33 Rev. B Bugflector - Bugflector II - Carflector ® ® ® Para una instalación adecuada y el mejor ajuste posible, lea todas las instrucciones ANTES de comenzar. Si desea recibir asistencia técnica u obtener piezas faltantes, llame al Servicio al cliente al 1-800-241-7219. -
Page 8: Pasos De Instalación
Pasos de instalación NOTA: El uso real puede variar levemente de ilustraciones. Ubique y quite las (8) tuercas que fijan la parrilla Coloque (2) tuercas remache en cada uno de los delantera al capó. Aparte la parrilla. lados en la parte inferior del capó. 10 mm Coloque (1) arandela y (1) tornillo para ajustar. -
Page 9: Cuidado Y Limpieza
800-241-7219 • Visite nuestro sitio Web: lundinternational.com © 2012 Lund International, Inc. Todos los derechos reservados. ™ Auto Ventshade , el logo de Auto Ventshade y el logo de AVS son marcas comerciales de Lund International, Inc. Página 3 de 3...
Need help?
Do you have a question about the Bugflector and is the answer not in the manual?
Questions and answers