Advertisement
Quick Links
Advertisement

Related Manuals for Dash Mini maker


Summary of Contents for Dash Mini maker
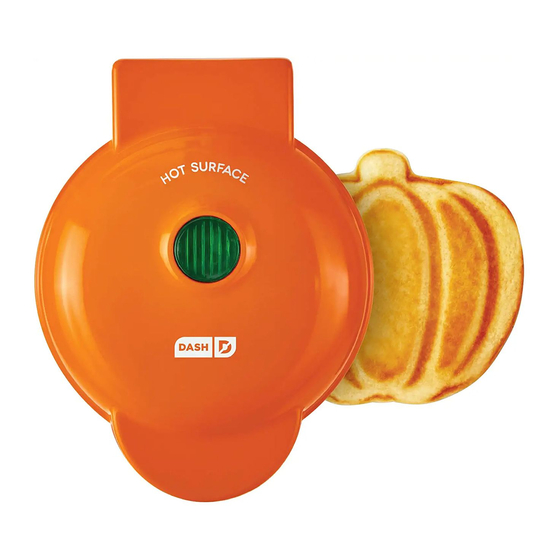
- Page 1 4" Cooking Surface Non-Stick 350 Watts DMG001...
-
Page 2: Table Of Contents
Using Your Mini Maker Grill ............. 10-12 whole, natural foods. At Dash, we make products that make it easier for you to prepare and eat real food at home, so that you can feel Maintenance .................. -
Page 3: Important Safeguards
IMPORTANT SAFEGUARDS IMPORTANT SAFEGUARDS IMPORTANT SAFEGUARDS: PLEASE they are provided with supervision Improper use of the Mini Maker Grill • and instruction concerning use of the can result in property damage or READ AND SAVE THIS INSTRUCTION appliance by a person responsible for even in personal injury. - Page 4 garanties importantes garanties importantes GARANTIES IMPORTANTES: ou mentales réduites, ou manquant Une mauvaise utilisation du mini • d’expérience et de connaissances, à gril peut entraîner des dommages VEUILLEZ LIRE ET CONSERVER CE moins qu’elles ne soient supervisées et matériels ou même des dommages instruites sur l’utilisation de cet appareil corporels.
-
Page 5: Parts & Features
parts & Features Indicator Light Cover Cover Handle Non-slip Feet Cooking Surfaces 8 ∙ important safeguards... -
Page 6: Using Your Mini Maker Grill
Place the appliance on a stable and dry surface. clean your Mini Maker Grill. Plug the cord into a power outlet. The Indicator Light will illuminate, signaling that the Mini Maker Grill is heating up. Once the Cooking Surface reaches the optimal cooking temperature, the Indicator Light will automatically shut off. -
Page 7: Maintenance
Mini Maker Grill. In order to keep your Mini Maker Grill in pristine working order, thoroughly clean the appliance after each use. This will prevent the build-up of food or oil. -
Page 8: Troubleshooting
Cooking Surface does not get too hot or cold. When this occurs, the Indicator Light turns on and off. After using my Mini Maker Grill a few times, food is starting to stick to the surface. What is happening? How do I know when the Mini Maker Grill is heated and ready to use? There is probably a build-up of burnt food residue on the Cooking Surface. - Page 9 RECIPE BOOK...
- Page 10 2 slices Italian bread or 1 mini ciabatta roll, cut lengthwise ½ tbsp butter DIRECTIONS: Thoroughly cook the chicken on the Mini Maker Grill. Unplug the Grill, let it cool, and then clean the Cooking Surface. Meanwhile, spread the pesto sauce on one slice of bread. Top with chicken, roasted peppers, arugula, and the other slice of bread.
- Page 11 Toast English muffin in the Mini Maker Grill. Then, Place the sandwich inside the Mini Maker Griddle and cook until the cheese is cook the sausage patty. Place the patty and cheese on the English muffin. melted and the bread is toasted.
- Page 12 Lightly toast burger bun one piece at a time by placing them face down on the Cooking Surface until slightly golden, and set aside. Place burger patty in heated Mini Maker Grill. Cook to desired doneness. Right before the patty is done cooking, open the Cover and place the cheese on the patty.
- Page 13 Grease Cooking Surface with butter. DIRECTIONS: Place one apple slice in the Mini Maker Grill and cook for about 2-3 minutes, or Combine the nutmeg and cinnamon. Sprinkle spices over both sides of the until the apple sliceis grilled.
- Page 14 MORE RECIPE IDEAS MORE RECIPE IDEAS RECIPE INGREDIENTS TIME RECIPE INGREDIENTS TIME 1 peach, sliced into 1” thick slices 2 (4”) tortillas (corn or flour) Peaches with 2 tbsp brown sugar 7 min Quesadilla ¼ cup grated Mexican cheese blend 7-8 min Ice Cream Vanilla ice cream 1 tbsp salsa...
- Page 15 NOTES NOTES 28 ∙ notes notes ∙ 29...
-
Page 16: Customer Support
10AM to 10PM REPAIRS 7AM to 7PM DANGER! Risk of electric shock! The Dash Mini Maker Grill is an electrical appliance. Do not attempt to repair the appliance yourself under any circumstances. Contact Customer Support regarding repairs to the appliance. - Page 17 1-800-898-6970 | @unprocessyourfood | bydash.com...
Need help?
Do you have a question about the Mini maker and is the answer not in the manual?
Questions and answers