Table of Contents
Advertisement
Advertisement
Table of Contents

Related Manuals for DirectOut Technologies PRODIGY.MP


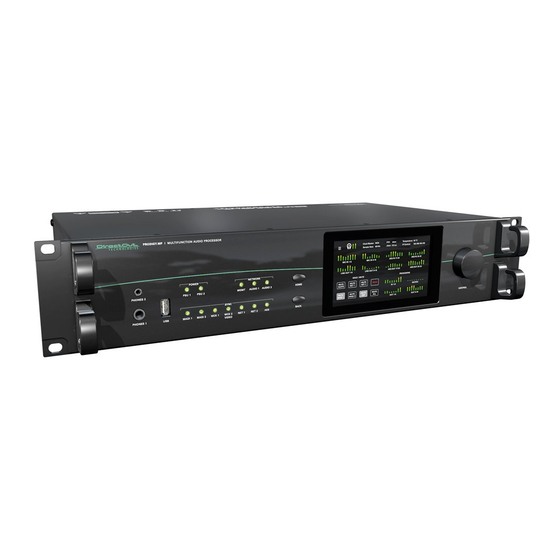
Summary of Contents for DirectOut Technologies PRODIGY.MP
- Page 1 PRODIGY.MP User’s Manual Version 2.0...
- Page 2 DirectOut GmbH cannot be held responsible for any misleading or incorrect information provided throughout this manual. DirectOut GmbH reserves the right to change specifications at any time without notice. DirectOut Technologies® is a registered trademark of the DirectOut GmbH. © DirectOut GmbH, 2020 page 2 of 130...
-
Page 3: Table Of Contents
Slots - Audio Network Modules ..............33 Slots - MADI Modules ................. 37 Slots - Converter Modules ................40 Word clock ....................50 Clocking ....................... 51 USB ......................52 MIDI ......................52 GPIO ......................53 Prodigy.MP Manual - Version 2.0 page 3 of 130... - Page 4 Statistic ...................... 100 Switch ....................... 101 RAV.IO - Firmware Update ................ 105 CHAPTER 7: DANTE.IO Introduction ....................106 Dante Controller ..................106 Switch - Configuration ................111 DANTE.IO - Firmware Update ..............112 page 4 of 130 Prodigy.MP Manual - Version 2.0...
- Page 5 CHAPTER 8: Troubleshooting and Maintenance Troubleshooting ..................116 Maintenance ....................117 CHAPTER 9: Technical Data Index Appendix A - DSUB-25 Pin assignment Appendix B - DSUB-9 Pin assignment Appendix C - Dimensions Appendix D - Firmware Update Prodigy.MP Manual - Version 2.0 page 5 of 130...
- Page 6 This page is left blank intentionally. page 6 of 130 Prodigy.MP Manual - Version 2.0...
-
Page 7: About This Manual
N OT E S are used for important points of clarification or cross references. WAR NI N GS! alert you when an action should always be observed. Prodigy.MP Manual - Version 2.0 page 7 of 130... -
Page 8: Chapter 1: Overview Introduction
I/O, dual network audio, DSP functions, sample rate conversion and powerful hard- and software. PRODIGY.MP has been designed to address numerous applications in live sound, broadcast, installation and recording, and it’s hardware can be configured to specific requirements. -
Page 9: Feature Summary
(84 V to 264 V AC / 47 Hz to 63 Hz / safety class 1) * see „Slots - Connecting Audio“ on page 31 for a comprehensive description of the different modules available. Prodigy.MP Manual - Version 2.0 page 9 of 130... -
Page 10: How It Works
I/Os with the DSP processing blocks - such as Flex Channels, Matrix Mixer, Summing Busses and Plug-Ins (EQ, Delay, Dynamics). Applications PRODIGY.MP can be used for bidirectional conversion between analog and digital signals, signal processing, signal distribution, conversion between network audio formats, streaming audio, conversion between audio networks and MADI environments, conversion of different MADI signals. - Page 11 MADI 2 M A T R I X Slot 1 Slot 4 O U T P U T NETWORK 1 MADI 1 Slot 1 ... Slot 4 Phones MADI 2 NETWORK 2 Prodigy.MP Manual - Version 2.0 page 11 of 130...
-
Page 12: Chapter 2: Legal Issues & Facts
We would like to remind you to please check carefully whether the failure is caused by erroneous configuration, operation or connection before sending parts for repair. page 12 of 130 Prodigy.MP Manual - Version 2.0... -
Page 13: First Aid (In Case Of Electric Shock)
Check their pulse and reanimate if their respiration is poor. Lay the body down and turn it to one side. Call for a doctor immediately. • Having sustained an electric shock, always consult a doctor. Prodigy.MP Manual - Version 2.0 page 13 of 130... -
Page 14: Updates
This guide refers to System Build 8. Intended Operation PRODIGY.MP is designed for signal processing / conversion / routing between analog, digital and audio network signals. Digital audio refers to AES3 and AES10, audio network refers to Dante, SoundGrid and RAVENNA (including AES67 and SMPTE ST 2110-30/31). -
Page 15: Conformity & Certificates
09648 Mittweida Germany Only stamped parcels will be accepted! WEEE-Reg.-No. DE 64879540 Contact DirectOut GmbH Leipziger Str. 32, 09648 Mittweida, Germany Phone: +49 (0)3727 5665-100 Fax: +49 (0)3727 5665-101 Mail: sales@directout.eu www.directout.eu Prodigy.MP Manual - Version 2.0 page 15 of 130... -
Page 16: Contents
CHAPTER 2: Legal issues & facts Contents The contents of your PRODIGY.MP package should include: • 1 x PRODIGY.MP (19’’, 2 RU) • 2 x power chord with self locking mechanism • 1 x Hardware Guide The device provides slots for audio network modules, MADI modules and converter modules. -
Page 17: Accessories
ANDIAMO or PRODIGY unit. BREAKOUT.AN8 - analog input / output, 8 channels Article code: DOBOB0719 BREAKOUT.AN16I - analog input, 16 channels Article code: DOBOB0720 BREAKOUT.AN16O - analog output, 16 channels Article code: DOBOB0721 Prodigy.MP Manual - Version 2.0 page 17 of 130... - Page 18 Digital patch cable for connection with DOCAA0332 BREAKOUT.AES or AESid transferring 8 audio channels, length 0.5 m DSUB25.AES100 Digital patch cable for connection with DOCAA0333 BREAKOUT.AES or AESid transferring 8 audio channels, length 0.5 m page 18 of 130 Prodigy.MP Manual - Version 2.0...
- Page 19 - 5.00 dBm - 3.00 dBm (Receiver overload) Temperature (min) 0° Celsius 0° Celsius Temperature (max) 70° Celsius 70° Celsius Type of DDM/DOM internal internal Extinction Ratio 8.20 dB 9 dB Prodigy.MP Manual - Version 2.0 page 19 of 130...
- Page 20 • SFP Optical Transceiver, optical LC Single Mode (No: DOICT0133) Specification Copper - RJ45 Optical - LC single mode Distance 100 m via CATe cable 2000 m Wavelength 1310 nm Datarate 12 Mbit/s to 1.25 Gbit/s 2.67 GBit/s page 20 of 130 Prodigy.MP Manual - Version 2.0...
- Page 21 CHAPTER 2: Legal issues & facts This page is left blank intentionally. Prodigy.MP Manual - Version 2.0 page 21 of 130...
-
Page 22: Chapter 3: Installation
For installation of separately delivered modules follow the instructions in the manual enclosed with the packaging of the modules. Audio Network Slots - see page 33 MADI Slots - see page 37 Converter Slots - see page 40 page 22 of 130 Prodigy.MP Manual - Version 2.0... - Page 23 WA R N IN G ! This device must be connected to the mains using the three-cord power leads supplied with the system. Only supply the voltages and signals indicated (84 V – 264 V). Prodigy.MP Manual - Version 2.0 page 23 of 130...
- Page 24 Select the port of the network where your device is connected to Sidebar - My Devices - Click Discovery Methods and set Ethernet Discovery to ‘ON’ Select the device from the list and click ‘Add’ page 24 of 130 Prodigy.MP Manual - Version 2.0...
- Page 25 5002, 5003 and 5004 unfiltered for TCP traffic. Since the device discovery uses multicast-DNS (mDNS), the device may be discovered but cannot be controlled if the ports 5002, 5003 and 5004 are filtered. Prodigy.MP Manual - Version 2.0 page 25 of 130...
-
Page 26: Chapter 4: Operation Introduction
• 44.1 kHz or 48 kHz = 1 FS • 88.2 kHz or 96 kHz = 2 FS • 176.4 kHz or 192 kHz = 4 FS page 26 of 130 Prodigy.MP Manual - Version 2.0... -
Page 27: Global Control
Note that an unlit LED does not guarantee that the device is free of voltage. To ensure that the device is completely disconnected from mains voltage, the power chords must be disconnected. Prodigy.MP Manual - Version 2.0 page 27 of 130... -
Page 28: Managing Device
Touch-Display to navigate the menu, adjust settings and for monitoring. Display tap, swipe - have fun! Encoder to adjust values and confirmation. CONTROL Rotate to modify values. Press to confirm a setting. page 28 of 130 Prodigy.MP Manual - Version 2.0... -
Page 29: Networking
CHAPTER 4: Operation Networking PRODIGY.MP uses separate network links for managing the device and network- audio transmission. LEDs on the front panel indicate the state of all network links. MANAGEMENT 2 x RJ 45 socket & SFP slot Connect here for network control and firmware updates. - Page 30 LED - indicates the state of the network AUDIO 1 & AUDIO 2 audio modules. (OFF) = network module not ready (ON) = network module ready (blinking, red) = network module in panic mode* * please contact support@directout.eu page 30 of 130 Prodigy.MP Manual - Version 2.0...
-
Page 31: Slots - Connecting Audio
CHAPTER 4: Operation Slots - Connecting Audio PRODIGY.MP offers three different slot-types that can be assembled individually according the particular requirements. Audio Network Slots 2 x Option slot for Audio Network Modules See „Slots - Audio Network Modules“ on page 33... - Page 32 This page is left blank intentionally. page 32 of 130 Prodigy.MP Manual - Version 2.0...
-
Page 33: Slots - Audio Network Modules
Dante / AES67 64 ch in / out RAV.IO RAVENNA / AES67 / 128 ch in / out SMPTE ST 2110-30/31 SG.IO SoundGrid 128 ch in / out DANTE.IO RAV.IO SG.IO Prodigy.MP Manual - Version 2.0 page 33 of 130... - Page 34 * See p 18 for SFP-transceiver that are available by DirectOut. NOT E If redundancy is being used, secondary interfaces should be connected to a second separate network. Secondary interfaces cannot communicate with primary interfaces. page 34 of 130 Prodigy.MP Manual - Version 2.0...
- Page 35 The configuration of the built-in network switch is available via the browser interface of the RAV.IO-module. NOT E Further devices that require PTP synchronisation should be connected to an external PTP-aware switch. Prodigy.MP Manual - Version 2.0 page 35 of 130...
- Page 36 (ON) = data sent or received (OFF) = no data transmission PORT 3 SFP cage Insert SFP transceiver here and connect to the network.* * See p 18 for SFP-transceiver that are available by DirectOut. page 36 of 130 Prodigy.MP Manual - Version 2.0...
-
Page 37: Slots - Madi Modules
SFP transceiver are available from DirectOut - see page 17 . ** The SC ports are multi-mode as default, single-mode SC ports are available on request. The housing of single-mode ports is colored blue. multi-mode single-mode Prodigy.MP Manual - Version 2.0 page 37 of 130... - Page 38 MADI input, connect MADI input signal here * The labelling of the MADI ports is printed on the Mainframe. SFP .IO OUT IN SFP cage Insert SFP transceiver here and connect MADI input/output. page 38 of 130 Prodigy.MP Manual - Version 2.0...
- Page 39 This page is left blank intentionally. Prodigy.MP Manual - Version 2.0 page 39 of 130...
-
Page 40: Slots - Converter Modules
8 ch line in MIC8.HD.I 8 ch mic input (HD) MIC8.HD.IO 8 ch mic input (HD) 8 ch line out MIC8.LINE.IO 8 ch mic input 8 ch line out AN8.O AN8.IO page 40 of 130 Prodigy.MP Manual - Version 2.0... - Page 41 AN8.I MIC8.HD.I MIC8.HD.IO MIC8.LINE.IO Prodigy.MP Manual - Version 2.0 page 41 of 130...
- Page 42 AN8.I 24/18/15 24/18/15 AN8.I - access from sideways AN8.O 24/18/15 24/18/15 AN8.O - access from top page 42 of 130 Prodigy.MP Manual - Version 2.0...
- Page 43 The line output is not servo balanced. Do not connect the negative lead to ground. This may cause damage at the output stage. Observe the technical specifications listed in this document. Prodigy.MP Manual - Version 2.0 page 43 of 130...
- Page 44 DSUB-25 Port (analog pinout) Analog audio input (balanced) - connect line level audio source here The pinout complies with AES59 (‘TASCAM pinout’) see „Appendix A - DSUB-25 Pin assignment“ on page 124. page 44 of 130 Prodigy.MP Manual - Version 2.0...
- Page 45 MIC / LINE INPUT Analog audio input (balanced) - connect mic / line level audio source here The pinout complies with AES59 (‘TASCAM pinout’) see „Appendix A - DSUB-25 Pin assignment“ on page 124. Prodigy.MP Manual - Version 2.0 page 45 of 130...
- Page 46 MIC / LINE INPUT Analog audio input (balanced) - connect mic / line level audio source here The pinout complies with AES59 (‘TASCAM pinout’) see „Appendix A - DSUB-25 Pin assignment“ on page 124. page 46 of 130 Prodigy.MP Manual - Version 2.0...
- Page 47 4 port AES3 out AES4.SRC.IO 4 port AES3 in with SRC 4 port AES3 out AES4.IO AES4.SRC.IO N OT E An AES4.IO transports eight audio channels - two audio channels per port. Prodigy.MP Manual - Version 2.0 page 47 of 130...
- Page 48 Digital audio input and output (AES3) - connect for digital audio here. Input offers switchable Sample Rate Conversion. The pinout complies with AES59 (‘TASCAM pinout’) see „Appendix A - DSUB-25 Pin assignment“ on page 124. page 48 of 130 Prodigy.MP Manual - Version 2.0...
- Page 49 This page is left blank intentionally. Prodigy.MP Manual - Version 2.0 page 49 of 130...
-
Page 50: Word Clock
Both word clock inputs also accept a AES3 frame (AES11). When switched to video sync, the WCK 2 input accepts black burst or tri-level sync. Termination (75 Ω) for the word clock inputs is switchable locally or via remote control. page 50 of 130 Prodigy.MP Manual - Version 2.0... -
Page 51: Clocking
= signal lock, in sync, NET 2 selected clock source (blinking, green) = signal lock, not in sync with selected clock source (blinking, red) = input selected as clock source and no signal lock. Prodigy.MP Manual - Version 2.0 page 51 of 130... -
Page 52: Usb
USB 2.0 socket (Type B) (front / rear) Connect here for legacy control. MIDI PRODIGY.MP offers MIDI control to either trigger device functions (input) or to control external equipment via globcon (output). * MIDI * 2 x DIN 5-pin connector... -
Page 53: Gpio
2 V and 30 V due to a safety limiter in the input. GPIO DSUB-9 socket (female) Connect for GPIO application here. Observe the pin out - see „Appendix B - DSUB-9 Pin assignment“ on page 125. Prodigy.MP Manual - Version 2.0 page 53 of 130... -
Page 54: Chapter 5: Managing Device Introduction
CHAPTER 5: Managing Device CHAPTER 5: Managing Device Introduction PRODIGY.MP can be managed via multiple user interfaces: • local touch display on the front panel • browser based control / website • globcon control Further a JSON API (JavaScript Object Notation) is available for management. -
Page 55: Getting Started
The device will look for a DHCP server in the network to obtain its IP address. However the IP address can be changed manually via the touch display - see “NETWORK SETTINGS” on page 62. Prodigy.MP Manual - Version 2.0 page 55 of 130... -
Page 56: Local Operation
Local and remote display are identical. For remote operation via globcon control, you need to install globcon on your computer first - see page 16. Then follow the steps described in “CHAPTER 3: Installation”on page 22. page 56 of 130 Prodigy.MP Manual - Version 2.0... -
Page 57: Main Menu
Home icon HOME Menu Clock Clock Settings Settings Network Settings for the Management Ports Info Display of Device Name, System Build, FPGA Version, cored version, Frontpanel version, License information Download Support Archive Prodigy.MP Manual - Version 2.0 page 57 of 130... -
Page 58: Home
5 seconds. * * When controlling via browser the phones volume control is accessed by pressing the <ENTER> key on the keyboard. Level is adjusted via arrow keys (left and right). page 58 of 130 Prodigy.MP Manual - Version 2.0... - Page 59 The pin code can be reset in the PRODIGY.MP plugin of globcon (Settings / Front Panel) when the device is locked or in the device settings (see “DEVICE SETTINGS” on page 63) when the device is unlocked.
-
Page 60: Clock
MADI 2 input as Clock Master WCK 1 Word Clock input 1 as Clock Master WCK 2 Word Clock input 2 as Clock Master VIDEO Video signal @ Word Clock input 2 as Clock Master*** page 60 of 130 Prodigy.MP Manual - Version 2.0... - Page 61 *** Word Clock input 2 also accepts analog video signal (black burst, tri-level) **** requires AES4.IO or AES4.SRC.IO installed - the first AES3 port receiving a valid signal will be used as clock source. Prodigy.MP Manual - Version 2.0 page 61 of 130...
-
Page 62: Network Settings
Enter values: • select field • turn the Encoder to adjust the value or use the arrow keys (left and right) • de-select field • tap SAVE to store the changes page 62 of 130 Prodigy.MP Manual - Version 2.0... -
Page 63: Device Settings
Auto Lock is enabled. Values: 10 to 180 seconds Enter values: • select field • turn the Encoder to adjust the value or use the arrow keys (left and right) • de-select field Prodigy.MP Manual - Version 2.0 page 63 of 130... -
Page 64: Device Info
Example: prodigy_support_2019-11-19_12-34-33.pdgs License Information display of license information * the support archive is generated and downloaded into the downloads folder of your browser. You may send it to support@directout.eu for troubleshooting. page 64 of 130 Prodigy.MP Manual - Version 2.0... -
Page 65: Level Meter - Input (Mic8.Line.io)
• turn the Encoder or use the arrow keys (left and right) • un-select field(s) when finished • to zero the value, press the Encoder Values: Gain: module dependent Trim: from - 24 dB to + 24 dB Prodigy.MP Manual - Version 2.0 page 65 of 130... -
Page 66: Level Meter - Input (An8.Io)
INPUT SLOT return to HOME screen * the arrows are used for circular navigation through slots 1 to 8 input, followed by slot 1 to 8 output. page 66 of 130 Prodigy.MP Manual - Version 2.0... -
Page 67: Level Meter - Output
• turn the Encoder or use the arrow keys (left and right) • un-select field when finished • to zero the value, press the Encoder Values: Gain: module dependent Trim: from - 24 dB to + 24 dB Prodigy.MP Manual - Version 2.0 page 67 of 130... -
Page 68: Chapter 6: Rav.io
(hmtl5 / javascript). The size of the window and the zoom level can be varied. The page is organized in tabs, pulldown menus or hyperlinks offer access to the values of a parameter. Some values use an input field (e.g. IP address). page 68 of 130 Prodigy.MP Manual - Version 2.0... -
Page 69: Connecting Audio Network
Mouse overs are used to display further information (e.g. connection speed of network link). N OT E The web user interface updates itself when changes are applied by other instances (other browsers, external control commands). Prodigy.MP Manual - Version 2.0 page 69 of 130... -
Page 70: Status - Sync
* Error: packet time stamps are out of bounds. Possible reasons: stream offset may be too small or transmitter or receiver are not synced properly to the Grandmaster. Hyperlinks: • PTP / PTP state (p p 71) page 70 of 130 Prodigy.MP Manual - Version 2.0... - Page 71 Module’s master / slave state may change automatically. Profile PTP profile selection (default E2E, default P2P , media E2E, media P2P , customized) Customized profile Edit opens the tab ‘ADVANCED’ to adjust the custom profile. Prodigy.MP Manual - Version 2.0 page 71 of 130...
-
Page 72: Status - Network
• LED Port 2 - indicating link state and connection speed NOT E If NIC 1 and NIC 2 are connected to the same switch, they must be configured to different subnets - see “Network Settings” on page 73. page 72 of 130 Prodigy.MP Manual - Version 2.0... - Page 73 Gateway (IPv4) IP address of gateway DNS server (IPv4) IP address of DNS server Apply Button to confirm changes. Another popup window will appear to confirm a reboot of the module. Prodigy.MP Manual - Version 2.0 page 73 of 130...
-
Page 74: Status - Device
AoIP Module Restart of the AoIP module. Confirmation required. Reboot Audio transmission will be interrupted. Language Menu language (english, german). Manufacturer Settings Restore device settings to factory defaults. Reset Confirmation required. page 74 of 130 Prodigy.MP Manual - Version 2.0... - Page 75 Restoring the configuration a dialog prompts for selection of individual settings. This enhances flexibility at setup changes when a particular adjustment shall be preserved or just a single adjustment shall be restored. Prodigy.MP Manual - Version 2.0 page 75 of 130...
-
Page 76: Status - Input Streams
01 to 32 Name of stream gathered from SDP or set manually Name in the stream settings dialog. 01 to 32 Number of audio channels transported by the stream xx ch page 76 of 130 Prodigy.MP Manual - Version 2.0... - Page 77 In case the main input fails the main stream is stopped (IGMP LEAVE) before the backup stream is being activated. This behaviour ensures that the required network bandwidth does not increase in case of a failure. Prodigy.MP Manual - Version 2.0 page 77 of 130...
- Page 78 In case the main input fails the main stream is stopped (IGMP LEAVE) before the backup stream is being activated. This behaviour ensures that the required network bandwidth does not increase in case of a failure. page 78 of 130 Prodigy.MP Manual - Version 2.0...
- Page 79 Source-Specific Multicast (SSM) support for IGMP v3, v2 and v1 (SSM via protocol only in IGMP v3, SSM via internal filtering is applied for IGMP v2 and v1) - see “Source Specific Multicast” on page 84. Prodigy.MP Manual - Version 2.0 page 79 of 130...
- Page 80 Example: Samples per frame = 16 (0.333 ms) ➭ Offset ≥ 32 (0.667 ms) It may be helpful to alter the stream discovery protocol if an expected stream can’t be discovered by the device. page 80 of 130 Prodigy.MP Manual - Version 2.0...
- Page 81 RTSP = Real Time Streaming Protocol SAP = Session Announcement Protocol Session PORT 1 Selection of discovered streams at PORT 1 Session PORT 2 Selection of discovered streams at PORT 2 Prodigy.MP Manual - Version 2.0 page 81 of 130...
- Page 82 In case the automatic stream announcement and discovery of RAVENNA streams fails or cannot be used in a given network, the stream‘s SDP file can also be obtained via an RTSP URL. page 82 of 130 Prodigy.MP Manual - Version 2.0...
- Page 83 CHAPTER 6: RAV.IO Discovery SAP SAP is used in Dante environments. Prodigy.MP Manual - Version 2.0 page 83 of 130...
- Page 84 (destination IP). With SSM activated the receiver only accepts RTP packets of a certain destination IP that are originated by a sender with the specified source IP . NOT E RTP Payload ID must match between sender and receiver. page 84 of 130 Prodigy.MP Manual - Version 2.0...
- Page 85 CHAPTER 6: RAV.IO This page is left blank intentionally. Prodigy.MP Manual - Version 2.0 page 85 of 130...
-
Page 86: Status - Output Streams
OUTPUT STREAMS Click to activate or deactivate all streams. activate all streams deactivate all streams (requires confirmation) Hyperlinks: • Name (p p 88) Mouse over: • LED - indicating stream state page 86 of 130 Prodigy.MP Manual - Version 2.0... - Page 87 SMPTE 2110-30/31 Streams To create output streams for interoperability in SMPTE ST 2110 environments please consult the information document Info - ST2110-30 Streams. Both documents are available on the product page. Prodigy.MP Manual - Version 2.0 page 87 of 130...
- Page 88 ...). The sending of stream data starts once the stream has been enabled. Once the stream is active, the SDP data is displayed and may be copied from the window or downloaded via http://<rav-io>/sdp.html?ID=<stream no.>. page 88 of 130 Prodigy.MP Manual - Version 2.0...
- Page 89 *** L16 = 16 bit audio / L24 = 24 bit audio / L32 = 32 bit audio / AM824 = standardized according to IEC 61883, allows AES3 transparent transmission (SMPTE ST 2110-31). Prodigy.MP Manual - Version 2.0 page 89 of 130...
-
Page 90: Advanced - Overview
• PTP CLOCK SETTINGS - definition of adaption algorithms to reduce jitter • NETWORK ADVANCED SETTINGS - definition of network and QoS characteristics • PTP JITTER - graphical display of measured PTP jitter page 90 of 130 Prodigy.MP Manual - Version 2.0... -
Page 91: Advanced - Ptp Settings
PTP profile ‚customized‘ allows for individual adjustment of the PTP parameters. If profile is set to ‚media‘ or ‚default‘ the PTP parameters cannot be altered and are displayed only. Factory default setting is PTP Media Profile E2E. Prodigy.MP Manual - Version 2.0 page 91 of 130... -
Page 92: Advanced - Ptp Profile Customized Settings
No = Two step clock is used Slave only PTP-clock is always slave. Delay mechanism E2E - Offset slave-to-master is determined by End-To- End packets. P2P - Offset master-to-slave and slave-to-master is determined by Peer-To-Peer packets. page 92 of 130 Prodigy.MP Manual - Version 2.0... -
Page 93: Advanced - Current Ptp Master
Priority setting for master announcement (the smaller the value the higher the priority) GMID ID of current Grandmaster Sync port Selected port for PTP clock IPv4 IP address of Grandmaster Prodigy.MP Manual - Version 2.0 page 93 of 130... -
Page 94: Advanced - Ptp Statistic
Max. number of 1 Gbit/s switches: less than 10 No PTP Switch Adapted PTP-clock algorithm to reduce clock jitter using 100 Mbit/s 100 MB network switches without PTP support. Max. number of 100 Mbit/s switches: 1 page 94 of 130 Prodigy.MP Manual - Version 2.0... -
Page 95: Advanced - Network Advanced Settings
Source-Specific Multicast (SSM) support for IGMP v3, v2 and v1 (SSM via protocol only in IGMP v3, SSM via internal filtering is applied for IGMP v2 and v1) - see “Source Specific Multicast” on page 84. Prodigy.MP Manual - Version 2.0 page 95 of 130... -
Page 96: Advanced - Ptp Jitter
CHAPTER 6: RAV.IO Advanced - PTP Jitter Graphical display of measured PTP jitter. NOT E An error message next to Jitter measurement is displayed if delay requests are not being answered by Grandmaster. page 96 of 130 Prodigy.MP Manual - Version 2.0... - Page 97 CHAPTER 6: RAV.IO This page is left blank intentionally. Prodigy.MP Manual - Version 2.0 page 97 of 130...
-
Page 98: Logging
file name and line and log data page 98 of 130 Prodigy.MP Manual - Version 2.0... - Page 99 Interrupts automatic scrolling of the list view to allow copying the content to a text file via copy & paste. If scrolling is stopped for a longer period of time the display may not list all entries. Prodigy.MP Manual - Version 2.0 page 99 of 130...
-
Page 100: Statistic
The tab ‘STATISTIC’ displays an overview of the CPU load of the particular processes, an error counter and a monitor display to indicate the incoming (RX) and outgoing (TX) network traffic on both network ports individually. See “Protocol Types” on page 99. page 100 of 130 Prodigy.MP Manual - Version 2.0... -
Page 101: Switch
To access the module‘s control page it is required to connect the management network to one of the ports that is directly attached to a NIC - see next page. Prodigy.MP Manual - Version 2.0 page 101 of 130... - Page 102 Port 2 NIC 2 NIC 2 NIC 2 NIC 1 Port 3 Switched RAV.IO RAV.IO RAV.IO Audio & Control via Port 1 and Port 2 Extra ethernet traffic via Port 3 page 102 of 130 Prodigy.MP Manual - Version 2.0...
- Page 103 NIC 2 NIC 1 Port 3 Switched RAV.IO RAV.IO RAV.IO Audio & Control via Port 1 and Port 2 Extra ethernet traffic via Port 3 * see example on the following page. Prodigy.MP Manual - Version 2.0 page 103 of 130...
- Page 104 • connect the RAVENNA network to Port 3 of the RAV.IO (if needed) Switch configuration Port 1 RAV.IO Audio & Control via Port 1 and Port 3 Extra ethernet traffic via Port 2 NIC 1 Port 2 NIC 2 Port 3 page 104 of 130 Prodigy.MP Manual - Version 2.0...
-
Page 105: Rav.io - Firmware Update
Click ‘Update’ and browse to the update file after unzipping first. Example: rav_io_hw_0_13_sw_0_16.update Folllow the instructions displayed. WAR NI N G! It is strongly recommended to backup the device configuration (Save Preset) before running any update. Prodigy.MP Manual - Version 2.0 page 105 of 130... -
Page 106: Chapter 7: Dante.io
Layer 3 based network. However Dante Controller will mark a device entry red if the IP Address is not matching the network environment and helps resolving the issue. page 106 of 130 Prodigy.MP Manual - Version 2.0... - Page 107 ‘Enable Sync to External’ allows to clock the device from an external source that is defined in the clock settings of PRODIGY - e.g. AES, MADI or internal. The device shall become Grandmaster of the network then. Prodigy.MP Manual - Version 2.0 page 107 of 130...
- Page 108 Connections are made by clicking into the matrix. T I P To patch a 1:1 connection: Hold CTRL + Click the minus-symbol To un-patch a 1:1 connection: Hold CTRL + SHIFT + Click the minus-symbol page 108 of 130 Prodigy.MP Manual - Version 2.0...
- Page 109 It can be opened by double-clicking on to a device name in the 'Network View'. The status tab informs about the current firmware and software versions. TI P See “DANTE.IO - Firmware Update” on page 112. Prodigy.MP Manual - Version 2.0 page 109 of 130...
- Page 110 The tab 'Network Config' of the device view provides access to the operating mode of the built-in network switch and the network settings of the device. Device Config The tab ‘Device Config’ to adjust the device name, sample rate, encoding modes and more. page 110 of 130 Prodigy.MP Manual - Version 2.0...
-
Page 111: Switch - Configuration
• connect the MGMT port of the device with Port 2 of the DANTE.IO • connect the DANTE network to Port 1 of the DANTE.IO • connect the DANTE network to Port 3 of the DANTE.IO (if needed) Prodigy.MP Manual - Version 2.0 page 111 of 130... -
Page 112: Dante.io - Firmware Update
It is strongly recommended to backup the device configuration before running any update. Online Procedure Open Dante Controller Menu: View - Dante Updater (CMD-U) Select device to update and click ‘Update Selected Devices’ page 112 of 130 Prodigy.MP Manual - Version 2.0... - Page 113 CHAPTER 7: DANTE.IO Confirm and take your time until the update procedure has finished. Mark the updated device for reboot and click ‘Reboot Selected Devices’. Prodigy.MP Manual - Version 2.0 page 113 of 130...
- Page 114 After Reboot the Updater will report the Update Status. Offline Procedure Download the update file from the product page at www.directout.eu. Open ‚Dante Firmware Update Manager‘ and follow the instructions. https://www.audinate.com/products/firmware-update-manager page 114 of 130 Prodigy.MP Manual - Version 2.0...
- Page 115 This page is left blank intentionally. Prodigy.MP Manual - Version 2.0 page 115 of 130...
- Page 116 Clicks in the Input source is not Check the status of input LED and check audiosignal. in sync with clock clock setting of the connected device. master of the box. page 116 of 130 Prodigy.MP Manual - Version 2.0...
- Page 117 To clean the device, use a soft, dry cloth. To protect the surface, avoid using cleaning agents. N OT E ! The device should be disconnected from the power supply during the cleaning process. Prodigy.MP Manual - Version 2.0 page 117 of 130...
- Page 118 • 4 x BNC socket (input / output), WCK 2 switchable to Video Sync • Video sync: analog, black burst or tri-level • Impedance: 75 Ω (termination switchable) • AES11 (DARS also supported) page 118 of 130 Prodigy.MP Manual - Version 2.0...
- Page 119 • 0.3 V up to 0.6 V (peak to peak) MADI Port SFP • 1 x SFP (empty cage without module) MADI Format (I/O) • 48k Frame, 96k Frame • 56 channel, 64 channel Prodigy.MP Manual - Version 2.0 page 119 of 130...
- Page 120 • SNR: -116.8 dB RMS (20 Hz - 20 kHz) / -119.5 dB(A) • THD @ -1 dBFS: -109 dB • Frequency response: -0,5 dB (10 Hz) / -0,15 dB (20 kHz) page 120 of 130 Prodigy.MP Manual - Version 2.0...
- Page 121 • 2 x RJ45, 1x SFP DANTE.IO • Network Audio DANTE®, 64 ch • 2 x RJ45, 1x SFP SG.IO • Network Audio Waves SoundGrid, 128 ch • 2 x RJ45, 1x SFP Prodigy.MP Manual - Version 2.0 page 121 of 130...
- Page 122 DANTE.IO ........... 112 PRODIGY ........... 127 Scaling Factor .......... 26 RAV.IO ..........105 Session Description Protocol ....88 First Aid ........... 13 SFP Modules ........... 19 Fuses ............. 118 Single-/Multi-mode ........37 page 122 of 130 Prodigy.MP Manual - Version 2.0...
- Page 123 RAV.IO ..........102 Technical Data ........118 Troubleshooting ........116 Unicast Stream ........89 Updates ........... 14 Video sync ..........50 Warranty ..........14 WEEE See Conformity & Certificates: WEEE Word clock ..........50 Prodigy.MP Manual - Version 2.0 page 123 of 130...
- Page 124 CH 1 OUT + CH 4 − CH 4 IN − CH 3 + CH 3 IN + CH 2 − CH 2 IN − CH 1 + CH 1 IN + page 124 of 130 Prodigy.MP Manual - Version 2.0...
- Page 125 GPO - Open drain MOSFET switch - max. 30 V, max. 200 mA. Power supply: + 12 V, max. 200 mA (in total) The pinout (3, 4, 5, 8, 9) complies with the GPO of PRODUCER.COM Prodigy.MP Manual - Version 2.0 page 125 of 130...
- Page 126 Appendix C - Dimensions Appendix C - Dimensions 465,7 19Zoll 2HE, Depht 260mm page 126 of 130 Prodigy.MP Manual - Version 2.0...
- Page 127 N OT E To change the IP address tap on ‘Change IP Configuration’. In Update Mode DHCP is set to ON. Click Start Update Choose the downloaded file for upload (*.pdgy) Prodigy.MP Manual - Version 2.0 page 127 of 130...
- Page 128 The entire update may take a couple of minutes. Once the update is stored into the device a reboot message will appear. The update progress messages are displayed below the upload box (green rectangle). page 128 of 130 Prodigy.MP Manual - Version 2.0...
- Page 129 Appendix D - Firmware Update Once the reboot message appears you can power cycle the unit. Check the new build version in the SETTINGS DEVICE INFO. Prodigy.MP Manual - Version 2.0 page 129 of 130...
- Page 130 DirectOut GmbH Leipziger Strasse 32 T: +49-3727-5665-100 09648 Mittweida F: +49-3727-5665-101 Germany www.directout.eu...
Need help?
Do you have a question about the PRODIGY.MP and is the answer not in the manual?
Questions and answers