Advertisement
Quick Links
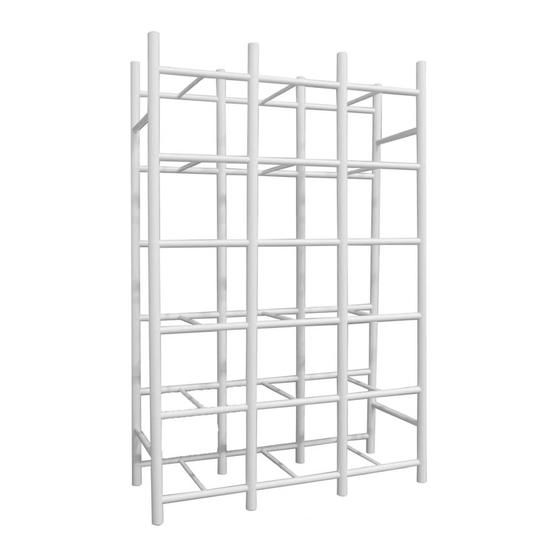
8 tote or file box storage system – assembly instructions
TOOLS REQUIRED
1. Powered Screwdriver with #2
Phillips-Head bip
PARTS LIST
1. 8 x Horizontal crossbars
2. 2 x Center verticals
3. 4 x Corner verticals
4. 6 x Vertical top caps
5. 4 x Front and rear grid
connecting tubes
6. 4 x Wall mount brackets
7. 8 x Horizontal slide rails
FASTENER LIST
1. 48 x #06 x ½" fastening screws
2. 08 x #10 x 1-¼" fastening screws
3. 08 x Plastic wall anchors
NOTE
Separate all parts into groups
(as shown) and familiarize. Read
all instructions before beginning
assembly.
#6
#5
48 x
#2
8 x
Solutions Murales PROSLAT inc.
225 Industriel blvd
Chateauguay (QC) J6J 4Z2
1 888 691-2944
US Patent No: 6,315,136B1 All rights Reserved
International Patents Pending
#1
#2
#3
#4
#7
#1
8 x
#3
Advertisement

Related Manuals for BIN WAREHOUSE DFAE2MBFBW0618

Summary of Contents for BIN WAREHOUSE DFAE2MBFBW0618
- Page 1 Solutions Murales PROSLAT inc. 225 Industriel blvd Chateauguay (QC) J6J 4Z2 1 888 691-2944 US Patent No: 6,315,136B1 All rights Reserved International Patents Pending 8 tote or file box storage system – assembly instructions TOOLS REQUIRED 1. Powered Screwdriver with #2 Phillips-Head bip PARTS LIST 1.
- Page 2 FRONT GRID ASSEMBLY Parts needed: STEP 1 STEP 2 4 of #1 2 of #3 4 Horizontal crossbars (#1) inserted through Two corner vertical (#3) inserted through 1 of #2 1 center vertical (#2) Note: Slide horizontal horizontal crossbars crossbar into left side of center vertical following direction of arrow until alignment dimple meets center vertical (see enlargement).
- Page 3 24 – #06 x ½’’ fastening screws (#1) Note: Fasteners in holes facing YOU only. FASTENING BIN WAREHOUSE RACK TO WALL Unit must be attached to wall Note: If mounting into drywall or masonry, Place 4 wall mount bracket (#06) over 4 rear mark and drill ¼...
Need help?
Do you have a question about the DFAE2MBFBW0618 and is the answer not in the manual?
Questions and answers