Table of Contents
Advertisement
Quick Links
Advertisement
Table of Contents

Subscribe to Our Youtube Channel
Related Manuals for ATEN CAMLIVE PRO UC3022


Summary of Contents for ATEN CAMLIVE PRO UC3022
- Page 1 UC3022 CAMLIVE™ PRO Dual HDMI to USB-C UVC Video Capture User Manual www.aten.com...
-
Page 2: Emc Information
CAMLIVE™ PRO User Manual EMC Information FEDERAL COMMUNICATIONS COMMISSION INTERFERENCE STATEMENT: This equipment has been tested and found to comply with the limits for a Class B digital service, pursuant to Part 15 of the FCC rules. These limits are designed to provide reasonable protection against harmful interference in a residential installation. -
Page 3: Rohs
CAMLIVE™ PRO User Manual The frequnecy and maximum EIRP Power in EU are listed as below 2402MHz~2480MHz:0.32dBm You are cautioned that changes or modifi cations not expressly approved by the part responsible for compliance could void the user’s authority to operate the equipment. - Page 4 CAMLIVE™ PRO User Manual 告 使 用 者 : 為 甲 類 資 訊 技 術 設 備 , 於 居 住 環 境 中 使 用 時 , 可 能 會 造 成 射 頻 擾 動 , 在 種 情 況 下 , 使 用 者 會 被 要 求 採 取 某 些 適 當 的 對 策 。 UC3022 備...
-
Page 5: User Information
Japan 81-3-5615-5811 Korea 82-2-467-6789 North America 1-888-999-ATEN ext 4988 1-949-428-1111 User Notice All information, documentation, and specifications contained in this manual are subject to change without prior notification by the manufacturer. The manufacturer makes no representations or warranties, either expressed or implied, with respect to the contents hereof and specifically disclaims any warranties as to merchantability or fitness for any particular purpose. -
Page 6: Package Contents
CAMLIVE™ PRO User Manual Package Contents 1 UC3022 CAMLIVE™ PRO Dual HDMI to USB-C UVC Video Capture 1 USB-B to USB-C Cable 1 USB-B to USB-A Cable 1 Power Adapter 1 Camera Mount Adapter Kit 1 User Instructions *When using the CAMLIVE™ PRO, if you are only detecting MJPG video, please disconnect the USB-C or USB-A head that you connected with the host. -
Page 7: Table Of Contents
ATEN OnAir Lite Application ........25... - Page 8 Resetting the CAMLIVE™ PRO ......43 ATEN OnAir Lite App Factory Default Settings ....44 5.
-
Page 9: About This Manual
Chapter 4, Aten OnAir Lite App explains how to download and configure the CAMLIVE™ PRO’s OnAir Lite App. Chapter 5, The Firmware Upgrade Utility explains how to download the CAMLIVE™... -
Page 10: Conventions
Indicates critical information. Product Information For information about all ATEN products and how they can help you connect without limits, visit ATEN on the Web or contact an ATEN Authorized Reseller. Visit ATEN on the Web for a list of locations and telephone numbers: International http://www.aten.com... -
Page 11: Introduction
USB video format in 720P or 1080P, which is sent to your laptop/smartphone via USB. Easy to use – the CAMLIVE™ PRO provides an intuitive ATEN OnAir Lite App. This App places everything you need to customize your video stream right at your fingertips. -
Page 12: Features
CAMLIVE™ PRO User Manual Features Mix and capture two unencrypted 4K live videos at 1080P UVC format on PC or mobile device via USB 3.x interface with seamless transition Intuitive Android/iOS App control – set up your camera gear and direct your show from anywhere ... -
Page 13: Supported Operation System And Requirements
Chapter 1. Introduction Supported Operation System and Requirements Operation System Minimum Hardware Requirement Windows 7 with Win7_driver installed CPU: Intel® i3 Dual Core 2.8Ghz or higher RAM: 4GB or more Windows 10 or later One USB-C Interface or USB-A Interface OS X 10.13 or later Android 5.0.1 or later with UVC support Android smartphone with UVC and USB-C Interface... -
Page 14: Components
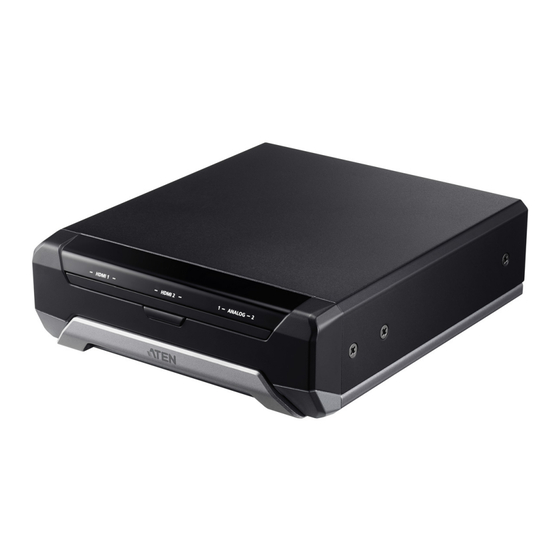
CAMLIVE™ PRO User Manual Components Front View No. Component Description HDMI 1 Video The LED lights green to indicate the HDMI 1 video source Status LED connection is in effect. The LED lights green to indicate the HDMI 1 audio source connection is in effect. - Page 15 Chapter 1. Introduction No. Component Description Bluetooth Link Press to quickly switch between scene 1 and scene 2. Pushbutton Press and hold 3 seconds to disconnect the bluetooth connection between CAMLIVE™ PRO and your mobile device. Press and hold the Bluetooth Link Pushbutton, and power on the CAMLIVE™...
-
Page 16: Rear View
CAMLIVE™ PRO User Manual Rear View Component Description USB-B UVC Connects to a host. Output Port HDMI Program Programmed (PGM) Video Output. Output Port HDMI 2 Input Connects to an HDMI input. HDMI 1 Input Connects to an HDMI input. Power Jack The power adapter plugs here. -
Page 17: Hardware Setup
Chapter 2 Hardware Setup Please review the safety information regarding the placement of this device in Safety Instructions, page 53. Mounting the Camera Mount Adapter To mount the camera mount adapter, screw the camera mount adapter on the bottom of the CAMLIVE™ PRO with the screws provided in the Camera Mount Adapter Kit. -
Page 18: Connecting The Camlive™ Pro Unit
CAMLIVE™ PRO User Manual Connecting the CAMLIVE™ PRO Unit Follow the steps below to connect the CAMLIVE™ PRO. HDMI Source Laptop & Mobile (unencrypted) Devices HDMI Display Power Adapter Audio Sources Install App 1. Plug the power adapter cable into the Power Jack. 2. - Page 19 6. Connect your XLR audio source to the Analog 2 Input Port. 7. Connect your RCA audio source to the Analog 1 Input Port. 8. Open the ATEN OnAir Lite App to pair up the CAMLIVE™ PRO with your app installed mobile device. For more information, see Aten OnAir Lite App, page 25.
-
Page 20: Aten Onair Lite App Installation
CAMLIVE™ PRO User Manual Aten OnAir Lite App Installation Download and install the ATEN OnAir Lite App from the Play Store to your Android mobile device. This App is designed for the UC3022 to manage and edit the program results. The ATEN OnAir Lite App includes the following power features. -
Page 21: Software
Chapter 2. Hardware Setup Software To enable CAMLIVE™ PRO, please download and install a suitable video recording or live streaming software for your requirement. Below lists some examples of supported video recording / live streaming software for PC. All trademarks are property of their respective owners. OBS: https://obsproject.com Xsplit: https://www.xsplit.com https://www.youtube.com... - Page 22 CAMLIVE™ PRO User Manual This Page Intentionally Left Blank...
-
Page 23: Livestream / Record Setup
Chapter 3 Livestream / Record Setup Livestream / Record Platform Below lists a few of the available live-streaming or recording software/platforms: OBS: https://obsproject.com Xsplit: https://www.xsplit.com https://www.youtube.com https://www.facebook.com https://www.zoom.com https://www.skype.com https://www.microsoft.com/en-us/microsoft-365 All trademarks are property of their respective owners. Discovering CAMLIVE on your Syste CAMLIVE™... - Page 24 CAMLIVE™ PRO User Manual 2. On the “Utilities” window, double-click “System Information” to bring up the system window. 3. Go to the USB page by clicking “USB” under “Hardware”.
- Page 25 Chapter 3. Livestream / Record Setup 4. Under “USB 3.0 Bus”, you should see an “HDMI to U3 capture”. This indicates that your system has successfully discovered CAMLIVE™ PRO. Go to the next section for an example of how to setup both video and audio for live-streaming and recording using CAMLIVE™...
-
Page 26: Windows Operation System
CAMLIVE™ PRO User Manual Windows Operation System This is an example used in a Windows 10 Operation System. 1. On a Windows 10 desktop, go to Control Panel and select System. 2. The System window appears, select Device Manager. - Page 27 Chapter 3. Livestream / Record Setup 3. The Device Manager window appears. Click on Cameras and Sound, video and game controllers. 4. You should see an “USB Video Device” in the Camera list, and an “USB Audio Device” in the Sound, video and game controllers list. This indicates that your system has successfully discovered CAMLIVE™...
-
Page 28: Video And Audio Setup
CAMLIVE™ PRO User Manual Video and Audio Setup After your system discovers CAMLIVE™ PRO, choose your livestream/record platform. You will need to setup the video and audio source coming from CAMLIVE™ PRO. Follow the steps below to setup your video and audio sources (separately). Note: OBS software is the example used in the setup steps below. - Page 29 Chapter 3. Livestream / Record Setup 2. Locate and click the “+” button on the bottom of the “Sources” pane (outlined in red in the picture below) to open the add source menu: 3. Select “Video Capture Device” or “Audio Capture Device.
- Page 30 CAMLIVE™ PRO User Manual 4. A pop-up window will be shown for you to name the video/audio source. Click the “OK” button to continue. It is recommended that “Make source visible” is checked. 5. On the properties page, click the drop-down menu named “Device” to select CAMLIVE™...
- Page 31 Chapter 3. Livestream / Record Setup Click the “OK” button to continue. 6. For successful setup, the sources will be shown in the “Source” pane. Setup of video and audio sources are complete, you can now start live- streaming/video recording. Detailed configuration of your live-streaming/video recording software/platform is not within the scope of this user manual, please refer to the software/ platform’s instruction guides/manual.
-
Page 32: Using The Usb Cables
CAMLIVE™ PRO User Manual Using the USB Cables When connecting CAMLIVE™ PRO on a PC with a USB2.0 interface, it will automatically set the provided compressed video quality to the MJPEG compression mode to fit the data bandwidth. For better video quality, we strongly recommend to connect CAMLIVE™... -
Page 33: Hdcp Switching
Chapter 3. Livestream / Record Setup If you find that the captured media only has MJPEG format, simply flip the USB- B to USB-C Cable connector connected to the CAMLIVE™ PRO as shown in the diagram below: HDCP Switching To display HDCP protected content via the HDMI Program Output Port using an HDMI cable, switch the HDCP Switch to ON. -
Page 34: Resetting The Camlive™ Pro
CAMLIVE™ PRO User Manual Resetting the CAMLIVE™ PRO To reset the CAMLIVE™ PRO to its default settings, do the following: 1. Press and hold the Bluetooth Link Pushbutton. Bluetooth Link Pushbutton 2. Plug the power adapter cable into the power jack to power on the CAMLIVE™... -
Page 35: Aten Onair Lite App
App Store or Google Play and install it on your mobile device. Note: 1. The maximum operation hour for the ATEN OnAir Lite App is 4 hours. 2. Please make sure to enable the GPS function before you begin to use the ATEN OnAir Lite App. -
Page 36: Connecting The Camlive™ Pro On Your Mobile Device
CAMLIVE™ PRO User Manual Connecting the CAMLIVE™ PRO on your Mobile Device CAMLIVE™ PRO is a plug-and-play device, after connecting CAMLIVE™ PRO as shown in Connecting the CAMLIVE™ PRO Unit on page 8. Open the On Air Lite App, it automatically searches for the CAMLIVE™ PRO, and press Connect. -
Page 37: Disconnecting The Camlive™ Pro From Your Mobile Device
Chapter 4. Aten OnAir Lite App When your mobile device is out of range, a warning message below appears. To connect back to the CAMLIVE™ PRO, press Connect and follow the on- screen instructions as explained in page 26. Disconnecting the CAMLIVE™ PRO from your Mobile Device To connect another mobile device to the CAMLIVE™... -
Page 38: Page Components
Tap to see the current software version, and firmware version information. See Information Tab, page 28. Deck Content The content depends on the selected deck. Information Tab To browse the current software and firmware version, tab from the ATEN OnAir Lite App screen. -
Page 39: Video Mixer
Chapter 4. Aten OnAir Lite App Video Mixer The Video Mixer deck page allows you to adjust effect on your video, scene selection and editing, and transition control. The components of the page is shown below: Component Description Scene 8 scenes are shown here. - Page 40 CAMLIVE™ PRO User Manual Component Description Enlarge Transition Controls the switching for the current stream (PGM). Control To switch, 1. Tap the Cut button; or 2. Select a specified time between 0.3s, 0.5s, and 1.0s transition, and tap the Fade button. Using the Cut button The transition happens immediately when you tap the Cut button.
-
Page 41: Scene Editor
Chapter 4. Aten OnAir Lite App Scene Editor To edit a scene, follow the steps below. 1. Select a scene from the scene selector. 2. Tap the button from the Video Mixer page. An example of a PIP2 is used and shown below:... -
Page 42: Overlay Button
CAMLIVE™ PRO User Manual Component Description Layout Tap to select a preferred layout. You can also resize the Selection dual-view. Overlay Button To view the overly display from a dual-view scene, tap from the Scene Editor page. Switching Video Source To switch the video source position between HDMI 1 and HDMI 2, tap from the Scene Editor page. -
Page 43: Reset Button
Chapter 4. Aten OnAir Lite App Reset Button To reset or undo any changes made to the selected scene, tap from the Scene Editor page. A warning message appears, click OK. Resize/Crop Tool This section describes how to resize or crop HDMI 1 and HDMI 2 of the scene layout. -
Page 44: Crop
CAMLIVE™ PRO User Manual Crop To crop HDMI 1 and HDMI 2 display content, select a scene and tap button from the Video Mixer page. A crop tool will be visible on the HDMI 1 and HDMI 2 displays in the scene editor page. An example of a PIP2 is used and shown below: To crop the display content, follow the steps below. - Page 45 Chapter 4. Aten OnAir Lite App 2. Tap the enlarge button to crop the display content. The screen below appears. 3. Tap and hold to drag the cropping tool point to adjust the cropping area. Tap and hold to relocate the cropping area.
-
Page 46: Audio Mixer
CAMLIVE™ PRO User Manual Audio Mixer The components of the Audio Mixer deck page is shown below: Component Description Audio Level Slide the volume slider to control the volume of each audio Control source. - Page 47 Chapter 4. Aten OnAir Lite App Component Description Audio Control Tap to select and adjust audio control. For the LEDs status indication, see Front View, page 4. HDMI1 and HDMI2: Tap to select an audio control for HDMI 1 and HDMI 2 between AFV, ON, and MUTE.
- Page 48 CAMLIVE™ PRO User Manual Component Description PGM: Tap to select an audio control and adjust compressor settings for PGM between ON, and MUTE. ON: The audio is turned on (unmuted). MUTE: The audio is turned off (muted). Compressor: Tap to enable or disable the compressor function and drag the dial to adjust the threshold.
-
Page 49: Settings Panel
Chroma key allows user to composite two HDMI sources based on a color range, it usually goes hand-in-hand with a green screen. Our ATEN OnAir Lite App removes the color screen background and fill in the area with the HDMI... -
Page 50: Selecting Color
CAMLIVE™ PRO User Manual Component Description Target Input Selects a target input for the Chroma Key. Select Color Selects a color background for the HDMI input source to be fully transparent. Color Range Adjust the color range for the colored background. Threshold Adjust the threshold for the colored background. -
Page 51: Auto Switch
Chapter 4. Aten OnAir Lite App Auto Switch Auto switch allows user to switch the HDMI display content connected on the HDMI Program Output Port to automatically follow with the input audio source. You can select a scene for each audio input source for the auto switch. -
Page 52: More Settings
CAMLIVE™ PRO User Manual More Settings Tap on the to adjust the audio sensitivity and duration. Advanced Component Description Resolution Selects a resolution for the HDMI display content when the HDCP is turned on. Note: 4K resolution is not supported when the HDCP is turned off, see HDCP Switching, page 23 for details. -
Page 53: Resetting The Camlive™ Pro
Chapter 4. Aten OnAir Lite App Resetting the CAMLIVE™ PRO To reset the CAMLIVE™ PRO back to the factory settings, tap A warning message appears, click OK. -
Page 54: Aten Onair Lite App Factory Default Settings
CAMLIVE™ PRO User Manual ATEN OnAir Lite App Factory Default Settings The OnAir Lite App factory default settings are as follows: Deck Component Setting Default Video Layout Name PIP1 PIP2 PBPFH PBPFV PBP1 Transition Effect Duration 0.3 seconds Audio HDMI 1... - Page 55 Chapter 4. Aten OnAir Lite App Settings CHROMA Target Input HDMI 1 Select Color 130 / 130 / 130 Color Range Threshold AUTO HDMI 1 SWITCH HDMI 2 Analog 1 Aanalog 2 Sensitivity Duration ADVANCED Resolution 1080p (HDCP On) Frame Rate...
- Page 56 CAMLIVE™ PRO User Manual This Page Intentionally Left Blank...
-
Page 57: The Firmware Upgrade Utility
Chapter 5 The Firmware Upgrade Utility Overview The purpose of the Firmware Upgrade Utility is to provide an easy process for users to upgrade the CAMLIVE™ PRO unit to either support PC video capture, or Android smartphone video capture capability. As new firmware versions become available, new firmware upgrade packages are posted on our website. -
Page 58: Preparation
CAMLIVE™ PRO User Manual Preparation To prepare for the firmware upgrade, do the following: 1. Press and hold the Bluetooth Link Pushbutton. Bluetooth Link Pushbutton 2. Plug the power adapter cable into the power jack to power on the CAMLIVE™ PRO. The front panel LEDs blink together once every 0.5 seconds to indicate Firmware Upgrade Mode is in effect. -
Page 59: Starting The Upgrade
Chapter 5. The Firmware Upgrade Utility Starting the Upgrade To upgrade the CAMLIVE™ PRO, follow the steps below: 1. Run the downloaded Firmware Upgrade Package file – either by double clicking the file icon, or by opening a command line and entering the full path to it. - Page 60 CAMLIVE™ PRO User Manual 3. Click Next to continue. The Firmware Upgrade Utility main screen appears: The Utility inspects your installation. All the devices capable of being upgraded by the package are listed in the Device List panel. 4. Click Next to perform the upgrade. If you enabled Check Firmware Version, the Utility compares the device’s firmware level with that of the upgrade files.
-
Page 61: Upgrade Succeeded
Chapter 5. The Firmware Upgrade Utility informing you of the situation and gives you the option to Continue or Cancel. If you didn’t enable Check Firmware Version, the Utility installs the upgrade files without checking whether they are a higher level, or not. As the Upgrade proceeds, status messages appear in the Status Messages panel, and the progress toward completion is shown on the Progress bar. -
Page 62: Upgrade Failed
CAMLIVE™ PRO User Manual Upgrade Failed If the Upgrade Succeeded screen doesn’t appear, it means that the upgrade failed to complete successfully, in which case you should do the following: 1. Power off the CAMLIVE™ PRO by removing the power jack. 2. -
Page 63: Appendix
Appendix Safety Instructions General This product is for indoor use only. Read all of these instructions. Save them for future reference. Follow all warnings and instructions marked on the device. Do not place the device on any unstable surface (cart, stand, table, etc.). If the device falls, serious damage will result. - Page 64 CAMLIVE™ PRO User Manual extension cord ampere rating. Make sure that the total of all products plugged into the wall outlet does not exceed 15 amperes. To help protect your system from sudden, transient increases and decreases in electrical power, use a surge suppressor, line conditioner, or uninterruptible power supply (UPS).
-
Page 65: Technical Support
Troubleshooting http://www.aten-usa.com/support Support Documentation Software Updates Telephone Support 1-888-999-ATEN ext 4988 1-949-428-1111 When you contact us, please have the following information ready beforehand: Product model number, serial number, and date of purchase Your computer configuration, including operating system, revision level, expansion cards, and software ... -
Page 66: Specifications
CAMLIVE™ PRO User Manual Specifications Function CAMLIVE™ PRO Connectors Video In 2 x HDMI Type A Female (Black) USB Port USB 3.2 Gen1 Type-B Male (Blue) Note: USB-B to USB-C and USB-B to USB-A cables included in the package. Video Output 1 x HDMI Type A Female (PGM Video, Black) Audio Inputs 1 x Balanced Analog Audio via XLR Connectors... - Page 67 Appendix Function CAMLIVE™ PRO Minimum Hardware PC/Mac: Requirement CPU: Intel® i3 Dual Core 2.8Ghz or higher RAM: 4GB or more One USB-C Interface or USB-A Interface Smartphone*: Android smartphone with UVC and USB-C Interface Note: For detail UVC compatible device list, please review the following link of third part App.
-
Page 68: Limited Warranty
ATEN will provide a repair service, without charge, during the Warranty Period. If a product is detective, ATEN will, at its discretion, have the option to (1) repair said product with new or repaired components, or (2) replace the entire product with an identical product or with a similar product which fulfills the same function as the defective product.
Need help?
Do you have a question about the CAMLIVE PRO UC3022 and is the answer not in the manual?
Questions and answers