
Related Manuals for CIAS Elettronica S.r.l. ERMUSA 30


Summary of Contents for CIAS Elettronica S.r.l. ERMUSA 30
- Page 1 ERMUSA Barriera a Microonde per protezioni esterne Manuale di Installazione External Microwave Protection Barrier Installation Handbook Edizione / Edition 2.0...
-
Page 2: Table Of Contents
CIAS Elettronica S.r.l. Ed 2.0 INDICE DESCRIZIONE ......................3 Descrizione ................................3 INSTALLAZIONE ......................4 Informazioni preliminari ............................ 4 2.1.1 Modi di Installazione ........................... 4 Numero di Tratte ..............................5 Condizioni del Terreno ............................6 Presenza di Ostacoli ............................6 Ampiezza dei Fasci Sensibili .......................... - Page 3 CIAS Elettronica S.r.l. Ed 2.0 INDEX DESCRIPTION ......................22 Description ................................. 22 INSTALLATION ......................23 Preliminary Information ..........................23 2.1.1 Installation types ............................23 Number of Sections ............................24 Ground conditions ............................. 25 Presence of Obstacles ............................25 Amplitude of the Sensitive Beam ........................26 Length of the Dead Zones near the equipment ....................
-
Page 4: Descrizione
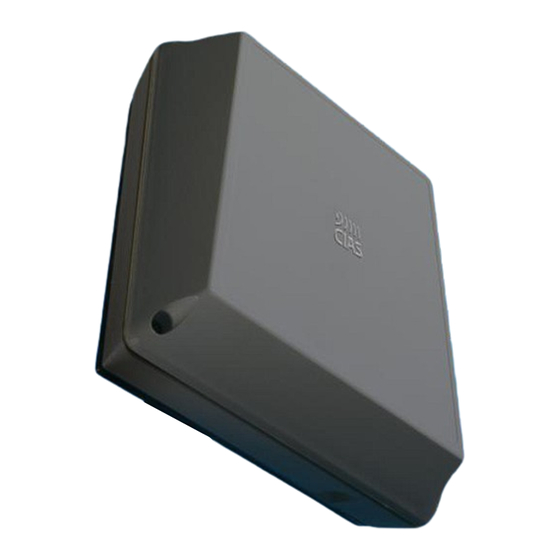
Il sistema è in grado di rilevare la presenza di un corpo che si muove all’interno del Campo Sensibile instauratosi tra il Trasmettitore (Tx) ed il Ricevitore (Rx). I modelli disponibili del prodotto sono: - ERMUSA 30 Portata 30 metri, da esterno - ERMUSA 60... -
Page 5: Installazione
CIAS Elettronica S.r.l. Ed 2.0 2 INSTALLAZIONE 2.1 Informazioni preliminari La diversificazione in vari modelli della barriera ERMUSA, implica più tipi di installazione e fissaggio, in base alle esigenze dell’utente. 2.1.1 Modi di Installazione Le versioni 30, 60, 80 e 80S sono già dotate della “piastra di fondo snodata” e sono completamente protette dall’attacco degli agenti atmosferici. -
Page 6: Numero Di Tratte
CIAS Elettronica S.r.l. Ed 2.0 2.2 Numero di Tratte Dovendo progettare la protezione con barriere volumetriche di un perimetro chiuso, oltre alle normali considerazioni di suddivisione del perimetro in un certo numero di tratte, che tengano conto delle necessità gestionali dell'intero impianto, occorre ricordare che è sempre preferibile installare un numero di tratte pari. -
Page 7: Condizioni Del Terreno
CIAS Elettronica S.r.l. Ed 2.0 2.3 Condizioni del Terreno E’ sconsigliabile installare l’apparato lungo tratti dove ci siano, erba alta (maggiore di 10 cm), stagni, corsi d’acqua in senso longitudinale, ed in generale tutti quei tipi di terreni la cui conformazione sia rapidamente variabile. -
Page 8: Ampiezza Dei Fasci Sensibili
CIAS Elettronica S.r.l. Ed 2.0 Pertanto è sconsigliabile tollerare la presenza di detti ostacoli entro le tratte di protezione. E’ possibile tollerarne la presenza solo a patto che la loro crescita venga limitata mediante una metodica manutenzione e che il loro movimento venga impedito mediante barriere di contenimento. -
Page 9: Lunghezza Delle Zone Morte In Prossimità Degli Apparati
CIAS Elettronica S.r.l. Ed 2.0 2.6 Lunghezza delle Zone Morte in prossimità degli apparati La lunghezza delle Zone Morte in prossimità degli apparati è in funzione sia della distanza dell'apparato stesso dal suolo, sia della sensibilità impostata sul ricevitore (fig. 9). L’Altezza consigliabile per installazioni standard è... -
Page 10: Collegamenti
CIAS Elettronica S.r.l. Ed 2.0 3 COLLEGAMENTI 3.1 Morsettiere, connettori e funzionalità del circuito 3.1.1 Circuito Trasmettitore S T B Y P T 1 GS T 1 TEST S Y NC P T 0 GS T 0 13,8 D17 D16 D10 T est Guasto Alimen. - Page 11 CIAS Elettronica S.r.l. Ed 2.0 CONNETTORE J1 Connettore per lo strumento STC 95 Simbolo FUNZIONE Tensione di alimentazione ( 0 V 13,8 V Tensione di alimentazione ( 13,8 V OSCILL Segnale funzionamento Oscillatore ( 4,5 V Alimentazione interna ( 9 V LEDS Simbolo FUNZIONE...
-
Page 12: Circuito Ricevitore
CIAS Elettronica S.r.l. Ed 2.0 3.1.2 Circuito Ricevitore PT 1 ALL1 PT 0 ALL0 13,8 D1 D6 D10 Canale Aliment Allarme Ampolla Sposizionamento Selettore Sensore Canale Regolazione Sensibilità Regolazione Integrazione Figura 11 Nelle seguenti tabelle sono indicate le funzioni delle morsettiere, connettori, selettori e trimmer presenti sulla scheda ERMUSA TX: MORSETTIERA MS1 Morsettiera principale per le connessioni alla Centrale... - Page 13 CIAS Elettronica S.r.l. Ed 2.0 LEDS Simbolo FUNZIONE Indica il riconoscimento del canale Tx ( Verde - normalmente On ) Indica Allarme ( Rosso - normalmente Off ) D 10 Indica se il dispositivo è alimentato ( Verde - normalmente On ) JUMPERS Simbolo FUNZIONE...
-
Page 14: Collegamento All'alimentazione Principale
CIAS Elettronica S.r.l. Ed 2.0 3.2 Collegamento all’Alimentazione Principale 3.2.1 Collegamento all’Alimentazione Le teste devono essere alimentate in corrente continua alla tensione nominale di 13,8 V Il collegamento tra l’alimentatore e la testa deve essere adeguatamente dimensionato, quindi la sezione del conduttore deve essere calcolata in base alla lunghezza del collegamento ed all’assorbimento degli apparati. -
Page 15: Connessione Per Sincronismo
CIAS Elettronica S.r.l. Ed 2.0 3.3.2 Connessione per Sincronismo SYNC, presente solo nella versione S, viene utilizzato quando si desidera sincronizzare tra loro due dispositivi Tx, relativamente vicini tra loro, in modo che possano funzionare alla stessa frequenza di modulazione. Per effettuare il sincronismo, occorre connettere tra loro i morsetti 7 “SYNC”... -
Page 16: Allineamento E Verifica
CIAS Elettronica S.r.l. Ed 2.0 4 ALLINEAMENTO E VERIFICA 4.1 Allineamento e Verifica con Strumento STC 95 Per facilitare l’operazione di installazione delle proprie barriere, Cias ha realizzato uno strumento di Allineamento e Taratura. Nella seguente immagine è riportato lo schema di connessione tra la barriera ERMUSA e lo strumento STC 95 e le funzioni dei tasti e dei leds. -
Page 17: Operazioni Sul Trasmettitore
CIAS Elettronica S.r.l. Ed 2.0 4.1.1 Operazioni sul Trasmettitore Per effettuare la taratura e il collaudo del trasmettitore ERMUSA occorre procedere nel seguente modo: togliere la calotta di plastica svitando le apposite viti; verificare la connessione dei fili di alimentazione alla morsettiera MS1 (figura 10); verificare l’accensione del led D10 con alimentazione presente;... - Page 18 CIAS Elettronica S.r.l. Ed 2.0 Allo scopo di ottimizzare il collegamento, si proceda all’effettuazione del puntamento elettronico nel seguente modo: c) Verificare che il led “on” (16) sia spento. Qualora fosse acceso, premere il tasto “buzzer” (15) per spegnerlo, disattivando in tal modo il buzzer interno al STC 95. d) Verificare che il led “open”...
- Page 19 CIAS Elettronica S.r.l. Ed 2.0 m) Premere il tasto ”” (10) fino ad ottenere l’accensione del led “sens RxTx” (6). Agire sul trimmer PT1 (testa ricevente, fig.10) fino a leggere sul display un valore compreso tra 0,3 10 %. Va tenuto presente che il valore di 0,3 V corrisponde alla massima sensibilità...
- Page 20 CIAS Elettronica S.r.l. Ed 2.0 r) Effettuare le prove di attraversamento verificando prima il suono intermittente del buzzer e successivamente il suono continuo e l’accensione del led D6 sulla barriera RX, che indica l’avvenuto rilevamento dell’allarme. Verificare, inoltre, che in assenza di movimento nel campo protetto il buzzer non entri in funzione.
-
Page 21: Manutenzione E Assistenza
CIAS Elettronica S.r.l. Ed 2.0 5 MANUTENZIONE E ASSISTENZA 5.1 Ricerca Guasti In caso di falsi allarmi, verificare i parametri riscontrati durante l’installazione che saranno stati registrati nell’apposita scheda di collaudo allegata e se si riscontrano delle variazioni che eccedono i limiti indicati, rivedere i relativi punti nel capitolo “ Allineamento e Verifica “ (4). Difetto Possibile Causa Possibile Soluzione... -
Page 22: Caratteristiche
Potenza massima di emissione In accordo con le richieste nazionali Modulazione On / Off Duty-Cycle 50 / 50 Numero di canali PORTATE ERMUSA 30 30 m ERMUSA 60 60 m ERMUSA 80 80 m ERMUSA 80 S 80 m Tensione d'alimentazione... - Page 23 Such a system can detect the presence of somebody or something moving within the sensitive field present between the transmitter (Tx) and the receiver (Rx). The ERMUSA system types availabile: - ERMUSA 30 Range 30 meters, for outdoor use - ERMUSA 60...
- Page 24 CIAS Elettronica S.r.l. Ed 2.0 2 INSTALLATION 2.1 Preliminary Information Due to the various types of ERMUSA barrier, there are some different kinds of installation and fixing unit types related to user requirements. 2.1.1 Installation types The 30, 60, 80 e 80S versions, are equipped with a "knuckle bottom board" and are environment conditions fully protected.
- Page 25 CIAS Elettronica S.r.l. Ed 2.0 2.2 Number of Sections Having to design protection of a closed perimeter with volumetric barriers, besides having to split the perimeter within a certain number of sections that take into account the management need of the entire plant, it must be remembered that it is always preferable to install an even number of sections.
- Page 26 CIAS Elettronica S.r.l. Ed 2.0 2.3 Ground conditions It is inadvisable to install the equipment along sections with tall grass (more than 10 cm), ponds, longitudinal waterways, and all those types of grounds whose structure is rapidly mutable. 2.4 Presence of Obstacles The fences, are generally metallic therefore highly reflecting hence causing various problems, for this reasons some precautions are suggested: first of all, make sure that the fence has been properly fixed in order that the wind does...
- Page 27 CIAS Elettronica S.r.l. Ed 2.0 2.5 Amplitude of the Sensitive Beam The amplitude of the sensitive beam depends on the distance between the transmitter and the receiver, and on the sensitivity adjustment set. The figures below state the diameter half-way of the sensitive beam section (based on the length of the section) in case of maximum and minimum sensitivity (figure 7 and 8).
- Page 28 CIAS Elettronica S.r.l. Ed 2.0 2.6 Length of the Dead Zones near the equipment The length of the dead zones near the equipment is based on the distance of the equipment from ground, on the sensitivity set on the receiver (figure 8). With regard to the considerations stated above, and based on plant requirements, the equipment must be installed at a certain height from ground.
- Page 29 CIAS Elettronica S.r.l. Ed 2.0 3 CONNECTIONS 3.1 Terminal block, connectors, and Circuit function 3.1.1 Transmitter Circuit The following figure and tables show the terminal block and connector function present on the ERMUSA TX board. S T B Y P T 1 GS T 1 TEST S Y NC...
- Page 30 CIAS Elettronica S.r.l. Ed 2.0 CONNECTOR J1 Connector for STC 95 Instrument Symbol FUNCTION Ground ( 0 V 13,8 V Power Supply Output ( 13,8 V OSCILL Function Oscillator Signal OK Internal Power Supply LEDS Symbol FUNCTION D 10 Power On ( Green normal On ) D 16 Fault ( Red normal Off ) D 17...
- Page 31 CIAS Elettronica S.r.l. Ed 2.0 3.1.2 Receiver circuit The following figure and tables show the terminal block and connector function present on the ERMUSA RX board. ALL1 PT 0 ALL0 13,8 D1 D6 D10 Power Channel Alarm Position Sup ply sensor bulb Cha nne l Selec tor...
- Page 32 CIAS Elettronica S.r.l. Ed 2.0 LEDS Symbol FUNCTION Channel Ok ( Green normal On ) Alarm / Channel Off ( Red normal Off ) D 10 Power On ( Green normal On ) JUMPERS Symbol FUNCTION JP 2 Jumper for Enable / Disabile LEDS ( Closed = Enable ) TRIMMER Symbol FUNCTION...
- Page 33 CIAS Elettronica S.r.l. Ed 2.0 3.2 Equipment connection to the Power Supply 3.2.1 Connections to the Power Supply The units must be powered with DC voltage, nominal value is 13,8 V The connection between unit and the power supply must be realised with cables of correct section, the cables section must be computed keeping in account connection length and unit current absorption.
- Page 34 CIAS Elettronica S.r.l. Ed 2.0 3.3.2 Synchronism connection SYNC, only S version: it is used for the synchronization of two transmitter mounted somehow near between them, so they can work at the same modulation frequency For the synchronisation operation is required the connection between pin 7 "SYNC" and 2 "GND"...
- Page 35 CIAS Elettronica S.r.l. Ed 2.0 4 ADJUSTMENT AND TESTING 4.1 Adjustment and testing with STC 95 Instrument For the Microwave Barrier adjustment and testing, CIAS gives the availability of a dedicated instrument, with the intention to facilitate installation operation and operator activity support. The following figure 12 shows the CIAS STC 95 instrument with function explanations.
- Page 36 CIAS Elettronica S.r.l. Ed 2.0 4.1.1 Transmitter Test and Adjustment To align and adjust the Transmitter ERMUSA proceed as follows: - unscrew the specific screws to remove the front cover; - activate the power supply connection to MS1 terminal block (Fig. 9); - check that the LED D10 indicating presence of mains lights up.
- Page 37 CIAS Elettronica S.r.l. Ed 2.0 f) After having loosened the fastening screws on the mast, turn the Receiver module on the horizontal plane till obtaining the maximum reading on the display (2). g) Repeat the pointing operation on the horizontal adjustment of the transmitter module. h) After having obtained the best pointing, lock the horizontal movement of the TX and RX modules.
- Page 38 CIAS Elettronica S.r.l. Ed 2.0 We suggest to adjust the min. integration at no less than 30 % (trimmer position). Too much integration can miss alarm in case of running intruder. We suggest to adjust the max. integration at no more than 80 % (trimmer position). Higher integration value can be adopted when the barrier can't be crossed by running intruder, (e.
- Page 39 CIAS Elettronica S.r.l. Ed 2.0 5 MAINTENANCE 5.1 Troubleshooting In case of false alarm, check the parameters recorded during the installation phase (on attached testing form), if there are divergences with permitted limits check again the related points in chapter "Adjustment and Testing (4)" Fault Possible reason Possible solution...
- Page 40 Maximum power to emitting 20 to 500 mW P.I.R.E. According with national rules Modulation On / Off Duty-cycle 50 / 50 Channel number RANGE: ERMUSA 30 30 m ERMUSA 60 60 m ERMUSA 80 80 m ERMUSA 80S 80 m DC power supply:...
- Page 41 SCHEDA DI COLLAUDO – TEST SHEET ERMUSA TX NUMERO DI SERIE SERIAL NUMBER: Cliente / Customer Indirizzo / Address Barriera / Barrier N° VALORI MISURATI SUL TRASMETTITORE – MEASURED VALUES ON THE TRASMITTER VALORI MISURATI MISURE VALORI TIPICI MEASURED VALUES MEASUREMENTS STANDARD INSTALLAZIONE...
- Page 42 SCHEDA DI COLLAUDO – TEST SHEET ERMUSA RX NUMERO DI SERIE SERIAL NUMBER: Cliente / Customer Indirizzo / Address Barriera / Barrier N° VALORI MISURATI SUL RICEVITORE – MEASURED VALUES ON THE RECEIVER VALORI MISURATI MISURE VALORI TIPICI MEASURED VALUES MEASUREMENTS INSTALLAZIONE MANUTENZIONE...
- Page 43 NOTE:...
- Page 44 Con la presente, CIAS Elettronica, dichiara che questo rivelatore d’intrusione “Ermusa” è conforme ai requisiti essenziali ed alle altre disposizioni rilevanti della Direttiva 1999/5/CE (Art.3.1 -3.1 -3.2) Hereby, Cias Elettronica, declares that this movement detector “Ermusa” is in compliance with the essential requirement and other relevant provisions of Directive 1999/5/EC (Art.3.1 -3.1 3.2)
Need help?
Do you have a question about the ERMUSA 30 and is the answer not in the manual?
Questions and answers