Fairland IDHR60 Installation & User Manual
R32 full-inverter dehumidifier
Hide thumbs
Also See for IDHR60:
- Installation and user manual (32 pages) ,
- Installation & user manual (45 pages)
Table of Contents
Advertisement
Advertisement
Table of Contents

Related Manuals for Fairland IDHR60

Summary of Contents for Fairland IDHR60
- Page 1 R32 Full-inverter Dehumidifier INSTALLATION & USER MANUAL...
-
Page 3: Table Of Contents
SUMMARY For users …………………………………………………………………. P.1-P.6 1. GENERAL INFORMATION 1. 1. Name of Parts 1.2. Spare Part Lists 1.3. Dimension 2. OPERATION 2.1.Instruction for Controller 3. TECHNICAL SPECIFICATION For installers and professionals …………………………………… P.7-P.17 1. Installation and Maintenance 1.1.Notice before installation 1.2 Instruction 1.3 Trail after Installation 1.4.Daily Maintenance Notice... -
Page 5: General Information
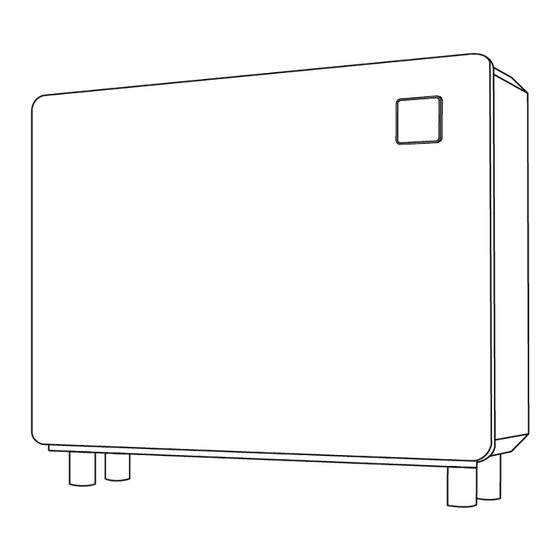
FOR USER 1. GENERAL INFORMATION 1. 1. Name of Parts Name Controller Feet Air Outlet Air Inlet(on the bottom) Hanging Strip on Wall... -
Page 6: Spare Part Lists
FOR USER 1.2. Spare Part Lists Padx3,Feetx4,Drain-pipe x1(2m),Hanging Stripx1,Manual 1.3. Dimension Model IDHR60 IDHR96 IDHR120 Dimension (Unit:mm)... -
Page 7: Operation
FOR USER 2. OPERATION 2.1.Instruction for Controller SYMBOL DESIGNATION FUNCTION ON/OFF Press to power on or off the dehumidifier 1. For dehumidifier with dehumidifying function only, press “ ” to select Smart /Silence mode. 2. For dehumidifier both with dehumidifying and heating functions (dehumidifier with Mode optional electric heater), press the "... - Page 8 FOR USER mode (2) Both Dehumidifying and Heating Function: Press for 3 seconds, the will flash, before it stops flashing, press to choose circularly, which means “Heating”“Dehumidifying”“Heating + Dehumidifying” A.Dehumidifying Function: Press one time,it can transfer the mode between Default is mode B.
- Page 9 FOR USER 5. Timer Setting (1) Timer ON setting: When the dehumidifier is on or off, press the “ ” to enter the timer setting; Meanwhile, the symbol light and the are flashing to enter the Timer ON setting. Press the to adjust Timer ON hour setting, then press , you can adjust the minute setting by pressing...
-
Page 10: Technical Specification
FOR USER 3. TECHNICAL SPECIFICATION Model IDHR60 IDHR96 IDHR120 Advised pool surface (㎡) * ≤25 ≤40 ≤50 Advised room size (㎡) * Operating air temperature (℃) 10~38 Capacity (l/h) (Air 30℃,RH 80% ) * DER (l/h.kW) (Air 30℃,RH 80% ) * 4.00~3.40... -
Page 11: For Installers And Professionals
FOR INSTALLERS AND PROFESSIONALS 1. Installation and Maintenance This product must be installed by a professional team. The users are not qualified to install by themselves, otherwise the dehumidifier might be damaged and risky for users’ safety. 1.1.Notice before installation The product is only used for dehumidification of the swimming pool and must ensure sufficient air circulation, otherwise the dehumidification function will be ineffective or have little effect. - Page 12 FOR INSTALLERS AND PROFESSIONALS 1.1.6. It is strictly forbidden to use or store flammable gases or liquids such as hair spray, paint, gasoline, etc. near the dehumidifier, otherwise a fire may occur. 1.1.7. If any abnormal conditions such as abnormal noise, odor, smoke, leakage, etc., are found, the power should be cut off immediately and contact the local dealer, and do not repair the equipment yourself.
- Page 13 FOR INSTALLERS AND PROFESSIONALS 1.1.9. In thunderstorms, disconnect the main power switch, otherwise the lightening might damage the unit 1.1.10. Do not wash the equipment directly with water. 1.1.11. Do not use for special purposes such as the preservation of fine arts or academic materials (Otherwise, the quality of the preservation may be reduced).
-
Page 14: Instruction
FOR INSTALLERS AND PROFESSIONALS 1.2 Instruction This product should be installed in a well-ventilated place 1.2.1.Installation 1.The dehumidifier may be placed on the ground or installed on the wall; 2. When installing on the wall, be sure to use M6 pull-out screws to fix the bracket, the concrete foundation of the selected wall should be firm and strong, and the bracket should be strong enough and rust-proof;... - Page 15 FOR INSTALLERS AND PROFESSIONALS Steps to install the foot and place it on the ground: 1. Align the foot to the mounting hole of the dehumidifier chassis and screw it in the clockwise direction (do not flip the equipment to install!). A:Power Cord;B:Drain Outlet(Connected with drain pipes) 2.
- Page 16 FOR INSTALLERS AND PROFESSIONALS 2. Place the pad on the wall-mounting platform behind the equipment 3. Hang the hanging strip on the back of the equipment on the bracket.
- Page 17 FOR INSTALLERS AND PROFESSIONALS After hanging the bracket, gently put the equipment until the pad of the bottom rests against the wall. 4. Connect the drain pipe, and connect the power cord according to the wiring diagram A: Power cord; B: Drain outlet( connect the drain pipes)
- Page 18 The cross-sectional area of the cable can be appropriately increased. 6) Completed all the wiring, must be checked carefully then connect the power. 7) Electric wiring diagram Power Supply 230V/50Hz Model IDHR60 IDHR96 IDHR120 Rated current Breaker Rated residual Action...
-
Page 19: Trail After Installation
FOR INSTALLERS AND PROFESSIONALS 1.3 Trail after Installation Please check all the wirings carefully before turning on the dehumidifier. 1.3.1. Inspection before use 1. Check if the dehumidifier is vertically or horizontally placed on the ground or hung on the wall, connected with drain pipe;... -
Page 20: Trouble Shotting For Common Faults
FOR INSTALLERS AND PROFESSIONALS 2.TROUBLE SHOTTING FOR COMMON FAULTS Failure Reason Solution No power Wait until the power recovers Dehumidifier doesn’t Power switch is off Switch on the power Fuse burned Check and change the fuse The breaker is off Check and turn on the breaker Evaporator blocked Remove the obstacles... -
Page 21: Failure Code
FOR INSTALLERS AND PROFESSIONALS 3.FAILURE CODE Failure Code High pressure protection Low pressure protection Abnormal power supply voltage protection Exhaust high temp protection System high temp protection Air out high temp protection Environmental low temp protection Controller failure Air inlet temperature sensor failure Air outlet temperature sensor failure Exhaust gas temp sensor failure Gas return temp sensor failure... - Page 23 Version:C00IDr32...
Need help?
Do you have a question about the IDHR60 and is the answer not in the manual?
Questions and answers