Table of Contents
Advertisement
Quick Links
®
CONDOR
STOP! WARNING: READ THIS FIRST!
First Read and Understand the Instruction manual and product labels for important safety, set-up and troubleshooting information. If you have problems setting up or
using the Condor® Pit-Stop, contact customer service @ 1-815-754-7418 or contact us via e-mail @ www.condor-lift.com. The Condor® Pit-Stop is not intended for
use by children.
:
Assembly Instructions
Remove all parts from shipping box. Check the parts below to make sure you have all the parts needed to assemble your Condor®
Pit-Stop before beginning. In the unlikely event that you find a part damaged or missing, please call customer service @ #1-815-754-7418.
Parts
PIT-STOP / TRAILER-STOP USER INSTRUCTION MANUAL
Key
A
B
C
D
E
F
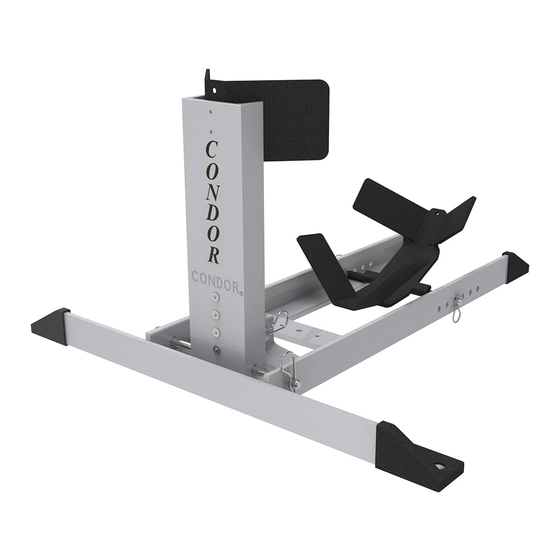
Assembly Illustration:
Qty.
1
Condor® Main Unit
1
Condor® Front Base Support Bar
Condor® Standard Maximum Retention Cradle
1
5/16" - 18 x 3/4" Flat Head Socket Cap Screw
2
1/2" x 10" Front Stop Pin w/ Hitch Pin Clip 11
1
3/8" x 10" Cradle Pin w/ Hitch Pin Clip 16
1
Step1: Using screws (D), attach the Base Bar
(B) to the
required, torque between 16 - 18 ft-lbs)
Step2: Swing the Front Stop containing the
CONDOR® logo into position.
Step3: Place Pin (E) through Main Unit and
Front Stop Channel. The pin may be tight at
first use, push it through using light force and
twisting it in. (Attach Hitch Pin Clip once the pin
has passed all the way through.)
Step4: Place Cradle (C) as shown in the
desired setting and insert Pin (F) through Main
unit and cradle pipe. (Attach Hitch Pin Clip once
the pin has passed all the way through.)
Warning: Only use unit when
properly assembled
Description
(P-Cradle-C)
(P-94254)
(Z118)
(Z101)
Main Unit (A). (3/16 allen wrench
.
Advertisement
Table of Contents

Related Manuals for Condor PS-1500


Summary of Contents for Condor PS-1500
- Page 1 First Read and Understand the Instruction manual and product labels for important safety, set-up and troubleshooting information. If you have problems setting up or using the Condor® Pit-Stop, contact customer service @ 1-815-754-7418 or contact us via e-mail @ www.condor-lift.com. The Condor® Pit-Stop is not intended for use by children.
- Page 2 RECOMMENDED CRADLE SETTINGS: The Condor Pit-Stop/Trailer-Stop is designed so that for every tire/wheel size within the ranges specified a minimum of 2 cradle settings is suitable. **The optimum cradle setting for a specific tire would be the setting that allows the cradle to tilt as far forward as possible without making contact with the unit’s mounting surface or ground.**...
Need help?
Do you have a question about the PS-1500 and is the answer not in the manual?
Questions and answers