Table of Contents
Advertisement
Advertisement
Table of Contents

Related Manuals for Funke Gerber CryoStar I


Summary of Contents for Funke Gerber CryoStar I
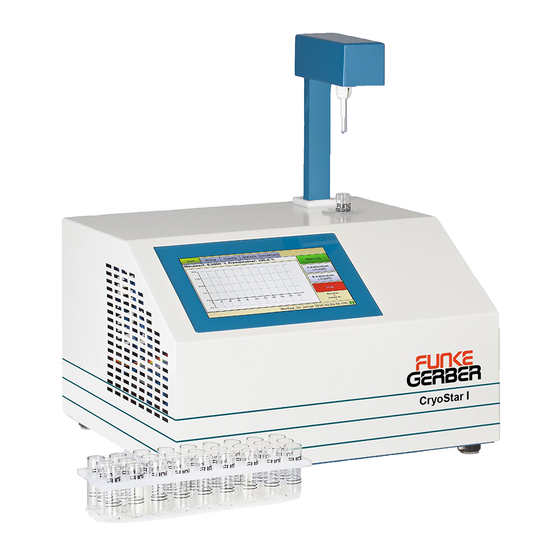
- Page 1 Manual CryoStar I Article Nr. 7150 January 2016...
-
Page 2: Table Of Contents
Table of contents 1.Introduction........................4 1.1.working with the manual.....................4 2.Security precautions......................4 a)For your protection....................4 b)Measures to the working safety................4 3.Installation..........................5 3.1.Unpacking........................5 3.2.Scope of delivery......................5 3.3.Installation location.....................5 3.4.Filling with cooling bath liquid..................6 4.Operation...........................6 4.1.Connections........................7 4.2.Screen.........................8 a)Start...........................8 b)Status........................9 c)History........................9 d)Statistic........................11 e)Setup........................11 f)Help..........................13 g)About........................13 5.Performing measurements....................14 5.1.Insert sample vial......................14 5.2.Start measurement....................14... - Page 3 d)Agitator error ......................22 10.Guarantee conditions.....................23 10.1.Guarantee period....................23 10.2.Guarantee terms.....................23 11.Specification........................23 12.Appendix........................24 12.1.Principle of the freezing point determination............24 a)Fixed time........................25 b)Plateau search......................25 c)Maximum search.....................25 13.CE..........................26...
-
Page 4: Introduction
1. Introduction 1.1. working with the manual Field Interactive fields on the touch screen are marked like the example on the left Special hints are marked fat. 2. Security precautions For your protection The device must not be used in hazardous environments; it is not gas-tight (danger from the formation of sparks, corrosion due to the entry of gases) Always adhere to hazard warnings and safety tips when using... -
Page 5: Installation
3.2. Scope of delivery The following parts are included in the scope of delivery: CryoStar I Mains cable 1 bottle of cooling bath liquid(500 ml) 1 bottle of calibration solution A(250 ml) -
Page 6: Filling With Cooling Bath Liquid
3.4. Filling with cooling bath liquid There is a holder for the cooling bath liquid container on the back. Fill up the cooling bath liquid container bevor turning on the machine for the first time up to the MAX marking. Insert the container into the holder and insert both tubes into the container. -
Page 7: Connections
Up-count down-count numbers For entering numbers a virtual keypad. Enterings have to be accomplished always with ↵ 4.1. Connections 1) USB B port for connections with a PC The device is setup as an serial device. 2) USB A port for USB-mass storage USB-Sticks formatted preferably with FAT file system can connected. -
Page 8: Screen
4.2. Screen Start The Start screen shows all relevant informations for measurements or calibrations. Measurements or calibration can started and stopped. 1. Measure: start a new measurement, see 5. A Calibration: start an A-calibration, see 6.2. b), the selected calibration solutions is shown Calibration: start a B-calibration, see 6.2. -
Page 9: B)Status
Status The Status screen shows actual parameters and possible problems of the device. If there was an error while measuring, it is shown here. Error codes, error messages and possible solutions are available in 9.. The status-area on the right shows the state of several components. They all should be green. - Page 10 Column Name Description Mode kind of measurement. The following abbreviation are used Measure Acal A-Calibration Bcal B-Calibration Pre-Calibration Date The date of the measurement User. The set user The sequentially id of the measurement Value/ The value and the unit of the measurement Unit Parameter For the different plateau-criteria, see 12.1 for example:...
-
Page 11: D)Statistic
Statistic The Statistic screen is for fast comparison of the last 10 measurements. By selection single cells values can be compared and statistic value are calculated. Setup On the Setup screen are all parameters, the can be changed by the user. On the left is the navigation area, on the right the parameters. - Page 12 Common: Mode can be changed to Celsius, Osmol, Hortvet or alcohol mode. The • base value for added water in Celsius mode, the user and the id can be changed. Temperature: The temperature of the cooling bath and the beat temperature can be •...
-
Page 13: F)Help
Language: The language can be chosen from several languages. • System: Date and time can be changed. The cooling bath pump can be tested, • history database can be cleared and updates can be installed. technical: all technical parameters, that user normally do not need to change. If •... -
Page 14: Performing Measurements
5. Performing measurements 5.1. Insert sample vial The milk sample to be measured is pipetted into a sample vial. The sample quantity must be between 2.0 ml and 2.5 ml, preferably 2.2 ml. The sample vial is placed at the measuring point. -
Page 15: Calibration
1. The parameters user probe date 4/20/15 9:32 AM mode measure value -0.575 °C [0.0 %] plateau S[0.4:22] 2. The measured values: 33.4049 33.0357 32.5181 31.7487 aso. First column is time in seconds, second is temperature in °C. Attention: You can still export the measurement in history mode, if no USB-stick was present while measuring. -
Page 16: Perform Calibration
6.2. Perform calibration Adjust the machine to the calibration standard The machine can be adjusted to different calibration standards (see 4.2. e). A-calibration a) Pipetting 3 sample vials are each pipetted with 2.5 ml of the “A” calibration liquid. b) Measurement with calibration liquid “A” Put sample vial with calibration liquid “a”... -
Page 17: Maintenance
7. Maintenance 7.1. Replacing the thermistor Proceed as follows to replace the thermistor: Remove the blue measuring head cover. Undo the Phillips screw on the rear side of • the measuring head for this. The cover can be lifted off afterwards. There is a hole on each side of the bottom part of the measuring head. -
Page 18: Weee Notice
8. WEEE Notice The WEEE (Waste Electrical and Electronic Equipment) Directive, which was adopted by European legislation on February 13, 2003, has led to a major reconsideration of the disposal of electrical and electronic equipment. The purpose of this directive is primarily to avoid WEEE, i.e. electrical and electronic waste, and also to promote the reuse, recycling and other forms of continuing use of this type of waste in order to reduce waste quantities. -
Page 19: Error Messages
9. Error messages 9.1. Error codes Error code Description error lift: end position not reached, please check uncalibrated or defective thermistor error on calibration: please check solution frozen too early plateau not found not frozen cooling system not ready yet communication error error lift: end position not reached, please check When starting a measurement or calibration, the device tries to move the lift at... -
Page 20: D)Frozen Too Early
frozen too early The state of the sample is unstable when it is below its freezing point. It can therefore happen that the sample freezes due to an unintentional influence or on its own before the device triggers freezing. There are many possible reasons for this. If stirring is too strong or if the stirring rod is grinding against something, jolting can occur and trigger freezing. -
Page 21: H)Communication Error
communication error The connection to the measurement board is broken. This could caused by a defective cable or a defective measurement board. Both should be checked. 9.2. Detection of errors during use Most of the errors made during use of freezing point determination equipment are miscalibrations. -
Page 22: C)Defective Thermistor
Defective thermistor This is the most frequently occurring error. There are two possible causes: 1. The thermistor is (has been) broken off: This can be recognised by the display constantly, without any change, showing a negative value. 2. The glass shell of the thermistor is showing hairline cracks and is leaky: This manifests itself with extremely unstable measuring behaviour. -
Page 23: Guarantee Conditions
Guarantee conditions 10.1. Guarantee period The guarantee period is 24 months from the date of invoice. 10.2. Guarantee terms Replacement parts will be exchanged at no cost during this period. Other costs for working time, transport etc. are not covered by the guarantee. Specification Measurement range 0,0000 °C bis -1,5000 °C... -
Page 24: Appendix
Appendix 12.1. Principle of the freezing point determination The freezing point is the temperature at which the solid phase and the liquid phase of a substance or mixture of substances are present simultaneously and are in equilibrium. The best suitable method for determining the freezing point has proved to be cooling down the sample and then triggering the freezing. -
Page 25: A)Fixed Time
Fixed time Here, there is a fixed waiting time (freely configurable from 20 to 200 seconds) after triggering the freezing. After this time, the measured value has set itself to a certain temperature which is then output as the freezing point value. Advantage: relatively high sample throughput Drawback: low repeatability for strongly fluctuating fat contents. - Page 26 EC Machines Directive in its design and construction and in the configuration put on the market by us. This declaration is invalid if the machine is modified without our agreement. Machine description: CryoStar I Machine type: Gefrierpunktbestimmungsgerät Machine No.
Need help?
Do you have a question about the CryoStar I and is the answer not in the manual?
Questions and answers