Table of Contents
Advertisement
Quick Links
Advertisement
Table of Contents

Subscribe to Our Youtube Channel
Related Manuals for Qomo QIT1455


Summary of Contents for Qomo QIT1455
- Page 1 Interactive Touch Screen User Manual V1.0 www.qomo.com...
-
Page 2: Table Of Contents
Content Safety Instruction ....................................1 Installation......................................3 Bearing ......................................3 Wall-mounting ....................................3 OPS Installation .................................... 5 Basic Operation ....................................6 Power on ...................................... 6 Power off ..................................... 6 Control Panel ....................................... 6 Panel Interface ..................................... 7 Remote Control....................................9 Remote Control Area................................... -
Page 3: Safety Instruction
Safety Instruction For your safety, please read the following instruction before you use the product. Serious injury or property loss may be caused by improper operations. Do not try to repair the product without guidance. Placement ⚫ Do not place the unit on an unstable cart, stand, tripod, racket, table, or shelf. ⚫... - Page 4 ⚫ Normal operating temperature is 5 ~ 40℃. Humidity ⚫ Do not expose machine in rain, damp or place near water. ⚫ Ensure the indoor drying, cool. Ventilation ⚫ Keep the ventilation openings clear. ⚫ Ensure that the unit has enough space for ventilation around: left, right and back >10cm, top> 20cm. Earphone ⚫...
-
Page 5: Installation
Installation Bearing If the product is I nstalled in a wall-mounted way, the bearing capacity of the surface for installation must be at least four times of the weight of the product. If the surface for installation is a wall or the ceiling of a building, the surface must be made of solid bricks, concrete or other materials with equal intensity. - Page 6 Insert wall plugs into the mounting holes. Attach the mounting arms to the Push the self-tapping screws through the back of screen with the screws. bracket into the wall plugs and tighten the screws. Note: The horizontal and vertical distance of mounting holes on the back of screen must be within the required distance of bracket.
-
Page 7: Ops Installation
OPS Installation Note: The OPS does not support hot-plugging. Please insert the plug of the OPS after the interactive panel is disconnected from the power. Install the OPS by the following steps: 1. Insert the OPS into the special slot on the rear of the interactive panel. 2. -
Page 8: Basic Operation
Basic Operation Power on Power the interactive touch screen with the 100V-240V 50Hz/60Hz AC power supply. Connect the panel to the power supply. Press the rocker switch (on the bottom left in the rear of the panel) to enter standby mode. The power indicator turns red. ... -
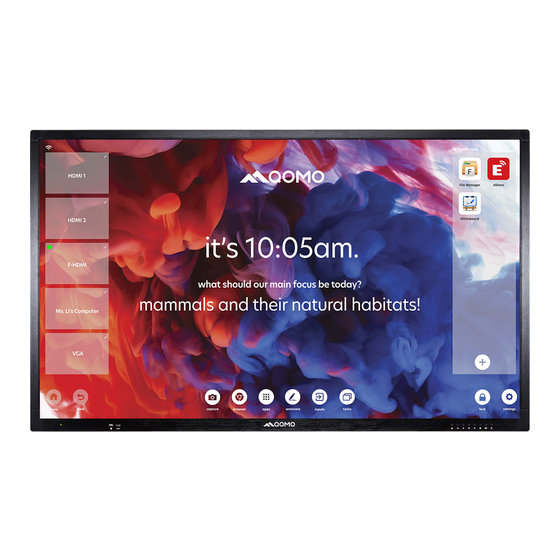
Page 9: Panel Interface
Item Icon Function Description Brightness sensor: Auto adjust brightness according to the enviroment Remote control receiving module Android/PC USB port*2 auto switch (Do not switch the signal source if the usb flash drive is writing.) Touch Port, designated for Front HDMI port HDMI port used to connect an external display device Front Speakers Magnetic pen holder... -
Page 11: Remote Control
Remote Control... - Page 12 Remote Control Buttons Function Description 1 POWER Power supply switch, Turn on and off the AC power 2 MUTE Mute ON/OFF for the sound 3 P-Mode Press Button to open Menu Picture Mode page 4 Sound Press Button to open Menu Sound Mode page 5 Zoom In USB Mode, Press button to Enlarge picture size 6 Sleep...
-
Page 13: Remote Control Area
Remote Control Area The effective receiving area is about 3 meters with 30° angle from vertical point to the left and right. And the effective receiving area is about 5 meters from the front of device. Note that the remote control signal receiver locates at the position of power indicator. -
Page 14: Connecting And Setting
Connecting and Setting For safety, please do not connect any power supply before the external devices setup. 1. External Computer and Touch Connecting Audio IN VGA IN USB-Touch 1) Connect a VGA cable (15 pin) between the VGA and external PC. Connect an earphone cable between the PC and audio at the same time. -
Page 15: Av Connecting
2. AV Connecting ⚫ HDMI IN 1) Connect a HDMI cable with the device with HDMI. 2) Plug the POWER cord and switch it on from the rear panel. 3) Press to turn on the panel. 4) Select Signal source to HDMI source according to the one you connected. 3. -
Page 16: Rs232
4. RS232 1) Connect a serial port cable with the device. 2) Plug the POWER cord and switch it on from the rear panel. 3) After connecting the central control system and unit, you can use some of the function such as power on/off or adjust the volume etc. - Page 17 Sound Mode 55 00 22 00 77 Picture mode 55 00 28 00 7D Set Sleep Timer 55 00 4A 00 9F Aspect 55 00 4C 00 A1 Volume plus(+) 55 00 0C 00 61 Volume plus(-) 55 00 0E 00 63 Channel plus(+) 55 00 10 00 65 Channel plus(-)
- Page 18 Set HUE 55 00 30 00 85 Set Sharpness 55 00 32 00 87 Set Color Temp 55 00 34 00 89 Set Reduction noise 55 00 36 00 8B Set BASS 55 00 3A 00 8F Set Treble 55 00 3C 00 91 Set Balance 55 00 3E 00 93 Set Language(0,1,2,3,,,,)
-
Page 19: Android Home Page
Android Home Page Journey 14 goes with completely new Android Interface for customization and quick-access. Signal Source Status and Long press corresponding Signal Source Switch App to delete it from home screen Add frequently- The side menu used apps on System Help the home screen Capture: Screen Shot. -
Page 20: Bottom-Up Toolbar
Bottom-up Toolbar The toolbar can be invoked in any signal source interface. Swipe up from the bottom of screen and it will appear. Buttons Functions Return to Android home page Return to previous interface Screen Shot Built-in browser All applications interface Quick to annotate Change signal source channel Switch or end the running programs... -
Page 21: Signal Source Selection
Signal Source Selection There are three ways to select a signal source to display. ⚫ Swipe your finger up from the bottom edge to bring up a toolbar then click ⚫ Press SOURCE button on the remote control. ⚫ Press button on the front control panel. -
Page 22: Android Settings
Android Settings Common Setting Click setting icon on toolbar to enter Android setting interface. Common function: Click Common function to set Sound, Brightness, Eye Protection, Startup and Shutdown, Screen Lock setting,Multi-user, Wake On Lan (WOL), HDMI output format, Wallpaper and Screen Saver. ... -
Page 23: Network Setting
Eye Protection: Enable eye protection function. Brightness turns dim when you touch the screen for 0.5s and return to the previous status when your finger removes from the screen for 3s. Startup and Shutdown: Click to set on/off time. ... -
Page 24: Application Setting
Application Setting Application: Select corresponding apps to uninstall it. Note that you can’t uninstall apps burnt-into the firmware. Storage Setting Click Storage to check internal storage and USB storage. Click eject icon to safely remove the USB flash drive. Date Setting Date: Where you can change time format, time zone and etc. -
Page 25: Language Setting
Language Setting Language: Where you can change the system or keyboard language. Factory Reset Reset: Erase all information and downloaded apps. You can’t recover it. About Device About Device: Where you can check Android Firmware Version “Build number”. -
Page 26: Built-In Pc Operation
Built-in PC Operation 1. Select PC signal source to enter PC interface. The following are three ways to select a signal source channel. Swipe your finger up from the bottom edge to bring up a toolbar then click input. ... -
Page 27: Menu
Menu Click menu icon on the bottom-up toolbar. Menu pops up as follows. Under menu, you can set sound and etc. Here provides some for quick-access. - Page 28 Whiteboard Annotation White board is an annotation software pre installed in the Journey panels. It features high speed annotation without any delay. Whiteboard Main Interface Whiteboard Desktop Mode Switch between whiteboard main Pen Eraser Select Undo Redo More Hide Clear Slide Management interface and desktop mode...
-
Page 29: Included Accessories
Included Accessories Picture Name Quantity Remote control Magnetic Pen Pointer Power cable HDMI cable USB cable (A-B) Bracket WIFI Antenna Warranty card... -
Page 30: Troubleshooting
No image is displayed or the Modify the color settings. ⚫ image is black and white. Check the color system. This is the general user manual for all QOMO interactive touch screens. Some details may be different from the actual product.
Need help?
Do you have a question about the QIT1455 and is the answer not in the manual?
Questions and answers