
Related Manuals for Folger Technologies 2020 Prusa i3


Summary of Contents for Folger Technologies 2020 Prusa i3
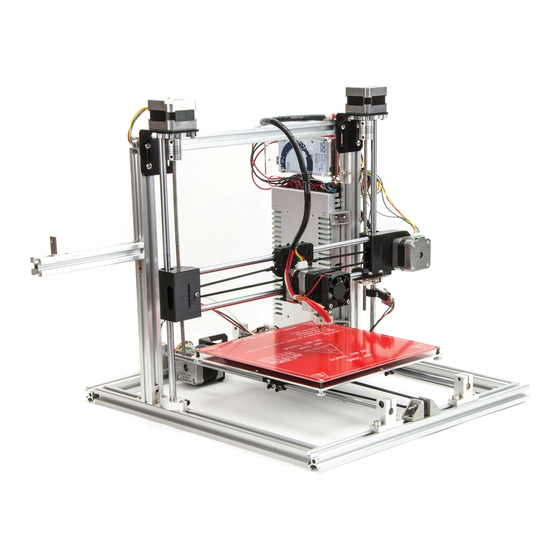
- Page 1 FOLGER TECHNOLOGIES, LLC 2020 i3 – 3D Printer Kit BUILD GUIDE Rev. A Thank you for your purchase! http://www.folgertech.com 2020 Prusa i3 | Build Guide Page: 1 / 38...
- Page 2 Step 2: Get out your calipers or ruler and separate screws into different piles based on size (believe us, it makes things much easier). Step 3: Assemble Bottom Half Of Main Frame: http://www.folgertech.com 2020 Prusa i3 | Build Guide Page: 2 / 38...
- Page 3 SK8's should be facing outwards to make it easier to tighten them later. 5. Take the other 375MM 2020 Beam and place it in front of you, we are going to attach the motor mount, and the remaining 2 SK8's. http://www.folgertech.com 2020 Prusa i3 | Build Guide Page: 3 / 38...
- Page 4 Tighten the set screws to lock them in place. Use the below pictures as reference. Note: The motor mount is not pictured, but should be attached to the rear 2020 beam. Step 4: Attach Y Carriage Rails & Bearings: http://www.folgertech.com 2020 Prusa i3 | Build Guide Page: 4 / 38...
- Page 5 LM8UU which can cause bearings to fall out. 4. Similar to step 3 slide the remaining (1) 395MM Chrome rod into the left side SK8 and slide (1) LM8UU Bearing onto the rod. http://www.folgertech.com 2020 Prusa i3 | Build Guide Page: 5 / 38...
- Page 6 3. Now attach the remaining (1) 375MM 2020 Beam to the top of the (2) vertical 295MM 2020 Beams using (2) 2020 L Mounts w/ Set Screws to secure them in place. http://www.folgertech.com 2020 Prusa i3 | Build Guide Page: 6 / 38...
- Page 7 Printed Belt Carriage to the Aluminum Bed Mount using the pre drilled holes. Note: the opening on the Printed Belt Carriage is facing the side with 2 bearing holders. http://www.folgertech.com 2020 Prusa i3 | Build Guide Page: 7 / 38...
- Page 8 Parts Needed: (1) MK2B Heated Bed, (1) Thermistor, (1) Black 16 Gauge Wire, (1) • Red 16 Gauge Wire. Special Tools Needed: Soldering Iron, Solder, Kapton Tape • 1. Prepare your MK2B Heated Bed to be soldered. http://www.folgertech.com 2020 Prusa i3 | Build Guide Page: 8 / 38...
- Page 9 12v and will not be able to reach max bed temp. 5. Solder the stripped and soldered end of the Red 16 Gauge Wire to contact #1. http://www.folgertech.com 2020 Prusa i3 | Build Guide Page: 9 / 38...
- Page 10 Aluminum Bed Plate > Secure with (1) Thumb Screw. Note: wires should be coming out the back of the printer. Thumb screws just need to be hand tight for now and can be adjusted later. http://www.folgertech.com 2020 Prusa i3 | Build Guide Page: 10 / 38...
- Page 11 3. Mount the (1) 4.8 Motor to the Metal Motor Mount that we attached to the Bottom Frame Assembly earlier in the build guide using (4) M3x8MM Bolts & (4) M3 Lock Washers. http://www.folgertech.com 2020 Prusa i3 | Build Guide Page: 11 / 38...
- Page 12 Insert (2) LM8UU Bearings into the (1) 3D Printed: Right Side by pressing them firmly. Note: You can use the table to push them into place if more force is required. Insert (1) M5 Nut into the pre cut slot provided. http://www.folgertech.com 2020 Prusa i3 | Build Guide Page: 12 / 38...
- Page 13 Take the (1) 3D Printed: Left Side and Place the 2 Bearings into the spot provided, just like you did with the Right Side. Place the remaining (1) M5 Nut into the spot provided on the (1) 3D Printed: Left Side. http://www.folgertech.com 2020 Prusa i3 | Build Guide Page: 13 / 38...
- Page 14 Zip Ties & Clip the ends off the Zip Ties. Note: Use the table to press the bearings into place if you are having trouble getting them to lock in. http://www.folgertech.com 2020 Prusa i3 | Build Guide Page: 14 / 38...
- Page 15 Side. Push them in so they are snug, we will have to adjust this later. 13.Push the 2 ends of the Chrome Rods on the right into the 2 holes in the 3D Printed: Left Side. http://www.folgertech.com 2020 Prusa i3 | Build Guide Page: 15 / 38...
- Page 16 (but on the opposite side). Trim the extra belt. Note: you want the belt to be tight but not to tight, we can always add a belt spring later to adjust tension. http://www.folgertech.com 2020 Prusa i3 | Build Guide Page: 16 / 38...
- Page 17 Remove the 2 screws from the top of the motor is part of the Extruder Assembly. Using the 2 screws removed in step 1, attach the motor to the X Carriage by screwing it to the 3D Printed Part: Extruder Carriage as pictured. http://www.folgertech.com 2020 Prusa i3 | Build Guide Page: 17 / 38...
- Page 18 Note: Be careful when putting the chrome rod in not to push out the ball bearings. Set this aside for later Step 13: Assemble The Front Pulley Assembly Parts Needed: (2) F623Z Bearings, (1) 623ZZ Bearing • http://www.folgertech.com 2020 Prusa i3 | Build Guide Page: 18 / 38...
- Page 19 Tip the printer back and using the same method used for the X Carriage belt installation we are going to attach the (1) xM GT2 Belt to the Y carriage. http://www.folgertech.com 2020 Prusa i3 | Build Guide Page: 19 / 38...
- Page 20 2020 L Brackets that are securing the top frame to the bottom frame on the front of the printer. Note: These are the set screws directly Below the small motors on the bottom frame. http://www.folgertech.com 2020 Prusa i3 | Build Guide Page: 20 / 38...
- Page 21 Secure them in place by tightening one of the M4 bolts. This is just to give you clearance when attaching the X & Z Assembly. http://www.folgertech.com 2020 Prusa i3 | Build Guide Page: 21 / 38...
- Page 22 Repeat this for both sides. Step 17: Attach the Power Supply. Parts Needed: (1) Power Supply, (2) 2020 Corner Brackets • Hardware Needed: (4) M4X8MM Pan Head Bolts, (x2) M4 T-Nuts • http://www.folgertech.com 2020 Prusa i3 | Build Guide Page: 22 / 38...
- Page 23 (1) M4 T-Nut for the lower screw hole. Note: The holes on the acrylic are differently spaced; if they don't line up try the other side. http://www.folgertech.com 2020 Prusa i3 | Build Guide Page: 23 / 38...
- Page 24 Attach the heat sinks that came with the (4) A4988 Stepper Drivers to the Stepper Drivers by removing the sticky back protector from the bottom of the heat sink and sticking it to the chip on the top of the Stepper Drivers http://www.folgertech.com 2020 Prusa i3 | Build Guide Page: 24 / 38...
- Page 25 Take the white end from all of your Motor Cables and plug one of them into each of the motors so that each motor has a wire attached to it. http://www.folgertech.com 2020 Prusa i3 | Build Guide Page: 25 / 38...
- Page 26 Take the wire from the Y Carriage Motor and plug it in under the 2 (middle) stepper driver. Take the wire from the Z Carriage Assembly (the motor with the 20T Pulley) and plug it in under the 3 (right most) stepper driver. http://www.folgertech.com 2020 Prusa i3 | Build Guide Page: 26 / 38...
- Page 27 Gauge wire into the second hole (-). Tighten down the flat screws to secure the wire in place. Take the red wires from the extruder and strip the ends off to expose a small amount of wire, as pictured. http://www.folgertech.com 2020 Prusa i3 | Build Guide Page: 27 / 38...
- Page 28 Take the Extruder Thermistor and attach it to the ramps board. This thermistor plugs into the pins directly below the left most top Stepper Driver on the far right side of the pin set. http://www.folgertech.com 2020 Prusa i3 | Build Guide Page: 28 / 38...
- Page 29 We are going to attach the Z Axis End Stop. Take (1) End Stop and mount it to (1) 3D Printed End stop using (1) M3X8MM Bolt & (1) M3 Nylock Nut as pictured. Note: This only requires 1 bolt, to the right of the limit switch. http://www.folgertech.com 2020 Prusa i3 | Build Guide Page: 29 / 38...
- Page 30 Attach another End Stop to one of the 3D Printed End Stop Mounts using (2) M3X8MM Bolts and (2) M3 Nylock Nuts. http://www.folgertech.com 2020 Prusa i3 | Build Guide Page: 30 / 38...
- Page 31 End Stop into the 3 row over. Use the picture as a reference. The red wire should be facing up, if plugged in backwards it will short the ramps causing permanent damage. http://www.folgertech.com 2020 Prusa i3 | Build Guide Page: 31 / 38...
- Page 32 We are going to attach the stripped ends of the power supply to contacts #7, #8, and #9 on the power supply. Unscrew the screw http://www.folgertech.com 2020 Prusa i3 | Build Guide Page: 32 / 38...
- Page 33 It should be Red, Black, Red, Black as pictured below. You can then take it and plug it into the ramps board. http://www.folgertech.com 2020 Prusa i3 | Build Guide Page: 33 / 38...
- Page 34 Take 1M of 22 Gauge Black & Red wire and strip a small amount off of each end of the wires. Using a soldering iron attach the wires to the Extruder Fan wires. http://www.folgertech.com 2020 Prusa i3 | Build Guide Page: 34 / 38...
- Page 35 Note: this is our preferred method for wiring the fan. Step 27: Verify your wiring using the below pictures as a reference. http://www.folgertech.com 2020 Prusa i3 | Build Guide Page: 35 / 38...
- Page 36 Remove the bolt from the front left corner of the upper left Z Axis Motor and replace it with (1) Wire Keeper holding it in place by using (1) M3X30MM Bolt and (1) M4 Washer in the empty socket from the removed screw. http://www.folgertech.com 2020 Prusa i3 | Build Guide Page: 36 / 38...
- Page 37 Ramps Board. Note: Ignore the black cable with the extruder wires these pictures were taken after we installed a proximity sensor to test out our upgrade kit. http://www.folgertech.com 2020 Prusa i3 | Build Guide Page: 37 / 38...
- Page 38 We value your feedback and we want to make sure this guide is as easy to follow as possible! Thank you for your continued business and support! - The Folger Tech Team http://www.folgertech.com 2020 Prusa i3 | Build Guide Page: 38 / 38...
Need help?
Do you have a question about the 2020 Prusa i3 and is the answer not in the manual?
Questions and answers