Advertisement
APEMAN C860 Detailed Operation Instruction
Part 1 - Something about Installation:................................................................... 1
Option1 Official installation video on the product page.................................... 1
Option2 Installation video shared by our customer on Q&A page....................1
Part 2 - Something Need to Prepare before Using:..............................................2
A: How to format SD card on computer:.................................................................2
B: How to format SD card on the camera:.............................................................. 3
Part 3 - Something about the Settings:...................................................................5
1. Instruction of 4 buttons of the camera:.............................................................. 5
3. How to switch mode of the camera?................................................................... 8
4. How to delete a video on the camera:.................................................................9
5. How to delete a locked video on the camera:.................................................. 11
Part 4 - Warm Tips:..................................................................................................12
Contents
Advertisement
Table of Contents

Related Manuals for Apeman C860


Summary of Contents for Apeman C860
-
Page 1: Table Of Contents
APEMAN C860 Detailed Operation Instruction Contents Part 1 - Something about Installation:..............1 Option1 Official installation video on the product page........1 Option2 Installation video shared by our customer on Q&A page....1 Part 2 - Something Need to Prepare before Using:..........2 A: How to format SD card on computer:..............2... -
Page 2: Part 1 - Something About Installation
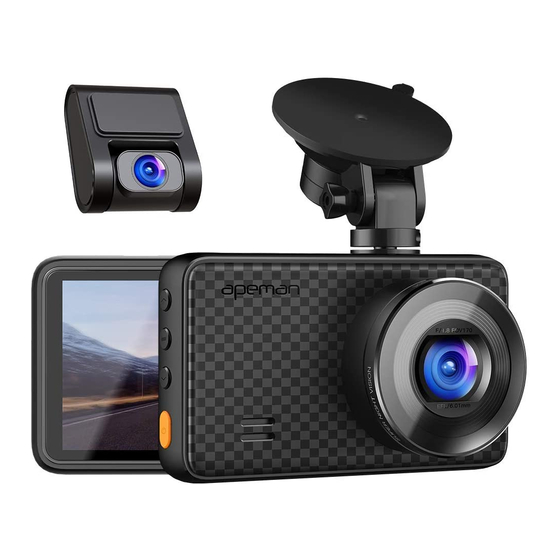
Part 1 - Something about Installation: The installation will be easy: a. Please install the front cam to the front window by suction. b. Provide power to the front cam by car charger into the cigarette lighter of your car. c. -
Page 3: Option2 Installation Video Shared By Our Customer On Q&A Page
Option 2 Installation video shared by our customer on Q&A page: Part 2 - Something need to Prepare before Using: a. Please charge the camera for about 2 hours in your car by the original car charger before use. b. This camera supports a class 10 Max128GB microSD card. Please set the card to FAT32 format on the computer and format it again on the camera before use. -
Page 4: B: How To Format Sd Card On The Camera
③ Please click “FAT32” to finish the format. B: How to format SD card on the camera: ①Turn on camera, press to stop the recording first if the camera is recording. - Page 5 ②Press to enter setting page. ③Press to enter system setting page. ④Press go trough the system setting page to reach "Format the Micro SD Card". ⑤Press to enter the menu. Press to reach “OK” and then press to finish formatting on the camera.
-
Page 6: Part 3 - Something About The Settings
Part 3 - Something about the settings: 1. Instruction of 4 buttons of the camera: button (up forward the menu); button (lock the video if you press it during recording). Lock button; button (return to previous menu) Menu Back button; button Down Audio... - Page 7 ②Press to enter Camera setting. (While you enter Camera setting, its submenu will become yellow, such as video resolution.) All settings in the Camera Settings menu...
- Page 8 Example: How to set Video Resolution ①Press to enter Video Resolution setting. ②Press to reach the setting you need, press to confirm. Then press to return to previous page. When finished the Camera settings, press to back the previous page. Press to switch to System setting and press to enter.
-
Page 9: How To Switch Mode Of The Camera
All settings in the System Settings menu 3. How to switch mode of the camera? ①Press to stop recording first if the camera is recording. ②Long press to enter Photo Mode (short press can take a picture). -
Page 10: How To Delete A Video On The Camera
③Long press again to enter Review Files Mode to review the video; at the last, long press to back to Recording Mode. 4. How to delete a video on the camera: ①Press to reach “VIDEO” and then press to confirm to enter. ②Press button to go through the video, press to enter... - Page 11 ③Long press and you can see “Delete Current File”. ④Press to enter “Delete Current File”. Press to reach “OK” and then press to delete that video.
-
Page 12: How To Delete A Locked Video On The Camera
5. How to delete a locked video on the camera: ①Go to Review Files Mode, press to confirm to enter “EVENT” (all the locked video are saved in this folder). ②Press button to go through the video and then press to enter and play that video. -
Page 13: Part 4 - Warm Tips
⑤ Press , you can see “Delete Current File”. Press to reach “OK” and then press to delete that video. Part 4 - Warm Tips: 1. Please set below Basic Settings: To ensure smooth video recording, please kindly turn off “motion detection”... - Page 14 parking guard are on during driving, it may cause "EMR" and produce many small useless videos for there may be many shake during driving. It will record and lock a short video when a shake happen and then turn off; and it will turn on and record a short video when there has another shake and then turn off...Therefore, we suggest to turn them off while during.
- Page 15 Hardwire the camera by a micro usb hardwire kit can solve this issue. 3. Red light of the camera means the camera is charging, and blue light flashing means the camera is recording. 4. If your camera only records for a while and it keeps turning on and turning off, Please check if the microSD card is full.
- Page 16 If the camera still cannot be charged successfully, please do not hesitate to email us for help, we will sure here provide you a satisfied solution based on your demand. Any advice would be appreciated! APEMAN official email: kt.support@apemans.com...
Need help?
Do you have a question about the C860 and is the answer not in the manual?
Questions and answers
I have the Apeman 860 dashcam withe the 4 buttons on the right front side. I have lost my manual and forgot how to set the day/date/year. How do I do this?