Table of Contents
Advertisement
Available languages
Available languages
•
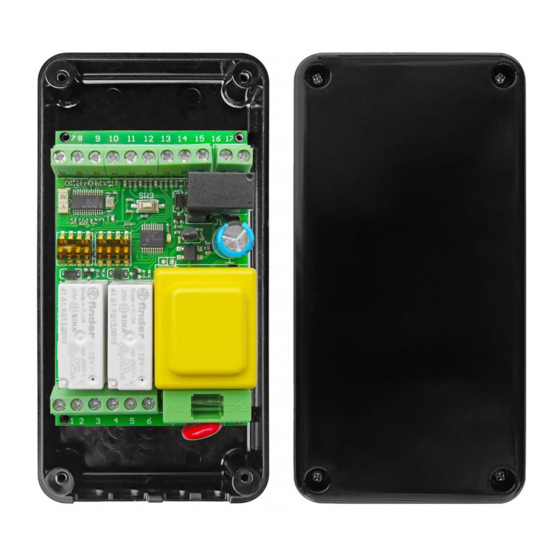
Centrale monofase per 1 motore 230 Vac.
•
Cancelli scorrevoli, porte basculanti, serrande.
•
3 velocità di rallentamento, apprendimento tempi automatico,
4 modi di funzionamento, gestione codici radio integrato.
START-S1XL v2
230 Vac
230 Vac
LAMPEGGIANTE
Com MOT / LAMP
MOT APRE
MOT CHIUDE
+ Antenna
Comune e calza ant.
12 Vac
12 Vac / + 12Vdc
- 12Vdc, Comune
CHIUDE / STOP
FOTO / ANEMOMETRO
APRE / START
BUS-DATI
Contatto pulito
Contatto pulito
Alimentazione ACCESSORI
JUMPER J1
AC - 12 Vac
mors 9-10
-1-
-2-
-3-
-4-
-5-
-6-
-7-
-8-
-9-
Selezione AC/DC tramite JUMPER J1
-10-
Vedi riquadro sotto-riportato
-11-
-12-
-13-
-14-
-15-
N.A.
-16-
Per passare da spia fi ssa a lampeggiante e vicevera, occorre
semplicemente tenere premuto il pulsante P, durante la manovra di
-17-
chiusura, fi no a quando il Led non lampeggia.
JUMPER J1
DC - 12 Vdc
mors 10-11
Per una corretta installazione
del lampeggiante fare riferimento al Par. 1.2
COM
M
AP
CH
DIP 3B
DIP 3B
OFF
ON
N.A.
N.C.
Versione Radio Integrata
Versione Radio Integrata
Fotocellule attive
solo in chiusura
TX
RX
Alim
Alim
OUT
100%
ITAL Y
2002/95/EC
Advertisement
Chapters
Table of Contents

Related Manuals for EB TECHNOLOGY START-S1XL v2


Summary of Contents for EB TECHNOLOGY START-S1XL v2
- Page 1 Centrale monofase per 1 motore 230 Vac. • Cancelli scorrevoli, porte basculanti, serrande. • 3 velocità di rallentamento, apprendimento tempi automatico, 4 modi di funzionamento, gestione codici radio integrato. START-S1XL v2 Versione Radio Integrata Versione Radio Integrata 230 Vac 230 Vac LAMPEGGIANTE...
-
Page 2: Table Of Contents
START-S1XL Manuale Tecnico Precauzioni di sicurezza Premessa Questo manuale fornisce tutte le informazioni specifi che In caso di utilizzo scorretto, di riparazioni o modi- necessarie alla conoscenza ed al corretto utilizzo dell’ap- fi che apportate personalmente decade qualsiasi parecchiatura in Vostro possesso. garanzia. -
Page 3: Installazione
START-S1XL Manuale tecnico Installazione Schema della centrale Ponticellare se non usati La centralina è studiata per collegare motori con finecorsa mec canici a bordo. Se la centralina viene utilizzata per automatizzare una tapparella o tenda, DIP 3-B e DIP 4-B vanno lasciati su OFF. FOTOCELLULA 11 - 13: Se il motore sta chiudendo, inverte il moto. -
Page 4: Modalità Di Funzionamento
START-S1XL Manuale Tecnico Collegamento del LAMPEGGIANTE 230 Vac Il lampeggiante NON deve essere provvisto di scheda di intermittenza, in quanto il lampeggio 16 17 vieni dato dal relè spia. Quindi seguire lo schema riportato a fi anco. Se si prevede di utilizzare una spia, non si può... -
Page 5: Tipologie E Logiche Di Funzionamento
START-S1XL Manuale Tecnico Tipologie e logiche di funzionamento Di seguito tutte le situazioni di funzionamento divise per modalità, si consiglia di leggere attentamente e quindi di impostare la modalità scelta e successivamente tramite il DIP B selezionare la logica scelta, come riportato nelle pagine seguenti. - Page 6 START-S1XL Manuale Tecnico Modalità NORMALE: A / B - Modalità UOMO PRESENTE 1° tasto del radiocomando 2° tasto del radiocomando APRE CHIUDE 10 11 12 13 14 15 Pulsante sali/scendi Impostare la situazione: senza chiusura automatica Radiocomando 1° tasto APRE-STOP-APRE-STOP... 2°...
-
Page 7: Modalità Normale: C / D
START-S1XL Manuale Tecnico Modalità NORMALE: C / D 1° tasto del radiocomando START passo-passo 10 11 12 13 14 15 Pulsante passo/passo Pulsante ALT (nc) Impostare la situazione: senza chiusura automatica Radiocomando 1° tasto APRE-STOP-CHIUDE-STOP... 2° tasto CHIUDE-STOP-CHIUDE-STOP... DIP A DIP B DIP 3-B ON Morsetti... -
Page 8: Modalità Anemometro: An / An-1 2.5 Modalità Acc
START-S1XL Manuale Tecnico Modalità ANEMOMETRO: AN / AN-1 AN AN-1 1° tasto del radiocomando 2° tasto del radiocomando START passo-passo CHIUDE 1° tasto del radiocomando APRE 10 11 12 13 14 15 10 11 12 13 14 15 ANEMOMETRO ANEMOMETRO Pulsante passo/passo Pulsante... - Page 9 START-S1XL Manuale Tecnico Modalità APERTURA CHIUSURA CENTRALIZZATA (ACC) Impostare la situazione: Radiocomando 1° tasto APRE-STOP-CHIUDE-STOP-APRE... DIP A DIP B 2° tasto CHIUDE-STOP-CHIUDE-STOP... DIP 3-B OFF Morsetti Il Comando CHIUDE 11 - 14 uguale a 1° tasto radiocomando (mors. 12) consente solo 11 - 12 Verifi care impostazione DIP3B la chiusura, se ripremuto...
-
Page 10: Cancellazione Memoria
START-S1XL Manuale Tecnico Radiocomandi: Cancellazione memoria La centrale dispone di un PULSANTE P1 per le varie operazioni tra cui la cancellazione di tutti i codici dei radiocomandi memorizzati nella centrale. Per fare questa operazione seguire i 2 passaggi: Le uscite della centrale devono essere disattivate, quindi nessun contatto attivo, eventuali luci collegate devono essere spente. -
Page 11: Apprendimento Dei Codici
START-S1XL Manuale Tecnico Radiocomandi: L’apprendimento dei codici La centrale dispone di un PULSANTE P1 per la programmazione dei tempi e per l’apprendimento dei codici dei radiocomandi. Se per l’apprendimento si utilizza un radiocomando vergine a codice fi sso tipo lo SMILE-C, assicurarsi che abbia un codice su tutti i pulsanti, altrimenti provvedere con l’autogenerazione del codice. -
Page 12: Programmazione
START-S1XL Manuale Tecnico Programmazione Programmazione tempi La centralina è già impostata di default con un tempo di lavoro di 60 secondi e 20 di pausa. L’operazione di impostazione dei tempi serve solamente nei casi in cui si voglia stabilire un ciclo di apertura-chiusura con tempi personalizzati. -
Page 13: Collegamento Al Bus-Dati
START-S1XL Manuale Tecnico Collegamento al BUS-DATI Questa centralina dispone della porta bidirezionale bus dati con PROTOCOLLO EB. Ciò signifi ca che può essere comandata da un dispositivo MASTER di stessa categoria, oppure da una tastiera di comando. Per inserire la centralina su una linea bus, è suffi ciente dare un comando di attivazione o disattivazione luci, dopodichè... -
Page 14: Dichiarazione Ce Di Conformità
START-S1XL Manuale Tecnico Dichiarazione CE di conformità (secondo Direttiva 2006/42/CE, Allegato II, parte B) Azienda: EB TECHNOLOGY SRL Indirizzo: Corso Sempione 172/5 Il sottoscritto Ernestino Bandera , 21052 Busto Arsizio VA Italia Amministratore Nome prodotto: START-S1XL centrale elettronica DICHIARA CHE: di comando per tapparelle IL PRODOTTO E’... - Page 15 Sono state eseguite tutte le necessarie prove All necessary radiofrequency tests have been di radiofrequenza performed Toutes les essais de radiofréquence néces- saires ont été effectués EB TECHNOLOGY SRL EB TECHNOLOGY SRL EB TECHNOLOGY SRL Corso Sempione 172/5 Corso Sempione 172/5 Corso Sempione 172/5...
- Page 16 EB TECHNOLOGY S.r.l. NOLOGO S.r.l. Corso Sempione 172/5, via Cesare Cantù 26, 21052 Busto Arsizio VA Italy 20020 Villa Cortese MI Italy tel. +39 0331.430457 fax.+39 0331.432496 posta@ebtechnology.it info@nologo.info www.ebtechnology.it www.nologo.info...
- Page 17 • 230Vac mono-phase control unit. • For rolling shutters and awainings. • 433.92 Mhz radio receiver included. • Standard or “Man present“ or Anemometer or centralized Open/Close START-S1XL v2 Operating Guide 230 Vac Input 230 Vac Input 230 Vac LAMP...
- Page 18 START-S1XL Operating Guide Foreword Safety precautions This manual provides all the specific information Using the unit improperly and performing repairs or you need to familiarize yourself with and correctly modifications personally will void the warranty. operate your unit. Read it very carefully when you Nologo declines any responsibility for damages purchase the instrument and consult it whenever due to inappropriate use of the product and due you have doubts regarding use and before perfor- to any use other than the use the product was de- ming any maintenance operations.
-
Page 19: Installation And Scheme Of The Control Unit
START-S1XL Operating Guide Installation and scheme of the control unit Make a link if not used. The control unit has been designed for mechanical limit switches. 230 Vac signal light without flashing light or for a standard ligh. If the control unit is installed in rolling shutters or awainings, DIP 3B and DIP 4B should be in OFF position. PHOTO-BEAMS 11 - 13: If the motor is not closing, it inverts the direction (NC input). ANEMOMETER 11 - 13: CLOSE and STOP the automation for 3 minutes (NC input) JUMPER J1 AC - 12 Vac... -
Page 20: Functions And Adjustments
START-S1XL Operating Guide Functions and adjustments STANDARD version Turn off the control unit, take out the 230V tension. 230 Vac Connect the control unit START S1XL after a while again LED L1 The LED L1 remains lit. within 5 seconds: Press and release the button P1 LED L1 fl ashes blink then it lit on, LED L1 STANDARD VERSION activated. fl ashes wait LED L1 turns normal fl ashes ANEMOMETER version Turn off the control unit, take out the 230V tension. - Page 21 START-S1XL Operating Guide MAN PRESENT version Turn off the control unit, take out the 230V tension. 230 Vac Connect the control unit START S1XL after a while again LED L1 The LED L1 remains lit. within 5 seconds: Press and release the button P1 LED L1 LED L1 fl ashes blink then it lit on: fl ashes Press and release the button P1 in 5 seconds LED L1 fl ashes twice then it lit on, LED L1 2 fl ashes...
- Page 22 START-S1XL Operating Guide Modes of operation Here you can find all functions, in the next pages you can program with DIPB: STANDARD VERSION START S1 Command OPEN-STOP-OPEN with the 1st Button of the remote control. OPEN-STOP-CLOSE with the 2nd button of the remote control, no automatic reclosing. Like A but with automatic reclosing. Command STEP BY STEP (open-stop-close-stop) with remote control and button, security but- ton ALT, without automatic reclosing Same as C but with automatic reclosing. “MAN PRESENT” VERSION START S1UP OPEN 1st command, 2nd command CLOSE via remote controls or via buttons. The signal will be transmitted until the button won’t be released.
- Page 23 START-S1XL Operating Guide program: no automatic reclosing 1° ch TX OPEN-STOP-OPEN-STOP... 2° ch TX CLOSE-STOP-CLOSE-STOP... 11 - 14 same as 1st ch TX DIP A DIP B 11 - 12 same as 2nd ch TX DIP 3-B OFF 11 - 13 photo-cell inverts when closing make a link when not use DIP 4-B OFF...
- Page 24 START-S1XL Operating Guide program: “Man present” function 1° ch TX OPEN “ Man Present” In questa versione non 2° ch TX CLOSE “Man Present” è disponibile la chiusura 11 - 14 same as 1st ch TX automatica! 11 - 12 same as 2nd ch TX 11 - 13 If the photo-cell has the Man Present version...
- Page 25 START-S1XL Manuale tecnico program: 1° ch TX OPEN-STOP-CLOSE-STOP... 2° ch TX CLOSE-STOP-CLOSE-STOP... DIP A DIP B 11 - 14 same as 1st ch TX 11 - 12 Check setting DIP3B DIP 3-B OFF 11 - 13 OPEN command only The CLOSE Command (does not STOP) (terminal 12) only allows 11 - 15...
-
Page 26: Cancellation Of The Memory
START-S1XL Operating Guide Remote control: Cancellation of the memory The control unit has a P1 button for different operation (cancellation of the codes,too). To cancel the codes make as follow: - The outputs should be deactivated, no contacts available, the lights should be turned off. THIS OPERATION CAN BE DONE ONLy wHEN THE GATES IS CLOSED Press and keep pressed the BUTTON P1, LED L1 will lit on. - Page 27 START-S1XL Operating Guide Remote control: code memorisation The control unit has a BUTTON P1 to program the working time and the memorization of the codes. If you memorize a SMILE-C, make sure that all buttons have a code otherwise you can create a code. In case you want to memorize a rolling code remote control (for ex.SMILE-H) you don’t need to create a code. The output of the control units should be deactivated, no contacts available and the lights should be turned off. Memorise the first channel of the remote control for the command OPEN (START) Press and release BUTTON P1 in the control board, LED L1 will lit on for 6 seconds. Then Press (with 6 seconds) one button of the remote control which should be associated to the command OPEN (START).
-
Page 28: Scheme And Symbol
START-S1XL Operating Guide Scheme and Symbol 1 st channel of the remote control 2nd channel of the remote control OPEN CHIUDE 11 12 Button up / down 1 st channel of the remote control START step by step 11 12 Button (nc) step by step... -
Page 29: Cancelation Of The Working Time
START-S1XL Operating Guide Cancelation of the Working time START S1XL can go back to the standard values, to cancel the program make as follow: Turn off the control unit Connect the control unit START S1XL after a while WARNING This program After 5 seconds from the turning on, press the button P1 until cancel all previous the LED L1 starts flashing. working time programs. This program cancel all previous working time programs. Fixed light or flashing Keep pressed the button P1 for a fixed or a flashing light until the LED-L1 starts flashing when the gate is closing. -
Page 30: Connection Of The Bus Data System
START-S1XL Operating Guide Connection of the BUS DATA SYSTEM The control unit has a bi-directional BUS DATA with EB Protocol There is a MASTER of the same category available or from a keyboard. It is suffi cient to give an activation or deactivation command for light to insert the control unit in a BUS DATA SySTEM , the the control unit will be managed from a MASTER or a CONTROL device. We suggest to read the manual of the MASTER or from the control device. This is a free program for a specifi c adress in the control unit. It is possible to install no.63 START S1Xl in the same BUS-DATA line It is not possible to install in the same installation control units with the same ID. -
Page 31: Declaration Of Ce Conformity
START-S1XL Operating Guide Declaration of CE conformity (according to EC Directive 2006/42, Attachment II, part 1, ses. A) Company: EB TECHNOLOGY SRL Adress: Corso Sempione 172/5 The undersigned Ernestino Bandera, 21052 Busto Arsizio VA Italia Administrator Product’s name: START-S1XL DECLARES THAT: 230Vac mono-phase control unit. THE PRODUCT COMPLIES with what is outlined in the European Community directive:... - Page 32 99/5/CEE Sono state eseguite tutte le necessarie prove All necessary radiofrequency tests have been di radiofrequenza performed Toutes les essais de radiofréquence néces- saires ont été effectués EB TECHNOLOGY SRL EB TECHNOLOGY SRL EB TECHNOLOGY SRL Corso Sempione 172/5 Corso Sempione 172/5 Corso Sempione 172/5 21052 Busto Arsizio (Va)
- Page 33 Central monofase para motores 230V para persianas, cortinas y cierres enrollables. • Receptor incorporado • Versión normal - Versión hombre presente • Gestión anemometro ó apertura/cierre centralizado START-S1XL v2 Instrucciones y advertencias Instrucciones y advertencias Entrada 230 Vac Entrada 230 Vac Lámpara Para una correcta instalación Com moT / LAmP de la lampara leer parrafo 1.2...
- Page 34 START-S1XL Manual Técnico Precauciones de seguridad Premisa Este manual proporciona la información específi ca nece- En caso de uso incorrecto, reparación por parte saria para el conocimiento y el uso adecuado del equi- ajena al fabricante o modifi cación, la garantía que- po en su posesión.
- Page 35 START-S1XL Manual Técnico Instalación: esquema de la central Esquema de la tarjeta electrónica Puentear si no se usa La central está diseñada para conectar motores con finales de carrera mecanicos incorporados Si la central se utiliza para una persiana ó toldo dejar DIP 3-B y DIP 4-B en OFF FoToCELULA 11-13: Cuando el motor está...
- Page 36 START-S1XL Manual Técnico Conexión LAmPARA 230Vac Se puede instalar sólo lampara sin carta electróni- ca, come en la foto: 16 17 230 Vac Alimentación de los acessorios Borne 10 (+) / 11 (-) 10 11 12 13 14 15 Borne 9 / 11 Tensión: 12 Vdc Tensión: 12 Vac màxima currient: 60 mA...
- Page 37 START-S1XL Manual Técnico Tipología de funcionamiento A continuación se muestra todos los modos de funcionamiento, divididos por modalidad. En la siguiente página se explica como colocar el DIP B: (Estándar) Versión noRmAL Comando tipo ABRE-STOP-ABRE a través del 1º canal del mando y pulsador, CIERRA-STOP-CIERRA a través de 2º...
- Page 38 START-S1XL Manual Técnico Versión noRmAL: A / B - Versión HomBRE PRESEnTE 1º canal del mando 2º canal del mando ABRE CIERRA 10 11 12 13 14 15 ABRE CIERRA Confi gurar el modo: sin cierre automático Radiocomando 1° ch TX ABRE-STOP-ABRE-STOP...
- Page 39 START-S1XL Manual Técnico Versión noRmAL: C / D 1º canal del mando START paso a paso 10 11 12 13 14 15 Pulsador Pulsador paso a paso ALT/STOP (nc) Confi gurar el modo: sin cierre automático Radiocomando 1° ch TX ABRE-STOP-CIERRA-STOP...
- Page 40 START-S1XL Manual Técnico Versión AnEmomETRo: An / An-1 An An-1 1º canal del mando 2º canal del mando START paso a paso CIERRA 1º canal del mando ABRE 10 11 12 13 14 15 10 11 12 13 14 15 AnEmomETRo AnEmomETRo Pulsador...
- Page 41 START-S1XL Manual Técnico Versión ABRE/CIERRA CEnTRALIZADo Confi gurar el modo: Radiocomando 1° ch TX ABRE-STOP-CIERRA-STOP-ABRE... DIP A DIP B 2° ch TX CIERRA-STOP-CIERRA-STOP... DIP 3-B oFF Borne El comando CIERRA 11 - 14 Igual a 1º ch TX (term.12) permite sólo 11 - 12 Comprobar confi guración DIP3B el cierre, no funciona...
- Page 42 START-S1XL Manual Técnico Radiocomando: Cancelación memoria La central dispone de un pulsador P1 para varias operaciones, entre las cuales, la cancelación de todos los códigos de radiocomandos memorizados en la central. Para realizar esta operación seguir estos 2 pasos. Las salidas de la central deben ser desactivadas, entonces ningún contacto activo, posibles luces conectadas, deben estar apagados.
- Page 43 START-S1XL Manual Técnico Radiocomando: Memorizacion de los codigos La central dispone de un botón P1 para la programación de los tiempos y para la memorización de los códigos de los radiocomandos. Si para la memorización se utiliza un radiocomando virgen de código fi jo tipo SMILE-C, asegurarse que todos los botones tienen código, si no proveer con la autogeneración de códigos.
- Page 44 START-S1XL Manual Técnico Programacion Programación de tiempos La central viene confi gurada de fábrica con un tiempo de trabajo de 60 segundos y 20 segundos de pau- sa. La operación de confi guración de los tiempos solamente sirve en caso de desear un ciclo de apertura cierre con tiempo personalizado.
- Page 45 START-S1XL Manual Técnico ConEXIon BUS-DAToS Esta central dispone de puerta bidireccional BUS-DATOS con PROTOCOLO EB. Esto signifi ca que pueden ser controladas desde un dispositivo MASTER de la misma categoría ó de una botonera de comandos. Para insertar esta central en una línea BUS-DATOS será sufi ciente realizar una activación o desactivación de luces, una vez hecho esto será...
- Page 46 START-S1XL Manual Técnico Declaración CE de conformidad (Secundo Directtiva 2006/42/CE, Anexo II, parte B) Empresa: EB TECHnoLoGY SRL Dirección: Corso Sempione 172/5 El suscrito Ernestino Bandera, 21052 Busto Arsizio VA Italy administrador nombre del producto: START-S1XL DECLARAR QUE: Central monofásica para 1 o 2...
- Page 47 START-S1XL Manual Técnico note -15-...
- Page 48 EB TECHnoLoGY S.r.l. noLoGo S.r.l. Corso Sempione 172/5, via Cesare Cantù 26, 21052 Busto Arsizio VA Italy 20020 Villa Cortese MI Italy tel. +39 0331.430457 fax.+39 0331.432496 posta@ebtechnology.it info@nologo.info www.ebtechnology.it www.nologo.info...
- Page 49 • Armoire mono-phasé pour moteurs 230Vac • Pour stores, volets roulants et rideaux métalliques • Avec radio recepteur intégré • Version “Homme Mort” ou gestion “anémomètre“ ou “ouverture / fermeture centralisée” START-S1XL v2 Notice d’emploi Entrée 230Vac de reseau Entrée 230Vac de reseau...
- Page 50 START-S1XL Notice d’emploi Introduction Précaution de sécurité Ce manuel donne tous les informations spécifi ques NOLOGO n’est pas responsable pour les domma- nécessaires pour la connaissance et l’utilisation de ges découlant d’une utilisation incorrecte ou une l’armoire. Il faut le lire avec attention et le consulter utilisation différente pour laquelle le produit a été afi n qu’il n’y ait pas des souci sur son utilisation ou conçu.
- Page 51 START-S1XL Notice d’emploi Installation: Schéma de l’armoire Faire un pontet si n’est pas utilisée. L’armoire est étudiée pour brancher les moteurs avec fin de courses mécanique intégrés. Lampe à 230Vac sans clignote ou voyant pour indiquer la porte en marche. Si l’armoire est utilisée pour les volets et le store, DIP3B et DIP4B sont laissé...
- Page 52 START-S1XL Notice d’emploi Logique de fonctionnement Activation MODE STANDARD Il faut couper l’alimentation de la carte 230 Vac Alimenter la carte électronique 230Vac LED L1 LED L1 reste allumée fi xe. Entre 5 seconds: fi xe Appuyer et relâcher le touche P1 LED L1 clignote une foi et reste allumée fi xe. LED L1 Mode STANDARD activée 1 clignote Attendre que LED L1 clignote regulièrement Activation MODALITE ANEMOMETRE...
- Page 53 START-S1XL Notice d’emploi Activation MODALITE “HOMME MORT” Il faut couper l’alimentation de la carte 230 Vac Alimenter la carte électronique 230Vac LED L1 LED L1 reste allumée fi xe. Entre 5 seconds: fi xe Appuyer et relâcher le touche P1 LED L1 LED L1 clignote, après reste allumée: clignotes Entre 5 seconds il faut appuyer e relâcher P1 LED L1 clignote 2 fois et après reste fi xe.
- Page 54 START-S1XL Notice d’emploi FONCTION Ici des examples de logique. Dans les prochaines pages est indiqué la fonction du DIPB: Version STANDARD Commande OUVRE-STOP-OUVRE. Avec le 1 er canal de l’émetteur et touche FERME-STOP-FERME avec le 2 em canal de l’émetteur et touche sans fermeture automatique.
- Page 55 START-S1XL Notice d’emploi Programmer situation: sans fermeture automatique 1er canal OUVRE-STOP-OUVRE-STOP... 2em canal FERME-STOP-FERME-STOP... 11 - 14 même que le 1er canal du TX DIP A DIP B 11 - 12 Même que le 2 em canal du TX DIP 3-B OFF 11 - 13 Photocellule renverse quand le Faire un pontet si n’est pas utilisée...
- Page 56 START-S1XL Notice d’emploi Programmer situation: (Homme Mort) 1er canal OUVRE “HOMME MORT” La fermeture automatique 2em canal FERME “HOMME MORT” n’est pas disponible sur 11 - 14 même que le 1er canal du TX cette version! 11 - 12 Même que le 2 em canal du TX 11 - 13 Si UP (version “Homme Mort”) il ne faut pas Faire un pontet si n’est pas utilisée...
- Page 57 START-S1XL Notice d’emploi Programmer situation: 1er canal OUVRE-STOP-FERME-STOP... 2em canal FERME-STOP-FERME-STOP... DIP A DIP B 11 - 14 même que le 1er canal du TX 11 - 12 Contrôller la programmation DIP3B DIP 3-B OFF 11 - 13 Commande OUVRE (pas du STOP) La commande FERME 11 - 15 Faire un pontet si n’est pas utilisée...
- Page 58 START-S1XL Notice d’emploi Emetteurs: Effacement de la mémoire L’armoire dispose d’un touche P1 pour beaucoup d’opération (même l’effacement de tous les codes des émetteurs mémorisés sur l’armoire). Pour faire cet opération il faut suivre 2 passages: Les sorties de l’armoire sont dsactivées, pas de contact activée ou lumière etéindues. L’opération est possible quand le portaile est fermé.
- Page 59 START-S1XL Notice d’emploi Emetteurs: Apprentissage des codes L’armoire dispose d’un touche P1 pour la programmation des temps de travail pour l’apprentissage des codes. Si l’émetteur SMILE-C n’a pas du codes il faut s’assurer que tous les touches on un code, si non il faut faire l’auto- génération du code. Dans le cas on veut enregistrer un rolling code il n’ y a pas besoin de gérer le code.
- Page 60 START-S1XL Notice d’emploi Platine et symbol 1 er touche de l’émetteur 2em touche de l’émetteur OUVRE FERME 11 12 Touche En haut/bus 1 er touche de l’émetteur START pas au pas 11 12 Touche Touche ALT (nf) Bistable Programmation Programmation de temps de travail Le temp de travail de l’armoire est de 60 seconds et 20 seconds pour la pause.
- Page 61 START-S1XL Notice d’emploi RESET temp de fonctionnement L’armoire START-S1XL permet de établir les paramètres d’usine, pour effacer il faut: Eteindre l’armoire, couper l’alimentation 230Vac Après quelque instant brancher le reseau ATTENTION: cette procédure Entre 5 seconds de l’allumage, efface tous appuyer le touche P1 jusqu’à...
- Page 62 START-S1XL Notice d’emploi Brachement BUS Cet armoire dispose d’une porte bidirectionell pour le bus protocol EB. Ça signifi e que la commande est donné par un MASTER de la même version ou par une clavier. Pour installer l’armoire sur la ligne bus c’est suffi sant donner une activation ou desactivation des lumières et il sera automatiquement comandé par des dispositifs master ou contrôlle. On peut lire les notices de l’armoire MASTER ou des dispositifs de contrôlle.
- Page 63 START-S1XL Notice d’emploi Declaration de Conformitè (selon la directive 2006/42/CE , Attachée II, partie B) Société: EB TECHNOLOGY SRL Adresse: Corso Sempione 172/5 Le sous-signé Ernestino Bandera 21052 Busto Arsizio VA Italy Administrateur Nom du produit: START-S1XL Armoire électronique Déclare que: LE PRODUIT EST CONFORME...
- Page 64 Sono state eseguite tutte le necessarie prove All necessary radiofrequency tests have been di radiofrequenza performed Toutes les essais de radiofréquence néces- saires ont été effectués EB TECHNOLOGY SRL EB TECHNOLOGY SRL EB TECHNOLOGY SRL Corso Sempione 172/5 Corso Sempione 172/5 Corso Sempione 172/5 21052 Busto Arsizio (Va)
Need help?
Do you have a question about the START-S1XL v2 and is the answer not in the manual?
Questions and answers