
Related Manuals for AVL Looms K Series

Summary of Contents for AVL Looms K Series
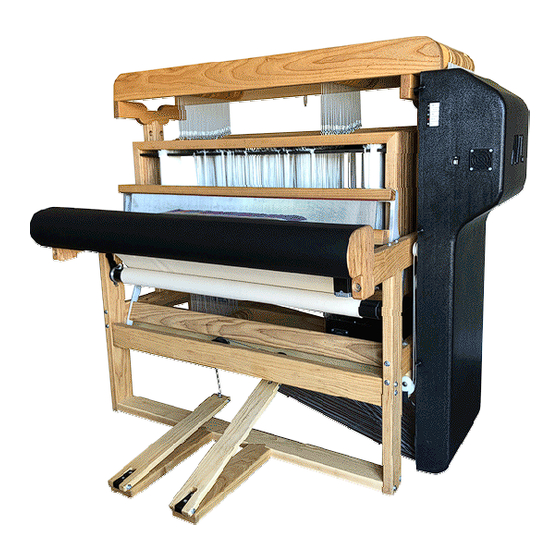
- Page 1 K-Series Loom User Manual AVL Looms 2360 Park Avenue Chico, CA 95928-6785 U.S.A. 530 893-4915 530 893-1372 fax sales@avlusa.com www.avlusa.com Version 2.2 January 29, 2020...
-
Page 3: Table Of Contents
K-Series Loom User Manual Introductory Information Table of Contents ........................ii Introductory Information ........................ 1 Introductory Information ......................1 Safety ............................2 Introduction ..........................4 Loom Features ..........................4 Compu-Dobby V on the K-Series Loom ..................9 Set Up............................10 Loom Assembly .......................... -
Page 4: Table Of Contents
Introductory Information K-Series Loom User Manual Install The Shelf ........................65 Connecting The Compu-Dobby ....................65 Additional Loom Options ......................69 Additional Loom Options ......................69 Rotary Ring Temples ........................ 70 Track & Mount ......................... 72 Raddle ............................75 Casters ............................76 Weaving Instructions ........................ -
Page 5: Introductory Information
K-Series Loom User Manual Introductory Information INTRODUCTORY INFORMATION NTRODUCTORY NFORMATION Introductory Information Page | 1... -
Page 6: Safety
Introductory Information K-Series Loom User Manual AFETY Before Getting Started: Please read the entire manual before using the loom. Warnings: WARNING: EQUIPMENT SHOULD ONLY BE USED FOR TEXTILE MANUFACTURING. IF THE EQUIPMENT IS USED IN A MANNER NOT SPECIFIED BY THE MANUFACTURER, THE PROTECTION PROVIDED BY THE EQUIPMENT MAY BE IMPAIRED. - Page 7 K-Series Loom User Manual Introductory Information WARNING: EQUIPMENT IS HEAVY. TO AVOID MUSCLE STRAIN OR INJURY, USE PROPER LIFTING TECHNIQUES AND A HELPER. WARNING: DO NOT POSITION EQUIPMENT IN A WAY TO BLOCK OR IMPEDE ACCESS TO DISCONNECTING DEVICES WARNING: USE OF CONDUCTIVE FIBER OR YARN ON OR AROUND THIS EQUIPMENT WILL VOID WARRANTY AND MAY DAMAGE EQUIPMENT.
-
Page 8: Introduction
K-Series Loom User Manual NTRODUCTION About AVL AVL Looms has been in the business of designing and building some of the world’s finest handweaving looms since 1977. Jim Ahrens had been building and designing looms for a number of years before Jon Violette, the “V”... - Page 9 K-Series Loom User Manual Introductory Information Counterbalanced harnesses use dobby weights in a closed loop setup to ensure light and balanced treadling no matter which pattern is being used or how many harnesses are being lifted. Lifting either one or forty harnesses requires minimal effort and feels nearly the same.
- Page 10 Introductory Information K-Series Loom User Manual A regular plain warp beam with apron and 2 rods may be substituted for the sectional beam at no extra charge. A second or supplemental warp beam can added to the loom. It can also be either a ½-yard sectional or plain beam.
- Page 11 K-Series Loom User Manual Introductory Information repeatable control. It allows for hundreds of picks per inch or the large movements needed when starting a new warp. Note: The default for the system is picks per inch, however, it can be changed to picks per centimeter.
- Page 12 Introductory Information K-Series Loom User Manual Loom Frame The K-Series comes available in 24, 32 or 40” (61, 81, or 102 cm) weaving widths. Advanced frame construction uses high quality joinery to improve rigidity and strength. Oiled hardwood construction is good both for longevity, beauty and the environment.
-
Page 13: Compu-Dobby V On The K-Series Loom
K-Series Loom User Manual Series Loom User Manual Series Loom User Manual Introductory Information Introductory Information Introductory Information Bench An AVL sh An AVL short bench is the suitable seat for this loom. ort bench is the suitable seat for this loom. ort bench is the suitable seat for this loom. -
Page 14: Set Up
Introductory Information K-Series Loom User Manual Choosing a UPS Depending on the model you buy, some of the outlets on the UPS may not provide battery backup. The options available on different brands and models vary widely, so look at various models. You will want to make sure that the UPS will provide enough power for you to successfully shut-down the loom during a power outage. - Page 15 K-Series Loom User Manual Introductory Information Upon departure of the truck, take pictures of the damaged box and email the pictures to AVL. We will use the pictures to initiate a claim. As soon as possible and preferably within a few days, open each damaged box/crate to search for damaged or missing items.
-
Page 17: Loom Assembly
K-Series Loom User Manual Loom Assembly LOOM ASSEMBLY SSEMBLY Loom Assembly Page | 13... -
Page 18: Before You Begin
Loom Assembly K-Series Loom User Manual EFORE EGIN Putting together your new loom may look intimidating at first, but this manual is designed to guide you through the process with clear steps, pictures, and diagrams. If the manual is unclear or confusing at any point, call us at 530-893-4915. -
Page 19: Identifying Pieces
K-Series Loom User Manual Loom Assembly Order of Count Name Parts operations Lower front assembly 1/4x2-3/4 Hex Bolt w/washer & square nut Upper Harness Pulley 1/4x2-3/4 Hex Bolt Support w/washer Lower treadle cable pulley 1/4x4 FHMS guide DENTIFYING IECES There are a number of different types of hardware that will hold your loom together. - Page 20 Loom Assembly K-Series Loom User Manual Figure 5 - Black Knob Figure 6 - Measuring Bolts Page | 16 Identifying Pieces...
-
Page 21: Inserting Nuts And Bolts
K-Series Loom User Manual Loom Assembly NSERTING OLTS NOTE: Given the limited space provided by the nut access holes, it can be challenging at first getting the nuts onto the bolt ends. You’ll find it helpful to push each bolt in just until it just appears in the access hole. Move the nut into position over the end of the bolt and hold it with your finger. -
Page 22: Unpacking The Loom
Loom Assembly K-Series Loom User Manual NPACKING THE Note: Some of the pieces need to be unpacked in a specific way. Please unpack the side frames and the dobby according to the directions in the assembly section. You will have several boxes containing the pieces of your loom. For the most part, you can leave pieces in the boxes until you are ready to work on a specific subassembly of your loom. -
Page 23: Install The Rear Cross Member
K-Series Loom User Manual Loom Assembly included with the side frames and there are cables running between the right side frame and the rear cross member. Follow these instructions to remove the loom safely from the crate. Note: To remove the side frames and associated parts from the boxes safely and easily, please have two people working together. - Page 24 Loom Assembly K-Series Loom User Manual be a tab at the end that you can lift to remove the tape. Unwrap the cellophane. Remove the Styrofoam blocks. Leave any other wrapping or bags in place for now. Locate the mounting holes for the Lower Rear cross member on the right side frame.
- Page 25 K-Series Loom User Manual Loom Assembly Finish covering wires There is a metal track embedded in the wooden horizontal which conceals the wires going from the motor to the power box. The wires are already embedded. If the loom is setup for two beams, with two brake motors, a connection cover is not needed.
-
Page 26: Install Lower Harness Pulley Support
Loom Assembly K-Series Loom User Manual NSTALL OWER ARNESS ULLEY UPPORT Locate the harness pulley support assembly. It is made of two pieces of wood the width of your loom held together by two sets of pulleys. Note: The cable retainers mounted next to the pulleys will hold the assembly together until it has been attached to the loom. -
Page 27: Install The Front Treadle Pulley Support With Axle
K-Series Loom User Manual Loom Assembly Insert the bolts through the top of the bottom horizontal and into the embedded bolt on the top of the bottom harness pulley support assembly. Figure 13 – Bolt for bottom harness pulley support assembly Attach each of the four bolts. - Page 28 Loom Assembly K-Series Loom User Manual Align the mounting holes in the front cross member with the holes in the side frame. Figure 14 - Front Cross Member Attach the front cross member to the frame with bolts. Figure 15 - Front cross member attached to side frame Page | 24 Install the Front Treadle pulley support with axle...
-
Page 29: Installation Of Lower Front Assembly
K-Series Loom User Manual Loom Assembly NSTALLATION OF OWER FRONT ASSEMBLY The nut access holes for the treadle cross member are at the bottom of the piece. In order to access them, the loom needs to be tilted back. Secure it in place by putting blocks of wood under the front. - Page 30 Loom Assembly K-Series Loom User Manual Please locate the treadles, treadle cross member and the Hardware Pack. Sort the hardware. Select four 1/4x2-3/4” hex bolts with washers and square nuts. Remove the nuts. Locate the mounting holes for the Treadle cross member. There will be two mounting holes on each side frame.
-
Page 31: Install The Upper Harness Pulley Support
K-Series Loom User Manual Loom Assembly Attach the treadle cross member to the side frames using the bolts. Remove the blocks from the loom. NSTALL PPER ARNESS ULLEY UPPORT Locate the harness pulley support assembly. It is made of two pieces of wood, a little wider than your loom, held together by three sets of pulleys, two sets of which are close to one end. - Page 32 Loom Assembly K-Series Loom User Manual Figure 21 – Bolt for top harness pulley support assembly Attach each of the four bolts. Remove any wrapping materials from the top harness pulley support assembly. Remove the top shelf by pulling the retainer pin (located at the back of the rear Harness Pulley Support) and sliding the board out to one side.
-
Page 33: Attach The Lower Treadle Cable Pulley Guide
K-Series Loom User Manual Loom Assembly TTACH THE OWER TREADLE CABLE PULLEY GUIDE This assembly, including cables, will be in a plastic bag hanging off the front of the dobby. Remove the assembly from the bag. In the hardware pack, find two 1/4x4” flat head machine screws. The screws go into the two holes near the dobby on the front of the bottom harness pulley assembly. -
Page 34: Squaring The Completed Frame
Loom Assembly K-Series Loom User Manual Attach the pulley assembly with the flat head machine screws. Figure 24 – Lower treadle pulley assembly from inside loom QUARING OMPLETED RAME Now that you have completely assembled the Loom Frame, it is time to make sure that the frame is square and level. -
Page 35: Install Harness Assemblies
K-Series Loom User Manual Loom Assembly These two measurements should match. If they do not, you will need to adjust the frame slightly, by pushing and pulling at the corners, until they do match. The frame will then be square. Now, using a level, check the verticals at the corners and the cross pieces at bottom and top. - Page 36 Loom Assembly Loom Assembly K-Series Loom User Manual Series Loom User Manual Series Loom User Manual Install Install the Harness he Harness Frames Frames If needed, remove the shelf as described earlier. If needed, remove the shelf as described earlier. If needed, remove the shelf as described earlier.
- Page 37 K-Series Loom User Manual Series Loom User Manual Series Loom User Manual Loom Assembly Loom Assembly Figure Figure 26 - Top harness cables Top harness cables Top harness cables Top harness cables Take up Take up a Harness Frame. Harness Frame. Orient the frame so the hooks that are Orient the frame so the hooks that are Orient the frame so the hooks that are...
- Page 38 Loom Assembly K-Series Loom User Manual The bottom harness cables are connected to springs which connect to the dobby weights. The springs and cables are secured to the loom for shipping. If anything has come loose, just hook the spring to the bottom of the dobby weight, then the cable to the spring.
- Page 39 K-Series Loom User Manual Series Loom User Manual Series Loom User Manual Loom Assembly Loom Assembly Fasten the the shorter shorter pulley cable pulley cable to the bottom eyehook on the right to the bottom eyehook on the right to the bottom eyehook on the right to the bottom eyehook on the right to the bottom eyehook on the right side of the harness.
-
Page 40: Add Heddles To The Harnesses
Loom Assembly K-Series Loom User Manual Figure 30 - Bottom harness cables with retainers EDDLES TO THE HARNESSES The heddle support rods are held in the loom at the ends and in the middle with hooks. The hook in the middle will prevent you from moving heddles from one side to the other easily. -
Page 41: Attach The Treadle Cables
K-Series Loom User Manual Loom Assembly TTACH THE READLE ABLES Left Treadle There are two cables coming off of pulleys behind the dobby. Figure 31 - Treadle cables Take the top one that runs down to and under the groove of the pulley nearest to the front of the loom in the dobby cam and pulley assembly. - Page 42 Loom Assembly K-Series Loom User Manual Continue routing the cable through the loom and over the far left pulley in the treadle pulley assembly down to the treadle. Figure 32 - Left treadle pulley with cable There is a bolt going through the large access hole near the far end of each treadle.
- Page 43 K-Series Loom User Manual Loom Assembly Push the bolt back in and tighten the nut with a wrench. With the treadle hanging, the cable should be coming straight up from the bolt and over the left side of the left pulley. Figure 33 - Left treadle cable on treadle Right Treadle Take the bottom cable that runs down to and under the groove of...
- Page 44 Loom Assembly K-Series Loom User Manual Pull the bolt out beyond the access hole as you did for the left treadle and secure the cable to the treadle by holding the loop in line with the bolt (inside the access hole)and passing the bolt through the loop and on through the treadle.
-
Page 45: Place The Power Box On The Loom
K-Series Loom User Manual Loom Assembly LACE THE OWER OX ON THE Find the power box. There are holes on the bottom which fit over pins. The bottom pulley assembly has pins on the right side. Figure 36 - Pins for power box Place the power box on top of these pins. -
Page 46: Install The Cloth Storage Beam
Loom Assembly K-Series Loom User Manual NSTALL LOTH TORAGE On the left side of the loom, there is a rotating bearing. There is an arm with a screw at the top attached to the bearing. Unwrap the bearing. Figure 38 - Cloth Storage Bearing Remove the retainer pin. - Page 47 K-Series Loom User Manual Loom Assembly Place the retainer pin through the hole. Figure 39 - Cloth Storage Beam Pin On the right side, remove the pin from the support by removing the small hitch pin at the bottom. Drop the right side of the Cloth Storage Beam into the support on the right side of the loom.
-
Page 48: Install The Swinging Beater Assembly
Loom Assembly K-Series Loom User Manual Tighten the clutch on the cloth storage beam The Cloth Storage Bearing on the left side of the loom is attached to the beater. When the beater is brought forward, the cloth storage bearing advances the cloth storage beam taking up the slack in the cloth between the cloth beam and the cloth storage beam. - Page 49 K-Series Loom User Manual Loom Assembly Figure 42 - Beater support pins Lift the beater into the loom and over the front cross-member. Figure 43 – Beater on loom Connect the rod from the cloth advance to the beater. Install The Swinging Beater Assembly Page | 45...
- Page 50 Loom Assembly K-Series Loom User Manual Figure 44 – Beater attached to cloth advance To remove the beater, unscrew it from the cloth advance, then lift it out of the loom. To install a beater weight on the beater, use the threaded insert on the back.
-
Page 51: To Remove Or To Change The Reed
K-Series Loom User Manual Series Loom User Manual Series Loom User Manual Loom Assembly Loom Assembly EMOVE OR TO EMOVE OR TO EMOVE OR TO HANGE THE HANGE THE HANGE THE Loosen the bolts on the Loosen the bolts on the Loosen the bolts on the top and top and bottom support bottom support... - Page 52 Loom Assembly Loom Assembly K-Series Loom User Manual Series Loom User Manual Series Loom User Manual Slide the reed out to the side Slide the reed out to the side Slide the reed out to the side Slide the reed out to the side. Figure Figure 48 –...
- Page 53 K-Series Loom User Manual Series Loom User Manual Series Loom User Manual Loom Assembly Loom Assembly Slide the new reed in. Slide the new reed in. Slide the new reed in. Figure Figure 49 – New reed inse New reed inse New reed inserted rted To Remove or to Change the Reed...
- Page 54 Loom Assembly Loom Assembly K-Series Loom User Manual Series Loom User Manual Series Loom User Manual Make sure the reed is centered. Make sure the reed is centered. Make sure the reed is centered. Make sure the reed is centered. Figure Figure 50 50 –...
- Page 55 K-Series Loom User Manual Series Loom User Manual Series Loom User Manual Loom Assembly Loom Assembly Make sure the top of the top support is even with the top of the Make sure the top of the top support is even with the top of the Make sure the top of the top support is even with the top of the Make sure the top of the top support is even with the top of the Make sure the top of the top support is even with the top of the...
-
Page 56: Install The Cloth Guide Rollers
Loom Assembly K-Series Loom User Manual NSTALL THE LOTH UIDE OLLERS The cloth guide rollers guides the cloth from the sandpaper beam to the cloth storage beam. Install the Rear Cloth Guide Roller Locate the long black guide rollers. The front beater bumpers have a support at the top for the cloth guide roller. - Page 57 K-Series Loom User Manual Loom Assembly Install the Front Cloth Guide Roller At the front of the loom near the warp beam support is a round guide roller support on each side. Figure 53 – Guide Roller Support Drop the beam into the supports. Figure 54 –...
-
Page 58: Install The Cloth Beam
Loom Assembly K-Series Loom User Manual NSTALL THE LOTH Remove the pins from the cloth beam holes. Figure 55 –Cloth Beam pins Put the left side of the beam in the hole on the left frame. The left side is the one without the gear. Place the right side of the beam in the hole on the right side of the frame. - Page 59 K-Series Loom User Manual Loom Assembly The gear at the end of the cloth beam fits into the grooves at the top of the cloth beam motor. Just put it in place. Figure 57 - Cloth Beam motor Note: The ends of the beams have plastic bearings to ensure smooth rotation. Make sure the bearings do not fall off the ends of the beams.
- Page 60 Loom Assembly K-Series Loom User Manual Replace the pins to hold the cloth beam in place. Figure 58 – Retainer pins for cloth beam Page | 56 Install the Cloth Beam...
-
Page 61: Install The Upper (Primary) Warp Beam
K-Series Loom User Manual Loom Assembly Install the Cloth Beam Cover Place the cover into position over the cloth beam. There are two small levers which lock the cover into position. Make sure the levers catch the cover. Figure 59 - Cloth Beam Cover To remove the cover, push the levers down and pull the cover away. - Page 62 Loom Assembly K-Series Loom User Manual Loosen the screw that holds the flat beam retainers over the two pockets. Figure 60 - Beam Retainer Swing the retainers aside and position the Beam in place. Bring the warp beam into position. If you are using the upper location, orient the beam so that the brake drum is opposite the Dobby Head.
- Page 63 K-Series Loom User Manual Loom Assembly Place the short spacer on the brake side of the warp beam. Figure 62 - Warp Beam Spacer on brake side Seat the beam in the axle pockets and, holding the beam in place, rotate each retainer back down, to safely secure the beam.
- Page 64 Loom Assembly K-Series Loom User Manual Mount the Tension System Note: Once you install the tension cable, you will only need to remove it if you remove the beam. The tension motor is already installed on the side frame. The motor on the non-dobby side is for the upper beam.
-
Page 65: Install The Lower (Secondary) Warp Beam
K-Series Loom User Manual Loom Assembly When you’ve just enough cable remaining to almost reach the motor, attach the snap hook to the eyehook at the top of the motor. Figure 65 - Tension system from inside loom Note: Check again to make sure the cable isn’t crossed on itself. Note: If the cable is installed in the wrong direction the Beam will turn easily toward the front of the loom and you will be unable to establish good tension. - Page 66 Loom Assembly K-Series Loom User Manual Locate your Warp Beam and the axle pockets located on the front edge of the Rear Verticals. Loosen the little bolts that hold the flat beam retainers over the two pockets. Swing the retainers aside and position the Beam in place. When using the lower position, place the handle at the right side of the loom.
- Page 67 K-Series Loom User Manual Loom Assembly When you’ve just enough cable remaining to almost reach the eyehook, join the coil at the end of the spring to the eyehook using a small pair of needle nose pliers. Figure 66 - Tension system for second beam Note: Check again to make sure the cable isn’t crossed on itself.
- Page 68 Loom Assembly K-Series Loom User Manual Seat the beam in the right axle pocket and, holding the beam in place, rotate the retainer back down, to safely secure the beam. Figure 67 – Loom with two warp beams Locate the Warp Beam Handle and remove its hardware. Slip the handle over the protruding end of the Beam Axle.
-
Page 69: Install The Shelf
K-Series Loom User Manual Loom Assembly Figure 68 - Separation Beam NSTALL HELF Orient the shelf so that the felt strips on the bottom will lay atop the three sets of Harness Pulleys when the shelf is in place. These act as Cable Retainers and will keep your Harness Cables properly located during lifting of the harnesses. - Page 70 Loom Assembly K-Series Loom User Manual Lift off both parts of the cover. Note: The back of the top part of the Dobby cover has a layer of blue insulation to help muffle the sound of the dobby. Figure 70 – Dobby with sound insulation The weights at the bottom are held in place for shipping with a metal rod.
- Page 71 K-Series Loom User Manual Loom Assembly Place the cover onto the Dobby Back and secure it with the thumbscrews. Note: We strongly recommend that you use an Uninterruptable Power Supply (UPS) for your loom. The loom is “always on” so that it will boot up quickly and does not need to be shut off.
- Page 72 Loom Assembly K-Series Loom User Manual Plug the USB cable included with your Compu-Dobby into the USB port and plug the other end into your computer. You can also access the loom through wi-fi, or a router. Refer to the Compu-Dobby V manual for information on using the loom.
-
Page 73: Additional Loom Options
K-Series Loom User Manual Additional Loom Options ADDITIONAL LOOM OPTIONS DDITIONAL PTIONS Additional Loom Options Page | 69... -
Page 74: Rotary Ring Temples
Additional Loom Options K-Series Loom User Manual OTARY EMPLES Rotary Ring Temples are an upgrade available for this loom. The K-Series comes with hidden, built-brackets making ring temple installation quick and simple. The Temple System is used to maintain a good selvage and prevent draw-in. You’ll usually deploy it after you’ve woven-off some fabric, once you have selvage enough to work with. - Page 75 K-Series Loom User Manual Additional Loom Options Slide the supports on the ring temple rod. Tighten down the knob so that the supports will stay in place. Figure 74 – Ring temple supports on rod Locate the brackets for the ring temple system, which are hidden in the support for the sandpaper beam.
-
Page 76: Track & Mount
Additional Loom Options K-Series Loom User Manual Adjust the position of the ring temple supports and place the ring temples in the support once you have enough cloth on the loom. Lock the ring temple in position with the nut. Nut for ring temple Figure 77 –... - Page 77 K-Series Loom User Manual Additional Loom Options Install this assembly, from the outside of the loom, through one of the two holes provided on either rear vertical. Figure 79 – Track and Mount support with bolt Slip the washer and nut on the inside of the loom frame and tighten with a 1/2"...
- Page 78 Additional Loom Options K-Series Loom User Manual Repeat this process with the remaining bolts. Figure 80 – Track and Mount supports Attaching the track to the track arms Place the track so that the lengthwise groove is on top. Mount the track to the brackets on the track arms using two 5/16” x 2-1/2”...
-
Page 79: Raddle
K-Series Loom User Manual Additional Loom Options Then lower the track/arm assembly to a horizontal position at which point the lower notch on the track arm should align with the rear stud. Figure 81 - Attach Track & Mount Arms This will hold your tension box in place while warping your loom. -
Page 80: Casters
Additional Loom Options K-Series Loom User Manual ASTERS One of the available options for the K-series loom is wheeled casters which allow the loom to be easily moved from one location to another. When the loom is not being moved, the casters are securely locked into position. Note: The casters at the front of the loom are positioned at the sides. - Page 81 K-Series Loom User Manual Additional Loom Options Place two casters at the rear of the loom against the pre-drilled holes, with the bracket facing down. Use the long bolts to secure the casters to the loom. Casters Page | 77...
-
Page 83: Weaving Instructions
NSTRUCTIONS Note: Unless otherwise noted, the instructions in this section are basic, general instructions for weaving and are applicable to many AVL and non-AVL looms. They should not be regarded as a substitute for training or experience. Weaving Instructions Page | 79... -
Page 84: Loom Orientation
Weaving Instructions K-Series Loom User Manual RIENTATION Before you get started, please take a minute to familiarize yourself with how we describe the loom in this manual. The front of the loom is where you will sit; the back of the loom is where the warp beam is. -
Page 85: Warping Direction
TOP beam comes off the TOP. And the BOTTOM beam comes off the BOTTOM. comes off the BOTTOM. comes off the BOTTOM. This may be different than other AVL looms that his may be different than other AVL looms that his may be different than other AVL looms that... - Page 86 Weaving Instructions K-Series Loom User Manual The K-series loom can have two warp beams. The warp comes off the top of the top warp beam, and from under the bottom warp beam. The handle for the top warp beam will be on the left side of the loom (when you are in weaving position).
-
Page 87: Warping The Plain Beam
K-Series Loom User Manual Weaving Instructions Figure 85 – Warp threads entering the heddles ARPING LAIN If you only have a Sectional Beam, proceed to the section titled Warping the Sectional Beam. Various warping methods can be adapted to an AVL loom. However, we recommend the following method in which the warp is wound on to the Plain Beam with the use of a Raddle. - Page 88 Weaving Instructions K-Series Loom User Manual The Threading Cross (each thread crosses the next thread in opposite directions; all are secured in a single loop). Figure 86 - Warping Board with Two Crosses The Raddle Cross (warp threads are tied in groups, depending on how many ends will be put in each section of the raddle).
- Page 89 K-Series Loom User Manual Weaving Instructions It is usually a good idea to use different color threads for the ties on the tops of the pegs and another color to tie the bows underneath the pegs. By color- coding your ties, you are less likely to twist the warp later. Removing The Warp From The Warping Board Remove the warp from the warping board by chaining or by winding on the kitestick.
- Page 90 Weaving Instructions K-Series Loom User Manual If you are using an AVL Raddle with a sliding cover, slide it on after the Raddle is threaded and secure it with two or three cord ties so it can’t come off. Remove the Raddle Cross sticks when this is completed. Figure 87 - The Raddle and the Raddle Cross Preparing The Paper Prepare the paper for winding between the warp layers.
- Page 91 K-Series Loom User Manual Weaving Instructions Figure 88 - Prepared Paper with Folded Edge Winding The Warp Remember, wind the warp on tightly under a lot of tension. The amount of tension used will vary depending on the warp material, but a good rule to remember is that the tension of the wound-on warp must as great as the tension during the weaving operation.
- Page 92 Weaving Instructions K-Series Loom User Manual the weaving process. Then be sure to bring the end of the warp around the Separation Beam so that it now travels into the loom. Using a strong cord, suspend the lease sticks between the Separation Beam and the Harnesses.
-
Page 93: Warping The Sectional Beam
K-Series Loom User Manual Weaving Instructions The warp from the upper warp beam goes over the separation beam closest to the heddles. The warp from the lower warp beam goes over the separation beam furthest to the back. Proceed with threading as if you were only working with one beam. Follow your threading instructions and take special care which thread from which pair of lease sticks comes next. - Page 94 Weaving Instructions K-Series Loom User Manual Extension Cords You might want to make a permanent set of Extension Cords to use when warping the Sectional Beam. Extension Cords are also called “apron cords” and serve the same function as the apron on the Plain Beam. They give you “reach”...
- Page 95 K-Series Loom User Manual Weaving Instructions example, if your section is 2” wide, with sixteen E.P.I., you would need thirty-two spools or cones of yarn. To prepare for Sectional Beam warping, we need to calculate: • NUMBER OF SPOOLS? Sectional Beaming requires the use of as many spools loaded with thread per individual section as your Ends Per Inch, or planned sett in the reed, dictates.
- Page 96 Weaving Instructions K-Series Loom User Manual Feeding The Spool Rack Once you have completed the calculations, place a Spool or Cone Rack about five or six feet behind your loom. Place the spools or cones for the first warp sections on the Cone Rack. Make sure you put each thread through the metal eye on the spool rack so the threads do not get tangled.
- Page 97 K-Series Loom User Manual Weaving Instructions Threading Cross. Right now we’ll need to use it to help put the heddles on the harnesses. Remove the “heddle retainer” of the harness that is up, using a phillips head screwdriver. Notice there are four twist ties holding the heddles together. Separate the top two.
- Page 98 Weaving Instructions K-Series Loom User Manual the back plate of the Box, then the next thread all the way through. It works best to use the threads from the rack in a vertical order rather than a horizontal order. Now let’s go through the sequence for threading the Tension Box. First, move the two adjustable Tension Pegs up above the Stationary Pegs or remove them completely.
- Page 99 K-Series Loom User Manual Weaving Instructions Once the Tension Box has been threaded, it is not always necessary to rethread it. If you need to change spools or cones, simply tie the new ends on to the old ends just before the rear stationary reed and pull gently on the old ends until the new ends have come all the way through the box.
- Page 100 Weaving Instructions K-Series Loom User Manual If any of the above is happening, gently unwind the warp (into a box, perhaps) and pivot the front reed on the Tension Box again until you get perfectly flat layers. This is very important, otherwise you will end up having different length threads in one section, since the circumference of the Beam within the section is not going to grow evenly.
- Page 101 K-Series Loom User Manual Weaving Instructions Creating The Cross When there is about a half-yard left to be wound onto the Beam, it is time to make the Threading Cross. Simply push on the rear Heddle Frame of the Tension Box, making half of the threads go up and the other half go down. Now slip in an 8”...
- Page 102 Weaving Instructions K-Series Loom User Manual To keep the warp from slipping forward during the threading process, retighten the tension rope around the pulley and tension drum and clip the rope end to the spring. Use of Warping Wheel The Setup Adjust height so position of mini-raddle is just below eye level.
- Page 103 K-Series Loom User Manual Weaving Instructions Slide the thread(s) under the metal catch clip, tails facing to the left. Tails should be about 5 inches long. Figure 93 - Catch Thread Ends Bring the thread(s) up and over the left side of the top spool so that you are ready to wind the Warping Wheel in a counterclockwise motion.
- Page 104 Weaving Instructions K-Series Loom User Manual After you have wound one length bring the thread(s) around the back of the raddle and through a dent (working from right to left). Figure 95 - Bring Thread Through Raddle Bring thread(s) down over the end you just wound and secure in the silver clip (swooping under from left to right).
- Page 105 K-Series Loom User Manual Weaving Instructions With the raddle top secure, remove the pin from the raddle holder while holding onto the threads. Figure 97 - Remove Raddle from Top Position Bring the raddle down to the winding-on position and secure with the pin.
-
Page 106: Combining Sectional And Plain Warping
Weaving Instructions K-Series Loom User Manual Take the extension cord from your beam. Create a larks head loop at its end and loop it around the knotted end of your warp section. Figure 99 - Place Extension Cord Around Thread Bundle Before the last part of the threads pass through the raddle, tape the threads on the loom-side of the raddle in their sequence using masking tape. - Page 107 K-Series Loom User Manual Weaving Instructions Calculate the number of threads for each section on your Sectional Beam. On the Warping Board or reel, make “baby warps” for each section on your Beam. Make crosses at each end: raddle cross on one side and thread-by- thread cross on the other.
-
Page 108: Threading, Sleying, & Tying On
Weaving Instructions K-Series Loom User Manual , & T HREADING LEYING YING Preparation For Threading The K-series loom was designed so that you can get as close to the harnesses for threading as possible. To do this, follow these steps. Remove the cover over the cloth beam. - Page 109 K-Series Loom User Manual Weaving Instructions Unused Heddles After threading is complete, make sure that the unused heddles are all pushed to the far sides of the harnesses. For balance, there should be approximately equal numbers of unused heddles on both sides of each harness.
- Page 110 Weaving Instructions K-Series Loom User Manual Now you can remove the tape marker and, turning the top of the Beam away from you, wind so the apron is wrapped once around, holding itself in place. Route the apron over the Rear Cloth Roller Guide, then over the Front Cloth Roller Guide.
- Page 111 K-Series Loom User Manual Weaving Instructions Figure 102 - Surgeon's Knot Start with one section in the middle, then the far right and the far left outside ones. Work your way in. After tying the knot, pull only until you feel some resistance and tighten the knot and proceed to the next section.
-
Page 112: Setting The Tension
Weaving Instructions K-Series Loom User Manual heddles, and about six inches past the reed when the beater is in its rear position. Now open two opposite tabby sheds and insert the lease sticks into these sheds behind the harnesses. Secure the sticks together with tie tapes through the holes. -
Page 113: To Remove Or To Change The Reed
K-Series Loom User Manual Series Loom User Manual Series Loom User Manual Weaving Instructions Weaving Instructions Weaving Instructions EMOVE OR TO EMOVE OR TO EMOVE OR TO HANGE THE HANGE THE HANGE THE Loosen the bolts on the top and bottom suppo Loosen the bolts on the top and bottom suppo Loosen the bolts on the top and bottom suppo Loosen the bolts on the top and bottom suppo... - Page 114 Weaving Instructions Weaving Instructions Weaving Instructions K-Series Loom User Manual Series Loom User Manual Series Loom User Manual Slide the bottom support down slightly Slide the bottom support down slightly Slide the bottom support down slightly Slide the bottom support down slightly Slide the bottom support down slightly.
- Page 115 K-Series Loom User Manual Series Loom User Manual Series Loom User Manual Weaving Instructions Weaving Instructions Weaving Instructions Slide the reed out to the side. Slide the reed out to the side. Slide the reed out to the side. Slide the reed out to the side. Figure Figure 105 –...
- Page 116 Weaving Instructions Weaving Instructions Weaving Instructions K-Series Loom User Manual Series Loom User Manual Series Loom User Manual Slide the new reed in. Slide the new reed in. Slide the new reed in. Figure Figure 106 – New reed inserted New reed inserted New reed inserted Page | 112...
- Page 117 K-Series Loom User Manual Series Loom User Manual Series Loom User Manual Weaving Instructions Weaving Instructions Weaving Instructions Make sure the reed is centered. Make sure the reed is centered. Make sure the reed is centered. Make sure the reed is centered. Figure Figure 107 107 –...
-
Page 118: Using The Beater
Weaving Instructions ng Instructions ng Instructions K-Series Loom User Manual Series Loom User Manual Series Loom User Manual Make sure the top of the top support is even with the top of the Make sure the top of the top support is even with the top of the Make sure the top of the top support is even with the top of the Make sure the top of the top support is even with the top of the Make sure the top of the top support is even with the top of the... -
Page 119: Using The Automatic Cloth Advance
K-Series Loom User Manual Weaving Instructions SING THE UTOMATIC LOTH DVANCE The auto advance controls allow you to advance the warp without weaving, or reverse the warp. You can also set the picks per inch. The default PPI is In the software go to the PPI field. Use the arrow keys to change the value, or click in the field and type in the value you want. - Page 120 Weaving Instructions K-Series Loom User Manual selvage enough to work with. It consists of two rollers(barrels), one on each side of the fabric, which grab the selvage and prevent it from drawing in. Your fabric should rest on top of the guide and come near the end of the temple mount bracket.
-
Page 121: Removing The Cloth From The Loom
K-Series Loom User Manual Weaving Instructions Using a temple system is somewhat of an art and opinion varies amongst weavers about things like the choice of rings. In fact, there are many rings to choose from -- some with large spikes, some with shorter. Call AVL for details. -
Page 123: Additional Loom Information
K-Series Loom User Manual Additional Loom Information ADDITIONAL LOOM INFORMATION DDITIONAL NFORMATION Additional Loom Information Page | 119... -
Page 124: Loom Maintenance
Additional Loom Information K-Series Loom User Manual AINTENANCE Tightening the Bolts The single most important thing you can do to extend the life of your loom, and preserve its operation, is tighten the bolts that hold its frame together. These will loosen over time, due to changes in its environment and to your own creative exertions. - Page 125 K-Series Loom User Manual Additional Loom Information carefully so that only the specific places shown below are lubricated. There are two bearing slides on each side of the loom. This picture shows one side. The bearings are small round balls on which the slides are able to move smoothly and quickly.
- Page 126 Additional Loom Information K-Series Loom User Manual Dobby Arms In the center of the dobby are dobby arms which rotate in and out. At the end of each arm is a blue thrust bearing that will require lubrication. Locate the blue thrust bearings. It is easy to see two of them from the top when the dobby arm is closed.
- Page 127 K-Series Loom User Manual Additional Loom Information Dobby Lint Cover You should also check the lint cover on the dobby occasionally to make sure it is not plugged up. If it is, use a handheld vacuum or the brush attachment on a larger vacuum to clean if off.
- Page 128 Additional Loom Information K-Series Loom User Manual Power Box The power box has two lint covers, one for air intake and one for outtake. Check to make sure the air intake cover is not plugged up. If it is, use a handheld vacuum or the brush attachment on a larger vacuum to clean if off.
- Page 129 K-Series Loom User Manual Additional Loom Information Cloth Storage Beam Bearing The cloth storage beam is advanced with a clutch bearing on one side of the loom. On each side of this bearing you will see a small plastic gear with bearings underneath it.
- Page 130 Additional Loom Information K-Series Loom User Manual Cloth Advance Gears There is a worm gear on the cloth advance that should be coated with a light coat of clear synthetic grease after every 160 hours of weaving. Remove the sandpaper beam cover and the sandpaper beam from the loom.
- Page 131 K-Series Loom User Manual Additional Loom Information Using AVL Drive, push the button to free your warp beam. This will put the screw at the top-most position. Put a small glob of the clear synthetic grease on the screw where there has been grease on the screw before.
- Page 132 Additional Loom Information K-Series Loom User Manual Pulleys The pulleys on your loom should not need lubrication. However, if any of the pulleys are squeaky, spray them with dry film lubrication or silicon spray. Shuttles and Shuttle Race If you notice any trouble with the movement of your shuttles, use paste wax on your shuttles and shuttle race.
-
Page 133: Troubleshooting
K-Series Loom User Manual Additional Loom Information Level Paste Wax 0000 Steel Wool Pad 220# Sandpaper Dry Film Lubricant Clear Synthetic Grease Spare Parts You Might Consider Having Spare Treadle Cable (left/right) ROUBLESHOOTING Harness Issues Symptom Possible Cause How to Fix it Harnesses don't raise 1.) Harness cables Reattach the cables to... - Page 134 Additional Loom Information K-Series Loom User Manual Tension Symptom Possible Cause How to Fix It A) Your Warp Beam 1) You have mis- Review the cable routing as won’t hold tension. routed your brake shown in the Assembly cable. If you have Section.
- Page 135 K-Series Loom User Manual Additional Loom Information Symptom Possible Cause How to Fix It C) Excessive tension 2) The tension cable Straighten out the cable. on the warp. has gotten crossed over itself on the warp beam brake drum. D) Cloth is not 1) The clutch Tighten the bolt on the cloth wrapping around the...
- Page 136 Additional Loom Information K-Series Loom User Manual Cloth Storage Beam Symptom Possible Cause How to Fix It A) Cloth is not 1) The clutch Tighten the bolt on the cloth wrapping around the controlling the cloth storage beam clutch. See page cloth storage beam storage beam may correctly.
-
Page 137: Reference Guide
K-Series Loom User Manual Additional Loom Information EFERENCE UIDE Connect your computer, phone, or tablet to your loom. Open a browser and go to http://[loom name].local. Power the loom on in the software. Click the warp tension button to set the tension for winding on. You will not need to remove the brake cable on the warp beam. -
Page 139: The Fine Print
K-Series Loom User Manual The Fine Print THE FINE PRINT RINT The Fine Print Page | 135... -
Page 140: Avl Customer Service
E-Mail: sales@avlusa.com AVL W ARRANTIES Limited Warranty: The benefits of this warranty accrue solely to the original purchaser of AVL Looms, Inc. products, as defined below. Your warranty covers: New Looms: AVL Looms, Inc., a California corporation (“AVL”) warrants to the original purchaser of any AVL loom (each, a "Product") that the Product will be free from defects in materials and workmanship... - Page 141 K-Series Loom User Manual The Fine Print Your warranty does not cover: 1.Labor charges for installation or set-up of the Product, as well as any labor charges required to install, disassemble, troubleshoot, or reassemble the Product. 2.Any taxes imposed on AVL for Product replacement or repair under this warranty. 3.Installation, performance of, or repair of: cabling, electrical, or accessory attachments used with the Product.
Need help?
Do you have a question about the K Series and is the answer not in the manual?
Questions and answers