Advertisement
Quick Links
Please read instructions thoroughly before starting installation
**Remove all contents of the Softopper carefully to protect from scratches.**
Windows scratch easily! Keep protective layer placed between them when they are stacked.
Beginning Note: It is best to do the initial installation in warmer temperatures (70+ degrees F). The
fabric of the top is at its tightest when it is new. Installing it in warmer temperatures
initially will ensure that the fabric is easier to work with. The fabric of the top will relax
slightly with time and become easier to put on.
1-800-810-7227
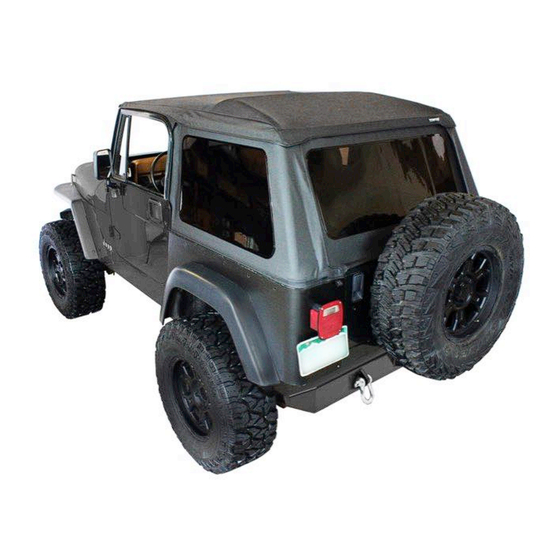
Softopper Installation Instructions
Jeep Wrangler YJ 02
Estimated Installation Time: 1 hour
www.softopper.com
Page 1
Advertisement

Subscribe to Our Youtube Channel
Related Manuals for Softopper YJ 02


Summary of Contents for Softopper YJ 02
- Page 1 Jeep Wrangler YJ 02 Please read instructions thoroughly before starting installation **Remove all contents of the Softopper carefully to protect from scratches.** Windows scratch easily! Keep protective layer placed between them when they are stacked. Estimated Installation Time: 1 hour Beginning Note: It is best to do the initial installation in warmer temperatures (70+ degrees F).
-
Page 2: Table Of Contents
**Safety Notes** Please read the following before driving with the Softopper installed: 1. This product is designed to shield the occupants from ordinary weather conditions. 2. DO NOT rely in any way on the soft top to contain occupants within the vehicle, or to protect against injury or death in the event of an accident or a roll-over. -
Page 3: Header Bar
7. 1 Front Overhead Strap 8. 2 Rear Window Roll Up Straps 9. 2 Rear Lower Straps 10. Bag Containing Hardware 11. Bottle of Seam Sealer 12. 1 Softopper Canopy Including 3 Windows (not depicted above) 1-800-810-7227 www.softopper.com Page 3... - Page 4 YJ, you will need to remove them as well. 2. Locate the Box containing the Header Bar. 3. Install header bar as per included Header Bar instructions located in the box. 1-800-810-7227 www.softopper.com Page 4...
- Page 5 3. Using a 7/16” socket wrench and another 7/16” wrench, secure the tubrail to the vehicle side rail as shown through the 3 REAR HOLES ONLY. Repeat on passenger side. Save the remaining hardware for later in the installation process. 1-800-810-7227 www.softopper.com Page 5...
- Page 6 1. Locate the 2 Door Surrounds (not to scale below) and the bag containing 4 Mounting Brackets, (4) 1/4-14 x 1” Self Drilling Hex Screws, (8) 1/4-20 x 1” Hex Screws, and 12 washers. Driver Side Passenger Side 1-800-810-7227 www.softopper.com Page 6...
- Page 7 The horizontal part of the bracket should face in toward the screw side as shown (driver side depicted). Repeat with passenger side door surround. 4. These Hex screws can be loosened and readjusted later in the station process if necessary for proper alignment. 7/16” 1-800-810-7227 www.softopper.com Page 7...
- Page 8 CLOSE the DOOR. Continue to align the door surround until you ensure a water tight seal between the door surround and the TOP as well as the REAR of the door. This may be easier with an extra pair of helping hands. 1-800-810-7227 www.softopper.com Page 8...
- Page 9 14. Reinstall the 2 screws removed in step #6. 15. Ensure that the entire door surround is aligned tightly with the door to create a water tight seal. 16. Tighten all bolts and screws. Repeat on passenger side. 1-800-810-7227 www.softopper.com Page 9...
- Page 10 The 2 outer most holes exist in the vehicle, and the 3rd will need to be drilled using a 1/4” bit. Refer to the next page for more photos. 1-800-810-7227 www.softopper.com Page 10...
- Page 11 5. Using (2) 7/16” sockets and/or wrenches, securely fasten the rear bracket to the vehicle using the correct hardware as shown. Place one washer on the bolt side and one washer on the nut side. Repeat on passenger side. Drill This Hole 1/4” 1-800-810-7227 www.softopper.com Page 11...
- Page 12 Softopper Canopy Installation 1. Locate the roof panel of the canopy (the largest panel), and the 2 horizontal supports (longest). 2. Find the 2 sleeves on the under side of the roof canopy, and slide the long supports into each sleeve CONCAVE SIDE UP until it is touching the bottom of the sleeve.
-
Page 13: Rear Brackets
Loosely tighten the straps. 8. Slide the 54” leading plastic piece into the front slot in the header bar, and pull backward on the canopy to secure it. 1-800-810-7227 www.softopper.com Page 13... - Page 14 12. Repeat with the passenger side triangle. 13. Use the Front overhead strap to buckle the two triangles together and tighten. 1-800-810-7227 www.softopper.com Page 14...
- Page 15 14. Locate the large, fabric rear triangle sewn into the roof. 15. Pull it around the rear of the rear roll bar and buckle the strap to the receiving loop at the front of the vehicle by the windshield. Tighten and secure. 1-800-810-7227 www.softopper.com Page 15...
- Page 16 19. Fold up the velcro flap on the roof to access the zippers. Join the zipper on the upper portion of the window to the zipper on the roof canopy, and zip closed. 1-800-810-7227 www.softopper.com Page 16...
- Page 17 29. Zip closed the 2 vertical zippers. 30. Push the 2” piece of plastic on the bottom of the rear window underneath the rear bracket. 1-800-810-7227 www.softopper.com Page 17...
- Page 18 Straps. Place them between the velcro joining the rear window upper zipper to the roof. Roll up gently as to not scratch the windows (DO NOT ROLL UP WINDOW IN FREEZING TEMPERATURES: WINDOW MAY CRACK). Buckle the straps around the window and tighten securely. 1-800-810-7227 www.softopper.com Page 18...
-
Page 19: Softopper Care And Maintenance
(see Warranty information for more detail on length of window warranties). When opening the rear of the Softopper in cold weather, be sure to raise the zippers as high as possible so that any folding will occur to the topper fabric and not to the vinyl window. - Page 20 Returns must be pre-approved and have Softopper’s issued RGA number attached. Any defective items must be returned with proof of purchase to Softopper 4750 Nautilus Court South, Unit B Boulder CO 80301, freight pre-paid. Items returned must be carefully packed, in clean condition, with plastic windows protected from scratching and creasing.
Need help?
Do you have a question about the YJ 02 and is the answer not in the manual?
Questions and answers