Table of Contents
Advertisement
Quick Links
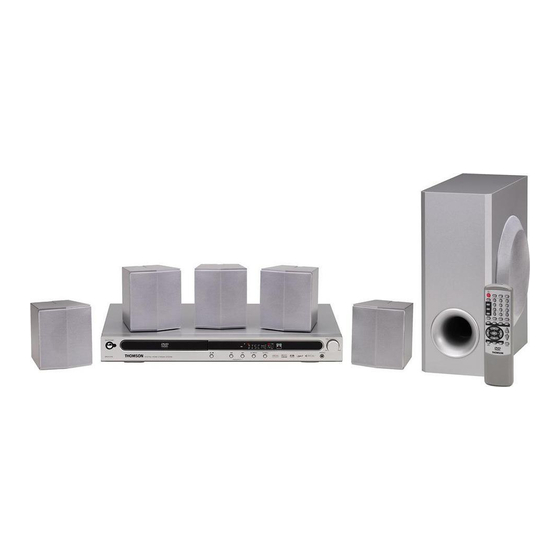
Pack Home Cinema with DVD
Instruction Manual
S
AFETY
To ensure proper use of this product, please read this owner manual carefully
and retain for future reference. Should the unit require maintenance, contact
an authorized service location.
I
S
I
MPORTANT
AFETY
NSTRUCTIONS
CAUTION: RETAIN THIS MANUAL FOR FUTURE REFERENCE.
This set has been designed and manufactured to assure personal safety.
Improper use can result in electric shock or fire hazard. The safeguards
incorporated in this unit will protect you if you observe the following
procedures for installation, use and servicing. This unit does not contain
any parts that can be repaired by the user.
•
Read these instructions.
•
Keep these instructions.
•
Heed all warnings.
•
Follow all instructions.
•
Do not use this apparatus near water.
•
Clean only with dry cloth.
•
Do not block any ventilation openings. Install in accordance with the
manufacturer's instructions.
•
Do not install near any heat sources such as radiators, heat registers, stoves, or
other apparatus (including amplifiers) that produce heat.
•
Protect the power cord from being walked on or pinched particularly at plugs,
convenience receptacles and the point where they exit from the apparatus.
•
Only use attachments/accessories specified by the manufacturer.
•
Unplug this apparatus during lightning storms or when unused for long periods
of time.
•
Use only with a cart, stand, tripod, bracket or table specified by the manufacturer,
or sold with the apparatus. When a cart is used, use caution when moving the
cart/apparatus combination to avoid injury from tip-over.
DPL912VD
•
Refer all servicing to qualified service personnel. Servicing is required when the
apparatus has been damaged in any way, such as when the power supply cord
or plug is damaged, liquid has been spilled or objects have fallen into the
apparatus, the apparatus has been exposed to rain or moisture, does not operate
normally, or has been dropped.
•
Apparatus shall not be exposed to dripping or splashing and that no objects filled
with liquids, such as vases, shall be placed on the apparatus.
•
Burden
Do not place a heavy object on, or step on the product. The object may fall,
causing serious personal injury and serious damage to the product.
•
Damage Requiring Service
Unplug this product from the wall outlet and refer servicing to qualified service
personnel under the following conditions:
a) When the power-supply cord or plug is damaged.
b) If liquid has been spilled, or objects have fallen into the product.
c) If the product has been exposed to rain or water.
d) If the product does not operate normally by following the operating instructions.
Adjust only those controls that are covered by the operating instructions. Improper
adjustment of other controls may result in damage and will often require extensive
work by a qualified technician to restore the product to its normal operation.
e) If the product has been dropped or damaged in any way.
f) When the product exhibits a distinct change in performance - this indicates a
need for service.
•
Servicing
Do not attempt to service this product yourself as opening or removing covers
may expose you to dangerous voltage or other hazards. Refer all servicing to
qualified service personnel.
•
Replacement Parts
When replacement parts are required, be sure the service technician has used
replacement parts specified by the manufacturer or have the same characteristics
as the original part. Unauthorized substitutions may result in fire, electric shock,
or other hazards.
•
Safety Check
Upon completion of any service or repairs to this product, ask the service
technician to perform safety checks to determine that the product is in proper
operating condition.
•
The main plug is used as the disconnect device, the disconnect device shall
remain readily operable condition.
•
Stand-by light will be on when the main plug is connected, while the Stand-by
light will be off when the main plug is disconnected to the socket.
•
European versions comply with CE requirements.
P
ACKING
Examine the contents of the box for your DVD Receiver.
There should be the following:
•
DVD Receiver with attached power cord
•
Remote Control with 2 batteries
•
Instruction Book
•
Subwoofer
•
2 front speakers
•
Center speaker
•
2 rear speakers
•
FM antenna
I
NSTALLATION
•
Install your unit on a stable flat surface. There must be sufficient room in front of
the unit for the drawer to be opened and the unit should be positioned so that it
can see the remote control.
•
Do not expose your unit to extremes of temperature or humidity.
•
Avoid standing it on a hot surface such as on top of other hot running equipment
and ensure that there is adequate ventilation to the unit.
Caution:
Do not install this equipment in confined space such as a book case or similar unit!
Cleaning Disc
Picture freezing & sound skipping or repeating can occur if the disc inside
the player is dirty.
•
When a disc becomes dirty, clean it with a cleaning cloth. Wipe the disc from the
center out.
•
Do not wipe in a circular motion. Circular scratches can cause picture distortion
or render the disc unplayable.
Caution:
Do not use solvents, commercially available cleaners, or antistatic spray
intended for analog discs.
F
RONT
1
EN
1. Standby On / Off
2 . Disc Tray
3 . Infra-Red Receiver Window
4 . VFD Display Area
5. VOLUME Adjusts the master volume. Turn clockwise to increase the volume
and anti-clockwise to decrease
6.
/
Open/stops 1) Opens or closes the disc loading tray, 2) Stops playing.
7.
Skip 1) skips to previous chapter/track in DVD/VCD/CD mode, 2) tunes
down frequency in tuner mode. When the preset function applied, you can search
downwards to select the channel you want or start the preset programming mode.
8.
SKIP 1) skips to next chapter/track in DVD/VCD/CD mode, 2) tunes up
frequency in tuner mode. When the preset function applied, you can search
upwards to select the channel you want or start the preset programming mode.
9.
1) Starts playing in DVD/VCD/CD mode, 2) In tuner mode, this starts to store
Displayed frequency at selected channel by
save it.
10.SOURCE Switches between AV mode, tuner mode and DVD mode.
11.Headphone Jack
R
P
EAR
13
12
8
9
10
IMPORTANT!
Connect the AC cord only after the speakers, antenna and all optional
equipment have been connected.
Never make or change any connections with the power switched on.
The rating plate is located at the rear panel of the system.
1 . FM Antenna Input Connections
For FM reception, connect the FM antenna to the FM jack. Move the antenna in
various directions until the clearest signal is received.
Note: Position the antenna as far away as possible from a TV, VCR or other
radiation source.
2. Audio Inputs
For connecting audio (Left / Right) input signals from auxiliary sources such as
VCR, TV or Satellite Receiver and playing them through this Home Theater
System. These connections are labeled AV1/AV2 and are selected by the
SOURCE button on the front panel.
3. Video Inputs
For connecting video signals from the corresponding video out jacks on the axillary
items, e.g. TV, VCR or satellite receiver.
4. REC Out (Video)
For connecting VCR or other recording device (Most DVDs cannot be
recorded, however you can use this connection to record from the auxiliary
inputs, e.g. satellite receiver, as well).
5. REC Out (Audio)
For connecting audio (Left / Right) signals to external recording devices such
as VCR or Tape Recorder.
6. Component Video & Progressive Outputs
For connecting TV with component video input (using component video cable,
not provided).
7. TV Audio Input/RGB Output
(1) Under DVD mode, Scart Video terminal provides the best quality for video
signal (Scart cable not included).
(2) Under TV mode, receive Audio Signal from TV and play them through Home
theatre system.
8. Subwoofer Speaker
For connecting the passive subwoofer, with colored wire to "+" terminal and
black wire to "-" terminal.
9. Center Speaker
For connecting the center speaker, with colored wire to "+" terminal and black
wire to "-" terminal.
10. Surround Speaker (Rear Speakers)
For connecting the left surround speaker to "SL" terminals and right surround
speaker to "SR" terminals. Connect the colored wire to "+" and black wire to "-" .
11.Front Speaker
For connecting the left front speaker to "L" terminals, right front speaker to "R"
terminals. Connect the colored wire to "+" and black wire to "-".
12.Active Subwoofer Out
For connecting an external powered subwoofer.
13.Power Cord
P
LAYER
For the purpose of distribution of DVD Discs, the world has been
separated into 6 zones. The zone your unit is intended for is indicated
on the Zone Label. This should be the same as the label on discs
available in your region.
If you have any difficulties in playing a disc, make sure that the disc is
for the same zone as your player.
P
ANEL
2
3
4
6
7
8
9
10
/
and a second press will
ANEL
6
7
1 1 1 1
2
3
4 4
5
Z
ONES
5
11
1
Advertisement
Table of Contents

Related Manuals for THOMSON DPL912VD


Summary of Contents for THOMSON DPL912VD
- Page 1 RONT ANEL DPL912VD Pack Home Cinema with DVD 1. Standby On / Off 2 . Disc Tray 3 . Infra-Red Receiver Window 4 . VFD Display Area 5. VOLUME Adjusts the master volume. Turn clockwise to increase the volume and anti-clockwise to decrease Open/stops 1) Opens or closes the disc loading tray, 2) Stops playing.
-
Page 2: Disc You Can Play
DISC PEAKER LACEMENT WITCH ON FOR THE IRST YOU CAN PLAY • You have connected up the Home Theater System as shown in the preceding Placement of speakers play an important role in the reproduction of surround While advances have been made to ensure that your disc player is compatible pages. - Page 3 Speaker Setup Selecting EQ Modes Speaker Setup Distance UNCTION ETUP Two options are available to adjust your There are 6 EQ modes available while you are listening to 2 channel output (e.g. Volume speakers setting to best fit your listening Music CD).
- Page 4 Note: Repeat A-B allows a passage to be repeated MP3 files along with JPEG files or JPEG files only: LEEP continuously. Press OK at the start of the required passage (A), then press OK again at the end of the required passage Setting the Sleep Timer (B).
Need help?
Do you have a question about the DPL912VD and is the answer not in the manual?
Questions and answers