Table of Contents
Advertisement
Available languages
Available languages
Quick Links
Advertisement
Table of Contents

Related Manuals for Beko HIML 95225 SXE


Summary of Contents for Beko HIML 95225 SXE
- Page 1 Built-In Hob User manual HIML 95225 SXE EN IT 01M-8860873200-0219-01...
-
Page 2: Meanings Of The Symbols
Please read this manual first! Dear Customer, Thank you for purchasing a Beko product. We hope that you get the best results from your product which has been manufactured with high quality and state-of-the-art technology. Therefore, please read this entire user manual and all other accompanying documents carefully before using the product and keep it as a reference for future use. - Page 3 CONTENTS ENGLISH 04-26 ITALIANO 27-52 3 / EN Built-In Hob / User Manual...
-
Page 4: Important Instructions And Warnings For Safety And Environment
Important instructions and warnings for safety and environment This section contains safety in- Do not operate the product if it is • structions that will help protect defective or has any visible dam- from risk of personal injury or prop- age. - Page 5 Important instructions and warnings for safety and environment This appliance is not connected to Gas appliances and systems must • • a combustion products or evacu- be regularly checked for proper ation device. It shall be installed functioning. Regulator, hose and and connected in accordance with its clamp must be checked reg- current installation regulations.
-
Page 6: Electrical Safety
Important instructions and warnings for safety and environment Turn off all valves on gas appli- Never wash the product by spread- • • ances and gas meter at the main ing or pouring water onto it! There control valve, unless it’s in a con- is the risk of electric shock! fined space or cellar. -
Page 7: Product Safety
Important instructions and warnings for safety and environment Make sure that fuse rating is com- Unattended cooking on a hobwith • • patible with the product. fat or oil can be dangerous and may result in fire. NEVER try to 1.4 Product safety extinguish a fire with water, but switch off the appliance and then... -
Page 8: Intended Use
Important instructions and warnings for safety and environment 1.5 Intended use Do not place any items above the • appliance that children may reach This product is designed for do- • for. mestic use. Commercial use will void the guarantee. 1.7 Compliance with the WEEE CAUTION: This appliance is for Directive and Disposing of the... -
Page 9: Your Product
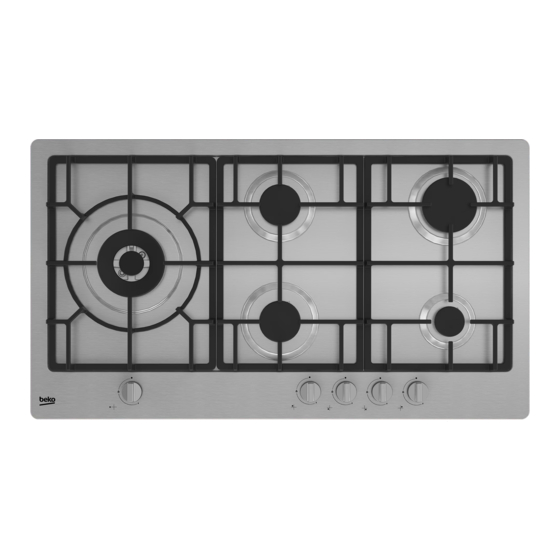
Your product 2.1 Overview 1. Pan support 6. Auxiliary burner 2. Normal burner 7. Burner plate 3. Assembly clamp 8. Rapid burner 4. Control panel 9. Wok burner 5. Base cover 10. Normal burner 2.2 Control panel 1. Normal burner Front left 4. -
Page 10: Package Contents
Your product 2.3 Package contents Accessories supplied can vary de- pending on the product model. Not every accessory described in the user manual may exist on your prod- uct. 2.3.1 Coffee pot adaptor Used for coffee pots. 2.3.2 Wok pan adaptor Used for hosting a wok pan with a round bottom. -
Page 11: Technical Specifications
Your product 2.4 Technical specifications Inox HIML 95225 SXE Burners 5 Gas Burner Voltage / frequency 220-240 V ~ 50-60Hz Cable type / section H05V2V2-F 3 x 0,75 mm2 Cable length max. 1.5 m Category of gas product II 2H3+... -
Page 12: Injector Table
Your product 2.4.1 Injector table Hob zone Auxiliary Normal Rapid Wok burner Wok burner burner burner burner Gas type / Gas pres- (4.2 kW) (4 kW) 1 kW 1.75 kW 3 kW sure NG G20-20 mbar 0,72 mm 0,97 mm 1,15 mm 1,53 mm LPG G30-28….30... -
Page 13: Before Installation
Installation Product must be installed by a qualified person in accordance with the regulations in force. The manu-facturer shall not be held responsible for damages arising from procedures carried out by unauthorized persons which may also void the warranty. Preparation of location and electrical and gas installation for the product is under customer’s responsibility. -
Page 14: Installation And Connection
Installation 3.2.1 Installation and connection Total gas con-sump- min. Ventilation tion (kW) opening (cm²) The product must be installed in accordance with all local gas and electrical regulations. 3.3 Electrical connection Connect the product to a grounded outlet/line protec-ted by a fuse of suitable capacity as stat- ed in the “Technical specifications”... -
Page 15: Gas Connection
Installation 3.4.1 Connecting the gas hose WARNING: Before starting any For NG work on the electrical installation, disconnect the product from the • Natural gas installation must be prepared before mains supply. installing the product. There is the risk of electric shock! •... - Page 16 Installation 3.5 Leakage control at the 3.4.2 Connecting the gas hose For LPG connection point • Make sure that all knobs on the product are • Have your product connected so that it is close turned off. Make sure that the gas supply is to the gas connection and it does not leak.
-
Page 17: Installing The Product
Installation 3.6 Installing the product Thickness of the counter must be at least 40 mm. When installing the hob onto a cab- 1. Remove burners, burner caps and grills on the inet, a shelf must be installed in hob from the product. order to separate the cabinet from 2. -
Page 18: Final Check
Installation 3.7 Final check 3.6.1 Rear view (connection holes) 1. Open gas supply. 2. Check gas installations for secure fitting and tightness. 3. Ignite burners and check appearance of the flame. Flame must be blue and have a reg- ular shape. If the flame is yellowish, check if the burner cap is seated se- curely or clean the burner. -
Page 19: Tips For Saving Energy
Preparation 4.1 Tips for saving energy The following information will help you to use your appliance in an ecological way, and to save energy: • Defrost frozen dishes before cooking them. • Use pots/pans with cover for cooking. If there is no cover, energy consumption may increase 4 times. -
Page 20: General Information About Cooking
Using the hob 5.1 General information about • Place the saucepans in a manner so that they are centered on the cooking zone. When you cooking want to move the saucepan onto another cook- ing zone, lift and place it onto the cooking zone Warning: Never fill the pan with you want instead of sliding it. -
Page 21: Igniting The Gas Burners
Using the hob WARNING: Do not use cooking WARNING: Release the button pans beyond the dimension lim- if the burner is not ignited within 15 its given above. Using larger pans seconds. Wait at least 1 minute be- causes risk of carbon monoxide fore trying again. -
Page 22: Maintenance And Care
Maintenance and care 6.1 General information Do not use steam cleaners to clean the appliance as this may cause an Service life of the product will extend and the pos- electric shock. sibility of problems will decrease if the product is cleaned at regular intervals. -
Page 23: Assembling The Wok Burner
Maintenance and care 1. Place the burner head on the burner chamber In case of any overflow, turn off the such that it passes through the plug (6) hole. burner immediately. Remove the 2. Place the burner caps on the burner heads. pots and pan supports on it. -
Page 24: Glass Ceramic Surfaces
Maintenance and care 6.3 Cleaning the control panel 6.2.4 Glass ceramic surfaces Wipe the glass ceramic surface using a piece of Clean the control panel and knobs with a damp cloth dampened with cold water in a manner as cloth and wipe them dry. not to leave any cleaning agent on it. -
Page 25: Troubleshooting
Troubleshooting Clanging is heard while the product is heating and cooling. • When the metal parts are heated, they may ex- pand and make noise. >>> This is not a failure. There is no ignition spark. • Power is cut. >>> Check the fuses in the fuse box. - Page 26 Troubleshooting Brand BEKO Hob Type Built-in Gas Hob Model Inox Symbol Value Unit Number of the gas burners Energy efficiency of the rear right EE gas-powered burner 55,3 burner Energy efficiency of the front right EE gas-powered burner burner Energy efficiency of the front left...
-
Page 27: Spiegazione Dei Simboli
Leggere per prima cosa questo manuale utente! Gentile Cliente, Grazie per aver scelto un prodotto Beko. Speriamo che Lei riesca ad ottenere i risultati migliori da questo prodotto, realizzato con tecnologia di alta qualità e all’ a vanguardia. Pertanto, legga questo intero manuale utente e tutti gli altri documenti allegati con attenzione prima di utilizzare il prodotto e lo conservi come riferimento per usi futuri. -
Page 28: Sicurezza Generale
Istruzioni importanti per sicurezza e ambiente Questa sezione contiene istruzioni Ciò renderà inoltre nulla la ga- di sicurezza che consentono di pre- ranzia. Leggere attentamente le venire il pericolo di lesioni personali istruzioni prima dell’installazione. o di danni materiali. L’inosservanza Non mettere in funzione il pro- •... - Page 29 Istruzioni importanti per sicurezza e ambiente Prima dell’installazione, assicu- Utilizzare il prodotto in maniera • • rarsi che le condizioni della di- intensa per periodi prolungati (1 stribuzione locale (tipo di gas e ora e più) può richiedere una ven- pressione del gas) e le regolazioni tilazione aggiuntiva (per esempio dell’...
-
Page 30: Sicurezza Elettrica
Istruzioni importanti per sicurezza e ambiente 1.3 Sicurezza elettrica Richiedere informazioni sui numeri • di telefono di emergenza per il gas In caso di guasti al prodotto, non • e sulle misure di sicurezza in caso utilizzarlo a meno che non venga di odore di gas al proprio fornitore riparato da un agente autorizzato locale di gas. - Page 31 Istruzioni importanti per sicurezza e ambiente 1.4 Sicurezza del pro- Se il cavo di alimentazione del pro- • dotto risulta danneggiato, deve dotto essere sostituito dal produttore, La macchina e le sue parti accessi- dal suo agente per l’assistenza o •...
-
Page 32: Uso Previsto
Istruzioni importanti per sicurezza e ambiente La cottura senza supervisione di Assicurarsi che non vi sia liquido o • • oli o grassi sul piano cottura può umidità sulla presa quando viene essere pericolosa e causare in- collegata all’ a pparecchio. cendi. -
Page 33: Informazioni Di Imballaggio
Istruzioni importanti per sicurezza e ambiente 1.6 Sicurezza dei bam- 1.7 Conformità alla direttiva WEEE e allo smaltimento dei bini rifiuti: Le parti accessibili possono diven- • Questo apparecchio è conforme alla Direttiva UE tare calde durante l’uso. I bambini WEEE (2012/19/EU). -
Page 34: Pannello Di Controllo
Il prodotto 2.1 Panoramica 1. Poggiapentola 6. Bruciatore ausiliario 2. Bruciatore normale 7. Piastra bruciatore 3. Morsetto per il montaggio 8. Bruciatore rapido 4. Pannello di controllo 9. Bruciatore wok 5. Coperchio base 10. Bruciatore normale 2.2 Pannello di controllo 1. -
Page 35: Contenuto Della Confezione
Il prodotto 2.3 Contenuto della confezione Gli accessori in dotazione posso- no variare a seconda del modello del prodotto. Non tutti gli accessori descritti nel manuale utente po- treb-bero esistere con il prodotto acquistato. 2.3.1 Adattatore caffettiera Usato per caffettiere. 2.3.2 Adattatore wok Usato come alloggiamento del wok con fondo ro- tondo. -
Page 36: Specifiche Tecniche
Il prodotto 2.4 Specifiche tecniche Inox HIML 95225 SXE Bruciatori 5 bruciatori a gas Tensione / frequenza 220-240 V ~ 50-60Hz Tipo / sezione cavo H05V2V2-F 3 x 0,75 mm2 Lunghezza cavo max. 1,5 m Categoria di prodotto a gas... - Page 37 Il prodotto 2.4.1 Tabella iniettori Zona di cottura Bruciatore Bruciatore Bruciatore Bruciatore Bruciatore rapido ausiliario normale Tipo di gas / Pressio- 3 kW 1 kW 1,75 kW (4,2 kW) (4 kW) ne del gas Gas metano G20-20 0,72 mm 0,97 mm 1,15 mm 1,53 mm mbar...
-
Page 38: Prima Dell'installazione
Installazione Il prodotto deve essere installato da personale • Tagliare l’ a pertura per il piano cottura nel piano qualificato secondo i regolamenti correnti. Il pro- da lavoro secondo le dimensioni dell’installa- duttore non sarà considerato responsabile dei zione. danni derivanti da procedure eseguite da persone non autorizzate. -
Page 39: Installazione E Collegamento
Installazione 3.2.1 Installazione e Consumo totale gas Apertura di ventila- collegamento (kW) zione min. (cm²) Il prodotto deve essere installato secondo i regola- menti locali per il gas e/o elettrici. 3.3 Collegamento elettrico Collegare il prodotto ad una presa messa a terra/ linea protetta da un fusibile della capacità... - Page 40 Installazione • Il collegamento deve essere conforme ai regola- Il tipo di gas del prodotto acquistato menti nazionali. è riportato sull’ e tichetta del tipo di • I dati sull’alimentazione di rete devono corri- apparecchio posta sul fondo del pia- spondere ai dati specificati sull’...
- Page 41 Installazione 3.5 Controllo perdite nel punto 3.4.2 Collegare il tubo flessibile del gas per GPL di collegamento • Posizionare il prodotto in modo tale che sia vi- • Assicurarsi che tutte le manopole del prodotto cino all’allacciamento del gas e non presenti siano spente.
-
Page 42: Installazione Del Prodotto
Installazione 3.6 Installazione del prodotto Lo spessore del ripiano non deve essere inferiore a 40 mm.. 1. Rimuovere bruciatori, coperture dei bruciatori e Quando si installa il piano cottura su grill del piano cottura dall’ a pparecchio. un alloggiamento, bisogna installare 2. -
Page 43: Controllo Finale
Installazione 3.7 Controllo finale 1. Aprire la fornitura del gas. 2. Controllare le installazioni del gas per montaggio e tenuta sicuri. 3. Accendere i bruciatori e controllare l’ a spetto della fiamma. La fiamma deve essere blu e avere forma regolare. Se la fiamma ten- de al giallo, controllare se il coper- chio del bruciatore è... -
Page 44: Consigli Per Il Risparmio Energetico
Preparazione 4.1 Consigli per il risparmio energetico Le informazioni che seguono aiutano ad usare l’ a pparecchio in modo ecologico e a risparmiare energia: • Scongelare gli alimenti congelati prima di cuo- cerli. • Usare pentole/padelle con coperchi per la cot- tura. - Page 45 Come utilizzare il piano cottura 5.1 Informazioni generali sulla • Non mettere coperchi di pentole o padelle sulle zone di cottura. cottura • Mettere le padelle in modo tale che siano al centro della zona di cottura. Quando si desidera PERICOLO: Non riempire mai la spostare la padella su un’altra zona di cottura, padella con olio per oltre un terzo.
- Page 46 Come utilizzare il piano cottura • Se il gas non si accende dopo aver premuto e rila- AVVERTENZA: Non utilizzare sciato la manopola, ripetere la stessa procedura pentole di cottura più grandi della tenendo la manopola premuta per 15 secondi. dimensione sopra indicata.
-
Page 47: Pulizia E Manutenzione
Pulizia e manutenzione 6.1 Informazioni generali La superficie può danneggiarsi a causa di alcuni detergenti o materiali La vita utile dell’ a pparecchio si allunga e problemi di pulizia. frequenti diminuiscono se lo stesso è pulito ad in- Non usare detergenti aggressivi, tervalli regolari. - Page 48 Pulizia e manutenzione 6.2.2 Assemblare le parti del bruciatore wok In caso di traboccamento, spegne- re immediatamente i bruciatori. Rimuovere le pentole e i poggiapen- tola. Pulire il materiale traboccato con un panno asciutto e assorbente. Non far entrare liquidi nei bruciatori. 1.
- Page 49 Pulizia e manutenzione 6.2.3 Assemblare le parti del 6.2.4 Superfici in vetroceramica bruciatore Pulire la superficie in vetroceramica usando un panno inumidito con acqua fredda in modo da non lasciare alcun agente di pulizia su di essa. Asciugare con un panno morbido e asciutto. I residui possono danneggiare la superficie in vetroceramica quando si usa il piano cottura la volta successiva.
- Page 50 Pulizia e manutenzione 6.3 Pulizia del pannello di controllo Pulire pannello di controllo e le manopole con un panno umido e asciugare. Non rimuovere tasti/manopole per pulire il pannello di controllo. Il pannello di controllo può danneg- giarsi! 2. Manopola 3.
-
Page 51: Ricerca E Risoluzione Dei Problemi
Ricerca e risoluzione dei problemi L’apparecchio emette rumori metal- Consultare l’ a ssistenza se non si rie- lici durante riscaldamento e raffred- sce a risolvere il problema nonostan- damento. te siano state implementate le solu- • Quando le parti di metallo si riscaldano, possono zioni di questa sezione. - Page 52 Ricerca e risoluzione dei problemi Marca BEKO Tipo di piano Piano cottura a gas incassato cottura Modello Inox Simbolo Valore Unità Numero dei bruciatori a gas Efficienza energetica del bruciatore destro bruciatore a gas EE 55,3 posteriore Efficienza energetica del bruciatore destro...
- Page 56 www.beko.com...
Need help?
Do you have a question about the HIML 95225 SXE and is the answer not in the manual?
Questions and answers