
Related Manuals for MIOX RIO Zuni Series


Summary of Contents for MIOX RIO Zuni Series
- Page 1 RIO Zuni™ Series On-Site Generator 1.0 and 2.0 Installation, Operation, and Maintenance Manual 1 December 2017 MIOX RIO Zuni™ Operators Manual P/N: 102-00094-I Page 1...
- Page 2 MIOX RIO Zuni™ Operators Manual MIOX maintains a constant product improvement program that may affect design and/or specifications. The company reserves the right to make these changes without prior notice or liability. Portions of the MIOX OSGs are covered by U.S. Patent...
-
Page 3: Table Of Contents
MIOX RIO Zuni™ Operators Manual CONTENTS CONTENTS ......................3 List of Figures ......................4 List of Tables ......................4 INTRODUCTION AND OVERVIEW ................5 Regulatory Compliance .................... 5 U. S. Environmental Protection Agency (US EPA) ............. 5 List of Certifications ....................5 NSF International .................... -
Page 4: List Of Figures
MIOX RIO Zuni™ Operators Manual Changing Peristaltic Pump Tubes ................27 Cell Replacement ....................28 APPENDICES ......................32 Inline Pressure Reducer ..................33 Changing Pump Tubes ................... 34 Water Quality Guidelines ..................40 Rio Zuni Spare Parts Identification/Ordering Guide ............ 41 List of Figures Figure 1: RIO Zuni On-Site Generator (tabletop model) .......... -
Page 5: Introduction And Overview
For details of specific NSF standards for specific MIOX equipment, please consult with MIOX. NSF listings are also available through NSF International at (800) NSF-Mark or their web site at www.nsf.org. -
Page 6: System Description
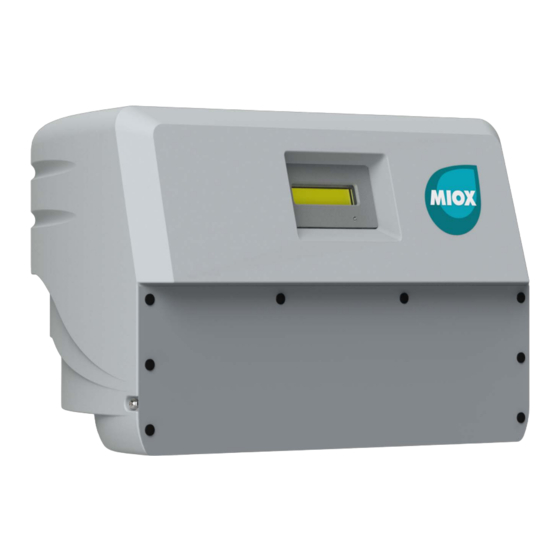
MIOX RIO Zuni™ Operators Manual System Description The MIOX RIO Zuni system is an on-site mixed oxidant generator that creates mixed oxidant solution from water, salt, and electricity. The system can create either 1.0 lb. or 2.0 lbs. of Free Available Chlorine (FAC) per day, depending on the model ordered. When producing oxidant the RIO Zuni system is automatically controlled by a pair of level switches inside the oxidant storage tank. -
Page 7: System Specifications
For continued protection against risk of fire, replace fuse only with a fuse of the same type and current rating *Performance may vary depending on salt quality, water quality, and water temperature. ^Refer to MIOX Salt Quality Guidelines for more details. Feed water flow rate is subject to +/- 15% variation. -
Page 8: System Illustrations And Component Descriptions
MIOX RIO Zuni™ Operators Manual System Illustrations and Component Descriptions RIO Zuni Hydrogen Vent Inline Pressure Reducer (must vent (connect to water supply) outside) Brine Tank Oxidant Level Switch Assembly Figure 2: Generic diagram of a RIO Zuni OSG with necessary components RIO Zuni OSG On-site mixed oxidant generator (OSG). - Page 9 10 PSI of pressure. See Figure 3 for details. MIOX Zuni Electrolytic Cell A proprietary electrolytic cell manufactured by MIOX produces 1.0 lbs of FAC per day of runtime. 1 lb. RIO Zuni OSGs use one cell while 2 lb. RIO Zuni OSGs use two cells. See Figure 4 for details.
- Page 10 NOTE: For items not listed above see the appendices and Documentation Kit. Additional items may include, but are not limited to the oxidant tank, hydrogen vent, oxidant pump, water heater and water chiller. Contact MIOX for additional details on available options. P/N: 102-00094-I Page 10...
-
Page 11: Figure 3: Rio Zuni 2.0 Lb Osg With Labeled System Components. Cover Not Shown
MIOX RIO Zuni™ Operators Manual Electrical Enclosure Brine Pump Water Pump Check Valve LCD Display Indicator Figure 3: RIO Zuni 2.0 lb. OSG with labeled system components. (System cover not shown) P/N: 102-00094-I Page 11... -
Page 12: Figure 4: Rio Zuni 2.0 Lb Osg Showing Cells, Thermowells, And I/O Panels
MIOX RIO Zuni™ Operators Manual 2 MIOX RIO Zuni Electrolytic Cells Electrical Back Panel Thermowells Plumbing I/O (T-shaped elements in plumbing line) Figure 4: RIO Zuni 2.0 lb. OSG showing cells, thermowells, and I/O panels P/N: 102-00094-I Page 12... -
Page 13: Figure 5: Rio Zuni Osg I/O Panels With Labeled Components
MIOX RIO Zuni™ Operators Manual USB Port for data Ethernet Port logging ON/OFF Power Switch Entry Module Fuse Holder Water Oxidant Inlet Outlet Level Switch Assembly Brine Inlet Figure 5: RIO Zuni OSG I/O panels with labeled components P/N: 102-00094-I... -
Page 14: Figure 6: One Of Two Level Switches Before Being Installed In An Oxidant Tank
MIOX RIO Zuni™ Operators Manual Figure 6: One of two level switches before being installed in an oxidant tank Figure 7: Inline Pressure Reducer assembly P/N: 102-00094-I Page 14... -
Page 15: Installation And Startup
Disconnect power before working on the system. Do not reconnect the power to the rear panel until installation is complete. All MIOX systems require a good earth ground. A neutral is not a substitute for a proper earth ground. Electrical wiring to all MIOX systems should be performed by a certified electrician. -
Page 16: Tools For Install
9) Power Cord (provided with OSG) Tools for install The MIOX RIO Zuni can be installed without any tools, although MIOX recommends using a pair of pliers to tighten the hose clamps on the plumbing I/O panel. Refer to the Integrated Brine Tank Manual for tools needed to install the Integrated Brine Tank. -
Page 17: Electrical
Without level switches plugged in, the OSG will never operate and instead will remain in ‘Standby’ mode. All MIOX systems require a good earth ground. A neutral is not a substitute for Safety an earth ground. -
Page 18: Figure 8: Image Showing All Connections For Full Operation Of The Rio Zuni Osg
MIOX RIO Zuni™ Operators Manual Figure 8: RIO Zuni Connections. P/N: 102-00094-I Page 18... -
Page 19: Installing The Rio Zuni
OSG. Secure with hose clamps. Leave valves closed. 6) Load Salt Load the brine tank with salt. If Integrated Brine Tank was ordered from MIOX, follow instructions in the Integrated Brine Tank Manual. NOTE: Only use salt that meets or exceeds the salt quality specifications in the MIOX Salt Guidelines. - Page 20 9) Hydrogen Venting Install hydrogen venting in the oxidant tank. Hydrogen must be vented outdoors. Follow the Hydrogen Vent Kit instructions in the Oxidant Tank Manual and MIOX Hydrogen Safety White Paper. 10) Attached Power Cord Attach power cord to IEC on the back panel of OSG. Connect to 220-240 VAC. For a 220-240 VAC connection, replace the supplied power cord with a 10A rated 220VAC IEC Cable (220VAC cable not provided by MIOX).
-
Page 21: Startup Tips
Plumbing length In some installations, the system must go through multiple priming cycles before liquid reaches the unit. MIOX recommends minimizing the length of hose in between the water and brine supplies and the OSG. NOTE: Assure there are no kinks or pinches in the tubing. -
Page 22: Operation And Maintenance
MIOX RIO Zuni™ Operators Manual OPERATION AND MAINTENANCE Normal Operation In normal operation, the RIO Zuni automatically enters ‘Run’ and ‘Standby’ modes based on the oxidant level in the oxidant tank. The RIO Zuni will also automatically enter a ‘Cleaning’... -
Page 23: Communications
MIOX RIO Zuni™ Operators Manual Normal Operation The system is within the normal operating window for oxidant generation and is running correctly Startup/Shutdown During the startup and shutdown modes of operation, the system flushes the lines and cell with water to remove any excess salt that may crystalize and clog the plumbing while the system is not in use. -
Page 24: Troubleshooting
The headers for the log are not included but are available through your sales representative or service provider. MIOX recommends always restarting the unit after plugging in a USB memory stick. -
Page 25: General Troubleshooting
Replace cell if Mixed oxidants stored too necessary. long before use. 4. Check for leaks and repair. System Running outside of 5. Call sales agent or MIOX specifications. Customer Support. 6. Verify measurements with demand free water. 7. Confirm all parameters are within system specifications outlined in Table 1. -
Page 26: Table 3: General Troubleshooting Approaches
MIOX RIO Zuni™ Operators Manual that have formed blockages in the brine lines. System faults immediately on 1. Water or brine feed not 1. Confirm brine and water startup. getting to system. feeds are connected and all valves in between supplies and inlets are open. -
Page 27: Maintenance
Maintenance The MIOX RIO Zuni is designed for minimal maintenance. As long as the water and brine supplies are within the specifications, there should be almost no maintenance required to keep the unit running. -
Page 28: Cell Replacement
MIOX RIO Zuni™ Operators Manual Cell Replacement In the event that your RIO Zuni needs to have an electrolytic cell replaced, use the following procedure to replace the cell and reset the cell hour counter to zero. Tool Purpose Step(s) Used 1/8”... - Page 29 MIOX RIO Zuni™ Operators Manual Remove the inlet (bottom) and outlet (top) plumbing connections from the cell by sliding the tubing off of the hose fittings on the cell. Note: liquid may still be present within the cell and plumbing lines, watch out for leaks and use a cup or similar container to help catch excess liquid.
-
Page 30: Figure 10: Rio Zuni Osg With System Cover And Screw Locations
MIOX RIO Zuni™ Operators Manual Figure 10: RIO Zuni OSG with system cover and screw locations P/N: 102-00094-I Page 30... -
Page 31: Figure 11: Internal Top View Of Zuni Showing Cell Hour Reset Button Location
MIOX RIO Zuni™ Operators Manual Brine (Small) Pump Cell Hour Reset ↓ Fron t of Un it ↓ Figure 11: Internal Top View of Zuni Showing Cell Hour Reset Button Location. P/N: 102-00094-I Page 31... -
Page 32: Appendices
MIOX RIO Zuni™ Operators Manual APPENDICES a. Inline Pressure Reducer b. Changing Pump Tubes c. Water Quality Guidelines d. Spare Parts Identification/Ordering Guide P/N: 102-00094-I Page 32... -
Page 33: Inline Pressure Reducer
MIOX RIO Zuni™ Operators Manual Inline Pressure Reducer For all installations a pre-assembled Inline Pressure Reducer Kit is provided. The Inline Pressure Reducer Kit includes the following: 1) Pressure Reducing Valve (PRV), ¾” NPT that regulates outlet pressure to 4-psi 2) Coupling ¾”... -
Page 34: Changing Pump Tubes
MIOX RIO Zuni™ Operators Manual Changing Pump Tubes The following pages show how to change the pump tubes on the RIO Zuni peristaltic pumps. They are excerpts from the Welco Instruction Manuals. P/N: 102-00094-I Page 34... - Page 35 MIOX RIO Zuni™ Operators Manual P/N: 102-00094-I Page 35...
- Page 36 MIOX RIO Zuni™ Operators Manual P/N: 102-00094-I Page 36...
- Page 37 MIOX RIO Zuni™ Operators Manual P/N: 102-00094-I Page 37...
- Page 38 MIOX RIO Zuni™ Operators Manual P/N: 102-00094-I Page 38...
- Page 39 MIOX RIO Zuni™ Operators Manual P/N: 102-00094-I Page 39...
-
Page 40: Water Quality Guidelines
These factors can affect the oxidant demand of each individual water system, the oxidant production of the MIOX system, or the life of the cell itself. It is important to use “worst case” measures since water quality can vary from season to season. -
Page 41: Rio Zuni Spare Parts Identification/Ordering Guide
MIOX RIO Zuni™ Operators Manual Rio Zuni Spare Parts Identification/Ordering Guide Below is a list of common parts on the Rio Zuni along with their MIOX part number to aid in any troubleshooting event where identifying or replacing a part may be necessary. - Page 42 MIOX RIO Zuni™ Operators Manual PUMP,WP11,3/16",STEP,PHARMED 301-00375 TUBE, 1/8"-135, WT6, PHARMED 301-00376 TUBE, 3/16"-2, WT6, PHARMED 301-00377 P/N: 102-00094-I Page 42...
- Page 43 MIOX RIO Zuni™ Operators Manual TUBING, 1/4" x 3/8" 300-00349 ADAPTER,1/4x1/4x1/4 BARB, HDPE 300-02757 ADAPTER,3/8x3/8BARBx1/4,HDPE 300-02759 BULKHEAD, 1/4" NUTS, STR, NYLO 300-02640 P/N: 102-00094-I Page 43...
- Page 44 MIOX RIO Zuni™ Operators Manual TUBING 3/8 OD PE 700-00447 TUBING 3/8 ID x 5/8 OD VINYL 700-00447 CLAMP HOSE SNAP 3/8 OD ACETAL 700-01193 CLAMP HOSE SNAP 5/8 OD ACETAL 700-00449 P/N: 102-00094-I Page 44...
- Page 45 MIOX RIO Zuni™ Operators Manual FUSE, 5x20mm, 4A/250V (2PPD SYSTEM) 400-02548 FUSE, 5x20mm, 2A/250V (1PPD SYSTEM) 400-01199 ASSY, CELL LEAD #1 400-02557-D ASSY, CELL LEAD #2 400-02558-D ASSY, TEMP SENSOR. 1/4"DIA 400-02551-B P/N: 102-00094-I Page 45...
- Page 46 MIOX RIO Zuni™ Operators Manual CONTROL BOARD ASSY 400-02083-04 POWER SUPPLY, 240W, 15V, 16A 400-02078 P/N: 102-00094-I Page 46...
Need help?
Do you have a question about the RIO Zuni Series and is the answer not in the manual?
Questions and answers