Table of Contents
Advertisement
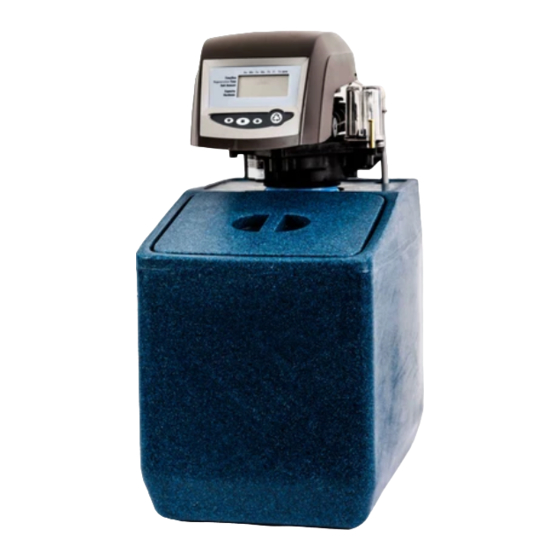
EMS Eco Premier Water Softener
User Guide
Please check your package and ensure you have everything
you need for your installation BEFORE you start
BOX CONTENTS:
1/2" flexible hose for
Water hardness
waste and overflow
test kit
(approx. 1.5m
length) You cut this
into two, to create
the two hoses
Your EMS Eco Premier
water softener
Installation
Electrical
instructions
transformer
IF YOU PURCHASED A 15mm OR 22mm FITTING KIT,
THIS IS PACKED INSIDE YOUR SOFTENER
PLEASE READ THIS INSTRUCTION BOOKLET BEFORE COMMENCING
INSTALLATION, AS IT CONTAINS USEFUL INFORMATION TO ASSUSTYOU.
Your 10 year warranty details are stored digitally
1
Advertisement
Table of Contents

Related Manuals for East Midlands Water Company EMS Eco Premier


Summary of Contents for East Midlands Water Company EMS Eco Premier
- Page 1 EMS Eco Premier Water Softener User Guide Please check your package and ensure you have everything you need for your installation BEFORE you start BOX CONTENTS: 1/2” flexible hose for Water hardness waste and overflow test kit (approx. 1.5m...
- Page 2 EMS Eco Premier Water Softener Thank you for purchasing your East Midlands Water Company EMS Eco Premier water softener. Soft water will benefit your household in many ways and if you haven't previously enjoyed soft water, you will soon be delighted with the difference it will make to your life.
- Page 3 Quick reference guide General information about water softeners Page 4 Plumbing requirements Pages 5, 6 Connecting the softener Pages 7, 8 Quick set up guide (programming the softener) Pages 9, 10 Regeneration process codes Page 11 Help pages for error code 3 Pages 12 - 15 Further help www.eastmidlandswater.com/fittingvideos...
- Page 4 What to expect from your EMS Eco water softener? All water softeners work on the same basic principal. Hard water flows through a bed of resin and the calcium and magnesium, the minerals that are responsible for hard water, are removed. Salt/Brine Tank This softener’s cabinet is also the brine tank.
- Page 5 Installation Guide for the EMS 10 and EMS 15 Premier Water Softeners Planning your installation Always observe the water bylaws. Make sure there is only one rising main and that you are allowing space for access to the unit, for filling with salt and possible maintenance in the future. ...
-
Page 6: Important Information
Installation Guide - continued IMPORTANT INFORMATION Before starting the installation of the valves, ensure THE STOP COCK (INCOMING MAIN) IS IN A CLOSED position. DO NOT ADJUST THE RED BAR ON THE SOFTENER—THIS IS ONLY TO BE USED BY OUR ENGINEERS Typical Softener Typical softener installation valve Installation Valve... -
Page 7: Electrical Connection
Installation Guide - continued Connecting to the softener Once you have completed the installation of the valves, put the valves into the positions as shown (image 1); softener inlet and outlet = closed bypass valve = open If you have also installed a hard water supply kit and have so far only installed the valve, make sure this is in the closed position. - Page 8 East Midlands Water Company are able to supply your salt and deliver to your door, for convenience. Please check our website for details www.eastmidlandswater.com...
- Page 9 QUICK SET UP GUIDE Initial programming of your water softener Control Panel ↓ Down arrow. Used to scroll down or increment through a group of choices ■ Set. Used to accept a setting to store in the memory ↑ Up arrow. Used to scroll up or increment through a group of choices Regenerate.
- Page 10 Initial programming of your water softener (continued) Set Days to Regenerate This setting is a default or holiday setting on meter softeners. If you have not used enough water and the machine has not regenerated on the meter setting, it will automatically regenerate after a set number of days have elapsed.
- Page 11 Initial programming of your water softener (continued) Regeneration Process C2 = Regenerant draw cycle C1 = Backwash cycle C4 = System pause C3 = Slow rinse cycle C6 = Backwash cycle 2 C5 = Fast rinse C8 = Regenerant refill C7 = Fast rinse cycle 2 View of rear of control panel AC Adapter...
- Page 12 Troubleshooting Guide (ERR3 CODE) Occasionally during transit the cam arm and optical sensor may become unseated. If your softener does not advance from ERR3 during the initial set up, please follow these instructions. Check the connections on the back of the control panel. You will need to follow the cable from the connection to the meter controller at the back right hand...
- Page 13 Troubleshooting Guide (continued) Checking that the optical sensor is located correctly and how to re-insert if the sensor is out of its location. . Remove the pin by pushing back. Next twist the motor to the right in a clockwise direction (if you are looking at the front of the machine).
- Page 14 Troubleshooting Guide (continued) This is a view of the sensor. It has a white electrical connection with two large black sensors and five locator lugs. Close up of the sensor. The lugs to the left of the white connector fit in the large hole to the left with the two lugs slotting into the two smaller locators.
- Page 15 Troubleshooting Guide (continued) To re-insert the cam, first position the front of the cam in the front locator. The rear cam housing has a slotted guide. Gently push the cam down on this guide; you may also need to slowly turn the cam arm anti clockwise until it clicks into position and is completely horizontal.
- Page 16 East Midlands Water Company For all your water treatment requirements Softener salt in tablet Compact softeners or block form Water softeners Reverse Osmosis systems removes micro plastics Water filters for pure 3 year long life water drinking water filters – fits under the kitchen sink Don’t forget to place your positive on line review in order to get your...
Need help?
Do you have a question about the EMS Eco Premier and is the answer not in the manual?
Questions and answers
I have plumbed in the softener, connected the valves and the overflow but there does not appear to be a drain, can you advise
Yes, the EMS Eco Premier water softener has a drain connection. It includes a drain hose that must be run to an upstand or an outside drain with a minimum air gap of 20mm. The drain hose can be extended using a 15mm copper tube for up to 8 meters, provided there is a minimum daytime pressure of 40 psi. The hose can also run uphill up to 3 feet with the same pressure requirement.
This answer is automatically generated
@Mr. Anderson ok, I have connected the white pipe to the outlet and connected this to the drain so where is the overflow
I have plumbed in the water softener, turned on the water to the softener and shut the by pass but the softener does not fill with water
The EMS Eco Premier water softener may not be filling with water after plumbing it in and shutting the bypass due to incorrect valve positioning. Ensure the following steps are completed in order:
1. Turn the softener inlet valve to the "on" position.
2. Turn the bypass valve to the "off" position.
3. Wait approximately five minutes to allow water pressure to build.
4. Turn the softener outlet valve to the "on" position.
5. Perform a manual regeneration to confirm there are no leaks.
If the issue persists, check for any blockages or incorrect connections in the plumbing.
This answer is automatically generated
@Mr. Anderson I have done all of this but no water enters the softener, I have water in and it comes out of the valves when removed, it does not enter the softener body