Advertisement
Quick Links
essential
home
TM
OWNER'S MANUAL
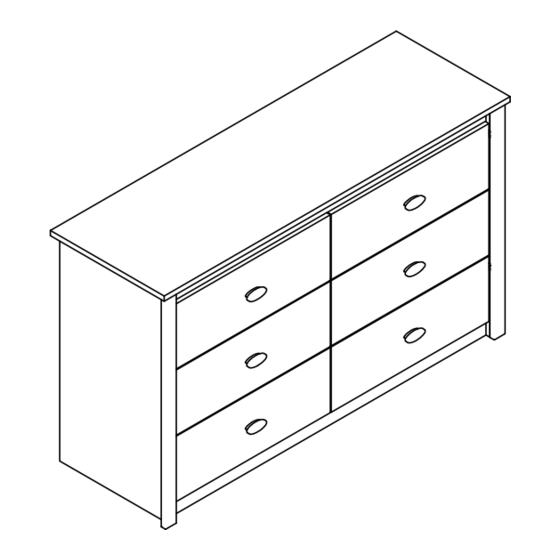
Anderson 6 Drawer Dresser
5916303KP
caution
carefully read instructions and procedures for safe operation
product code
0-06654291-1
upc code
0-2998659163-0
date of purchase
_____/_____/_____
Please Recycle
receipt of purchase
Recicle Por Favor
attach here
B345916303KP00
Advertisement

Related Manuals for Dorel Ameriwood essential home Anderson 5916303KP


Summary of Contents for Dorel Ameriwood essential home Anderson 5916303KP
- Page 1 essential home OWNER'S MANUAL Anderson 6 Drawer Dresser 5916303KP caution carefully read instructions and procedures for safe operation product code 0-06654291-1 upc code 0-2998659163-0 date of purchase _____/_____/_____ Please Recycle receipt of purchase Recicle Por Favor attach here B345916303KP00...
- Page 3 Some parts may not be labelled. PARTS - PIEZAS Algunas de las piezas no serán etiquetados. Left Panel Partition Right Panel panel izquierdo montante panel derecho 35916303010 35916303030 35916303020 Valance Bottom Kick cima valancia fondo soporte 35916303040 35916303070 35916000050 35916303060 Vertical Moldings (2) Drawer Sides (12) Right Drawer Fronts (3)
- Page 4 PARTS - PIEZAS #A22500 #A22920 #A22510 #A43105 #A57000 housing cam lock base glide cam bolt plastic slides cerradura de leva conector perno de leva deslizar corredera de plastico #A12210 #A53760 #A53600 #A22910 1/2" pan head drawer bracket angle bracket connector bolt cabeza redondo 1/2"...
- Page 5 This illustration shows how the cam fastening system works. Esta ilustracion muestra el sistema de fijacion de leva y como functiona. Tighten to fully seat. Do not over tighten. Proper orientation of cam. Aprietése a totalmente asiento. No La orientacion apropiada de leva. haga encima apriétese.
- Page 6 proper orientation of cam lock orientación correcta de la cerradura de leva lightly tap the connector into the hole with a hammer lightly tap the connector into the golpee suavemente el conector hole with a hammer en el agujero con un martillo golpee suavemente el conector en el agujero con un martillo proper orientation of cam lock...
- Page 7 marked with an "L" marcado con una "L" finished edge borde acabado marked with an "R" marcado con una "R" finished edge borde acabado page 7 B345916303KP00...
- Page 8 marked with an "R" marcado con una "R" finished edge borde acabado proper orientation of cam lock orientación correcta de la cerradura de leva flip panel voltear el panel marked with an "L" finished edge marcado con una "L" borde acabado page 8 B345916303KP00...
- Page 9 center this screw in the brackets centrar el tornillo en los soportes raw surface superficie cruda center the valance (G) onto the top (D) centrar la valencia (G) en la cima (D) finished edge borde acabado Be certain that the holes in the Apron (G) line up with the center of the slot in the Angle Brackets (8) Asegúrese de que los agujeros en el Valancia (G) se alinean con el centro de la ranura entre el Soportes Angulo (8)
- Page 10 Be certain that the holes in the Kick (F) line up with the center of the slot in the Angle Brackets (8) Asegúrese de que los agujeros en el Soporte (F) se alinean con el centro de la ranura entre el Soportes Angulo (8) proper orientation of cam lock the kick (F) will cover the...
- Page 11 All finished edges are facing upwards Todos los bordes acabados se vean hacia arriba LOCK SERRER page 11 B345916303KP00...
- Page 12 All finished edges are facing upwards Todos los bordes acabados se vean hacia arriba LOCK SERRER page 12 B345916303KP00...
- Page 13 All finished edges are facing upwards Todos los bordes acabados se vean hacia arriba Press the moldings (H&I) onto the panels (A&B) so the connector bolts (6) engage the connectors (5). Turn the screw clockwise in the center of the connector (5) to lock in place.
- Page 14 Place the unit onto its front Coloque la unidad sobre su parte frontal 16 x 36 WARNING ADVERTENCIA Please make sure that the Back Panel is attached securely. Por favor asegúrese que el Panel Trasero se ate firmemente. All nails must be driven into the parts straight. Todos los clavos deben manejarse en las partes recto.
- Page 15 larger gap on this side mayor brecha en este lado second segundo first primero page 15 B345916303KP00...
- Page 16 Open each drawer half way, insert a Drawer Stop into the hole of each Drawer Side towards the rear. This will lock the drawers and prevent them from completely sliding out. Abra cada mitad de camino cajón, inserte una parada de cajón en el agujero de cada cajón lateral hacia la parte trasera.
- Page 17 larger gap on this side mayor brecha en est lado second segundo first primero page 17 B345916303KP00...
- Page 18 Open each drawer half way, insert a Drawer Stop into the hole of each Drawer Side towards the rear. This will lock the drawers and prevent them from completely sliding out. Abra cada mitad de camino cajón, inserte una parada de cajón en el agujero de cada cajón lateral hacia la parte trasera.
- Page 19 MAXIMUM LOADS - CARGA MAXIMA This unit has been designed to support the maximum loads shown. Exceeding these load limits could cause sagging, instability, product collapse, and/or serious injury. Esta unidad se ha diseñado para apoyar las cargas máximas demostradas. Exceder estos límites de carga podía causar ceder, inestabilidad, derrumbamiento del producto, y/o lesión seria.
Need help?
Do you have a question about the Ameriwood essential home Anderson 5916303KP and is the answer not in the manual?
Questions and answers