Advertisement
Quick Links
Advertisement

Related Manuals for Cannon OPTIMUM TS


Summary of Contents for Cannon OPTIMUM TS
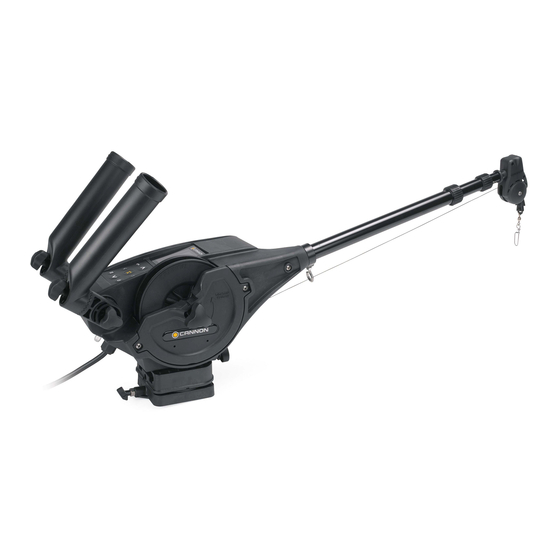
- Page 1 OPTIMUM OPTIMUM ELECTRIC DOWNRIGGERS Installation Instructions...
-
Page 2: Product Information
THANK YOU Thank you for purchasing a Cannon downrigger. We have designed your new downrigger to be an accurate and reliable tool that will enhance fishing control and improve your ability to catch fish. We hope that you enjoy the use of your new downrigger and enjoy the benefit of controlled depth fishing for years to come by always following safe boating practices and laws wherever you are fishing. -
Page 3: Safety Considerations
WARNING You are responsible for the safe and prudent operation of your vessel. We have designed your Cannon product to be an accurate and reliable tool that will enhance boat operation and improve your ability to catch fish. This product does not relieve you from the responsibility for safe operation of your boat. -
Page 4: Know Your Boat
KNOW YOUR BOAT Port Starboard Inboard Outboard Port Starboard Keel Gunwale Transom Stern Gunwale Stern Hull © 2019 Johnson Outdoors Marine Electronics, Inc. cannondownriggers.com... - Page 5 INSTALLING THE OPTIMUM Your new Cannon Optimum comes with the hardware you’ll need to directly install it to the boat. Cannon recommends mounting your downrigger using a deck plate and also offers a variety of accessories to customize your installation. Read these installation instructions to learn more and visit cannondownriggers.com for a full list of accessories.
- Page 6 A deck plate is recommended to provide adequate support and to maximize the capability of the product. Cannon offers a complete line of mounting accessories that allow you to optimize your installation to fit the way you fish. Before making any permanent changes to your boat, consider what accessories might be used in your application.
- Page 7 Gimbal Mount SIDE/RAIL MOUNTS DECK PLATES GIMBAL MOUNTS Can be mounted to a welded Cannon deck plates prevent Designed to fit medium-sized T-section. Side/Rail Mounts deflection and add stability flush mounted rod holders can also be to decks. Recommended for built into the gunwale of larger (Item No.
- Page 8 INSTALLING ThE BASE INSTALL ATION INSTALLING ThE BASE Item(s) needed: #A x 1 #C x 1 #B x 1 Review the mounting considerations at the Downrigger beginning of the installation and select a mounting Assembly location. Make sure the downrigger is not connected to a power source.
- Page 9 INSTALLING THE BASE Once satisfied with the selected location, begin by using the Swivel Base as a mounting template. Mounting Holes Swivel Base Mounting Take the Swivel Base and place it at the desired Release Mounting Hole Knob Holes location. Make sure that the Release Knob is orientated in the desired direction and the mounting location is clear to drill holes and can accommodate mounting hardware.
- Page 10 Wetting the screws or applying an anti-seize may help Phillips Phillips Screws prevent seizing. Screws NOTICE: Consider installing an optional Cannon Lock on the Mounting Base for added security. Mounting Location (Item No. 1903020) Item(s) needed: #8 x 4 The Mounting Base will be installed to the Swivel Truss Head Screws Base.
- Page 11 INSTALLING ThE CLuTCh KNOB Once the bases are secured together, replace the Downrigger Assembly Downrigger Assembly on the Mounting Base and secure it with the Soft Grip Knob. Hand tighten. Spool Soft Grip Knob Mounting Base Mounting Location Swivel Base INSTALLING ThE CLuTCh KNOB Item(s) needed: #10 x 1...
- Page 12 INSTALLING ThE TELESCOPIC BOOM INSTALLING ThE TELESCOPIC BOOM Item(s) needed: #D x 1 or #E x 1 Take the Telescopic Boom (Assembly #D or Boom Clamps Telescopic Boom Assembly #E) and cut the Cable Tie holding the three tubes of the boom together with a wire cutter or cutting tool.
- Page 13 INSTALLING THE TELESCOPIC BOOM Item(s) needed: #18 x 1 Take the Ball Hook Extrusion (Item #18) and Ball Hook place it over the wider end of the Telescopic Extrusion Boom, opposite the Clamps. At this point on the Telescopic installation, the Ball Hook Extrusion will slide Boom freely on the Telescopic Boom.
- Page 14 INSTALLING THE TELESCOPIC BOOM Item(s) needed: #16 x 1 The 1/4-20 X 2" Phillips Pan Head Screw (Item #16) will be used to secure the Telescopic Boom Ball Hook to the Downrigger Assembly. The Phillips Pan Spool Extrusion Head Screw will pass from the spool side of the Telescopic Boom downrigger to the opposite side of the Downrigger...
- Page 15 INSTALLING ThE BOOM END Secure the orientation of the Bolt Hook by turning Ball Hook Extrusion Ball Hook Extrusion the Hex Nut on the Bolt Hook Assembly until it is seated tightly against the Ball Hook Extrusion with a 7/16" wrench. Hand tighten until secure. Telescopic Telescopic Boom...
- Page 16 TERMINATING ThE DOWNRIGGER CABLE TERMINATING ThE DOWNRIGGER LINE With the body of the Cannon downrigger installed, the Line on the To watch a video of Terminating the Spool can be terminated. The downrigger comes standard with Cannon Downrigger, follow the link stainless steel Line held in place on the Spool with a Rubber Band.
- Page 17 TERMINATING THE DOWNRIGGER CABLE The Clutch Knob holds tension on the Spool. Loosen the Clutch Knob on the side of the Spool downrigger by turning it clockwise while keeping tension on the Line. Pull the Line so that there is enough slack to feed the Line Clutch through the Pulley.
- Page 18 #36 X 1 Take the Snap Swivel (Item #36) and attach it to Cannon the hook at the bottom of the Cannon Terminator Terminator (Item #32). The Snap Swivel can be attached by inserting the end with the smaller metal loop...
- Page 19 Terminator through the hole to the front of Line the Terminator. Cannon m. When the Cannon Terminator is turned over facing Terminator forward, the Line should follow the Track along the Track left side of the Terminator to the Bottom Hook. The...
- Page 20 TERMINATING THE DOWNRIGGER CABLE With the front of the Cannon Terminator still facing toward you, take the Line and place it along the track along the right side of the Terminator and Cannon insert it so that it exits the hole at the far end of Terminator the track.
- Page 21 Slide the Cushion Sleeve Terminator securely over the Terminator until it is seated against it. Once fully seated, the downrigger is Cannon successfully terminated. A Cannon Weight can Terminator Line then be attached directly to the Snap Swivel. Cushion...
- Page 22 The Cannon Optimum downrigger comes with two Rear Mount Rod NOTICE: The Rod Holder assembly is not covered under Holders, while the Cannon Optimum TS comes with one. The Rod warranty when used with tackle above 30 lbs. Equipment Holder(s) incorporate a two-piece locking tooth design. This allows...
- Page 23 INSTALLING THE REAR MOUNT ROD HOLDER Item(s) needed: #20 X 1 or 2 #22 x 1 or 2 #34 X 1 #36 X 1 A Soft Grip Knob will be used to secure the Dual Axis Rod Holder Tube to the Arm just installed. Spring Release Take one or two Soft Grip Knobs (Item #20) and Soft Grip Knob...
-
Page 24: Conductor Gauge And Circuit Breaker Sizing Table
CAuTION These guidelines apply to general rigging to support your Cannon product. Powering multiple downriggers or additional electrical devices from the same power circuit may impact the recommended conductor gauge and circuit breaker size. If you are using wire longer than that provided with your unit, follow the conductor gauge and circuit breaker sizing table below. - Page 25 The line on your downrigger should be replaced every 2 years. Etching of the line can weaken it physically and electrically. • The use of Cannon coated weights and the snap assembly with the insulator will help insulate the weight from the positively charged line.
-
Page 26: Connecting To The Battery
Locate battery in a ventilated compartment. POWERING MULTIPLE Quick Connect Plug DOWNRIGGERS Cannon #1 When operating multiple downriggers, run a maximum of 2 downriggers per dedicated 12 volt battery. Follow the instructions from the "Connecting to the Battery" section of these Installation... - Page 27 ADDITIONAL ACCESSORIES CONNECTED TO DOWNRIGGER BATTERIES Significant damage to your Cannon downrigger, your boat electronics, and your boat can occur if incorrect connections are made between your downrigger batteries and other battery systems. It is recommended to use an exclusive battery system for your downrigger.
- Page 28 SETUP GUIDE SETTING UP THE OPTIMUM When powering the downrigger "on" for the first time, the Color LCD will bring up a Setup Guide. In order to follow through the Setup Guide, first become familiar with the downrigger keypad. When comfortable with the keypad, follow through the Setup Guide to customize downrigger settings before beginning to use the downrigger for fishing.
- Page 29 Once happy with the selections, scroll to the Complete Setup option and use the Right button to select it. After the second menu is complete, the downrigger will bring up information on the Cannon Transducer. Read the information on the Color LCD and then use the Right button to Select next.
- Page 30 The network works by designating one Master downrigger that is paired with all additional equipment through a wireless network. This network includes up to 3 additional Optimum downriggers, a mobile device, the Fish Hawk X4D System and a Cannon transducer.
- Page 31 Cannon Optimum or Optimum TS downrigger. Launching the app when it is not paired with the Cannon will allow you to try it in Demo Mode. The first time the app is launched, you must agree with the disclaimer in order to continue.
- Page 32 PAIRING A DEVICE TO A SINGLE DOWNRIGGER PAIRING A DEVICE TO A SINGLE DOWNRIGGER Cannon offers an app that can be used to control and update The Cannon app icon. See the Cannon the Cannon downrigger using a Bluetooth enabled device. The ®...
- Page 33 Bluetooth Menu is opened, the scan starts automatically. When the Optimum is recognized by the device, it will appear on the device list. Select the Optimum or Optimum TS from the list of available devices. © 2019 Johnson Outdoors Marine Electronics, Inc.
- Page 34 In order for again at the same time and repeat the process. the Cannon app to detect the downrigger, it needs to be paired and communicating with the downrigger. NOTICE: It may take a few moments for your device to connect an the app to respond to the network even after it is connected.
- Page 35 NOTICE: The Master downrigger is the downrigger that a mobile device, all downriggers and accessories, such as the Cannon transducer and Fish Hawk, will be paired to. The Client downrigger is the downrigger that will be paired to a Master downrigger.
- Page 36 • An optional Fish Hawk probe can only be paired to the BT Master. • The Cannon mobile app can only be paired to the BT Master. • Cannon Transducer can only be connected to 3h - Master...
- Page 37 PAIRING ThE MASTER DOWNRIGGER TO A FISh hAWK m. You can also confirm that the downriggers have 5m - Master 5m - Master paired to each other by finding them on the Device List under the Bluetooth Menu. The Master downrigger will appear on the Device List with a box around the Bluetooth icon.
- Page 38 Device and select it. Android Once the device is unpaired or forgotten, the device is no longer paired or communicating with the device and will not be visible to the Cannon app or the device. © 2019 Johnson Outdoors Marine Electronics, Inc.
- Page 39 Forget Downrigger screen. Use the Right removes them from the network. The Cannon app will not button to Confirm that the downrigger should work until you pair the device with the Cannon app to the forget the equipment selected. Bluetooth Master downrigger.
- Page 40 Fish Hawk. To do this, use the Settings Menu on the Master downrigger. Devices on a Cannon network may include the Fish Hawk 4XD System, another downrigger, or a paired device. Restoring the network on the downrigger is helpful when creating a new network or assigning a new Bluetooth Master.
- Page 41 CLEARING ThE MASTER DOWNRIGGER FROM ThE CLIENT DOWNRIGGER CLEARING ThE MASTER DOWNRIGGER FROM ThE CLIENT DOWNRIGGER It may be necessary to remove a Client downrigger from the network. This can be accomplished without interrupting the rest of the network simply by removing the Master downrigger from the Client downrigger. This may be helpful when moving one Client downrigger to a different network, or replacing one downrigger in an existing network with a new one.
- Page 42 "Pairing a Device to a Single Downrigger" section in these instructions. Before updating the downrigger, check for updates to the Cannon app on the Mobile Device by looking for updates on iOS devices through the Apple App store or Android devices through the Google Play store.
- Page 43 UPDATING THE CANNON APP & DOWNRIGGERS IN A NETWORK Both the Cannon app and the downrigger will alert that the software update is transferring to the downrigger. When the update has completed transferring to the downrigger(s), the downrigger(s) will reboot. The...
- Page 44 Do not kink the cables. • Connecting the Cannon Transducer to a Bluetooth enabled downrigger that is networked to one or more downriggers will make it the Master downrigger.
- Page 45 Stopping the weight at water level eliminates the line strain caused by a bouncing weight or a weight hitting the boom end and it also prevents the weight from swinging into the boat hull. This feature comes on all Cannon electric downriggers and requires the boat to be properly grounded and the use of an electrically conductive cable such as stainless steel.
- Page 46 To watch a video on how to attach a The last step in prepping the downrigger for fishing is to attach a Line Release, follow the link on-line Line Release. To attach the Line Release, first attach a Cannon https://youtu.be/qpONbVgbbt8 Weight and then follow the steps below:...
- Page 47 This completes the installation of your Optimum. A complete Owner’s Manual can be downloaded at cannondownriggers.com. © 2019 Johnson Outdoors Marine Electronics, Inc. cannondownriggers.com...
-
Page 48: Recommended Accessories
• Uni-Line Release • Uni-Stacker Release • 4 to 12 lb. weights For a complete listing of Cannon accessories, visit cannondownriggers.com Cannon Consumer & Technical Service 121 Power Drive Johnson Outdoors Marine Electronics, Inc. Mankato, MN 56001 PO Box 8129 Phone (800) 227-6433 ©2019 Johnson Outdoors Marine Electronics, Inc.
Need help?
Do you have a question about the OPTIMUM TS and is the answer not in the manual?
Questions and answers