Table of Contents
Advertisement
Quick Links
Advertisement
Table of Contents

Related Manuals for Cannon DIGI-TROLL 5


Summary of Contents for Cannon DIGI-TROLL 5
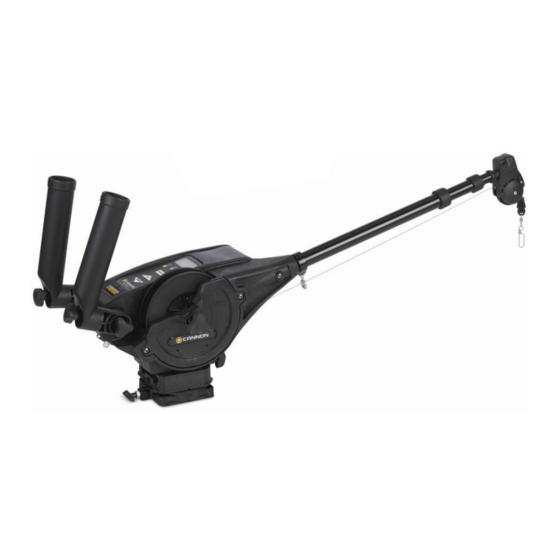
- Page 1 DIGI-TROLL 5 DIGI-TROLL 5 TS Owner’s Manual Owner’s Manual...
-
Page 2: Table Of Contents
TABLE OF CONTENTS Introduction ...3 Warranty / Service Information ...4 Product Overview...5 Installation ...6 Mounting ...6 Boom and Ball Hook ...8 Boom End Assembly...10 Spool Cover Removal ...11 Rod Holders ...12 Cable Termination...13 Line Release………………………………………………………………………………………………………………...13 Intellitroll Antenna ...14 Power Loss Crank Handle ...15 Wiring Your Downrigger ...16 Getting Started ...18 Display ...18... -
Page 3: Installation
This manual covers installation and the functions of both the Digi-Troll 5 and Digi-Troll 5 TS. The Tourna- ment Series version of the Digi-Troll is fitted with a cast stainless steel reel, brushed finish stainless steel boom, and a white frame. -
Page 4: Cannon ® Service Policy
AFTER THE APPLICABLE WARRANTY PERIOD After the applicable warranty period, or, if one of the above exclu- sions applies, Cannon products will be repaired for a charge of parts plus labor. All factory repairs, after the applicable warranty period, carry a 90-Day Limited Warranty, subject to the exclusions and limita- tions stated above. - Page 5 Whether fishing for blues off Rhode Island, walleyes in Lake Erie, sailfish off the coast of Florida, or stripers in Tennessee, the use of down- riggers will make your fishing more successful and more enjoyable. Digi-Troll 5 TS www.cannondownriggers.com...
-
Page 6: Mounting
Due to the great variety of boats available, mounting your downrigger can be a difficult decision. Cannon has a complete line of mounting and fishing accessories to aid in your fishing experience. Before making any permanent changes to your boat consider what accessories might be used in your application. - Page 7 Decks thinner than 1/4" Use a Cannon deck plate (PN 2200693) to prevent deflection and add stability to decks thinner than 1/4". Use the deck plate as a template to mark the hole locations. If access to the underside of the deck is not available, the deck plate can be mounted using screws and wellnuts.
-
Page 8: Boom And Ball Hook
INSTALLING THE BOOM AND BALL HOOK 1) Remove the ball hook collar, ball hook, and 1/4-20 nut from the included hardware bag assembly. 2) Thread the nut onto the ball hook, then thread the ball hook into the ball hook collar. Do not tighten yet. (Figure 1) 3) Slide ball hook collar onto the end of the boom and leave it loose. - Page 9 FIGURE 5 FIGURE 6 FIGURE 7 FIGURE 8 6) Insert the 1/4-20 nylon locknut into the hex pocket on the nose of the frame (motor side of frame). (Figure 5) 7) Insert 1/4-20 x 2” bolt into reel side of frame nose. With a Phillips head screw driver, thread bolt into the nylon locknut from step 6.
-
Page 10: Boom End Assembly
BOOM END PULLEY Telescopic Boom 1) Remove boom end assembly from hardware bag. 2) Remove #8 self tapping screw from hardware bag. 3) Insert boom end post into end of the small tube of the telescopic boom assembly. (Figure 9) 4) Align hole in boom post with hole in small end tube. - Page 11 FIGURE 11 FIGURE 12 FIGURE 13 FIGURE 14 REMOVABLE SPOOL COVER Your new downrigger comes with a removable spool cover. By removing this cover, you are able to gain easy access to your spooled cable and easy spool removal. This feature allows you to easily access tangled line, get it repaired and get you back into ac- tion quickly.
-
Page 12: Rod Holders
REPLACING THE CLUTCH PAD To replace the clutch pad, follow the steps for removing the spool. Once the spool is removed, you have access to the clutch pad. (Figure 16) Simply pull it off the shaft and replace. Reassemble the spool and cover in the reverse order. -
Page 13: Line Release
ATTACHING THE LINE RELEASE (UNI-RELEASE) The Cannon Uni-Release attaches directly to the downrigger weight. Attach fishing line to the clip at the end of the release, and then click through a series of increasing tension settings. - Page 14 USING YOUR DIGI-TROLL WITH THE INTELLITROLL ACCESSORY Both the Digi-Troll 5 and Digi-Troll 10 are compatible with the IntelliTroll accessory. The Digi-Troll 5 receives the IntelliTroll data and sends it to your Humminbird fishfinder (using the Cannonlink accessory). You can also use the Intellitroll monitor and antenna cable as- sembly to display sensor information.
- Page 15 Your Digi-Troll is now Intellitroll compatible. Once you attach your Intellitroll to the cable per the instructions included, your Digi-Troll 5 will pass this data on to the Cannonlink for display on your Humminbird fish finder. USING THE INCLUDED POWER LOSS MANUAL...
-
Page 16: Wiring Your Downrigger
It should be 0.6-0.8VDC (fixed PIC) or it should match your Digi-Troll setting if properly wired. • The use of Cannon vinyl coated lead weights is recommended. • Use the trolling weight insulators supplied with your downrigger. This insulates your weight from the positive charge on the cable. - Page 17 FUSE / BREAKER SPECIFICATIONS: An over-current protection device (circuit breaker or fuse) must be used with this downrigger. Coast Guard require- ments dictate that each ungrounded current-carrying conductor must be protected by a manually reset, trip-free circuit breaker or fuse. The following breaker size is a recommended guideline: 1 downrigger—30A @ 12 vdc 2 downriggers—60A @ 12 vdc...
-
Page 18: Getting Started
GETTING STARTED Operating the Digi-Troll 5 The Digi-troll 5 offers you the most advanced features available in a downrigger. • Variable Positive Ion Control. • Large LCD digital display for weight depth and easy programming. • Networking operation allowing you to chain several Digi-Troll 5s together for use with Cannonlink. -
Page 19: Display
Digi-Troll 5 Keypad The Digi-Troll 5's keypad has six keys located below the display. Power The ON/OFF key functions: 1) Turn the Digi-Troll ON - Simply press and release. 2) Turn the Digi-Troll OFF - Press and hold power button for three seconds. - Page 20 Programming the Digi-Troll 5 The Digi-Troll 5 contains four menus that enable you to program and customize its operation. Any changes made using the menu system are automatically saved in permanent memory when the downrigger is turned off. NOTE: The downrigger must be turned off with the power button for the settings to be saved.
-
Page 21: Positive Ion Control
Positive Ion Control Menu This menu lets you control the PIC level from 0.2 vdc to 1.2 vdc. Press the Menu one (1) time from the depth screen or once from the up/down screen. Line On Reel Menu This menu lets you set the amount of line on the reel. Increments are in 50 ft. This setting is important in determin- ing true line out. -
Page 22: Line On Reel
Un/Coated Menu This menu lets you switch between Cannon coated and uncoated cable. This setting is important as well in deter- mining accurate line out. Press the Menu (4) four times from the depth screen or once form the Units screen. -
Page 23: Networking
The Digi-Troll 5 downriggers are compatible with the In- tellitrol but only when connected to the Cannonlink system. The Digi-Troll 5 will pass the Intellitrol data to the Hum- minbird fishfinder for display on the fishfinder screen. - Page 24 Because of the composite construction of the frame, Cannon downriggers are insu- lated from your boat's hull charge. When the stainless steel downrigger cable is low- ered into the water, the natural ionization between the cable and the boat creates a positive charge of 0.7 to...
- Page 25 How the Positive Ion Control System Works The PIC system uses an internal circuit that passes the voltage through the drive train of the Digi-Troll to the shaft. The shaft contacts the cable by means of a ball bearing, spring and, lastly, a one direction button head screw.
- Page 26 Current drag, water salinity and the use of non-Cannon products will affect your actual trolling depth. As an example, the first chart shows that if you are trolling at 4 MPH with an 8 pound weight and you have 100 FT.
-
Page 27: Trolling Tips
Ten Good Trolling Tips 1) Test your lures over the boat side before sending them down and back. Do this to make sure the lure wig- gles and wobbles properly without going belly up or wandering off. Some lures can be adjusted, fine tuned actually, to impart maximum action. -
Page 28: Troubleshooting
Troubleshooting PROBLEM: In the UP or AUTO-UP mode the downrigger stops periodically but the display stays on or the circuit breaker trips repeatedly. SOLUTION: • Low battery. The battery voltage at the power cord is less than 11.5 volts (measure with a volt meter while the downrigger is pulling up the weight). - Page 29 THIS PAGE INTENTIONALLY LEFT BLANK www.cannondownriggers.com...
- Page 30 www.cannondownriggers.com...
- Page 31 www.cannondownriggers.com...
- Page 32 www.cannondownriggers.com...
- Page 33 www.cannondownriggers.com...
- Page 34 www.cannondownriggers.com...
- Page 35 NOTES: __________________________________________ __________________________________________ __________________________________________ __________________________________________ __________________________________________ __________________________________________ __________________________________________ __________________________________________ __________________________________________ __________________________________________ __________________________________________ __________________________________________ __________________________________________ __________________________________________ __________________________________________ __________________________________________ __________________________________________ __________________________________________ __________________________________________ __________________________________________ __________________________________________ __________________________________________ __________________________________________ __________________________________________ __________________________________________ __________________________________________ www.cannondownriggers.com...
-
Page 36: Weee Compliance
To download product manuals or purchase Cannon products from an authorized dealer, please visit our web page at ©2010 Johnson Outdoors Marine Electronics, LLC. All rights reserved. Product conforms to EU EMC directive WARNING: This product contains chemical(s) known to the state of California to cause cancer and/or reproduc- www.cannondownriggers.com...
Need help?
Do you have a question about the DIGI-TROLL 5 and is the answer not in the manual?
Questions and answers