Table of Contents
Advertisement
Quick Links
Advertisement
Table of Contents

Subscribe to Our Youtube Channel
Related Manuals for EcLine EC-PM-530D Series


Summary of Contents for EcLine EC-PM-530D Series
- Page 1 User's Manual EC-PM-530D Series Printer...
- Page 2 EC-PM-530D User's Manual Declare About Trademark Corporation names and product names are the registered trademarks or commodity names of the corporation. * EPSON and ESC/POS are the registered trademarks of Seiko Epson Corporation. * Windows is a registered trademark of Microsoft Corporation. - i -...
- Page 3 EC-PM-530D User's Manual Warnings, Cautions, and Notes Pay attention to the following promises when using this manual: Warning: Warnings must be followed carefully to avoid bodily injury. Caution: Cautions must be observed to avoid damage to your equipment. Note: Notes contain important information and useful tips on the operation of your printer. - ii -...
-
Page 4: Important Safety Instructions
EC-PM-530D User's Manual Important Safety Instructions Read all of these instructions carefully and thoroughly and save them for later reference. The unauthorized operation would lead to malfunction or accident. Manufacturers have no responsibilities for the problems which are led by unauthorized operations. Follow all warnings and instructions in the manual as well as marked on the product. - Page 5 EC-PM-530D User's Manual Notice: The contents of this manual are subject to change without notice. *All the parts of the printer can be recycled. When it is abandoned, we can call it back freely. Please contact us when you abandon it. - iv -...
-
Page 6: Table Of Contents
EC-PM-530D User's Manual Table of Content Declare................................i Important Safety Instructions ........................iii Chapter 1 Overview ............................1 1.1 Model Information ..........................1 1.2 Application............................1 1.3 Main Parts of the Printer........................1 Chapter 2 Printer Installation........................3 2.1 Unpacking and Checking ........................3 2.2 Removing the Protective Materials......................3 2.3 Connecting to Computer or Other Equipment ..................3 2.3.1 Connecting the Cash Drawer Cable .....................3 2.3.2 Connecting the Parallel Cable ......................4... - Page 7 EC-PM-530D User's Manual Chapter 4 Paper Loading ......................... 49 Chapter 5 Specifications .......................... 50 5.1 General Specifications ........................50 5.2 Interface ............................52 5.2.1 Cash Drawer Interface........................ 52 5.2.2 Parallel Interface......................... 52 5.2.3 USB Interface ..........................54 5.2.4 Serial Interface ........................... 55 5.2.5 Ethernet Interface ........................
-
Page 8: Chapter 1 Overview
+serial interface, USB interface + Ethernet interface, USB interface + serial interface + Ethernet interface, USB interface + Bluetooth, Wi-Fi interface, or USB interface + Wi-Fi. Interface: EC-PM-530D series products are configured with cash drawer interface, you can choose one of the following data interfaces when purchasing this product: ● Parallel interface (EC-PM-530D) ●... - Page 9 EC-PM-530D User's Manual Power Supply Inlet Data Interface Cash Drawer Interface Figure 1-2 Main parts of printer (Rear view) Note: Please take the specific interface as standard. - 2 -...
-
Page 10: Chapter 2 Printer Installation
EC-PM-530D User's Manual Chapter 2 Printer Installation 2.1 Unpacking and Checking Check the following items in the package, if any of these items is missing, please contact your dealer. (As shown in Figure 2-1) AC Adapter Ribbon Cartridge Roll Paper Guide (Optional) Printer Driver CD Interface Cable (Optional) -
Page 11: Connecting The Parallel Cable
EC-PM-530D User's Manual Cash Drawer Cable Cash Drawer Interface Figure 2-2 Connecting the cash drawer cable Note: You must use the proper cash drawer. Manufacturer will not honor warranty when using improper cash drawer. 2.3.2 Connecting the Parallel Cable 1. Make sure that the computer and the printer are both turned off, connect the parallel cable to the parallel interface of the printer, and squeeze the wire clips on both sides of the connector to make the cable fixed. -
Page 12: Connecting The Serial Cable
EC-PM-530D User's Manual USB cable USB Interface Figure 2-4 Connecting the USB cable 2.3.4 Connecting the Serial Cable 1. Make sure that the computer and the printer are both turned off, connect the serial cable to the serial interface of the printer and tighten the screws on both sides to make the cable fixed. (As shown in Figure 2-5) Screw Serial Cable... -
Page 13: Connecting The Power Cord
EC-PM-530D User's Manual Note: The detailed information of the network settings, please refer to the User’s Manual. 2.4 Connecting the Power Cord 1. Make sure the printer is turned off. (The pressed down side on the power switch with O mark denotes the printer is off). -
Page 14: Installing The Driver
EC-PM-530D User's Manual Cover-open Button Ribbon Core Rear Cover Ribbon Cartridge Ribbon Knob Front Cover Power Switch Figure 2-8 Installing the ribbon cartridge Caution: Don’t move the print head when the printer is powered on, or else, it may damage the printer. -
Page 15: Hand-Operated Installing Way
EC-PM-530D User's Manual 2.6.2 Hand-operated Installing Way Note: This installing way is used for people who have some knowledge on hand-operated installing and equipment application. 2.6.2.1 The Operating Systems of Windows 2000/XP/Vista/Win7 (1) The hand-operated installing steps of parallel interface cable or serial interface cable: In the following, Windows XP is taken as an example to show the installing steps. - Page 16 EC-PM-530D User's Manual “OK” to return to the window of “Install Printer Driver”, click “Next”. 6. Follow the guide and click “Next” gradually until the installation is finished. 2.6.2.3 The Operating System of Windows 98 (1) The installing steps of a parallel interface cable or a serial interface cable: 1.
-
Page 17: Installing Bluetooth Interface Driver
EC-PM-530D User's Manual please click “Browse”, select the path as follows: CD-ROM → “Drivers” → “WIN98 (WINME)”, and then click “OK”. 4. A window of “Install From Disk” pops up, click “OK”, return to the window of “Add Printer Wizard”, then click "Next". - Page 18 EC-PM-530D User's Manual 3. Tick off the option of “My device is set up and ready to be found.” Click “Next” to continue. 4. Select the “EC-PM-530D”, and then click “Next”. EC-PM-530D 5. Tick off the option of “Let me choose my own passkey” and enter “1234” as shown, then click “Next”. - 11 -...
- Page 19 EC-PM-530D User's Manual 6. Record the Outgoing COM port and click “Finish”, then reboot the computer. 7. Set the printer driver print port as the outgoing port and the installation is finished. Note: Every Bluetooth device has its own address. Please reinstall it when replacing the Bluetooth device.
-
Page 20: Network Settings
EC-PM-530D User's Manual 2.8 Network Settings Please use EC network setting software NetFinder to set the IP address for EC Ethernet interface network printers, which can be found in the CD or downloaded from http://www. eclinepos.com. Note: The network printing function needs the operation systems of Windows2000 and above and the operation systems of Windows98/ME and below are not supported. - Page 21 EC-PM-530D User's Manual If the printer connects correctly, the IP address can be found in a search period. If the printer still can not be found out when the network connection is correct in the same network, Please check whether the network fire wall on the PC is open or not. If there is fire wall, please close it temporarily, open again after finishing searching and setting a printer completely.
-
Page 22: Wi-Fi Setting Of Ec Printer
EC-PM-530D User's Manual address used in printer may conflict with another one). The network segment part of the IP address and Subnet Mask must be the same as those of PC connecting with a printer. For example, the address of working PC is 192.168.0.1/255.255.255.0 (IP/Subnet Mask), then which of printer should be set to 192.168.0.x/255.255.255.0 (x=2~254 and should avoid the occupied IP). - Page 23 EC-PM-530D User's Manual Take Windows XP operating system as an example to show how to connect the printer with the equipment in Windows system. 1. Turn on the printer and make sure the printer is in normal working condition. Start the operation 30 seconds after the printer is on.
- Page 24 EC-PM-530D User's Manual Figure 2 (3) Connecting to the equipment in iOS Take the mobile phone of iOS 8.1 as an example to show how to connect the printer with the equipment in iOS. 1. Turn on the printer; make sure the printer is in normal working condition. Start the operation 30 seconds after the printer is on.
-
Page 25: Wi-Fi Parameters Description
EC-PM-530D User's Manual The printer Wi-Fi of this example. Figure 3 2.9.2 Wi-Fi Parameters Description After connecting the equipment with the printer through wireless network, please import http://10.10.10.1 in the browser address bar and enter, then the setting interface pops up. The display style of setting interface may differ in different systems, but the parameter items are the same. - Page 26 EC-PM-530D User's Manual Figure 4 You can select Simple Chinese, Traditional Chinese and English in the “Select Language” and the default language is English. When you need to change the language, just select the language you need in the “Select Language” and then click “Apply” (as shown in Figure 5). Figure 5 - 19 -...
- Page 27 EC-PM-530D User's Manual (1) Printer-equipment connected printing Printer-equipment connected printing is a way of printing which uses printer as the hotspot and connects the wireless equipment for printing. “Wireless Settings” is the relevant setting parameter when the printer is as the hotspot (as shown in Figure 6).
- Page 28 EC-PM-530D User's Manual Security Mode: The security mode of the printer wireless card. You can modify it if necessary. If the connection between printer and computer is exceptional, please restart the printer or modify “Channel’ in “AP Client”. (2) AP connected printing AP connected printing is a way of printing which connects the printer with the wireless equipment by the outer hotspot.
- Page 29 EC-PM-530D User's Manual Double click it Figure 8 ② The dialog box “Wireless Network Connection Status” pops up, then click “Properties” (as shown in Figure 9). Figure 9 - 22 -...
- Page 30 EC-PM-530D User's Manual ③ When the dialog box pops up, click “Wireless Networks” on the upper side of the dialog box (as shown in Figure 10). Figure 10 ④ Select the current wireless network name in “Preferred networks” and then click “Properties” ( as shown in Figure 11) - 23 -...
- Page 31 EC-PM-530D User's Manual Figure 11 ⑤ When the window of “Properties” pops up, find out the security mode and encrypt type in “Wireless network key” (as shown in Figure 12). - 24 -...
- Page 32 EC-PM-530D User's Manual WIFI001 Security mode Encrypt type Figure 12 ⑥ Close the windows in turn, then the dialog box “Local Area Connection 2 Status” pops up according to the operation of step ①, click “View Wireless Networks” (as shown in Figure 13). When the window of “Wireless Network Connection”...
- Page 33 EC-PM-530D User's Manual Figure 13 - 26 -...
- Page 34 EC-PM-530D User's Manual The current Wi-Fi hotspot of this example. Figure 14 The setting of Security Mode and Encrypt Type Refer to “Connecting the Printer”, connect the wireless equipment with the printer and select the parameters acquired by the above steps in the “Security Mode” and “Encrypt Type” of the “AP Client”.
-
Page 35: Wi-Fi Interface Status Display And Parameters Reset
EC-PM-530D User's Manual Figure 15 Note: The green handshaking mark on the right side of the SSID column denotes the connection between the printer and the outer Wi-Fi hotspot is successful. IP Address: Set the IP address of the printer wireless card and the IP address should be in the same network segment with the wireless networks you are using. -
Page 36: Mobile Equipment Wi-Fi Printing Function Application
EC-PM-530D User's Manual Turn on the printer. The Wi-Fi LED blinks fast, which denotes the interface is on the ON status. 30 seconds later, the Wi-Fi LED blinks slowly, which denotes the Wi-Fi interface is in normal working condition. If user needs to restore the Wi-Fi parameters to factory default setting; just press the Wi-Fi RESET button to do it in a quick way. - Page 37 EC-PM-530D User's Manual Install AdrPrintSvc.apk, the “EC Print Service” will be added in the Android system. 2. Connect Wi-Fi printer 2.1 Enter into the “Settings” of system, as shown in Figure 18. 2.2 Find out the “WIRELESS & NETWORKS” in “Settings” interface, then click “Wi-Fi”, as shown in Figure 19.
- Page 38 EC-PM-530D User's Manual 3. Turn on the print service 3.1 Enter into the “Settings” of the system, as shown in Figure 18. 3.2 Find out “Printing” in “Settings” interface and enter into, as shown in Figure 21. 3.3 Find out “EC Print Service” in “Printing” interface and enter into, as shown in Figure 22. Figure 22 Figure 21 3.4 Switch the “EC Print Service”...
- Page 39 EC-PM-530D User's Manual Figure 24 Figure 23 4. Run APP APP has to support the system’s print service, WPS Office is taken as an example to describe. 4.1 Run the APP “WPS Office”, as shown in Figure 25. 4.2 Open the document which is to be printed in the software, then click the “Tools” button, as shown in Figure 26.
- Page 40 EC-PM-530D User's Manual Figure 27 Figure 28 4.5 When the “Select Print Service” interface pops up, select “System Print Service”, as shown in Figure 29. 4.6 Select “EC-PM-530@10.10.10.1”, as shown in Figure 30. Figure 30 Figure 29 4.7 Make sure the printer and the corresponding printing parameters are correct, click “Print”, as shown in Figure 31.
-
Page 41: Airprint Printing Application Of Iphone Ios Equipment
EC-PM-530D User's Manual Figure 32 Figure 31 2.10.2 AirPrint Printing Application of iPhone iOS Equipment iPhone iOS equipment used in this example is iPad Air2, iOS system version is 9.1. The application situation of other iOS equipment or system version may be different to this example. 1. - Page 42 EC-PM-530D User's Manual 1.4 Select the “EC-PM-530B” hotspot, as shown in Figure 36. Figure 36 Figure 35 2. Run APP As the interface designs of APP are different, the operating way of printing function will also be different. “Word” is taken as an example to describe. 2.1 Install and run “Word”, as shown in Figure 37.
- Page 43 EC-PM-530D User's Manual Figure 39 Figure 40 2.5 When the “Printer Options” interface pops up, click “Select Printer”, as shown in Figure 41. 2.6 Select “EC-PM-530” in the list, as shown in Figure 42. Figure 42 Figure 41 2.7 Return to “Printer Options” interface and click “Print”, the system sends print data to the printer, as shown in Figure 43.
-
Page 44: Installing Printer Network Driver
EC-PM-530D User's Manual Figure 43 2.11 Installing Printer Network Driver The ways of installing network driver are divided into Newly-install way and Upgrade-install way according to whether the PC is installed the printer driver or not. If the printer driver hasn’t been installed on the PC, adopt newly-install way whose steps are shown in “Newly-install printer network driver”. - Page 45 EC-PM-530D User's Manual 5) A window of “Add Standard TCP/IP Printer Port Wizard” pops up, click “Next”. 6) A window of “Add Port” pops up, enter the IP address reported by the “Setting printer’s IP address” in the “Printer Name or IP Address” column. Take IP address “192.168.0.240” for example.
- Page 46 EC-PM-530D User's Manual 8) A window of “Port Settings” pops up. Affirm that “Port Name” and “Printer Name or IP Address” are correct, “Protocol” is “RAW” and “Port Number” is “9100”, click “OK”. - 39 -...
- Page 47 EC-PM-530D User's Manual 9) Return to “Additional Port Information Required”, click “Next”. 10) A window of “Completing the Add Standard TCP/IP Printer Port Wizard” pops up, click “Finish”. 11) A window of “Install Printer Software” pops up, click “Have Disk”. 12) A window of “Install From Disk”...
- Page 48 EC-PM-530D User's Manual 5) A window of “Add Standard TCP/IP Printer Port Wizard” pops up, click “Next”. 6) A window of “Add Port” pops up, import the IP address reported by the “Setting printer’s IP address” in the “Printer Name or IP Address” column. Take IP address “192.168.0.240” for example. “Port Name”...
- Page 49 EC-PM-530D User's Manual 8) A window of “Port Settings” pops up. Affirm that “Port Name” and “Printer Name or IP Address” are correct, “Protocol” is “RAW” and “Port Number” is “9100”, click “OK”. - 42 -...
- Page 50 EC-PM-530D User's Manual 9) Return to “Additional Port Information Required”, click “Next”. 10) A window of “Completing the Add Standard TCP/IP Printer Port Wizard” pops up, click “Finish”. 11) Return to “Printer Ports”, click “Close”. 12) Return to “Properties”, make sure the network port is selected, click “Apply”, and then click “Close”. Thus, printer’s network port setting is finished.
-
Page 51: Chapter 3 Control Panel
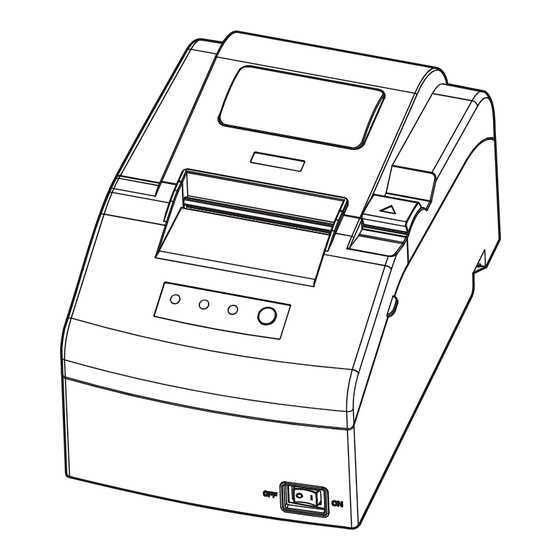
EC-PM-530D User's Manual Chapter 3 Control Panel 3.1 Control Panel There are three indicator LEDs and one key on the control panel as shown in Figure 3-1. Figure 3-1 Control panel 3.1.1 Indicator LED Blink POWER Power off Power on ——... -
Page 52: Parameter Settings
EC-PM-530D User's Manual Alignment Adjust Mode ■ While pressing the FEED button and holding on, turn on the printer. The printer beeps three times, and then you should loosen the FEED button. The printer will enter the alignment adjust mode. Each press on the FEED button will add 1 to the BID value. - Page 53 EC-PM-530D User's Manual 5. The left side of each setting item is the parameter icon, the top right is the item name and the bottom right is the current setting. The current settings of the printer will be loaded automatically when opening each parameters settings window.
- Page 54 EC-PM-530D User's Manual 6. When setting the parameter, please click the parameter icon firstly to open the parameter setting window. In the parameter setting window, there are parameter options, item explanation and control buttons. After selecting the corresponding parameter, click “Set”, the printer will change the setting at the moment it receives the setting command.
-
Page 55: Menu Terms Descriptions
EC-PM-530D User's Manual 7. If you need to set several parameters, please refer to the previous point and set the parameters one by one. 8. After finishing setting, click “Set” to exit the “Properties” window. 9. Restart the printer and the new settings take effect. 3.2.3 Menu Terms Descriptions Terms Description... -
Page 56: Chapter 4 Paper Loading
EC-PM-530D User's Manual Chapter 4 Paper Loading The printer can use the papers with the width of 76±0.5mm and 45±0.5mm/57.5±0.5mm, and it is easy to load paper. How to load paper will be introduced in this chapter. 1. Push the cover-open button to open the rear cover. If you want to use 45±0.5mm/57.5±0.5mm paper to print, you must install the roll paper guide. -
Page 57: Chapter 5 Specifications
EC-PM-530D User's Manual Chapter 5 Specifications 5.1 General Specifications Item Description Printing method 9 Pins dot matrix impact Printing direction Bidirectional logic seeking Diameter of wire 0.3 mm Horizontal: 160 DPI Resolution Vertical: 144 DPI Print speed Max.4.7 LPS (40 columns,16 cpi) Printing width Max.63.4 mm Copy... - Page 58 EC-PM-530D User's Manual Note: 1. Only one of the data interfaces is supplied when leaving the factory. 2. Please take the specific interface as standard. Cash drawer RJ-11, 24V(DC)/1A interface Black mark Standard Input buffer 60 KB Voltage: 100 ~ 240V(AC) Input Frequency: 50Hz ~ 60Hz Power...
-
Page 59: Interface
EC-PM-530D User's Manual 5.2 Interface This printer is equipped with one cash drawer interface and a data interface (you can select parallel interface, USB interface, USB interface +serial interface, USB interface + Ethernet interface, USB interface + Serial interface + Ethernet interface, USB interface + Bluetooth or Wi-Fi interface). Connect the printer to the computer with correct cable. - Page 60 EC-PM-530D User's Manual (3) Definition of pins (as shown in Table A-2) Table A-2 Pin definition of parallel interface connector Return Signal name Direction Description Data /STROBE Width of selected pulse is 0.5µ sec. selected DATA1 Data bit 1 IN / OUT DATA2 Data bit 2 IN / OUT...
-
Page 61: Usb Interface
EC-PM-530D User's Manual * The “Direction” in the title column means the flow direction of printer signal to the printer. * The “Return” in the title column means pair-twist return. You must confirm that the interface cable is a pair-twist shielding line, and every signal line is looped with ground line and pair-twisted together. -
Page 62: Serial Interface
EC-PM-530D User's Manual VBUS PDIUSBD12 USB-B connector Printer’s 26PIN connector PDIUSBD12 chip Figure 5-5 Connection figure of printer and computer with USB interface USB Interface is 2.0 Full-Speed interface, and displayed as a USB port on the computer finally. User can carry out USB printing by selecting corresponding USB port. -
Page 63: Ethernet Interface
EC-PM-530D User's Manual The connection of serial interface: Printer 9-Pin connector Host 9-Pin connector Figure 5-7 The connection figure of host 9 PIN and printer Printer 9PIN connector Host 25PIN connector Figure 5-8 The connection figure of host 25 PIN and printer 5.2.5 Ethernet Interface Ethernet interface of 10/100 Base-T can be connected to 10/100M Ethernet Figure 5-9 Ethernet interface... -
Page 64: Chapter 6 Maintenance And Technical Service
EC-PM-530D User's Manual Chapter 6 Maintenance and Technical Service 6.1 Cleaning the Printer Clean the paper scrap and other objects inside the printer periodically. Cleaning periodically and the cleaning tool Periodical cleaning: every 3 months or every 300 working hours once Cleaning tool: dry cloth (please use soft cloth to clean metal parts.) Cleaning the paper feed path and the parts under carriage Wipe off paper scrap and clean dirt and dust. -
Page 65: Contact The Technical Service Centre
EC-PM-530D User's Manual ① Phenomenon: The printer can't print at all. Solution: 1. Check whether the ribbon cartridge is installed or not. 2. Make sure that the interface cable is connected correctly. ② Phenomenon: The printed characters are faint. Solution: Remove the ribbon cartridge and turn the ribbon knob, then install it again. If the printed characters are still faint, please replace a new one. -
Page 66: Chapter 7 Command Code Summary
EC-PM-530D User's Manual Chapter 7 Command Code Summary 7.1 General EC-PM-530D printer‘s control commands are compatible with ESC/POS. Explanation of every command contains format and description. “Format” parts give three kinds of command format, including ASCII Code, Decimal code and hexadecimal code. “Description” parts describe the function of command. - Page 67 EC-PM-530D User's Manual ESC SP Set right-side character spacing Format: ASCII: ESC SP n Decimal: 32 n Hex: 1B 20 n Description: Set the right-side spacing of character to n times of half dot spacing (1/144 Inch). n=0~32; Default n=0. ESC !...
- Page 68 EC-PM-530D User's Manual m: Ending ASCII code of user-defined character set. m≤127. The number of user-defined characters is m-n+1, and the maximum number is 96. When user defines only 1 character, m=n. a: The byte number of user-defined characters. d1 d2…db: The data of user-defined characters. Every character has s×a bytes. m-n+1 characters altogether have (s×a) ×...
- Page 69 EC-PM-530D User's Manual ESC 2 Set 1/6 inch line spacing Format: ASCII: ESC 2 Decimal: Hex: 1B Description: Set the line spacing to 1/6 inch. ESC 3 Set n/144 inch line spacing Format: ASCII: ESC 3 Decimal: Hex: 1B Description: Set the line spacing to n/144 inch.
- Page 70 EC-PM-530D User's Manual ESC D Set horizontal tab positions Format: ASCII: n[k] Decimal: n[k] Hex: 1B n[k] Description: Set horizontal tab positions to n1, n2, …, nK. For k=1~21, and it can set 21 horizontal tab positions at most. The absolute horizontal position of the first horizontal tab position is: n1 times of half-dot spacing; The absolute horizontal position of the second horizontal tab position is: (n1+n2) times of half-dot spacing;...
- Page 71 EC-PM-530D User's Manual ESC K Print and feed reversely Format: ASCII: ESC K Decimal: 75 n Hex: 1B 4B n Description: Print the data in the print buffer and feed the paper by n*1/144 inch in the reverse direction. n=0~48. ESC U Turn unidirectional printing mode on/off Format:...
- Page 72 EC-PM-530D User's Manual ESC e Print and feed reversely n lines Format: ASCII: ESC e Decimal: Hex: 1B Description: Print the data in the print buffer and feed n lines in the reverse direction. n=0~2. The maximum reverse paper feed distance is 48 dots (48*0.176mm). ESC I Full cut Format:...
- Page 73 EC-PM-530D User's Manual FS ! Select Chinese printing mode Format: ASCII: ! Decimal: Hex: 1C Description: bit 2 of n=0, double-width mode is disabled; bit 2=1, double-width mode is enabled bit 3 of n=0, double-height mode is disabled; bit 3=1, double-height mode is enabled bit 7 of n=0, underline is disabled;...
- Page 74 EC-PM-530D User's Manual FS W Turn quadruple-size mode on/off for Chinese character Format: ASCII: Decimal: Hex: 1C Description: When n≤*******1>B, quadruple-size mode is turned on. When n≤*******0>B, quadruple-size mode is turned off. GS FF Execute black mark detecting Format: ASCII: Decimal: Hex: 1D Description:...
- Page 75 EC-PM-530D User's Manual Line position for paper tearing Beginning print-position Middle position of black mark detector Feeding direction A (tear off) = 84 mm C (tear off) = 47 mm Figure 1 a: set the different offset function Set the beginning print-position offset from the black mark detecting position Set the tearing position offset from the black mark detecting position Set the beginning print-position offset from the cutter position m=0 or m=48, calculate the offset in the feed direction.
- Page 76 EC-PM-530D User's Manual the inherent mechanical value L of the printer (shown as Figure 4), the calculation of tearing position offset is shown as follows: Tearing position offset=(L + distance of adjacent two black marks-L)/0.176 (dots number) Note: When the tearing position offset is being set, the parameter “a” of “GS ( F” command should be “2”.
- Page 77 EC-PM-530D User's Manual Calculating the tearing position offset As the black mark is on the tearing position, L=0, therefore, tearing position offset = (67-0)/0.176=381 points. Using the following command to set the tearing position offset 1D 28 46 <4> <0> <2> <0> <7D> <1> Calculating the beginning print-position offset (32-29) /0.176+381=364 points Using the following command to set the beginning print-position offset...
- Page 78 EC-PM-530D User's Manual [Example 3] Bill requirement: Bill length is 150mm, tearing position is 142mm from the black mark position, and beginning print-position is 32mm from the tearing position. Tearing position ABCDEFG BCDEFGH Black mark detector Cutting/tearing position Calculating the tearing position offset As the distance between the black mark and the tearing position is greater than L (67mm), therefore, tearing position offset = (67+150-142)/0.176=426 points.
- Page 79 EC-PM-530D User's Manual If n=1 or n=49, paper status is returned. If there is paper, the bit2, 3 of the returned byte is 0; if there is no paper, the bit 2, 3 of the returned byte is 1. GS V Feed paper to cutting position Format1: ASCII:...
-
Page 80: Appendix Commands List
EC-PM-530D User's Manual Appendix Commands List Command Hexadecimal Function (ASCII) Code Move the print position to the next horizontal tab position. Print the data in the line editing buffer and feed one line The printer prints one line data and the print head returns to the left position automatically. - Page 81 EC-PM-530D User's Manual 1C 21 n Select Chinese printing mode ! & 1C 26 Enter Chinese characters printing mode 1C 2D n Set Chinese underline mode 1C 32 Self-define Chinese characters 1C 53 n1 n2 Set full-size Chinese characters spacing 1C 57 n Turn quadruple-size mode on/off for Chinese characters GS FF...
- Page 82 Manufacturer: EC LINE Thank you very much for using EC Line product For service, please contact service@ecline.com.hk www.eclinepos.com...
Need help?
Do you have a question about the EC-PM-530D Series and is the answer not in the manual?
Questions and answers
Item: Printer ECPM-530D Qty.: 1 unit Can you quote this with delivery cost to Kuala Lumpur MALAYSIA