EcLine EC-PM-80320D User Manual

EcLine EC-PM-80320D User Manual

Ec-pm-80320 series. thermal receipt printer

Advertisement

User's Manual
EC-PM-80320 Series
Thermal Receipt Printer

Advertisement

Table of Contents
loading
Need help?

Need help?

Do you have a question about the EC-PM-80320D and is the answer not in the manual?

Questions and answers

Summary of Contents for EcLine EC-PM-80320D

  • Page 1 User's Manual EC-PM-80320 Series Thermal Receipt Printer...
  • Page 2 EC-PM-80320 User's Manual Declare About Trademark Corporation names and product names are the registered trademarks or commodity names of the corporation. * EPSON is a registered trademark of Seiko Epson Corporation. * ESC/POS is a registered trademark of Seiko Epson Corporation. *...
  • Page 3: Important Safety Instructions

    EC-PM-80320 User's Manual Important Safety Instructions Read all of these instructions carefully and thoroughly and save them for later reference. The unauthorized operation may lead to error or accident. Manufacturer will not answer any problems which lead by unauthorized operations. Follow all warnings and instructions in the manual as well as marked on the product.
  • Page 4 EC-PM-80320 User's Manual If the product does not operate normally when the operating instructions are followed. Adjust only those controls that are covered by the operating instructions since importer adjustment of other controls may result in damage and will often require extensive work by a qualified technician to restore the product to normal operation.
  • Page 5: Table Of Contents

    EC-PM-80320 User's Manual Table of Contents Declare ..............................i Important Safety Instructions........................ii Chapter 1 Overview ..........................1 1.1 Features............................1 1.2 Product Model Description......................1 1.3 
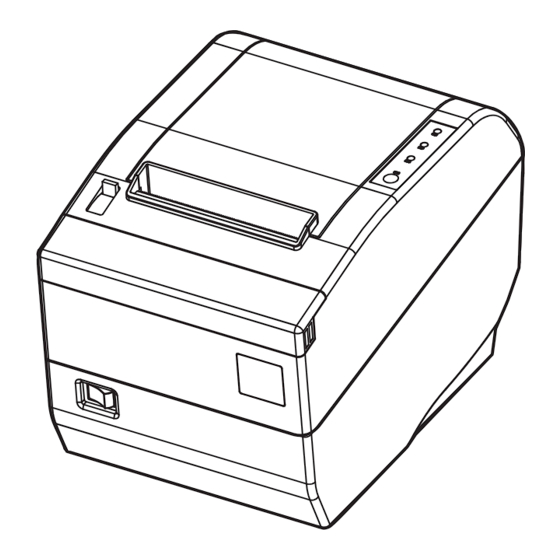
Main Parts of the Printer .........................1 Chapter 2 Installing the Printer ......................3 2.1 Unpacking & Checking........................3 2.2 Unpacking the Protective Materials....................3 2.3 Connecting to Your Computer or Other Equipment.................3 2.3.1 Connecting the Cash Drawer Cable ..................3 2.3.2 Connecting the Parallel Interface Cable ...................4...
  • Page 6 EC-PM-80320 User's Manual Chapter 5 Specification........................43 5.1 General Specification ........................43 5.2 Interface Specifications .........................45 5.2.1 Cash Drawer Interface ......................45 5.2.2 Parallel Interface ........................45 5.2.3 USB Interface .........................46 5.2.4 Serial Interface ........................47 5.2.5 Ethernet Interface........................48 5.2.6 Power Supply Inlet .........................48 Chapter 6 Troubleshooting and Maintenance..................49 6.1 Maintenance ..........................49 6.2 Error Message on the Control Panel.....................49 6.3 Auto-Cutter Jammed or Error ......................49...
  • Page 7: Chapter 1 Overview

    EC-PM-80320 series products which are high-speed thermal mini-printers. According to different data ports (interfaces), EC-PM-80320 series can be classified into different models: EC-PM-80320D, EC-PM-80320U, EC-PM-80320US, EC-PM-80320UE, EC-PM-80320UB and EC-PM-80320UW. EC-PM-80320 series printer is equipped with an auto cutter which has two options for the consumer to select: partial cutter can only cut the paper with one point left while full cutter cuts the paper fully.
  • Page 8 EC-PM-80320 User's Manual Power Supply Inlet Data Interface Cash Drawer Interface Figure 1-2 Interfaces on the back of the printer Note: Please take the specific interface as standard. - 2 -...
  • Page 9: Chapter 2 Installing The Printer

    EC-PM-80320 User's Manual Chapter 2 Installing the Printer 2.1 Unpacking & Checking Check the following items in the package, if any of these items is missing, please contact your dealer. Interface Cable (Optional) Printer Power Cord Driver CD AC Adapter (Including User's Manual and Driver) Figure 2-1 Packing items Note: Models with Bluetooth and Wi-Fi are not equipped with interface cable.
  • Page 10: Connecting The Parallel Interface Cable

    EC-PM-80320 User's Manual Cash Drawer Interface Cash Drawer Cable Figure 2-2 Connecting the cash drawer cable Caution: Please use the appropriate cash drawer. Manufacturer will not honor warranty when using unauthorized cash drawer. 2.3.2 Connecting the Parallel Interface Cable 1. Make sure the computer and the printer are both turned off, connect the parallel interface cable to the connector of the printer.
  • Page 11: Connecting The Serial Interface Cable

    EC-PM-80320 User's Manual USB Interface USB Interface Cable Figure 2-4 Connecting the USB interface cable Note: Please don’t impact the plug after connecting USB interface cable. 2.3.4 Connecting the Serial Interface Cable 1. Make sure the computer and the printer are both turned off, connect the serial interface cable to the connector of the printer.
  • Page 12: Connecting The Power Cord

    EC-PM-80320 User's Manual Ethernet Interface Cable Ethernet Interface Figure 2-6 Connecting the Ethernet interface cable Note: Please refer to the user’s manual for the detailed instructions of network settings. 2.4 Connecting the Power Cord 1. Make sure the printer’s power is turned off. (The pressed down side on the switch with “O” mark denotes the printer is off) 2.
  • Page 13: Installing The Driver

    EC-PM-80320 User's Manual 2.5 Installing the Driver Please use the cable to connect computer with printer, then turn on the computer and the printer, put the driver CD into the CD-ROM. Install driver by the following ways: 2.5.1 Auto-installing Way (Recommended) Double click the file "Setup.exe"...
  • Page 14 EC-PM-80320 User's Manual 2.5.2.2 The Operating System of Windows 8 The hand-operated installing steps of parallel interface, serial interface or USB interface: 1. Enter “Control Panel” → “Device and Printers”. 2. Click “Add Printer”, then a window of “Add Printer Wizard” pops up, then click “Next”, select “Add Local printer Manually”...
  • Page 15: Selecting The Cutter

    EC-PM-80320 User's Manual driver search for the device” pops up, click “Next”. 6. After the system finishing installing the file automatically, a window of “USB Printer Supported” pops up, click "Finish". 7. The printer USB driver process is installed successfully. USB printer driver installing steps: 1.
  • Page 16: Installing Bluetooth Interface Driver

    EC-PM-80320 User's Manual 2.7 Installing Bluetooth Interface Driver Note: Select to install this driver according to the chosen model. 1. Choose the appropriate Bluetooth adapter, the operation system is Window XP or above which is with Bluetooth adapter driver. 2. Turn on the printer, search Bluetooth device in Window XP system, and click “Add”. - 10 -...
  • Page 17 EC-PM-80320 User's Manual 3. Tick off the option of “My device is set up and ready to be found.” Click “Next” to continue. - 11 -...
  • Page 18 EC-PM-80320 User's Manual 4. Select the “EC-PM-80320”, and then click “Next”. EC-PM-80320 5. Tick off the option of “Let me choose my own passkey” and enter “1234” as shown, then click “Next”. 6. Record the Outgoing COM port and click “Finish”, then reboot the computer. - 12 -...
  • Page 19: Ethernet Settings

    2.8 Ethernet Settings Please use EC network setting software NetFinder to set the IP address for EC printers, which can be found in the CD or downloaded from www.ecline.com.mx. Caution: The network printing function needs the operating systems of Windows2000 and above and the operating systems of Window 98/ME and below are not supported.
  • Page 20 EC-PM-80320 User's Manual Button description: Exit — Exit from the software Search — Search printers in the same LAN Assign IP — Modify the IP address and other settings for the specified printer. 2. Search Printer Click “Search” button in the main interface, the dialogue box appearing will begin searching automatically and displays the status, listing a printer in the main interface if found.
  • Page 21 EC-PM-80320 User's Manual 3. Setting printer’s IP address The printer’s information is listed in the main interface, the left side of which is the model and description and the right side are the IP address and MAC address. What’s more, the assign mode (dynamic/static) is noted behind the IP address.
  • Page 22: Wi-Fi Setting Of Ec Printer

    EC-PM-80320 User's Manual Check the “Use DHCP” if needed to assign dynamic address, the settings above will be disabled automatically. Please make sure there is a DHCP server in the network, or the printer can not receive an effective IP address. When to specify static address, uncheck “Use DHCP”...
  • Page 23 EC-PM-80320 User's Manual 2”. Double click it and the window of “Wireless Network Connection” pops up, select and double click the corresponding printer Wi-Fi name. The printer Wi-Fi default name is composed of “the printer model+6 numbers and letters” (as shown in Figure 1) Double click it The printer Wi-Fi of this example.
  • Page 24 EC-PM-80320 User's Manual Figure 2 (3) Connecting to the equipment in iOS Take the mobile phone of iOS 8.1 as an example to show how to connect the printer with the equipment in iOS. 1. Turn on the printer; make sure the printer is in normal working condition. Start the operation 30 seconds after the printer is on.
  • Page 25: Wi-Fi Parameters Description

    EC-PM-80320 User's Manual The printer Wi-Fi of this example. Figure 3 2.9.2 Wi-Fi Parameters Description After connecting the equipment with the printer through wireless network, please import http://10.10.10.1 in the browser address bar and enter, then the setting interface pops up. The display style of setting interface may differ in different systems, but the parameter items are the same.
  • Page 26 EC-PM-80320 User's Manual Figure 4 You can select Simple Chinese, Traditional Chinese and English in the “Select Language” and the default language is English. When you need to change the language, just select the language you need in the “Select Language” and then click “Apply” (as shown in Figure 5). Figure 5 - 20 -...
  • Page 27 EC-PM-80320 User's Manual (1) Printer-equipment connected printing Printer-equipment connected printing is a way of printing which uses printer as the hotspot and connects the wireless equipment for printing. “Wireless Settings” is the relevant setting parameter when the printer is as the hotspot (as shown in Figure 6).
  • Page 28 EC-PM-80320 User's Manual Subnet Mask: The subnet mask of the printer wireless card. You can modify it if necessary. Security Mode: The security mode of the printer wireless card. You can modify it if necessary. If the connection between printer and computer is exceptional, please restart the printer or modify “Channel’...
  • Page 29 EC-PM-80320 User's Manual ① Right click “My Network Places”, and click “Properties”, then double click “Local Area Connection 2” (as shown in Figure 8). Double click it Figure 8 ② The dialog box “Wireless Network Connection Status” pops up, then click “Properties” (as shown in Figure 9).
  • Page 30 EC-PM-80320 User's Manual ③ When the dialog box pops up, click “Wireless Networks” on the upper side of the dialog box (as shown in Figure 10). Figure 10 ④ Select the current wireless network name in “Preferred networks” and then click “Properties” ( as shown in Figure 11).
  • Page 31 EC-PM-80320 User's Manual Figure 11 ⑤ When the window of “Properties” pops up, find out the security mode and encrypt type in “Wireless network key” (as shown in Figure 12). - 25 -...
  • Page 32 EC-PM-80320 User's Manual WIFI001 Security mode Encrypt type Figure 12 ⑥ Close the windows in turn, then the dialog box “Local Area Connection 2 Status” pops up according to the operation of step ①, click “View Wireless Networks” (as shown in Figure 13). When the window of “Wireless Network Connection”...
  • Page 33 EC-PM-80320 User's Manual Figure 13 - 27 -...
  • Page 34 EC-PM-80320 User's Manual The current Wi-Fi hotspot of this example. Figure 14 The setting of Security Mode and Encrypt Type Refer to “Connecting the Printer”, connect the wireless equipment with the printer and select the parameters acquired by the above steps in the “Security Mode” and “Encrypt Type” of the “AP Client”.
  • Page 35 EC-PM-80320 User's Manual Figure 15 Note: The green handshaking mark on the right side of the SSID column denotes the connection between the printer and the outer Wi-Fi hotspot is successful. IP Address: Set the IP address of the printer wireless card and the IP address should be in the same segment with the wireless networks you are using.
  • Page 36: Wi-Fi Interface Status Display And Parameters Reset

    EC-PM-80320 User's Manual 2.9.3 Wi-Fi Interface Status Display and Parameters Reset Wi-Fi interface is equipped with the “RESET button (Wi-Fi RESET)” and “LED indicator”. Turn on the printer, the Wi-Fi LED blinks fast, which denotes the interface is on the ON status. 30 seconds later, the Wi-Fi LED blinks slowly, which denotes the Wi-Fi interface is in normal working condition.
  • Page 37 EC-PM-80320 User's Manual address” in the “Printer Name or IP Address” column. Take IP address “192.168.0.240” for example. “Port Name” is created automatically after finishing filling in IP address. 7) A window of “Additional Port Information Required” pops up, select “Custom” in the “Device Type”, then click “Settings”.
  • Page 38 EC-PM-80320 User's Manual 9) Return to “Additional Port Information Required”, click “Next”. 10) A window of “Completing the Add Standard TCP/IP Printer Port Wizard” pops up, click “Finish”. 11) In the selection of “Manufacturers/Printers”, click “Have Disk”, and then click “Next”. 12) A window of “Install From Disk”...
  • Page 39 EC-PM-80320 User's Manual 4) A window of “Printer port” pops up, select “Standard TCP/IP Port”, click “New port”. 5) A window of “Add Standard TCP/IP Printer Port Wizard” pops up, click “Next”. 6) A window of “Add port” pops up, import the IP address reported by the “Setting printer’s IP - 33 -...
  • Page 40 EC-PM-80320 User's Manual address” in the “Printer name or IP address” column. Take IP address “192.168.0.240” for example. “Port name” is created automatically after finishing filling in IP address. Click “Next”. 7) A window of “Additional Port Information Required” pops up, select “Custom” in the “Device Type”, then click “settings”.
  • Page 41 EC-PM-80320 User's Manual 9) Return to “Additional Port Information Required”, click “Next”. 10) A window of “Completing the Add Standard TCP/IP Printer Port Wizard” pops up, click “Finish”. 11) Return to “Printer Ports”, click “Close”. 12) Return to “Properties”, make sure the network port is selected, click “Apply”, and then click “Close”.
  • Page 42 EC-PM-80320 User's Manual - 36 -...
  • Page 43: Chapter 3 Control Panel

    EC-PM-80320 User's Manual Chapter 3 Control Panel 3.1 Control Panel There are three LEDs and one key on the control panel shown as Figure 3-1. Figure 3-1 Control panel 3.1.1 LED Description Denotes whether the printer’s power supply is connected or not. The LED is on (Green) POWER when the power is connected.
  • Page 44: Hex Dump Printing

    EC-PM-80320 User's Manual 3.3 Hex Dump Printing This function allows you to check whether the connection between the printer and the computer or the terminal device works properly or not. The method is that holds on pressing the FEED key while turn on the printer, the ERROR LED blinks once with two beeps.
  • Page 45 EC-PM-80320 User's Manual to find “Devices and printers”, at last, open the window of “Devices and printers”. 3. Right click “TP850” in the window of “Printers”, and then select “Properties”. 4. Click “Printer settings” in the “Properties” page and open the window of “Printer settings”. 5.
  • Page 46 EC-PM-80320 User's Manual 6. To set parameter, first click the parameter icon, then open the parameter setting window. There are Parameter options, Explanation and Control buttons in the window. Select the corresponding parameter and click “Set”; the printer will change the setting at the time it receives the command. Click “Cancel”...
  • Page 47: Chapter 4 Installing And Replacing The Roll Paper

    EC-PM-80320 User's Manual Chapter 4 Installing and Replacing the Roll Paper The printer can install the paper which should be 80mm wide conveniently. How to deal with the paper will be explained in details in this chapter. 4.1 Paper Installation Steps Note: 1.
  • Page 48 EC-PM-80320 User's Manual Figure 4-3 Pull out the paper 4. Put the paper as shown below, and then close the upper cover. Figure 4-4 Close the cover Note: After finishing installing the paper, if PAPER OUT LED and ERROR LED are still on, or the printer makes strange noise when feeding paper, please open the cover and re-close it tightly.
  • Page 49: Chapter 5 Specification

    EC-PM-80320 User's Manual Chapter 5 Specification 5.1 General Specification Item Description Printing method Direct thermal printing Dot density 640 dots/line (203×203 DPI) Printing width Max:80 mm, 640 dots Print speed 220 mm/s TF50KS-E (Japan paper co.ltd) Thermal roll paper model AF50KS-E (JUJO THERMAL) Width: 79.5 ±...
  • Page 50 EC-PM-80320 User's Manual Input voltage: 100 ~ 240V(AC) Frequency: 50Hz/60Hz Power Supply (AC adapter) Output voltage: 24V(DC) Current: 2.5 A Input voltage: 24 V (DC) Current: 2.5 A Power input Parameters Warning: Please use the original AC adapter only. Manufacturers have no responsibilities for the problems which are led by using unauthorized AC adapter.
  • Page 51: Interface Specifications

    EC-PM-80320 User's Manual 5.2 Interface Specifications The printer is configured with one cash drawer interface and one data interface (Parallel interface, USB interface, USB interface + Serial interface, USB interface + Ethernet interface, USB interface + Bluetooth or USB interface + Wi-Fi). 5.2.1 Cash Drawer Interface The cash drawer interface of the printer uses the RJ-11 connector, which is shown below.
  • Page 52: Usb Interface

    EC-PM-80320 User's Manual DATA5 DATA6 DATA7 DATA8 Acknowledge signal, Low level means that printer is /ACK ready for receiving data. BUSY High level means printer is too busy to receive data High level means that paper is out. High level with the pull-up resistor. /ERR Low level means the printer is in error state 14, 15, 17, 18, 34, 36...
  • Page 53: Serial Interface

    EC-PM-80320 User's Manual 5.2.4 Serial Interface EC-PM-80320 printer’s serial interface is compatible with RS-232C protocol, supporting RTS/CTS and XON/XOFF handshaking protocol. Its connector is a DB-9 type connector and each pin’s definitions are shown as below. Figure 5-5 Sequence numbers of Serial connector Table A-3 Pin assignments of the serial interface Pin Number Signal...
  • Page 54: Ethernet Interface

    EC-PM-80320 User's Manual Printer 9PIN connector Host 25PIN connector Figure 5-7 Connecting with 25-Pin PC 5.2.5 Ethernet Interface Ethernet interface of 10/100 Base-T can be connected to 10/100M. Figure 5-8 Ethernet interface 5.2.6 Power Supply Inlet The EC-PM-80320 printer connects with a 24V±10% and 2.5A AC adapter. The power supply inlet is shown as Figure 5-9.
  • Page 55: Chapter 6 Troubleshooting And Maintenance

    EC-PM-80320 User's Manual Chapter 6 Troubleshooting and Maintenance 6.1 Maintenance To prolong the printer’s life, make sure that the printer is well away from heaters and other sources of extreme heat, and the surrounding area is clean, dry, and free of dust. Cleaning paper holder and thermal print head periodically is the only necessary task of maintaining the printer.
  • Page 56 EC-PM-80320 User's Manual Upper cover Auto-cutter Figure 6-1 Adjust the auto-cutter by hand - 50 -...
  • Page 57: Chapter 7 Control Commands

    EC-PM-80320 User's Manual Chapter 7 Control Commands 7.1 General The commands EC-PM-80320 supplies are based on ESC/POS. The format described as following: Command Function Format: ASCII: Indicates the ASCII equivalents Decimal: Indicates the decimal equivalents Hex: Written in hexadecimal code Description: The function and using instruction of that command.
  • Page 58 EC-PM-80320 User's Manual DLE EOT n Real-time status transmission * Format: ASCII: Decimal: Hex: Description: Transmit the selected printer status according to the specified parameter n in serial interface, 1≤n≤4; this instruction is still valid even thought in error or off-line status. n=1: Transmit print status n=2: Transmit off-line status n=3: Transmit error status...
  • Page 59 EC-PM-80320 User's Manual ESC $ Set absolute print position Format: ASCII: Decimal: Hex: Description: Set the distance from the beginning of the line to the position at which subsequent characters are to be printed. The distance is (nL+nH*256)* (horizontal or vertical motion unit). Nl, nH=0~255. Horizontal or vertical motion unit are specified by GS P command.
  • Page 60 EC-PM-80320 User's Manual double-density 24-dot 203DPI 101DPI single-density 24-dot 203DPI 203DPI double-density ESC - Turn underline mode on/off Format: ASCII: Decimal: Hex: Description: n=0, 48 Turn underline mode off. n=1, 49 one-dot thick underline mode on n=2, 50 two-dot thick underline mode on ESC 2 Set default line spacing Format:...
  • Page 61 EC-PM-80320 User's Manual ESC @ Initialize printer Format: ASCII: Decimal: Hex: Description: Initialize the printer to the state when the printer was turn on. ESC D Set horizontal tab position Format: ASCII: n1……nk Decimal: n1……nk Hex: n1……nk Description: Set the horizontal tab position to the column specified by nk from the beginning of the line. n = 0~255;...
  • Page 62 EC-PM-80320 User's Manual ESC V Turn 90°clockwise rotation mode on/off Format: ASCII: Decimal: Hex: Description: n=0,48 Turn off 90°clockwise rotation mode. n=1,49 Turn on 90°clockwise rotation mode. No 90°clockwise rotation for underline in underline mode. ESC \ Set relative print position Format: ASCII: Decimal:...
  • Page 63 EC-PM-80320 User's Manual ESC d Print and feed n lines Format: ASCII: Decimal: Hex: Description: Print the data in print buffer and feed n lines, n= 0~255. ESC p m t1 t2 Generate pulse Format: ASCII: Decimal: 112 m Hex: Description: Printer output pulse, whose width specified by t1 and t2.
  • Page 64 EC-PM-80320 User's Manual FS ! Select Chinese character mode Format: ASCII: Decimal: Hex: Description: Off/On Decimal Function Not define Not define Double-width is not selected Double-width is selected Double-height is not selected Double-height is selected Not define Not define Not define Underline is selected Underline is not selected FS &...
  • Page 65 EC-PM-80320 User's Manual FS 2 Define user-define Chinese characters Format: ASCII: c1 c2 d1……d72 Decimal: 50 c1 c2 d1……d72 Hex: 32 c1 c2 d1……d72 Description: c1=fe; a1≤c2≤fe; 0≤d≤255; c1 specified the first byte of the character code, c2 specified the second byte of the character code.
  • Page 66 EC-PM-80320 User's Manual command should not be processed more than 10 times per day. The hole command including the bit image data should less than 128K bytes (1M bits). xL, xL specifies (xL + xH*256) bytes in the horizontal direction for the NV bit image you defined. yL, yH specifies (yL + yH*256) bytes in the vertical direction for the NV bit image you defined.
  • Page 67 EC-PM-80320 User's Manual GS / Print downloaded bit image Format: ASCII: Decimal: Hex: Description: Print the downloaded bit image using the mode specified by n. n=0, 1, 2, 3, 48, 49, 50, 51. The bit image defined by GS * command. n specifies the mode as follows: Mode Density in vertical Density in horizontal...
  • Page 68 EC-PM-80320 User's Manual GS V Select cut mode and cut paper Format: ASCII: Decimal: Hex: Description: (There is only one cut mode can be selected if the cutter can only realize one cut type.) m=0, 48; No n parameter, Executes a full cut. m=1, 49;...
  • Page 69 EC-PM-80320 User's Manual UPC-E Fixed 11≤k≤12 48≤d≤57 EAN13 Fixed 12≤k≤13 48≤d≤57 EAN8 Fixed 7≤k≤8 48≤d≤57 0~9, A~Z, SP, 48≤d≤57, 48≤d≤57, CODE39 Can be changed 1≤k $, %, +, -, ., / d=32, 36, 37, 43, 45, 46, *(stat, stop) 47. d=42 (stat, stop) *65 UPC-A Fixed 11≤n≤12...
  • Page 70: Appendix Commands List

    EC-PM-80320 User's Manual Appendix Commands List Here lists the commands supported in the printer in alphabetical order. Control Commands Functions Beeper Horizontal tab Print and line feed Print and Feed paper to next black mark position DLE EOT Real-time status transmission ESC BEL Beep for appointment ESC SP...
  • Page 71 EC-PM-80320 User's Manual FS ! Select Chinese character mode FS & Set Chinese language mode FS - Turn Chinese character underline on /off FS . Cancel Chinese language mode FS 2 Define user-define Chinese characters FS S Set Chinese character spacing FS W Turn quadruple-size mode on/off for Chinese character FS p n m...
  • Page 72 Manufacturer: EC Line...

Table of Contents