Advertisement
Quick Links
Talkman® T5 System Version and
Compliance
Version
For version information, please consult the Help | About menu option of any Vocollect
application or check the release notes that accompanied the Vocollect Management
Software™.
Software
Vocollect VoiceConsole™
Talkman® T5 Terminal
Software
Release Version
Consult the release notes.
Consult the release notes.
Advertisement

Related Manuals for Vocollect Talkman T5


Summary of Contents for Vocollect Talkman T5
- Page 1 Talkman® T5 System Version and Compliance Version For version information, please consult the Help | About menu option of any Vocollect application or check the release notes that accompanied the Vocollect Management Software™. Software Release Version Vocollect VoiceConsole™ Consult the release notes.
-
Page 2: Declaration Of Conformity
Country Certify and declare under our sole responsibility that the following equipment: Product description / Intended use Vocollect® T5 wearable computer with terminal charger and battery charger. Voice directed data acquisition device operating in the 2.4Ghz ISM frequency band. EU / EFTA Member states intended Approved for use in all EU and EFTA member states. - Page 3 Rules Regulatory Policy Compliance Talkman T5 Specific Absorption Rate (SAR) Level The Talkman T5 terminal with the USI WM-BB-AG-01 radio has been SAR tested. The maximum SAR value measured was 0.471W/kg. This product has been tested to the following standards:...
- Page 4 2. Industry Canada RSS211 and RSS139 3. ETSI 300-328, EN 60950 The Talkman T5 is nominally a Class B digital device, pursuant to Part 15 of the FCC Rules. Caution: Exposure to Radio Frequency Radiation. The Talkman T5 terminal contains an internal low-power radio. The radiated output power of the radio is far below the FCC radio frequency exposure limits.
- Page 5 Products intended for sale within the European Union are marked with the CEMark, which indicates compliance to applicable Directives and European Normes (EN) as follows. Amendments to these Directives or ENs are included. Important Notice: This device is a 2.40 to 2.48GHz RF device intended for office and light 0336 industrial use in all EU and EFTA member...
- Page 6 Pyrenees Orientales Val de Marne Gers Bas Rhin Ille et Vilaine Haute Rhin Note: This device is also authorized for use in all EU and EFTA member states (CH, ICE, LI, NOR). Made in the U.S.A. Vocollect Inc. Pittsburgh, PA...
- Page 7 General Safety Guidelines Follow these guidelines when working with Vocollect electrical equipment: • Grounded equipment must be plugged into an outlet, properly installed, and grounded in accordance with all codes and ordinances. • Never remove the grounding prong or modify the plug in any way.
- Page 8 • Only Vocollect-approved batteries should be charged in the charger. Do not attempt to charge any other type of battery in the charger. •...
- Page 9 Cord Uses standard IEC 60320 plug Operating Temperature 50º to 113º F (10º to 45º C) Storage Temperature -22º to 158º F (-30º to 70º C) Functional to 90% non- Humidity condensing Vocollect part number 10-Bay Combination #CM-700-1 Charger, T5...
- Page 10 Power Supply: T5 10-Bay Combination Charger Please read the General Safety Guidelines before working with any Vocollect equipment. Vocollect provides cord plugs that vary from country to country. Procedures 1. Connect the provided AC cord to the left end of the power supply brick that is mounted inside the 10-Bay Combination Charger.
- Page 11 Specifications Input Voltage: 100-250 Vac Input Input Current: 2.4 A maximum Line Frequency: 50-60 Hz Output Output: 97.5 W (15 V x 6.5 A) UL listed and CSA certified 3 conductor 18 AWG Cord (U.S., Mexico, Terminated with a molded on plug Canada): cap rated at 125V 15A Six feet minimum length...
- Page 12 The clip is attached to the Vocollect belt at the beginning of a shift. Then, the operator can attach the terminal to and remove the terminal from the clip as often as necessary throughout the shift.
- Page 13 Vocollect part numbers T5 Belt/Clips Note: All belts have belt clip installed Belt number Belt size BL-700-1 XS 18”-26” BL-700-2 S 24”-32” BL-700-3 M 28”-36” BL-700-4 L 34”-42” BL-700-5 XL 40”-48” BL-700-6 XXL 46”-54” BL-700-7 XXXL 52”-60” BL-700-101B Belt Clips (pack of 5)
- Page 14 Vocollect offers an optional protective cover for the T5 terminal. Product notes • The use of a terminal cover is not required; however, Vocollect strongly recommends using the cover to help preserve the appearance and prolong the life of the terminals. •...
- Page 15 Operators must regard the clip and the terminal as two separate entities. The clip should be attached to the Vocollect shoulder harness at the beginning of a shift. Then, the operator can attach the terminal to and remove the terminal from the clip as often as necessary throughout the shift.
- Page 16 T5 Combination Charger Wall Mount This unit provides a convenient surface for mounting the T5 10-Bay Combination Charger and its associated power supply on a wall. Product notes • Customer assembly required. Be aware of potential hazards (electrical wires, waterlines, etc.) when drilling the pilot holes.
- Page 17 Combination Charger. Level the charger so the supports on the bottom of the bracket are underneath the charger (see image 1). Image 1 Vocollect part number Mounting Bracket for 10-Bay T5 Combination Charger #CM-701-1...
- Page 18 Charging a Battery: T5 To charge T5 terminal batteries in the T5 Charger, you can: • Leave the battery connected to a terminal and place the terminal into a terminal slot on the charger. • Remove the battery from the terminal and place the battery into a battery slot on the charger.
- Page 19 3. Insert the terminal into an open terminal slot on the charger, pressing down and then back until the terminal clicks into place. Warning: Do not attempt to place the terminal into the charger unless you have first disconnected the headset and any other peripheral devices. Do not remove the battery from the terminal when placing a terminal into a charger.
- Page 20 Using a Terminal Cover T5 Terminal Covers To place a terminal cover onto a terminal: 1. If the terminal is not already off, press and hold the yellow play/pause button until the LED indicator turns solid red and then off. 2.
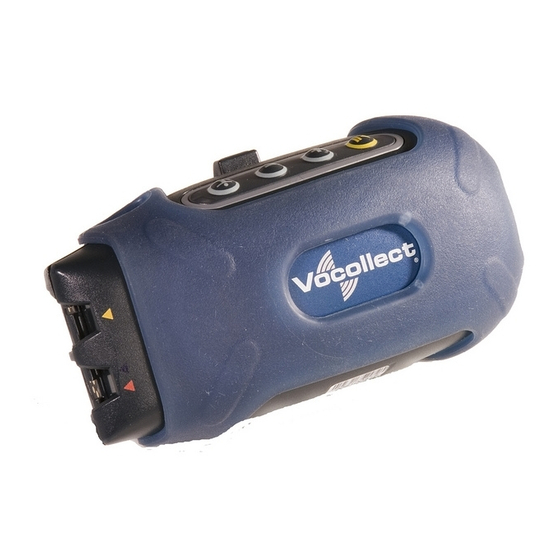
- Page 21 T5 Terminals Talkman T5 terminals are voice-directed, wearable computers. Operators listen to instructions to perform tasks such as warehouse order picking, and factory floor inspection and speak simple phrases to enter data. T5 terminals are attached with a specially designed clip to a customized belt or to a shoulder harness.
- Page 22 Specifications Weight 12.1 ounces (343 g) (with battery) Length 5.5” (13.97 cm) Width 2.63” (6.68 cm) Depth 1.7” (4.3 cm) • Headset port (yellow) I/O Ports • Maintenance port with audio out and RS-232 serial support Operating -33º to 50º C (-29º to 122º F) Temperature Storage -34º...
- Page 23 Peripheral / Maintenance Port T5 has a single external serial port for connecting to peripheral devices or a PC. External Serial Port Pin Out (exterior) Function Description Data pin for the charger 12C interface to the Charger 12C SDA terminal - connects to the MSP430 Regulated 5V at 500mA 5V Output...
- Page 24 The 5V output is enabled with the SERIAL1_5V_EN signal (GPIO35). The RS232 driver is enabled with the SERIAL_EN signal (GPIO36). Vocollect part numbers T5 Terminal #TT-700-100 For additional specifications, see Version and Compliance.
-
Page 25: Troubleshooting
Turning a Terminal On/Off Before you turn on a terminal, you should make sure that there is a charged battery properly connected to the terminal and that you have put on a properly connected headset. Turn the terminal on 1. Press the yellow play/pause button on the terminal. Notes: You will see the LED indicator first turn solid red while the processor reboots. - Page 26 Loading a Task onto a Terminal/Device You can assign a task to a terminal or device using the terminal/device itself. You also can assign a task to a terminal/device group using management software. For information, see the online help for the management software installed at your site. If your site is set up with more than one task, assigning a task can be done only when the terminal is in radio range.
- Page 27 The voice engine says, "Current operator is (operator name). Select menu item." 3. Tap the + button or — button on the device screen until the voice engine says, "Change task." Then, tap the operator button. 4. The voice engine says, "Please wait. Loading task list." This may take a few moments. Note: While the voice engine retrieves the task list, the status indicator blinks red.
- Page 28 Connecting and Disconnecting Peripherals For T5 wearable computers, match the color on the terminal's connection port to the color on the connector. • Headsets: Yellow port • All other peripherals: The port designated by red|blue triangles To connect a peripheral to the terminal: Note: When you attach a peripheral to a T5 terminal, the terminal may automatically shut down if the peripheral is powered on when attached to the cable.
-
Page 29: Led Indicators
Do not skip one step in favor of a later step. Do not continue with other steps once the problem is fixed. If the steps listed do not solve the problem, contact Vocollect for technical support. Blinking green The terminal LED indicator has two blink-green patterns: •... - Page 30 4. Verify that the DHCP server is running, if your site uses DHCP to assign IP addresses. 5. View the terminal's properties using the terminal management software. 6. Make sure that the terminal's IP address is set to 0 (if appropriate) using zeroes, not the letter O.
- Page 31 Solid red The LED indicator should turn red, then turn off when an operator turns the terminal off (see Turning Off a Talkman Terminal). It should also turn red when the terminal first comes on, then flash red and green, then turn solid green. If the terminal continuously displays a solid red light, contact your system administrator.
- Page 32 The T5 Charger provides the capability to charge batteries within and separate from terminals. The T5 chargers come equipped with four LED indicators below each set of slots on the charger. The upper set of indicators applies to the charger's battery slots; the lower set of indicators applies to the charger's terminal slots.
- Page 33 Charger module is malfunctioning; Other see Troubleshooting Charger Malfunction Normal Condition: the battery may not be inserted into the charger correctly. Reinsert the battery into the charger. If the condition persists, the battery may be too hot or too cold. The charger waits for the battery to warm up or cool off before it begins charging (at which point the left LED...
- Page 34 to gently brush away dirt on the contacts. • If dirt or residue cannot be removed with an eraser, use an alcohol swab or soft cloth dampened with alcohol. Warning: Use only alcohol. Do not use any other cleaning solvent. Carefully clean one contact at a time, and make sure contacts are completely dry before using the charger.
- Page 35 Then, the operator can attach the terminal to and remove the terminal from the clip as often as necessary. Notes: Vocollect strongly recommends that the terminal be worn on the right side of the body with the terminal's buttons on the top and its connectors toward your back.
- Page 36 T5 Shoulder Harness To put the clip and terminal on the shoulder harness: Open the flap on the front of the shoulder harness by unsnapping the two buttons. Slide the flap through the slots on the belt clip. With the clip all the way on the flap, snap the buttons together. To put on the shoulder harness: 1.
- Page 37 Unclipping a Terminal To remove a terminal from the belt clip, perform the following procedures: Grasp the terminal firmly. Press the terminal's clip release button. This button is located just behind the terminal's keypad. Lift the terminal up and off the clip.
- Page 38 Using a T5 10-Bay Combination Charger T5 terminals should be placed into a charger when not in use. The charger serves as a link to the host computer so that new tasks can be downloaded, terminal settings can be reconfigured, and terminal software can be updated. The charger also charges the battery that is currently connected to the terminal.
- Page 39 Warning: Do not attempt to place the terminal into a terminal charger unless you have first disconnected the headset and any other peripheral devices. Do not remove the battery from the terminal when placing a terminal into a charger. 7. After the terminal has been placed into the charger, make sure that the LED indicator on the terminal turns on and begins to blink green.
Need help?
Do you have a question about the Talkman T5 and is the answer not in the manual?
Questions and answers