Table of Contents
Advertisement
Available languages
Available languages
Quick Links
Advertisement
Table of Contents

Subscribe to Our Youtube Channel
Related Manuals for mabe MEI1174ZJSS


Summary of Contents for mabe MEI1174ZJSS
- Page 1 English version, go to page 23 lea este instructivo antes de instalar su horno de microondas/ read this manual before installing your new microwave oven modelo/model MEI1174ZJSS PM01...
- Page 3 bienvenido Todo lo que desee saber para el correcto funcionamiento de su producto se encuentra aquí y en nuestros sitios web. Lo invitamos a conocer su producto, a leer el instructivo y obtener el máximo provecho de él. Si usted sigue estas instrucciones, su horno le proporcionará muchos años de buen servicio.
-
Page 4: Instrucciones Importantes De Seguridad
instrucciones importantes de seguridad • No use extensiones. • No conecte otros aparatos en el mismo contacto eléctrico. • Sujete el conector por la clavija, no por el cable. • Su producto está provisto de un tomacorriente polarizado tipo "Y" con cable a tierra integrado. - Page 5 Para reducir el riesgo de incendio, choque eléctrico, lesiones a las personas o una exposición excesiva a la energía de microondas mientras usa su aparato, siga precauciones básicas incluyendo las si- guientes: ADVERTENCIAS: • LOS LÍQUIDOS ASÍ COMO OTROS ALIMENTOS NO DEBEN SER CALENTADOS EN CONTENEDO- RES SELLADOS YA QUE PUEDEN EXPLOTAR.
- Page 6 • NO deben calentarse en el horno de microondas huevos en su cas- carón ni los huevos ya cocidos debido a que pueden explotar, aún después de que el calentamiento con microondas ha finalizado. • Este aparato está diseñado para ser usado en aplicaciones domésti- cas y similares como por ejemplo áreas de cocina para empleados en tiendas, oficinas y otros ambientes laborales, por clientes en ho- teles, moteles y otros ambientes tipo residencial, granjas, ambien-...
-
Page 7: Conexión A Tierra
ADVERTENCIA: EL APARATO ASÍ COMO SUS PAR- TES ACCESIBLES SE CALIENTAN DURANTE SU USO. DEBE TENERSE CUIDADO DE NO TOCAR LOS COMPONENTES GENERADORES DE CALOR. LOS NIÑOS MENORES DE 8 AÑOS DE EDAD DE- BEN MANTENERSE ALEJADOS DEL APARATO A MENOS QUE SE LES SUPERVISE CONTINUAMEN- conexión a tierra ADVERTENCIA: RIESGO DE SUFRIR UN CHOQUE... - Page 8 limpieza ADVERTENCIA: ANTES DE LLEVAR A CABO CUALQUIER TRABAJO DE LIMPIEZA, DESCONEC- TE EL APARATO DEL SUMINISTRO DE ENERGÍA • Limpie la cavidad del horno después de su uso con un trapo ligera- mente húmedo. • Limpie los accesorios con agua jabonosa. •...
- Page 9 materiales que puede usar para cocinar con microondas Platón para dorar Siga las instrucciones del fabricante. La parte inferior del plato para dorar debe quedar a 5 mm por lo menos por encima de la torname- sa. El uso incorrecto puede causar que la tornamesa se rompa. Vajillas de cerámica Use solamente la que es segura para microondas.
- Page 10 Película plástica para envolver Use solamente la que es segura para microondas. Úsela para cubrir los alimentos durante su cocción para retener humedad. No permita que la película plástica toque los alimentos. Termómetros Use solamente los que son seguros para microondas (termómetros para carne y para dulce).
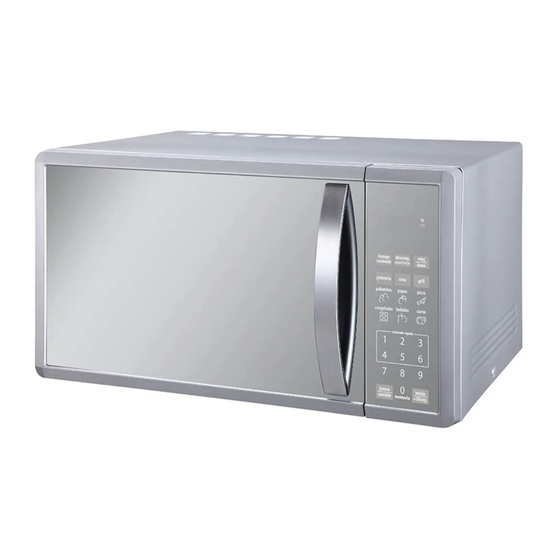
- Page 11 preparando su horno Nombres de las partes y accesorios del horno Retire el horno y todos los materiales de la caja de empaque del horno y de la cavidad del horno. Su horno viene con los siguientes accesorios: 1 Charola de vidrio. 1 Anillo con ruedas para la tornamesa.
-
Page 12: Instalación
• Nunca coloque la charola de vidrio de cabeza. La charola de vidrio no debe estar restringida nunca. • Ambos, la charola de vidrio y el anillo con ruedas de la tornamesa deben usarse siempre durante la cocción. • Los alimentos y contenedores para alimentos deben colocarse siempre sobre la charola de vidrio para cocinar. -
Page 13: Instrucciones De Operación
ADVERTENCIA: NO INSTALE EL HORNO POR EN- CIMA DE UNA ESTUFA O PARRILLA NI DE NIN- GÚN OTRO APARATO QUE PRODUZCA CALOR. SI SE INSTALA CERCA O POR ENCIMA DE UNA FUENTE DE CALOR, EL HORNO PODRÍA DAÑAR- SE Y LA GARANTÍA SERÍA INVALIDADA. ADVERTENCIA: LAS SUPERFICIES ACCESIBLES PODRÍAN CALENTARSE DURANTE LA OPERA- CIÓN DE ESTE APARATO. -
Page 14: Nivel De Potencia
nivel de potencia Este aparato está equipado con 11 niveles de potencia: Nivel de Nivel de potencia Potencia Pantalla potencia Potencia Pantalla 100% PL 10 PL 4 PL 9 PL 3 PL 8 PL 2 PL 7 PL 1 PL 6 PL 0 PL 5 ajustando el reloj... - Page 15 cocinando con microondas 1. Presione el botón TIEMPO COCINADO una sola vez, la pantalla LED muestra "00:00". 2. Presione los botones numéricos para ingresar el tiempo de coc- ción. El tiempo máximo que puede ingresarse es de 99 minutos con 99 segundos. 3.
-
Page 16: Descongelar Por Peso
cocinando por combinación (microondas y asador) 1. Presione el botón GRILL dos veces para seleccionar "Combinación 1" (55% microondas y 45% asador), o tres veces para seleccionar "Combinación 2" (36% microondas y 64% asa- dor). La pantalla muestra "C-1" o "C-2". 2. -
Page 17: Descongelar Por Tiempo
descongelar por tiempo 1. Presione dos veces el botón DESCONG. PESO/TIEMPO. La pantalla muestra " EF2". 2. Presione los botones numéricos para ingresar el tiempo para des- congelar. Ingrese el tiempo dentro de un rango efectivo de 0:01 a 99:99. El nivel de potencia predeterminado para descongelar es el "3". - Page 18 bebidas 1. Presione repetidamente el botón BEBIDAS hasta que el número que usted desea aparezca en pantalla. La pantalla muestra "1", "2" y "3" tazas en este orden. Una taza equivale a unos 120 ml. Por ejemplo, presione una sola vez el botón BEBIDAS; la pantalla muestra "1".
- Page 19 plato de cena 1. Presione repetidamente el botón CENA hasta que la pantalla muestre el número que usted desea. La pantalla muestra "250", "350" y "500" gramos en orden. Por ejemplo, presione una sola vez CENA. La pantalla muestra "250" gramos. 2.
-
Page 20: Función De Memoria
bloqueo de teclado para proteger a los niños Para bloquear el teclado, mientras el horno se encuentra en el esta- do de espera, presione durante 3 segundos el botón PAUSA/CANCELAR. Escuchará un "bip" largo que indica el ingreso al estado de bloqueo para niños. -
Page 21: Otras Especificaciones
consulta de información • Mientras el horno se encuentra cocinando, puede presionar el bo- tón RELOJ/TIMER. La pantalla muestra el reloj por tres segundos. • Mientras el horno está cocinando con microondas, usted puede presionar el botón POTENCIA para que la pantalla muestre el nivel de potencia programado. - Page 22 IMPORTANTE: No debe ponerse a trabajar el horno de microondas sin alimentos en su interior. Es peligroso. Problema Posible causa Solución El horno no El cordón eléctrico no Desconecte el horno y co- opera. está bien conectado. néctelo de nuevo después de 10 segundos.
-
Page 23: Precautions To Avoid Possible Exposure To Excessive Microwave Energy
welcome Everything you need to know for the proper operation of your product can be found here and in our web sites. We invite you to get to know your product, read this manual and get the most out of If you follow the instructions, your oven will provide you with many years of good service. -
Page 24: Important Safety Instructions
important safety instructions • Your own safety is important for us. Please read this information before using your new product. • Do not use extension cords. • Do not plug other electric appliances to the same power outlet. • Hold the connector by the power plug, not by the cord. •... - Page 25 To reduce the risk of fire, electric shock, injury to persons or expo- sure to excessive microwave oven energy when using your appli- ance, follow basic precautions, including the following: WARNINGS: • LIQUIDS AND OTHER FOODS MUST NOT BE HEATED IN SEALED CONTAINERS SINCE THEY ARE LIABLE TO EXPLODE.
- Page 26 • This appliance is intended to be used in household and similar ap- plications such as staff kitchen areas in shops, offices and other working environments; by clients in hotels, motels and other resi- dential type environments; farm houses; bed and breakfast type environments.
- Page 27 WARNING: THE APPLIANCE AND ITS ACCESSIBLE PARTS BECOME HOT DURING USE. CARE SHOULD BE TAKEN TO AVOID TOUCHING HEAT- ING ELEMENTS. CHILDREN LESS THAN 8 YEARS OLD SHOULD BE KEPT AWAY UNLESS CONTINU- OUSLY SUPERVISED. grounding WARNING: ELECTRIC SHOCK HAZARD. TOUCH- ING SOME OF THE INTERNAL COMPONENTS CAN CAUSE SERIOUS PERSONAL INJURY OR DEATH.
- Page 28 cleaning WARNING: BEFORE PERFORMING ANY CLEAN- ING OR SERVICE JOB, UNPLUG THE APPLIANCE FROM THE POWER SUPPLY. • Clean the cavity of the oven after using it with a slightly damp cloth. • Clean the accessories in the usual way in soapy water. •...
- Page 29 materials you can use in the microwave oven Browning dish Follow manufacturer’s instructions. The bottom of browning dish must be at least 3/16 inch (5 mm) above the turntable. Incorrect us- age may cause the turntable to break. Dinnerware Microwave-safe only. Follow manufacturer’s instructions. Do not use cracked or chipped dishes.
-
Page 30: Materials To Be Avoided In Microwave Oven
Plastic wrap Microwave-safe only. Use to cover food during cooking to retain moisture. Do not allow plastic wrap to touch food. Thermometers Microwave-safe only (meat and candy thermometers). Wax paper Use as a cover to prevent splattering and retain moisture. materials to be avoided in microwave oven Aluminum tray May cause arcing. -
Page 31: Setting Up Your Oven
setting up your oven Names of oven parts and accessories Remove the oven and all materials from the carton and oven cavity. Your oven comes with the following accessories: 1 Glass tray. 1 Turntable ring assembly. 1 Instruction manual. A. Control panel B. -
Page 32: Countertop Installation
• Never place the glass tray upside down. The glass tray should never be restricted. • Both glass tray and turntable ring assembly must always be used during cooking. • All food and food containers, should always be placed on the glass tray for cooking. -
Page 33: Operation Instructions
WARNING: DO NOT INSTALL OVEN OVER A RANGE COOKTOP OR OTHER HEAT PRODUCING APPLIANCE. IF INSTALLED NEAR OR OVER A HEATING SOURCE, THE OVEN COULD RESULT DAMAGED AND THE WARRANTY WILL BE VOID. WARNING: ACCESSIBLE SURFACES MAY BE- COME HOT DURING OPERATION. operation instructions control panel... -
Page 34: Power Level
power level 11 power levels are available. Power Power level Power Display level Power Display 100% PL 10 PL 4 PL 9 PL 3 PL 8 PL 2 PL 7 PL 1 PL 6 PL 0 PL 5 setting the clock 1. - Page 35 microwaving 1. Press the TIEMPO COCINADO pad once, LED will display "00:00". 2. Press the number keys to input the cooking time; the maximum cooking time is 99 minutes and 99 seconds. 3. Press POTENCIA pad once, LED will display "PL10". The default power is 100% power.
-
Page 36: Express Cook
combination cooking (microwave+grill) 1. Press the GRILL button twice to select "Combination 1" (55% microwave + 45% grill), or three times to select "Combina- tion 2" (36% microwave + 64% grill), LED will display "C-1" or "C- 2". 2. Set the cooking time. The maximum cooking time is 99 minutes and 99 seconds. -
Page 37: Time Defrost
time defrost 1. Press DESCONG. PESO/TIEMPO twice. LED will display " EF2". 2. Press the number pads to enter defrosting time. The effective time range is from 00:01 to 99:99. 3. The default microwave power level to defrost is "3". If you want to change the power level, press the POTENCIA pad once, the LED will display "PL 3", then press the number pad which corresponds to the desired power level. -
Page 38: Dinner Plate
BEBIDAS" once , "1" appears. 120ml. For example, press " 2. Press " INCIO/+30 SEG " to cook, buzzer sounds once.When cooking finish, sounds five times and then turn back to buzzer waiting state. meat A. Chicken menu 1. Press CARNE pad once to enter the chicken menu. "CHIC" will be displayed. -
Page 39: Frozen Pizza
2. Press the INICIO/+30 SEG pad to start cooking. The buzzer sounds once. When cooking finishes, the buzzer sounds five times and then the oven turns back to the standby state. frozen pizza 1. Press the PIZZA pad repeatedly until the number you want appears in the display, "100", "200", "400"... -
Page 40: Memory Feature
memory feature 1. Press the 0/MEMORIA pad to select the desired memory (1 to 3) procedure. The LED will display 1, 2 or 3. 2. If the cooking procedure has already been set, press the INICIO/ +30 SEG pad to start it. If not, continue to set the cooking proce- dure. -
Page 41: Other Specifications
other specifications • In the standby state, if the clock is set, then the icon ":" flashes; otherwise the display shows 0:00. • During setting, the LED display shows the corresponding setting information. • During operation or pause state, the LED display shows the re- maining cooking time. - Page 42 Problem Possible cause Possible solution Oven won’t Power cord is not Unplug the power cord. start. rmly plugged in. Plug it again after 10 sec- onds. Blown fuse or tripped Replace fuse or reset circuit circuit breaker. breaker. Problem with electri- Test the outlet with other cal outlet.
Need help?
Do you have a question about the MEI1174ZJSS and is the answer not in the manual?
Questions and answers