
Subscribe to Our Youtube Channel
Related Manuals for AJS Highway Star 125


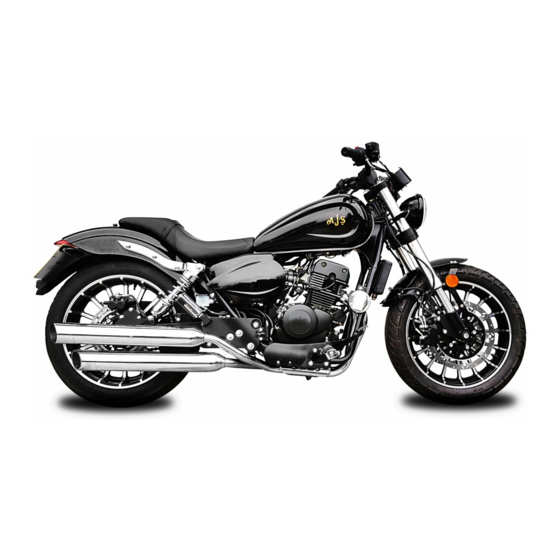
Summary of Contents for AJS Highway Star 125
-
Page 1: Owners Manual
Owners Manual Please study this manual carefully before riding the motorcycle for the first time... - Page 4 Your AJS Dealer should service, and carry out specialised tasks for you. If you are unsure of any aspects, consult your AJS Dealer for advice or service.
-
Page 5: Table Of Contents
CONTENTS Notice to user..…….….….….….…….….….…..….….1 Inspection and maintenance.….….….….….….….…25 Air filter.….….………………….….………….…..…….28 Inspection before riding.….….….….….….…..…..….19 Battery.….….….….….….….….….….….….….………26 Instruments.…………….….…..…….….………...….….8 Brakes.….….….….………………….….……..….……38 Key components.…….….….….….….….………………4 Chain.….….….….………….………….….……...….….35 Oil renewal.…………….………….….….….….………31 Cleaning.…….…….….….….……….….……….….….49 Riding tips.….….….….………….….….…..……..……21 Fuel and oil…….……….………….…….………….….15 Running In.….….….….………….….….….….……….17 Fuel filler cap.….….….….….….….….….….….….….11 Service Schedule ...…..…..…...….….……..….…….. 18 Foot brake pedal.….….….….….….….….……………14 Spark plug.….….….….….….….….……….…………..29 Specification.…….….….….….….….…….…….…..…51 Fuse.…….….….….….….….….….….…………..……27 Stand..….….….….….….….….….….…..….….….….14... -
Page 6: Notice To User
Seek advice from your unsafe when riding your motorcycle. dealer. You can purchase AJS parts from your AJS Always wear good quality motorcycle riding Dealer or directly from our web shop: apparel when riding your motorcycle. - Page 7 NOTICE TO USER Vehicle Identification Number (VIN) NOTICE TO USER The 17 digit Vehicle Identification Number (VIN) Ride within your limits and engine serial numbers are used to register the motorcycle. The numbers will also assist your Do not ride with excessive speed. Look ahead and dealer to provide you with better service when plan your route.
- Page 8 Information about using this manual Write down the numbers below for your future reference. Read and observe this Manual carefully. Terms such as “Warning”, “Caution” and “Notice”are Always quote your 17 digit VIN (Vehicle Identification used to emphasize the intensity of precaution Number) when ordering spare parts.
-
Page 9: Key Components
KEY COMPONENTS 1. Rearview mirror 2. Fuel tank 3. VIN number 4. FR.R turning lamp 5. RR.R turning lamp 6. RR. Brake calliper 7. Exhaust muffler 8. RR. shock absorber 9. Pillion footrest 10. Battery cover 11. Fuel injector assy 12. - Page 10 KEY COMPONENTS 1. Rearview mirror 2. Headlight 3. Vehicle data plate 4. FR.L turning lamp 5. Air filter cover 6. Seat 7. RR.L Turning lamp 8. Taillight 9. Gear shift lever 10. Driver footrest 11. Engine number 12. Side stand 13.
- Page 11 KEY COMPONENTS 1. Clutch lever 2. L switch assy 3. Meter clock 4. Ignition switch & lock 5. R switch assy 6. Throttle grip 7. FR brake lever...
-
Page 12: Ignition Switch And Lock
The ignition switch has three positions: IGNITION SWITCH AND LOCK This motorcycle is supplied with two keys. “ ” (OFF POSITION) Keep one in a safe place as a spare. In this position the engine cannot be started. The key can be inserted and removed. -
Page 13: Instruments
When using the high beam and pressing the overtaking button, this lamp will be illuminated blue. Engine Management Light When illuminated contact your AJS Dealer. Turning light indicator Light When the right turn signals are being Speedometer operated, this green indicator light will flash. -
Page 14: Handle Bar Controls
LEFT HANDLEBAR CONTROL Turn signal operation Moving the switch to the “ “ position will flash the left turn signal. Moving the switch to the “ “ position will flash the right turn signal. The green indicator light on the tachometer will also flash intermittently. - Page 15 RIGHT HANDLEBAR CONTROL Throttle grip Rotate the grip towards you from the top to increase the engine speed and also the speed of the motorcycle when it is in gear. Rotate the grip away from you to decrease the engine speed. Starting switch Use this switch to activate the electric starter.
-
Page 16: Fuel Filler Cap
CAUTION! Do not activate the starter for more than 5 seconds at a time. If the motorcycle will not start. Wait a few minutes and try again. Over use of the starter motor may cause overheating of the electrical circuit. FUEL FILLER CAP To open 1) Lift the latch. -
Page 17: Gear Lever
GEAR LEVER CAUTION! Risk of damage. This model is equipped with 5 gears and a Neutral Always use the clutch when shifting gear. position. Press the lever down with your left foot to Never stamp or jerk the gear lever aggressively. select lower gears, lift the lever up to select higher gears. -
Page 18: Foot Brake Pedal
FOOT BRAKE PEDAL SIDE STAND This motorcycle is fitted with a Side Stand for your convenience. Pressing the pedal with your foot will apply the front To use the Side Stand for quick and easy parking on brake and the rear brake simultaneously, according flat, firm soil or asphalt. -
Page 19: Stand
FUEL AND ENGINE OIL NOTICE! RECOMMENDATIONS The side stand is fitted with a Cut Out Switch for Use only Unleaded or E5 Petrol (gasoline). your safety. If the stand is put in the down position, Use 10W40 semi synthetic engine oil to API SF, SG & the engine will not start or will cut out. - Page 20 ENGINE LUBRICATION OIL WARNING! Lubrication is a main factor that affects the performance and the engine’s service life. It also has Risk of fire! an effect on the engine’s emission levels. Therefore Do not fill the tank beyond level the level shown in the oil should be selected according to these the diagram below.
- Page 21 “RUNNING IN” A NEW ENGINE API classification table Careful running in will prolong the service life if your engine. For the first 500 miles do not use full throttle and avoid high engine speeds at all times. You should also avoid aggressive starts and stops except in an emergency.
-
Page 22: Running In
SERVICE SCHEDULE previous table. Do not use wide open throttle for long Your motorcycle must be serviced by a AJS Dealer or a bona fid motorcycle dealer in accordance to the AJS periods. -
Page 23: Inspection Before Riding
INSPECTION BEFORE RIDING Before you make each journey, you should make the following checks to you motorcycle to ensure it is safe 1) Check the engine oil level. to ride and that it will not let you down. Engine oil 2) Add oil if necessary. - Page 24 1) Check for correct tension. Check the following lamps: 2) Adjust if necessary. 1) High beam lamp Drive chain 3) Lubricate as necessary. 2) Indicator warning lamp. Information lamps 4) Check for stiff links. 3) Neutral gear lamp. 4) Engine management lamp.
-
Page 25: Riding Tips
RIDING TIPS STARTING THE ENGINE 1) Check the engine kill switch is set to the RUN If you are riding the motorcycle for the first time, we position “ “ suggest you find a quiet area away from traffic and off 2) Put the key in the ignition switch and turn to the ON the main highway. - Page 26 NOTICE! NOTICE! Do not allow the motorcycle to idle for long periods Using the electric starter. Use the starter in 5 second bursts. If the engine or overheating could occur. fails to start, wait 10 seconds and try again. Release the starter button to disengage the starter motor as soon as the engine starts.
- Page 27 RIDING ON HILLS USING THE GEARS (transmission) When climbing steep hills, the motorcycle will start to Gears are used to keep the engine running at the slow down and show lack of power. At this point you optimum revolutions per minute for any given road should shift to a lower gear so that the engine will speed.
-
Page 28: Stopping And Parking
STOPPING AND PARKING WARNING! 1) Turn the throttle away from you to slow the engine. Risk of injury. 2) Evenly apply the front and rear brakes together. As your speed increases, your stopping distance 3) Change down progressively through the gears. also increases progressively. -
Page 29: Service Schedule
You must keep to the Service Schedule shown in comes first. The schedule allows for normal usage, but the AJS Warranty & Service Booklet, supplied with if abnormal conditions are encountered such as dusty your new machine, and carry out maintenance... - Page 30 BATTERY BATTERY When connecting the battery leads, be sure to connect the leads correctly; Red to positive (+) and Black to negative (-). Incorrect connection can cause damage to the charging system, ECU, CDI and battery. After you have tightened the terminal fixing bolts, coat them with white grease to prevent corrosion.
-
Page 31: Battery
4) In the event of the Fuse continuing to blow, switch If the engine suddenly stops, or off the ignition and disconnect the battery. Call your there is a general electrical failure, first check the AJS Dealer for help. fuses before other diagnostic work is carried out. WARNING! Fuse Holder Risk of fire or damage. -
Page 32: Fuse
Spare parts can be increased exhaust emissions. purchased from your AJS Dealer or directly on line at Once blocked, dirt will pass through the filter and into www.ajs-shop.co.uk the upper cylinder area, causing accelerated engine 5) Wipe the inside of the air filter case clean. -
Page 33: Air Filter
SPARK PLUGS (NGK CR7HS) WARNING! Risk of fire. The spark plugs are important components. They are easy to check and should be kept in good condition Do not use petrol or other low flash point solvents and changed according to the Service Schedule. to clean the air filter. -
Page 34: Spark Plug
SPARK PLUGS, continued CAUTION! Whilst checking each spark plug, note the colour of the electrodes. Mild brown indicates all is normal and 1) Install a new spark plug by hand until it seats – well. Black indicates that the engine is running too (fig 1) a length of rubber tubing pushed over the rich. - Page 35 Drain plug Oil gauge and filler WARNING! Health Hazard. Used engine oil can harm your skin. Always wear protective gloves when handling used oil.
- Page 36 ADJUSTING THE THROTTLE CABLE WARNING! Do Not adjust the throttle cable tension to alter the idle speed. The idle speed is set by the EFI system.
- Page 37 NOTICE! Wear and damage to the drive chain means that the sprockets may also be worn or damaged. Check the front and rear sprockets for the following conditions: 1) Excessive wear or “hooking” or the teeth. 2) Broken or damaged teeth. 3) Loose sprocket fixings.
-
Page 38: Drive Chain Adjustment
DRIVE CHAIN ADJUSTMENT WARNING! Risk of injury Excessive Chain Tension An over-tight chain increases the working loads between the pins and the rollers, overheating the chain thus consuming the lubricant more rapidly. This causes the chain to wear faster. Moreover, if the motorcycle is ridden on rough roads or trails, the chain is subjected to extremely hard shocks by the up and down lever action of the swinging arm. - Page 39 Adjust the chain in its tightest position to give 10- 20mm free play. 10-20mm CAUTION! When replacing the drive chain, also replace the sprockets, as a chain and sprocket set. A new chain will not sit well on worn sprockets. CAUTION! Ensure the rear wheel is aligned correctly after any adjustments have been made.
-
Page 40: Braking System
It is extremely important that the brakes are working correctly and are serviced to schedule by your AJS Dealer. There are some important checks that should be carried out regularly by the owner. Such as: 1) Check the brake fluid levels. - Page 41 WARNING! Do not ride the motorcycle if the braking system is defective or the brake pads are worn to the wear limit grooves. Contact your AJS Dealer for help. Brake pad wear limit grooves...
- Page 42 WARNING! Rear brake disc Risk of injury or death. If the braking system is not functioning correctly, DO NOT ride the motorcycle. Contact your AJS Dealer for assistance.
-
Page 43: Brakes
WARNING! After adjusting the brake free play, check that the rear brake lamp operates correctly. FRONT BRAKE LIGHT SWITCH REAR BRAKE LIGHT SWITCH The rear brake light switch is located on top of the rear The front brake light switch is located under the brake master cylinder. -
Page 44: Tyres
Tyre Front tyre Rear tyre Parameter Rider only 32psi 36psi Rider and passenger 32psi 36psi WARNING! TYRE PRESSURE Each time before you ride, you should check the tyre pressures. Incorrect tyre pressures will effect handling, stability and cause abnormal and uneven wear. - Page 45 Head lamp 12V 35W/35W Rear lamp/Braking lamp LED panel LED panel Turning signal lamp 1.5mm Front position lamp 12V 4W...
- Page 46 NOTICE! In order to avoid contamination of the bulb glass surface, do not touch with your bare fingers. Grease from your fingers will cause the brightness of the bulb and the life of the bulb to be reduced. If you inadvertently touch the bulb, wipe it clean with denatured alcohol such as methylated spirits.
- Page 48 WARNING! Risk of Injury or Death! Do Not spill fuel. Waste fuel should be collected in a suitable fuel proof container. Dispose of carefully and legally. Do not allow fuel to spill onto a hot engine or exhaust. Do not allow fumes to build up in a confined space.
-
Page 49: Troubleshooting
4) Replenish the fuel 4) No fuel in the tank 5) Add fuel 5) Fuel level is low 6) Contact your AJS Dealer 6) Water or Diesel in the fuel 7) See the next section 7) No spark at the plug. - Page 50 1) Remove spark plug and clean/replace. 2) Fuel supply is restricted 2) Check fuel pipes for kinks. 3) Contaminated fuel 3) Drain and replenish fuel. Contact your AJS 4) Air leak to the intake system Dealer 5) Air filter is blocked...
- Page 51 1) Adjust the tappets to 0.15mm clearance each. 2) Brakes binding. Inlet and Exhaust. 3) Air leak to the intake system. 2) Service the brakes / contact your AJS Dealer. 4) Catalytic converter plugged. 3) Check the intake system for leaks. 5) Fuel cap vent blocked.
- Page 52 TROUBLESHOOTING Possible Cause Remedy 1) Loose exhaust. 1) Tighten the exhaust fasteners. 2) Incorrect tappet clearances. 2) Adjust the tappets to 0.15mm clearance each. 3) Damaged valve gear. Inlet and Exhaust. 4) Excessive piston to cylinder 3) Check / repair valve gear. clearance.
-
Page 53: Cleaning The Motorcycle
A light lubricant ("GT85" or similar) is fine for coating the engine, Frequent, regular cleaning is an essential part of maintaining your AJS motorcycle. If regularly cleaned, carburetter and most non-painted bodywork area. the appearance will be maintained for many years. -
Page 54: Cleaning
NOTICE! Cleaning Summary. 1. Prepare yourself, your equipment and use only high quality automotive cleaning agents. 2. Prepare the bike for washing. 3. Wash the bike and leave to soak. 4. Rinse the bike with clean, cold water. 5. Dry the bike using a clean micro-fibre cloth. 6. - Page 55 Technical Specification AJS Highway Star 125 Overall Length 2,135mm Overall width 810mm Overall height 1,160mm Wheelbase 1,330mm Ground clearance 150mm Mass in running order 164kg Max load 140kg Max speed 96km/h (60mph) Drive-by noise level 74.5dB(A) Climbing ability ≥20° Idle speed...
-
Page 56: Specification
Specification Continued Front shock absorber Hydraulic telescopic - USD Rear shock absorber Spring / hydraulically damped Turning angle Left / right ≤43° Front tyre 120/80-17 Rear tyre 140/70-17 Front tyre pressure 33psi Rear tyre pressure 36psi Wheel rim material Light aluminium alloy Front rim size 17 x MT3.00 Rear rim size... - Page 57 Specification Continued Engine type Twin cylinder 4 stroke, oil cooled, OHC Displacement 124.6cc Bore x Stroke 2 x 44mm x 41mm Compression ratio Power 8.4 kW @ 9000 r/min Max torque 9.4 NM @ 7500 r/min Spark Plug NGK CR7HS Firing order Simultaneous (wasted spark) Ignition method...
- Page 58 Specification Continued Clutch type Wet type, multi plate Gearbox shift pattern International 1-N-2-3-4-5 Primary ratio 3.833 Final drive ratio 2714 1st ratio 2.767 2nd ratio 1.882 3rd ratio 1.400 4th ratio 1.217 5th ratio 1.0835 Front sprocket 520 x 14T Rear sprocket 520 x 38T...
- Page 59 Specification Continued Starting method Electric / kickstart Headlight bulb 12v 35w / 35w Front position light bulb 12v 4w Tail / brake light bulb LED Unit Turning lamp bulb 12v 10w Instrument bulb 12v 0.2w Horn 12v 3A Battery 12v 9Ah Fuse Fuel type Unleaded E5 gasoline only...
- Page 60 To buy spare parts and accessories for your AJS Highway Star 125, contact your AJS Dealer or visit www.ajs-shop.co.uk AJS Highway Star 125 Owner’s Manual 2nd edition July 2019 All rights reserved. Any reprinting, copying, digitally sharing or unauthorised use without the written permission of AJS Motorcycles Ltd.
- Page 61 AJS Motorcycles Ltd. Unit 3, Balksbury Ind. Est. Upper Clatford Andover, Hants. SP11 7LW, UK Website: www.ajsmotorcycles.co.uk Spares: www.ajs-shop.co.uk...
Need help?
Do you have a question about the Highway Star 125 and is the answer not in the manual?
Questions and answers