Table of Contents
Advertisement
Advertisement
Table of Contents

Related Manuals for Dormakaba KTV 3


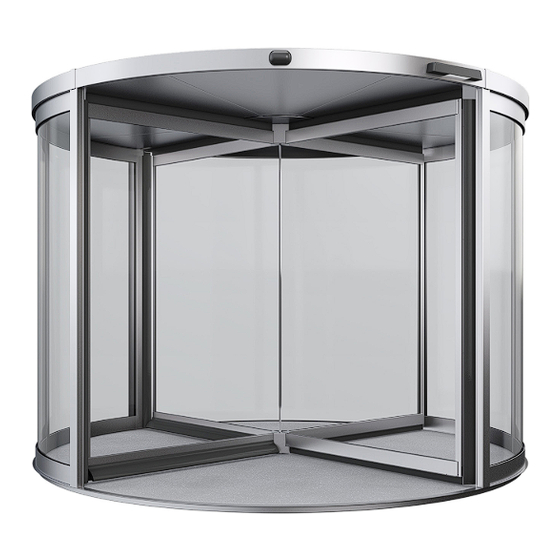
Summary of Contents for Dormakaba KTV 3
- Page 1 KTV 3/4 FLEX Direct Revolving Door Quick Start Guide...
- Page 2 Quick Start Guide...
-
Page 3: Table Of Contents
Table of contents Table of contents About this quick start guide Safety Operating and locking device elements 3.1 Summary of control elements type P/S/A 3.2 Control elements KTV M 3.3 Locking device elements* In case of emergency 4.1 Triggering the emergency stop 4.2 Start-up after emergency stop Locking the revolving door 5.1 Locking with a rod locking device*... -
Page 4: About This Quick Start Guide
Quick Start Guide About this quick Safety start guide Automatic startup KTV P/S/A Scope of this guide WARNING! Risk of injury due to automatic start-up of the This quick start guide provides an overview of the opera- revolving door! tion and securing of the KTV revolving door. -
Page 5: Operating And Locking Device Elements
Operating and locking device elements Summary of control elements type P/S/A Operating and lock- ing device elements Summary of control elements type P/S/A Fig. 1 Summary of control elements Emergency stop switch (inside and outside*) This depends on the type of the emergency stop switch. Program switch (inside) The revolving door then continues the current program Disabled access pushbutton * (inside and out-... - Page 6 Quick Start Guide...
- Page 7 Operating and locking device elements Summary of control elements type P/S/A...
-
Page 8: Control Elements Ktv M
Quick Start Guide KTV M controls Disabled pushbutton* The revolving door KTV M does not have its own controls, since it is a manual revolving door and is moved only by manually pushing the door wing. Using the optional speed limiter*, the door can be protected against excessive load. - Page 9 Operating and locking device elements Locking device elements* Floor locking device If a floor locking device has been installed, a locking cylinder will be located at the lower part of the door wing (Fig. 2/2). A bolt in a ground sleeve is extended or retracted through the lock cylinder.
-
Page 10: In Case Of Emergency
Quick Start Guide In case of Press the emergency stop button ( Fig. 3 ) at the en- trance or exit. emergency The revolving door will stop. The drive will be dis- » engaged and the door wings can then be turned manually. -
Page 11: Start-Up After Emergency Stop
In case of emergency Start-up after emergency stop Start-up after emergency stop Personnel • Operator Requirements • The danger is over • No persons are in or near the revolving door Fig. 4 Procedure after an emergency stop Reset the emergency stop switch by turning or pull- ing, depending on the type of the emergency stop switch. -
Page 12: Locking The Revolving Door
Quick Start Guide Locking the Unlocking with a rod locking device revolving door Personnel • Operator Locking with a rod locking device* Requirements Personnel • The program switch is unlocked with a key / code • Operator • All emergency stop switches are unlocked by turning... -
Page 13: Locking With A Floor Locking Device
Locking the revolving door Locking with a floor locking device* Locking with a floor locking Unlocking with a floor locking device* device Personnel Personnel • Operator • Operator Special tool Requirements • Key/code for program switch • The program switch is unlocked with a key / code •... -
Page 14: Closing And Locking The Manual Night Shield
Quick Start Guide Closing and locking the manual Opening the manual night shield* night shield* Personnel Personnel • Operator • Operator Special tool Special tool • Key/code for program switch • Square key and key for locking cylinder •... -
Page 15: Man's Switch
Closing the electric night shield* Locking the revolving door and locking with the dead man’s switch Closing the electric night shield* WARNING! and locking with the dead man’s Risk of injury due to improper locking! switch Turn the dead man’s switch to the “ Lock ”... -
Page 16: Closing And Locking The Revolving Door Electrically
Quick Start Guide Closing and locking the revolving door electrically* WARNING! Risk of injury due to improper switching off of KTV P/S/A! A P/S/A type revolving door will move on its own while being switched off. If there are people in the revolving door when this happens, they may be at risk of injury. -
Page 17: Unlocking And Switching On The Revolving Door
Closing and locking the Unlocking and switching on the revolving door revolving door electrically* Unlocking and Select the desired program using key / code ( Fig. 10 Program switch, p. 5). switching on the The revolving door will execute the selected pro- »... -
Page 18: Using A Transport Opening
Quick Start Guide Using a transport 3. Release the stop on the foldable wing ( Fig. 11 /1) by inserting the Allen key into the handle at the top and opening* bottom bracket ( Fig. 11 /2) and turning the handle to the side. -
Page 19: Resetting The Transport Opening
Using a transport opening* Resetting the transport opening Resetting the transport opening Personnel • Operator Special tool • Key/code for program switch Requirements • At least two people must be present. Fig. 12 Releasing the door wing (four and three wings) CAUTION! Pinch hazard due to improper use! Have one person hold the door wing at the entrance... -
Page 20: Opening As Escape Route
Quick Start Guide Opening as escape Requirements route* • The program switch is unlocked with a key/code. • A second person must be present. • There are no persons near or in the revolving door. Creating an escape route Personnel •... - Page 21 Opening as escape route* Creating an escape route WARNING! Risk of crushed limbs at the closing edges! Carefully orient the wing manually ( Fig. 14 /1), as shown in Fig. 14 WARNING! Risk of injury if door is held onto inappropri- ately! Have one person hold the lower door wing at the entrance (...
-
Page 22: Closing The Escape Route
Quick Start Guide Closing the escape route Personnel • Operator Requirements • At least two people must be present. The procedure described below applies for re- volving doors with three and four door wings. Fig. 17 Folding the door wing back... -
Page 23: Cleaning Plan
Cleaning plan Closing the escape route Cleaning plan Interval Cleaning work Requirement Daily • Clean the floor Emergency stop button is pressed (only for a KTV P/S/A • Clean the floor or shoe cleaning mats • Remove heavily soiled mats and clean the mat acceptor revolving door type) grooves Weekly... - Page 24 Deutschland GmbH DORMA Platz 1 58256 Ennepetal Germany T: +49 2333 793-0 F: +49 2333 793-4950 Internet: www.dormakaba.com www.dormakaba.com...
Need help?
Do you have a question about the KTV 3 and is the answer not in the manual?
Questions and answers