Table of Contents
Advertisement
Advertisement
Table of Contents

Related Manuals for Dovpo Ember


Summary of Contents for Dovpo Ember
- Page 4 Size: 62mm X 33.5mm X 23mm Material: Zinc alloy Threaded connection: 510...
-
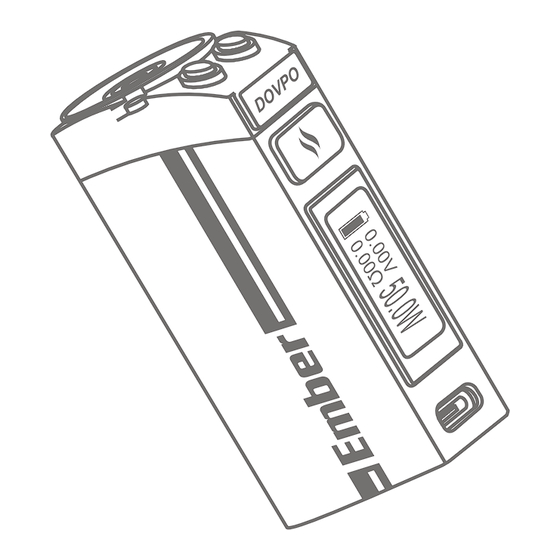
Page 5: Specification
1. 0.69 inch OLED screen. Specification 2. Operating Voltage: 3.2V - 4.2V. 3. Maximum Output Current: 25A. 4. Operating Wattage: 5.0W - 50.0W. 5. Temperature control range: 200°F - 600°F/100℃ 300℃. 6. Temperature control atomizer working resistance range: 0.1ohm - 1.0ohm. 7. - Page 6 Operation Guide 1. Power on By pressing the fire button 5 times quickly, the screen will display the "DOVPO" logo. This leads you to the main interface. See picture 1.1 (In Ni200 temperature control mode), see picture 1.2 (In Titanium temperature control mode), see picture 1.3 (In Ss316Ltemperature control mode), see picture 1.4 (In Power mode) and see...
- Page 7 After 30 seconds of inactivity, the device screen will dim. Wake up the device up by pressing any button. After 3 minutes of inactivity, the device will enter low power state. 3. Auto Power-off / Manual Shutdown 3.1 The device will power-off automatically after 60 minutes of inactivity, restart the device by pressing the fire button 5 times quickly to begin vaping again.
- Page 8 0.20Ω ℉ 0.42Ω 0.32Ω ℉ ℉ 23.6W 27.6W 27.6W Picture 4.1 Picture 4.2 Picture 4.3 0.23Ω 0.51Ω 46.0W 3.53V 3.25V 24.4W Picture 4.4 Picture 4.5 5. Work Mode Setting / Hands Mode Setting When in main interface, press and hold both fire button and "-" button for more than 1.5s, this will lead you into the main menu which you can set the work mode and hands mode.
- Page 9 6. Wattage Adjustment When in wattage mode, using the "+" or "-" button will allow you to increase or decrease desired wattage by 1.0W. Holding either button will cause the wattage to scroll more quickly. 7. Temperature Settings When in any TC mode, using the "+" or "-" button will allow you to increase or decrease desired temperature by 10°F/5°C.
- Page 10 press the "+" button to confirm that is a new atomizer, press the "-" button to confirm it is the same atomizer and the resistance will be same as previously attached. NEW + : 0.54Ω SAME - : 0.23Ω Picture 9.1 10.
- Page 11 12. Temperature Control Mode 12.1 Temperature Control is available for Ni200, Titanium, and Ss316L coil. 12.2 The device will only display the correct temperature when using the appropriate mode. 12.3 Temperature control coil working resistance range: 0.1Ω - 1.0Ω. 12.4 Temperature control range: 200°F - 600°F/100℃ - 300℃. 12.5 Please ensure the Ni200, Titanium, or Ss316L coil is at room temperature before locking resistance, or it may read a wrong resistance value (see sections 9/10).
-
Page 12: Low Voltage Protection
14. Low Voltage Protection 14.1 If the battery voltage is as low as 3.2v the device will stop working and display "LOW VOLTAGE". 14.2 When power on and during vaping with a voltage lower than 2.7v will display "WEAK BATTERY". If the battery capacity is full and display “WEAK BATTERY" . This can be adjusted by using a low-drain/overused battery or it could be caused by poor connection. -
Page 13: Overheat Protection
17. Overheat Protection When the mainboard's temperature is too high the device will stop working and screen will display "DEVICE TOO HOT". Allow the device to cool before resuming use. The screen will display “CHECK ATOMIZER” if there's no atomizer attached to the device or an atomizer that has an open circuit. -
Page 14: Operating Instructions
Operating Instructions 1. Please use all accessories as intended to avoid damage to your device. 2. Please use the original charging cable, or a quality replacement when charging this device. 3. When not using your device for a long period of time, please turn it off and store it in a cool dry place to prevent damage.
Need help?
Do you have a question about the Ember and is the answer not in the manual?
Questions and answers