Wahl MAX 45 Instructions Manual

Wahl MAX 45 Instructions Manual

Animal clippers and trimmers

Advertisement

ANIMAL CLIPPERS AND TRIMMERS
INSTRUCTIONS
1

Advertisement

Table of Contents
loading

Summary of Contents for Wahl MAX 45

  • Page 1 ANIMAL CLIPPERS AND TRIMMERS INSTRUCTIONS...
  • Page 2: Table Of Contents

    IMPORTANT SAFEGUARDS USEFUL INFORMATION ABOUT YOUR PRODUCT BLADES PRODUCT INSTRUCTIONS MAINS CLIPPERS MAX 45 - KM6245 / WM6245 MAINS POWERED CORDED CLIPPER KM5 / KM10 - WM6260 / WM6261 MAINS POWERED DOG CLIPPER POWER GRIP - 8879 MAINS POWERED DOG CLIPPER...
  • Page 3: Important Safeguards

    IMPORTANT SAFEGUARDS When using your electrical appliance, basic safety precautions should always be followed, including the following: REQUIREMENTS ► Read the instruction manual in full to familiarise yourself with the product before the first use. ► This appliance can be used by children from aged 14 years and above and persons with reduced physical, sensory or mental capabilities, or lack of experience and knowledge, if they have been given supervision or instruction concerning use of the appliance in a safe way and understand the hazards involved.
  • Page 4 Danger of explosion ► Never use the appliance where aerosol (spray) products are being used or where oxygen is. ► Do not expose the appliance to temperatures below 0˚C and above +40˚C for any length of time. Avoid direct exposure to sunlight. Warning! Injuries due to incorrect handling ► Cutting blades may become hot after prolonged use. ► Switch off the appliance and unplug from outlet when not in use, before putting on or taking off attachments and also before cleaning the appliance. ► Never use your appliance without paying attention! Except when charging always unplug this appliance from the electricity outlet immediately after using.
  • Page 5: Useful Information About Your Product

    • Flushes abrasive particles and hairs out from between the blades. If you cut into dirt, immediately clean your blades with Wahl Hygienic Spray or Wahl Clipper Oil to flush out the dirt. ALWAYS apply clipper oil after cleaning with hygienic spray or coolant.
  • Page 6 MAX 45 - CORDED DOG CLIPPER Model: MAX 45 - KM6245 / WM6245...
  • Page 8 Model: MAX 45 CORDED DOG CLIPPER - KM6245 / WM6245 Description of parts (Fig. 1) Blade set Release button for blade set On/off switch Air filter Hang-up loop Mains cable Oil for blade set Cleaning brush Mains Operation Connect to the mains power supply (Fig. 2) Switch on the appliance using the on/off switch and switch off after use (Fig. 3).
  • Page 9 • Oil the blade set with the blade set oil (Fig. 10). • We recommend that you clean and care for your blade set during and after clipping. • Re-attach the blade set after cleaning (Fig. 7/8). Switch the appliance on briefly (approx. 10 seconds) to ensure the oil film is evenly distributed. • For a good and long-lasting cutting performance, it is important to oil the blade set frequently. •...
  • Page 10 KM5 - CORDED DOG CLIPPER KM10 - CORDED DOG CLIPPER Model: KM5 - WM6260 KM10 - WM6261...
  • Page 11 slide...
  • Page 12 Model: KM5 - CORDED DOG CLIPPER WM6260 KM10 - CORDED DOG CLIPPER WM6261 Description of parts (Fig. 1) Blade set Release button for blade set On/off switch Hang-up loop Mains cable Cleaning brush Oil for blade set Plug-in transformer Mains Operation Connect to the mains power supply (Fig.
  • Page 13 • Re-attach the blade set after cleaning (Fig. 7/8). Switch the appliance on briefly (approx. 10 seconds) to ensure the oil film is evenly distributed. • For a good and long-lasting cutting performance, it is important to oil the blade set frequently. • If the cutting performance deteriorates after long use despite regular cleaning and oiling, the blade set should be replaced. Clean the air filter regularly to ensure the supply of air: Clean the air filter using the cleaning brush.
  • Page 14: Power Grip

    POWER GRIP CORDED DOG CLIPPER Model: Power Grip - 8879...
  • Page 16 Model: POWER GRIP - CORDED DOG CLIPPER - 8879 Description of parts (Fig. 1) A Blade set B Release button for blade set C On/off switch (2 speed) D Hang-up loop E Mains cable F Clip for blade set G Replaceable drive lever tip H Special tool I Oil bottle J Cleaning brush...
  • Page 17 For a long-lasting, good cutting performance, it is important to oil the blade set frequently (Fig. 12). • Only use Wahl blade oil. • Blade set oil and hygienic spray are available from your dealer or our Customer Service team.
  • Page 18: Rechargeable Dog Clipper

    ARCO RECHARGEABLE DOG CLIPPER Model: ARCO - WM6854...
  • Page 20 Model: ARCO RECHARGEABLE DOG CLIPPER - WM6854 Description of parts (Fig. 1) Blade set Cleaning lever C. On/off switch D. Cutting-length adjustment Battery charge indicator Battery pack Charging stand Charging stand socket Charging indicator Interchangeable battery pack Plug-in transformer Appliance plug Cleaning brush Oil for blade set * Attachment combs are optional accessories and can vary from model to model.
  • Page 21 Attaching/removing the attachment comb Slide the attachment comb on to the blade set in the direction of the arrow until it reaches the limit (Fig. 7a). The attachment comb can be removed by pushing it in the direction of the arrow (Fig. 7b). Maintenance, cleaning and care.
  • Page 22: Cord/Cordless Dog Clipper

    BRAVURA CORD /CORDLESS DOG CLIPPER Model: BRAVURA - WM6870 > 80% 80 - 65% 65 - 50% 50 - 30% 30 - 10% 10 - 0%...
  • Page 24 Model: BRAVURA CORD / CORDLESS CLIPPER - WM6870 Description of parts (Fig. 1) Blade set B. On/off switch Battery power indicator Charging stand E. Cutting-length adjustment Appliance socket Charging stand socket Plug-in transformer Appliance plug Cleaning brush Oil for blade set * Attachment combs are optional accessories and can vary from model to model. Charging the battery Connect the appliance plug (I) on the plug-in transformer to the charging stand socket (G) (Fig.
  • Page 25 Attaching/removing the attachment comb Slide the attachment comb on to the blade set in the direction of the arrow until it reaches the limit (Fig. 6a). The attachment comb can be removed by pushing it in the direction of the arrow (Fig. 6a). Maintenance, cleaning and Care.
  • Page 26 • Check whether the blade set is blocked and the blade is able to move. • Switch the appliance on and off. If the entire display is flashing, please contact your specialist retailer or the Wahl Customer Service team. Battery power indicator light does not light up. Cause: Appliance has not been correctly placed on the charging stand. Battery Removal, Disposal and Replacement For removal instructions see page 33 Skin injury Cause: Too much contact pressure on the skin.
  • Page 27: Rechargeable Dog Trimmer

    BRAVMINI RECHARGEABLE DOG TRIMMER Model: BRAVMINI - WM6590...
  • Page 29 Model: BRAVMINI RECHARGEABLE DOG TRIMMER - WM6590 Description of parts (Fig. 1) Blade set On/off switch Charging indicator Charging stand Charging stand socket Oil for blade set Cleaning brush Attachment comb Plug-in transformer Appliance plug * Before the appliance is used for the first time it should be charged for 16 hours. Charging the Rechargeable Battery Connect the appliance plug (J) on the plug-in transformer to the charging stand socket (E) (Fig. 2a). Battery overcharging is prevented thanks to intelligent charge management.
  • Page 30: Cord/Cordless Dog Trimmer

    MINI ARCO CORD /CORDLESS DOG TRIMMER Model: MINI ARCO - WM6565...
  • Page 31 Model: MINI ARCO CORD / CORDLESS DOG TRIMMER - WM6565 Description of parts (Fig. 1) Blade set On/off switch Charging indicator light Appliance socket Attachment comb small = cutting lengths 3 mm and 6 mm Attachment comb large = cutting lengths 9 mm and 12 mm Cleaning brush Oil for blade set Plug-in transformer...
  • Page 32 STAINLESS STEEL BLADES AND ATTACHMENT COMBS Competition Series Blades 10mm (#3F) 42mm (#4) 42mm (#4F) 42mm (#5) 42mm (#5F) 42mm (#7) 42mm (#7F) 42mm (#8.5) 42mm (#9) 42mm 1.8mm #10) 42mm 1.5mm (#15) 42mm 0.8mm (#30) 42mm 0.6mm (#40) 42mm 0.4mm (#50) 42mm...
  • Page 33: Battery Replacement, Removal & Disposal

    At the end of its life, when it will no longer take a full charge, the battery in your trimmer must be removed and recycled/disposed of correctly. Batteries should be disposed of at an official collection point. If you are having trouble removing the battery you can also return the product to Wahl (UK) Ltd Customer Services who will dispose of it in an environmentally safe way.
  • Page 34: Wiring & Disposal

    Fuse cover must be refitted when changing the fuse. If the fuse cover is lost the plug must not be used until a replacement is obtained. Information for obtaining the correct fuse is marked on the carrier itself and in the bottom of the fuse cavity in the plug. These may be obtained from Wahl (UK) Ltd. KM5 - WM6260...
  • Page 35 DISPOSAL Handle with care! Environmental damage in the case of incorrect disposal. Correct disposal will ensure environmental protection and prevent any potentially harmful impacts on people and the environment. Adhere to the relevant legal requirements when disposing of the appliance. Information on the disposal of electrical and electronic appliances in the European Community: Within the European Community, national regulations are specified for the disposal of electrical appliances, based on EU Waste Electrical and Electronic Equipment Directive 2002/96/EC (WEEE).
  • Page 36 WAHL (UK) LTD Sterling House Clipper Close Ramsgate Kent CT12 5GG Customer Services T: 01227 740066 W: www.wahl.co.uk E: customer.services@wahl.co.uk Form No. ZB642 Rev.2 09-18...

This manual is also suitable for:
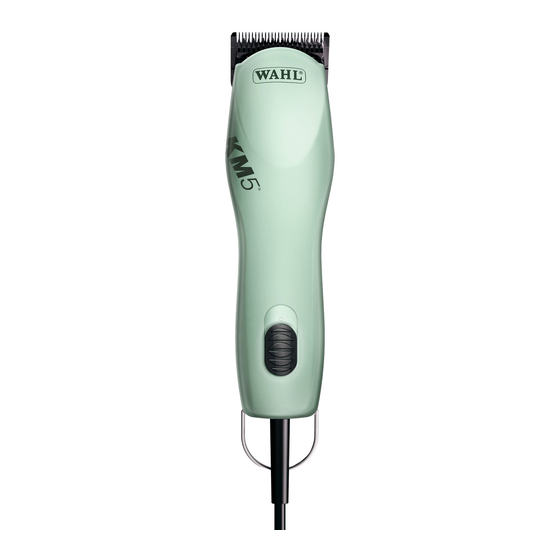
Km5BravuraKm10BravminiPower gripMini arco ... Show all

Table of Contents