Table of Contents
Advertisement
Quick Links
Advertisement
Table of Contents

Related Manuals for Yamaha YC Series


Summary of Contents for Yamaha YC Series
- Page 1 STAGE KEYBOARD CLAVIER DE SCÈNE TECLADO DE ESCENARIO...
- Page 2 YC61 Owner’s Manual...
- Page 3 Compliance with FCC regula- uted by Yamaha Corporation of America or its subsidiaries. * This applies only to products distributed by Yamaha Corporation of America. (class B) COMPLIANCE INFORMATION STATEMENT (Supplierʼs declaration of conformity procedure) Responsible Party: Yamaha Corporation of America Address: 6600 Orangethorpe Ave., Buena Park, Calif.
-
Page 4: Important Safety Instructions
Explanation of Graphical Symbols The lightning flash with arrowhead symbol CA U TI O N within an equilateral triangle is intended to alert the user to the presence of uninsulated RISK OF ELECTRIC SHOCK “dangerous voltage” within the product’s DO NOT OPEN enclosure that may be of sufficient magnitude to constitute a risk of electric shock to persons. -
Page 5: Precautions
Then have the device inspected by Yamaha service personnel. • Only use the voltage specified as correct for the instrument. The required voltage is printed on the name plate of the instrument. - Page 6 When you are not using the product for a long time, make sure to unplug the power cord from the wall AC outlet. Yamaha cannot be held responsible for damage caused by improper use or modifications to the instrument, or data that is lost or destroyed.
-
Page 7: Notice
• Do not use the instrument in the vicinity of a TV, radio, • This product incorporates and bundles contents in stereo equipment, mobile phone, or other electric which Yamaha owns copyrights or with respect to devices. Otherwise, the instrument, TV, or radio may which Yamaha has license to use others’ copyrights. -
Page 8: Welcome
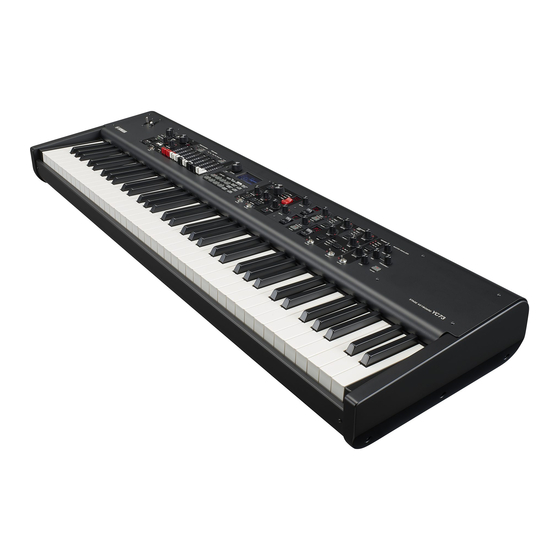
The YC61 is equipped with high-quality acoustic piano and electric piano sounds perfected in and derived from the Yamaha CP series. It also features an FM tone generator with 128-note polyphony for smooth, dynamic performance. Design embodies high-class appearance and portability The finely crafted design and aluminum exterior of the YC61 delivers both a sleek, professional appearance in a lightweight (7.1 kg), highly portable instrument—perfect for onstage use. -
Page 9: Table Of Contents
Contents PRECAUTIONS ..............5 Using with External Devices NOTICE ................7 Setting the MIDI transmit and receive channels ... 28 Information................7 Setting the internal tone generator to not produce Welcome................8 sound when the built-in keyboard is played ..28 Accessories ................8 Setting how the MIDI [IN]/[OUT] terminals are used Main Features ..............8 (MIDI Port settings) .......... -
Page 10: Controls And Functions
Controls and Functions Front Panel SPEAKER/AMP Section Organ Section Live Set (page 18) (page 14) (page 12) Settings of LCD and the lamps 1 Bend Lever For using as the Pitch Bend controller or as to change the To make the following settings, press the [MENU] rotation speed of the rotary speaker on the SPEAKER/ button →... - Page 11 Controls and Functions Master EQ Keys (Key A, Key B) Sections EFFECT, SPEAKER/AMP, REVERB (page 19) (page 16) Sections (pages 17–19) 6 [EXIT] button 9 [TOUCH] button The MENU screens and the SETTINGS screens have a For selecting curves that determine how the actual hierarchical structure.
-
Page 12: Live Set
Controls and Functions Live Set Live Set View Turn the Encoder dial when at the Top screen to open the Live Set View. On the Live Set View, the names of the Live Set Sounds [1]–[8] for one Live Set Page are displayed in a screen. -
Page 13: Swapping/Copying Live Set Sounds
The Split function allows you play different Voices with details, refer to the website below. the right and left hands. The point on the keyboard that http://www.yamaha.com/2/soundmondo separates the right hand section and the left hand section of the keyboard is called the “Split Point.”... -
Page 14: Organ Section
Controls and Functions Organ Section & The YC61 Organ Section allows you to select an organ type from the VCM Organ tone generator that faithfully reproduces a tonewheel-type vintage organ or an FM tone generator that reproduces a transistor-type organ, and uses physical drawbars allowing you to perform while changing the organ sound in real time. - Page 15 Controls and Functions ( LOWER/UPPER [L U] button button, the values for the actual positions of all the drawbars are immediately reflected in the settings without having to The Organ Section is divided into two parts: LOWER move the drawbars. and UPPER.
-
Page 16: Keys (Key A/Key B) Section
Controls and Functions P SPLIT [L R] button Keys (Key A/Key B) Section Determines where the currently selected Section can be played on the keyboard, with the Split Point as the basis. Pressing the button alternates sequentially between the three settings. The Section sounds no matter where on the keyboard you play. -
Page 17: Effect Section
Controls and Functions b Effect type selection switch/display EFFECT Section Use this switch to select the type of Insertion Effects. The type name currently selected is displayed using two characters. The Effect types that can be selected in EFFECT 1/2 and the EFFECT Section are different. -
Page 18: Speaker/Amp Section
Controls and Functions g [TAP] button tune the status of the rotary speaker from [SETTINGS] button “Sound” “Rotary Speaker” (page 44). Use this button to control the speed (tempo) when the • Rtr A and Rtr B use monaural input and stereo/monaural “Tempo Delay”... -
Page 19: Reverb Section
Controls and Functions REVERB Section Master EQ Master EQ adjusts the tone of the overall sound. r MASTER EQUALIZER [ON/OFF] button The REVERB Section applies a reverb effect to all Voice To enable (turn on) or disable (turn off) the Master EQ. Sections, creating a rich, special ambience as if you are The lamp is lit up when Master EQ is applied. -
Page 20: Rear Panel
Rear Panel AC outlet USB flash drive Computer 1 [STANDBY/ON] switch 5 MIDI [IN]/[OUT] terminals For switching the instrument to standby or turning it on. With a standard MIDI cable (commercially available), you can connect an external MIDI instrument, and 2 [AC IN] jack control it from this instrument. - Page 21 Controls and Functions FC3A, FC4A, External FC4A, synthesizer, etc. Headphones Keyboard amplifier Monitor speakers External MIDI keyboard, etc. 8 FOOT CONTROLLER [1]/[2] jacks ! [PHONES] jack For connecting a separately sold foot controller (FC7), Use this 1/4" standard stereo phone jack to connect a which conveniently lets you continuously control one of pair of headphones.
-
Page 22: Setting Up
Setting Up Setting Up Power Supply Connecting Speakers or Headphones Connect the respective ends of the supplied AC power cord in the following order. Make sure the [STANDBY/ Since the instrument has no built-in speakers, you will ON] switch on the instrument is set to the STANDBY need to monitor the sound of the instrument by using position. -
Page 23: Auto Power Off Function
Basic Structure & Display Content Auto Power Off Function Restoring the Factory Default Settings (Factory Reset) The Auto Power Off function automatically turns off this instrument after 30 minutes of inactivity. By default, The Factory Reset function allows you to restore this this is set to “Disable.”... -
Page 24: Exiting From The Current Screen
Exiting from the Current Use the Live Set Sound [1]/[2] buttons to move the cursor to the position of the character you wish to edit. Screen Use the Encoder dial to select characters, and then use the following buttons to edit the name. The MENU screens and the SETTINGS screens are arranged in a hierarchical structure. -
Page 25: Saving / Loading Data
Saving / Loading Data Saving / Loading Data In the File screens ([MENU] button → “File”), you can save/load the data of this instrument, including the entire system settings, entire Live Set, or each Live Set Sound to/from a USB flash drive. NOTE Before using a USB flash drive, be sure to read “Precaution when using the USB [TO DEVICE] terminal”... -
Page 26: Formatting A Usb Flash Drive
When turning off the instrument, make sure that the The instrument does not necessarily support all instrument is NOT accessing the USB flash drive by file commercially available USB devices. Yamaha cannot management (such as during Save, Copy, Delete and guarantee operation of USB devices that you purchase. -
Page 27: Using With External Devices
Using with External Devices Using with External Devices By using the MIDI [IN]/[OUT] terminals and the USB [TO HOST] terminal, you can connect various kinds of external devices to this instrument. • MIDI [IN]/[OUT] terminals: Connecting the instrument to an external MIDI device (synthesizer, tone generator module, etc.), and transmit/receive MIDI data. -
Page 28: Setting The Midi Transmit And Receive Channels
USB [TO HOST] terminal to • Port 2: For communication between a computer or the the “MIDI IN 2 (YC Series)” and “MIDI OUT 2 (YC like and an external device Series)” (Port 2). -
Page 29: Connecting To A Computer
NOTE A USB cable and the Yamaha Steinberg USB Driver are If using this instrument with an iPhone or iPad app, we necessary to connect this instrument to the computer. recommend first putting the iPhone or iPad in Airplane mode and then turning the Wi-Fi on to avoid noise due to Follow the instructions below to make the connection. -
Page 30: Midi
Using with External Devices MIDI MIDI Channels Musical Instrument Digital Interface (MIDI) is a global MIDI data can be transmitted and received on one of standard designed to allow performance, Voice, and sixteen MIDI channels. Therefore, performance data other data to be transferred between musical for up to sixteen different instrument parts can be instruments. -
Page 31: Special Operations List
Special Operations List The Special Operations are convenient shortcuts that help you quickly set important functions and parameters, especially for Live Set Sounds. To use them, hold down the [EXIT] button and operate the relevant controls listed below. Location Operation Description Center area [EXIT] + [SETTINGS] button... -
Page 32: Insertion Effect Type List
Insertion Effect Type List *Keys: These effect types can only be used in the EFFECT 1 and EFFECT 2 on the Key A and Key B Sections. *EFFECT: These effect types can only be used in the EFFECT Section. Category Type Name Display Description Stereo/... - Page 33 Insertion Effect Type List Category Type Name Display Description Stereo/ Mono Pedal Wah Wah that is controlled by the pedal. Turn the [DEPTH] knob to adjust the amount of Stereo distortion, and the [RATE] knob to adjust the amount of resonance. By default, pedal wah control is assigned to FOOT CONTROLLER [2].
-
Page 34: Eg/Filter Control Type List
EG/Filter Control Type List You can change the expression of the sound in real time by operating the [EG FILTER] knob while playing phrases. This list explains the control types of each EG and Filter. EG (Envelope Generator) EG allows you to determine how the level of the sound changes in time. This lets you to reproduce a variety of sound characteristics of natural acoustic instruments—such as the quick attack and decay of percussion sounds, or the long release of sustained piano sound. - Page 35 EG/Filter Control Type List Filter Filter is a function that changes the tone of a sound by passing or only a specific frequency range and cutting signals in other frequency ranges. The YC61 controls the following two characteristics with a single knob. Cutoff Resonance Determines the cutoff frequency of the filter (which frequency...
-
Page 36: Menu List
MIDI messages received by the MIDI [IN] terminal are output without alteration to USB Port 2 (MIDIOUT2 (YC Series)). MIDI messages received by the USB Port 2 (MIDIIN2 (YC Series)) are output without alteration to the MIDI [OUT] terminal. - Page 37 MENU LIST Function name Description MIDI Settings MIDI Control Determines the transmission of MIDI control messages. When this is set to “On,” MIDI messages corresponding to the controls on the instrument are transmitted when a setting is changed using the controls (knobs, etc.), allowing you to receive and record the operation information on DAW software or an external MIDI device.
- Page 38 MENU LIST Function name Description Keyboard/ Octave Shifts the octave range of the keyboard up or down. Pedal Settings: -3 – +3 Default: Transpose Transposes the pitch of the keyboard up or down in semitones. Settings: -12 – +12 Default: Touch Curve Determines how actual velocities will be generated according to the strength with which you play notes on the keyboard (page 11).
-
Page 39: Control Panel
MENU LIST Control Panel Function name Description Panel Lock Live Set Determines whether the panel lock for each of the categories listed at left are Settings enabled (On) or disabled (Off). Organ/Keys Default: Effect/Sp Amp/Reverb Master EQ Display Lights Section Determines whether the indicator lamps of each Section are always lit (“On”) regardless the status of the corresponding Section [ON/OFF] switch. - Page 40 MENU LIST Function name Description Advanced Settings EG/Filter Reset Determines whether to reset (On) or maintain without resetting (Off) the parameters of EG and FILTER when Voices are switched in the Key A/Key B Sections. Default: System Settings Power On Sound Determines which Live Set Sound is shown when this instrument is turned on.
- Page 41 Function name Description Section Initialize Organ Initializes all the settings under [SETTINGS] → “Sound” → “Organ Settings” of Manager the Live Set Sound currently being edited. Rotary Initializes all the settings under [SETTINGS] → “Sound” → “Rotary Speaker” of Speaker the Live Set Sound currently being edited.
-
Page 42: Settings List
SETTINGS LIST SETTINGS LIST From the [SETTINGS] button, you can configure and store the various settings of the currently selected Live Set Sound. The settings made here will all be stored in the Live Set Sound. Operation Press the [SETTINGS] button. Use the Encoder dial and the [ENTER] button to select an item and display the settings screen. - Page 43 SETTINGS LIST Function name Description Key A Settings/ Mono/Poly Selects whether to play the Section as monophonic (Mono) or polyphonic Key B Settings (Poly). When set to “Mono,” the icon is displayed to the right of the Section name (A, B) on the Top screen. Default: Poly Portamento...
- Page 44 SETTINGS LIST Function name Description Rotary Speaker Determines the detailed operations of the VCM Rotary Speaker types (RtrA and RtrB types of the SPEAKER/AMP Section). Level Horn Determines the volume of the horn (treble). Settings: 0 – 127 Default: Rotor Determines the volume of the rotor (bass).
- Page 45 SETTINGS LIST Function name Description Tempo Delay Time Determines the delay time in note lengths relative to the tempo for the “Tempo Delay” effect. Settings: 1/32 Tri. – 1/2 Default: NOTE You can change the tempo used for calculating the delay time by setting it with the [TAP] button or the [RATE] knob in the EFFECT Section.
- Page 46 SETTINGS LIST Function name Description Key A • Ext+Int: Sound is generated for both key-on signals received from an external MIDI device and performance on this instrument’s keyboard. • ExtOnly: Sound is generated only for key-on signals received from an external MIDI device. Sound is not generated when the keyboard on this instrument is played.
- Page 47 SETTINGS LIST Master Keyboard This function is for using the YC61 as a master keyboard. It allows the keyboard to be split into as many as four different zones, each of which can control separate sounds of an external tone generator. For example, you can make a Live Set Sound combining Voices from this instrument and the connected external tone generators, or a Live Set Sound composed with Voices of external tone generators only.
- Page 48 SETTINGS LIST Function name Description Zone Settings Bank LSB* Determines the Bank Select LSB to be sent as a MIDI message to the external tone Zone 1–4 generator played by the currently selected zone upon selection of a Live Set Sound. *: Detailed settings Default: Program Change*...
- Page 49 SETTINGS LIST Controllers Function name Description Bend Lever Mode Switches the operation mode of the Bend Lever. • Pitch Bend: Operates as a Pitch Bend controller. • Rotary S/F: Switches between slow and fast for the rotary speaker of the SPEAKER/AMP Section.
- Page 50 SETTINGS LIST Function name Description Foot Assign Determines the Control Change number to be assigned to a foot controller (sold Controller 2 separately) connected to the FOOT CONTROLLER [2] jack. Settings: Off, 1 – 63, 65, 67 – 119, USB Audio Volume Default: 4 (Pedal Wah) Limit Low...
-
Page 51: Appendix
Appendix Display Messages LCD indication Description Auto power off disabled. This message appears when Auto Power Off is disabled. Completed. The specified load, save, format, or other Job has been completed. Connecting to USB device… Currently recognizing the USB flash drive connected to the USB [TO DEVICE] terminal. -
Page 52: Troubleshooting
No sound? Wrong sound? When a problem like this occurs, please check the following points before assuming that the product is faulty. Many problems can be solved by executing the Factory Reset operation (page 23). If the problem persists, consult your Yamaha dealer. Issue... - Page 53 Appendix Issue Suspected cause Solution Data communication between The Port settings on the computer are not Check the port settings on the computer. the computer and this appropriate. instrument does not work properly. MIDI bulk data transmission Use of the wrong terminals (MIDI, USB). Check the connections.
-
Page 54: Specifications
The contents of this manual apply to the latest specifications as of the printing date. Since Yamaha makes continuous improvements to the product, this manual may not completely apply to the specifications of your particular product. To obtain the latest manual, access the Yamaha website then download the manual file. -
Page 55: Index
VCM Organ ...............14 Key B Section ..............16 VIBRATO/CHORUS ............15 Voice Section ..............23 Live Set ................12 Live Set Sound ............. 12, 23 Yamaha Steinberg USB Driver ........29 Live Set View ..............12 Load ..................25 LOWER ................15 Master EQ ................19 Master Keyboard ...............47 MENU .................36... -
Page 56: Data List
DATA LIST Live Set Sound List Split Split Bank Name Section Voice Name Bank Name Section Voice Name Point Point Jazz Lead Organ FM EP+Pad 1 Organ Key A Key A FM The EP Key B Key B Lite Strings Rock Organ 1 Organ Motion Pad... - Page 57 DATA LIST Split Split Bank Name Section Voice Name Bank Name Section Voice Name Point Point FM EP 5 Organ String Ensemble Organ Key A FM The EP Key A Fast Strings Key B FM DX Road Key B Violin Magic Piano Organ Big Fanfare...
-
Page 58: Voice List
DATA LIST Voice List Parameter Parameter Section Category Name Section Category Name Category Value(*) Category Value(*) Organ Keys A/B Synth Lead Sine Lead Square Lead Soft Square Dirty Hook Sync Saw Lead Nu Mini Keys A/B Piano Grand 5th Lead S700 Calliope Lead Bass... - Page 59 DATA LIST Parameter Section Category Name Category Value(*) Keys A/B Others Bass Pick Bass Fretless Bass Slap Bass ChromPerc Glocken Jazz Vibes Marimba Xylophone Tubular Bell Kalimba Others Accordion Musette *This is the number used for the “Voice Number” parameters (pages 67, 68). YC61 Owner’s Manual...
-
Page 60: Control Change Number List
DATA LIST Control Change Number List O: = Organ, U: = Organ UPPER, L: = Organ LOWER, A: = Key A, B: = Key B, E: = EFFECT, S: = SPEAKER/AMP *1: Parameter Value/Controller Value Correspondence Table (page 61) *2: Assignable only to the foot switch. *3: Assignable only to the foot controller 1/2 and modulation lever. - Page 61 DATA LIST Table Panel controls CC No. (LCD indication) (*1) Controller Parameter Foot Switch, U: Drawbar 2 2/3' Drawbar Transmitted Recognized Foot U: Drawbar 2' Drawbar Controller 1, 100Hz U: Drawbar 1 3/5' Drawbar Foot 110Hz Controller 2, U: Drawbar 1 1/3' Drawbar Modulation 125Hz...
-
Page 62: Midi Data Format
DATA LIST MIDI Data Format (1) TRANSMIT FLOW +-------------------SYSTEM EXCLUSIVE MESSAGE IDENTITY REQUEST F0H 7EH 0nH 06H 01H F7H MIDI <-+--[SW1]--+---------NOTE OFF [SW1] Complies with MIDI Receive Channel. [SW2] SYSTEM MIDI Device Number +---------NOTE ON [SW3] SYSTEM Bank Select Switch [SW4] SYSTEM Program Change Switch +---------CONTROL CHANGE SUSTAIN... - Page 63 PROGRAM CHANGE, BANK SELECT MSB/LSB, VOLUME 11110000 Exclusive status 01000011 YAMAHA ID (3-2-3) ALL NOTE OFF (CONTROL NUMBER = 7BH, DATA VALUE = 0) 0011nnnn Device Number All the notes currently set to on in certain channel(s) are muted when receiving this...
-
Page 64: Midi Data Table
DATA LIST MIDI Data Table Bank Select Bulk Dump Block “Top Address” indicates the top address of each block designated by the bulk dump operation. Program Type Memory Description “Byte Count” indicates the data size contained in each block designated by the bulk dump operation. - Page 65 DATA LIST MIDI PARAMETER CHANGE TABLE Default Address Data Parameter (HEX) Size Description Notes Range Name (BULK CONTROL) High Mid Low YC61 reserved Group Number = 7F 1C, Model ID = 09 00 – 01 Section Hold Disable, Enable Address Data Parameter Default...
- Page 66 DATA LIST LIVE SET SOUND Default Address Data (HEX) Size Parameter Name Description Notes Range High Mid Low YC61 Common reserved Group Number = 7F 1C, Model ID = 09 reserved Default 00 – 01 Effect Switch Off, On Address Data (HEX) Size...
- Page 67 DATA LIST ZONE Default Address Data Parameter (HEX) Size Description Notes Range Name High Mid Low YC61 Zone 1-4 reserved zz: Zone Number, 00 – 03 (HEX) Group Number = 7F 1C, Model ID = 09 00 – 01 Receive Off, On Expression Default...
- Page 68 DATA LIST Keys Sections Default Address Data Parameter (HEX) Size Description Notes Range Name High Mid Low YC61 Key A/Key B Section 00 – 14, Effect 1 Type 16 – 17, s: Section number, 0-1 (0: A, 1: B) Group Number = 7F 1C, Model ID = 09 19 –...
-
Page 69: Midi Implementation Chart
DATA LIST YAMAHA [Stage Keyboard] Date :25-SEP-2019 MIDI Implementation Chart Model YC61 MIDI Implementation Chart Version : 1.0 Function... Transmitted Recognized Remarks Basic Default 1 - 16 1 - 16 Memorized Channel Changed 1 - 16 1 - 16 Default... - Page 70 Apache License 2.0 Copyright (c) 2009-2018 Arm Limited. All rights reserved. SPDX-License-Identifier: Apache-2.0 Licensed under the Apache License, Version 2.0 (the License); you may not use this file except in compliance with the License. You may obtain a copy of the License at www.apache.org/licenses/LICENSE-2.0 Unless required by applicable law or agreed to in writing, software distributed under the License is distributed on an AS IS...
- Page 71 MEMO YC61 Owner’s Manual...
- Page 72 MEMO YC61 Owner’s Manual...
- Page 73 Important Notice: U.S. LIMITED WARRANTY for Customers in the United States For detailed information about this Yamaha product and warranty service, please either visit the following website address (printable file is available at our website) or contact Customer Service at the address or telephone number identified below.
- Page 76 Manual Development Group © 2019 Yamaha Corporation Published 11/2019 MWMA*.*-**A0 VCN7200 YC61 Owner’s Manual...
Need help?
Do you have a question about the YC Series and is the answer not in the manual?
Questions and answers