Table of Contents
Advertisement
Available languages
Available languages
Advertisement
Chapters
Table of Contents

Related Manuals for BIS HSW

Summary of Contents for BIS HSW
-
Page 1: User Manual
ELECTRONIC SCALE BILANCIA ELETTRONICA USER MANUAL MANUALE OPERATIVO BIS S.r.l. Via Trieste, 31 20080 Bubbiano MI – Italia Tel.: +39 02 90834207 Fax: +39 02 90870542 e-mail: info@BilanceOnLine.it HSW_18.03_IT_EN_U P.IVA e C.F.: 03774900967 www.BilanceOnLine.it... - Page 2 ENGLISH ..........3 ITALIANO ..........24...
-
Page 3: Table Of Contents
INDEX INTRODUCTION ............................5 1.1 Safety Precautions ............................5 1.2 Controls ..............................5 INSTALLATION .............................. 8 2.1 Package Contents ............................8 2.2 Level Balance .............................. 8 2.3 Connect Power ............................8 2.4 Initial Calibration ............................8 OPERATION ..............................9 3.1 Tare Balance ............................... 9 3.2 Memory Function ............................ - Page 4 MAINTENANCE ............................21 5.1 Failure & Error Codes..........................21 5.2 Ordinary Maintenance..........................21 5.3 Assistance Informations ........................... 21 TECHNICAL DATA ............................22 6.1 General ..............................22 DECLARATION OF CONFORMITY ........................23...
-
Page 5: Introduction
1. INTRODUCTION 1.1 Safety Precautions Please follow these safety precautions: • Verify that the AC Adapter input voltage and plug type are compatible with the local AC power supply. • Do not position the scale such that it is difficult to disconnect the AC adapter from the power receptacle. - Page 6 It appears when the weight is stable. 4) W1 W2 INDICATOR This indicates the scale is set with dual range, and the weight is within the first range Max1/e1 or within the second range Max2/e2. 5) AVERAGE FUNCTION This indicator appears when digital motion filtering function is engaged. 6) WEIGHING UNIT This indicates the weight unit set (kg, g, lb).
- Page 7 → Short Press: Scroll Main Menu Function Short Press: Display Total Accumulated Weighing ↓ Short Press: Scroll Main Menu Function M+/MC Short Press: Save Weighing Result in Memory Function MC (after MR): Delete Memory Total Weighing ← Menu Function Setup: n.d.
-
Page 8: Installation
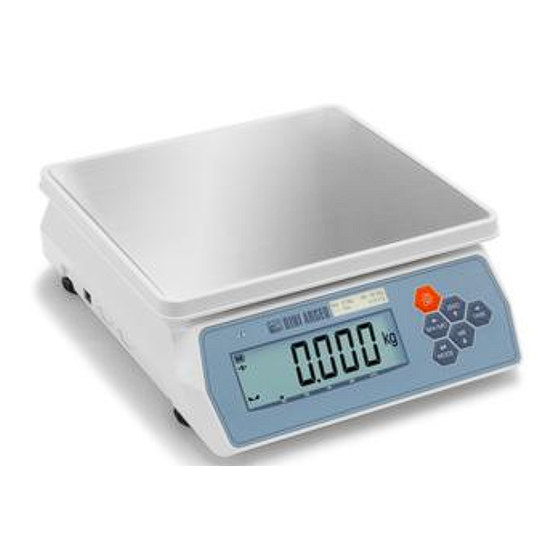
2. INSTALLATION 2.1 Package Contents User manual Switch power adaptor Scales Warranty Certificate 2.2 Level Balance Place the scale in a stable environment and adjust the adjustable feet to a level position by referring to the bubble level placed behind it. Avoid to use the scale in places with strong wind, vibration and excessive heat sources or rapid changes in temperature. -
Page 9: Operation
3. OPERATION At startup the scale will be configured as last session. 3.1 Tare Balance This indicator equips with auto tare, continuous tare (please refer to Fn.10 of internal setting) and manual tare. a) If auto tare function is enabled, the first weight being placed on platter will be automatically tared. -
Page 10: Weighing Mode
there is no data in the memory. 3.3 Weighing Mode Press repeatly MODE(ENT) until display shows the weighing unit set in configuration scale(Fn3). Press ZERO(↑) to reset the scale and put the objects to be weighed on platter. 3.4 Piece Counting Mode The scale equipped with simple piece counting function, please follow the below procedure to enable the function and sampling method. -
Page 11: How To Connect Rs-232 (D-Sub 9Pin Female Connector)
3.5 How to connect RS-232 (D-SuB 9pin female connector) Refer to 4.11 to setup transmission protocol[Fn11]). Mainboard Scales Pin 7 & 8 cortocircuitati internamente Pinout (PC) Assignment... -
Page 12: Settings
4. SETTINGS 4.1 Menu Settings DISPLAY FUNCTION SETTING ACCESS CONDITION 1. LCD segment check and software version information Fn 1 Open 2. Adjusting backlight brightness 1. Analog to digital offset value Fn 2 Open 2. Function key test Fn 3 Scales configuration setup Dealer only when LOCKED Fn 4... -
Page 13: Lcd Segment Check And Backlight Adjustment [Fn1]
Function (Fn1 - LCD Segment Check and Backlight Adjustment). Navigation in Menu Function – Scroll the Function in main menu with keys TARE(→) and MR(↓), and secondary menu with ZERO(↑) and MR(↓). Modify Parameters – For select desired parameters, press MODE(ENT). Esc to Menu –... -
Page 14: Linearity Calibration [Fn4]
4.5 Linearity Calibration [Fn4] ATTENTION !!! This function is locked by manufactureer and can’t modified by user. 4.6 Zero Tracking Speed [Fn5] ATTENTION !!! This function is locked by manufactureer and can’t modified by user. 4.7 Digital Motion Filtering [Fn6] Under this function, user can enable digital motion filtering function if the weighing environment is unstable. -
Page 15: Backlight Timing [Fn8]
4.9 Backlight Timing [Fn8] Under this function, user can select when to turn off backlight. a. Scale is off b. Press and hold TARE(→) and press ON/OFF, display shows “Fn1” c. Continue pressing TARE(→) until display shows “Fn8” d. Press MODE(ENT) to enter, and display shows “bL.10” e. -
Page 16: Transmission Protocol Through Rs232 [Fn11]
Press MODE(ENT) to enter the next function, or press ZERO(↑) to exit. When ZERO(↑) is pressed, display will show “SAVE” if setting was changed, user can either press MODE(ENT) for yes to save the changes made or press ZERO(↑) for not to save the changes. 4.12 Transmission Protocol Through RS232 [Fn11] Under this function, user can select the transmission interface, speed, mode and format for RS-232 and also the communication protocol. - Page 17 Manu: manual mode, data sends once when manually pressing keypad (press M+/MC(←) to send one data, press M+/MC(←) to clear memory and send total value) When format is set at “Ser.1”. Press M+/MC(←) to send single data (as “Ser.1” formt), and will not print total value. NOTE: 1.
-
Page 18: Printer Selection [Fn12]
99.01 1210.05 kg 10.12 …………………………. ---------------------- print total result when M+/MC(←) is pressed 9876.10kg When Real Time Clock function is enabled When indicator is set at “rtC.on”, date and time information will be included in the RS-232 data stream: When “Fn11”... -
Page 19: Turning On/Off Rtc [Fn14]
4.14 Turning ON/OFF RTC [Fn14] Under this function, user can turn on or off real time clock function. a. Scale is off b. Press and hold TARE(→) and press ON/OFF, display shows “Fn1”. c. Continue pressing TARE(→) until display shows “Fn14”. d. -
Page 20: Final Destination Gravity Value Setup [Fn21]
4.17 Final Destination Gravity Value Setup [Fn21] ATTENTION !!! This function is locked by manufactureer and can’t modified by user. 4.18 High Resolution Verification Mode [Fn99] ATTENTION !!! This function is locked by manufactureer and can’t modified by user. 4.19 Reset To Factory Default [Fn100] ATTENTION !!! This function is locked by manufactureer and can’t modified by user. -
Page 21: Maintenance
5. MAINTENANCE 5.1 Failure & Error Codes ERROR CODE DESCRIPTION SOLUTION Scale don’t start Scale don’t supplied Verify power connection and voltage Low Precision Improperly Tare Execute Tare Unstable Place Place the scale in properly zone Impossible Tare Scale Unstable Place Place the scale in properly zone Tare Weight uncorrectly Use Tare Weight correct... -
Page 22: Technical Data
6. TECHNICAL DATA 6.1 General LCD Digits 5+1/2 digits ±10% of Max Power-on Zero Range ±2% of Max Zero Range Tare Range Full Range Tare Platter Size 230 x 250mm with Stainless Steel Insert Power Source External AC Adaptor: AC100~240V, DC9V/0.6A Built-in Rechargeable Battery: 6V/4Ah Operating C / 40... -
Page 23: Declaration Of Conformity
DECLARATION OF CONFORMITY This device conforms to the essential standards and norms relative to the applicable European regulations. The Declaration of conformity is available in the web site www.diniargeo.com WARRANTY Dini Argeo products are guaranteed for a period of twelve months from delivery, excluding the parts classified as expendable materials such as mechanical printing heads, batteries, electric motors and wheels. - Page 24 INDICE INTRODUZIONE ..............................26 1.1 Precauzioni di sicurezza ..........................26 1.2 Comandi ..............................26 INSTALLAZIONE ............................29 2.1 Contenuto della confezione ........................29 2.2 Messa a livello della bilancia ........................29 2.3 Collegamento dell'alimentazione elettrica ....................29 2.4 Taratura iniziale ............................29 FUNZIONAMENTO ............................
- Page 25 MANUTENZIONE ............................42 5.1 Individuazione guasti ..........................42 5.2 Manutenzione ordinaria ........................... 42 5.3 Informazioni relative all'assistenza......................43 DATI TECNICI .............................. 44 6.1 Generali ..............................44 DICHIARAZIONE DI CONFORMITA’ ......................... 45...
-
Page 26: Introduzione
INTRODUZIONE 1.1 Precauzioni di sicurezza Seguire le precauzioni di sicurezza riportate di seguito: • Verificare che la tensione alla tensione di rete locale corrisponda al valore d'ingresso richiesto dall’alimentatore. • Non posizionare la bilancia in modo che sia difficile scollegare l’alimentatore dalla presa di corrente. - Page 27 Appare quando è stabile. 14) SOGLIE W1-W2 Indicano che la bilancia ha due campi di misura, e il peso è dentro al primo range Max1/ e1 o dentro al secondo range Max2/ e2. 15) FUNZIONE PESO INSTABILE Appare quando il filtro per pesatura in presenza di vibrazioni è attivo. 16) UNITA’...
- Page 28 Pressione avvio: Entra menu funzioni → Pressione breve: Navigazione menu principale funzioni Pressione breve: Visualizza peso totalizzato memoria ↓ Pressione breve: Navigazione menu principale funzioni M+/MC Pressione breve: Memorizzazione risultato pesata Funzione MC (dopo MR): Cancella memoria totalizzazione pesate ← Menu funzioni setup: n.d.
-
Page 29: Installazione
2. INSTALLAZIONE 2.1 Contenuto della confezione Manuale utente Alimentatore di rete Bilancia Scheda di garanzia 2.2 Messa a livello della bilancia Mettere a livello la bilancia su una superficie solida e ferma, svitando/avvitando i piedini, facendo riferimento alla bolla posta di dietro. Evitare luoghi con correnti d'aria, vibrazioni, fonti di calore eccessive o variazioni rapide di temperatura. -
Page 30: Funzionamento
3. FUNZIONAMENTO All’ avvio lo strumento sarà configurato come da ultima sessione. 3.1 Tara strumento La bilancia è equipaggiata con la funzione di tara automatica, tara continua e manuale(vedi funzione Fn10). a) Se impostata la tara automatica (tr.on), il primo peso posizionato sul piatto della bilancia viene automaticamente messo in tara. -
Page 31: Modalità Peso
a) Premere prima MR(↓) per richiamare il totale salvato in memoria. Appare l’ indicatore MR sul display. b) Premere M+/MC(←) immediatamente per cancellare la memoria e da display l’ indicatore M+ si spegne indicando che non ci sono dati in memoria. 3.3 Modalità... -
Page 32: Come Connettere Rs-232 (D-Sub 9Pin Femmina)
3.5 Come connettere RS-232 (D-SuB 9pin femmina) Fare riferimento alla sezione 4.11 (Protocollo trasmissione RS232 [Fn11]). Mainboard bilancia Pin 7 & 8 cortocircuitati internamente Pinout (PC) Assignment Uscita Uscita bilancia... -
Page 33: Impostazioni
4. IMPOSTAZIONI 4.1 Navigazione nei menu DISPLAY FUNZIONE ACCESSO 1. CONTROLLO LCD E INFORMAZIONI VERSIONE SOFTWARE Fn 1 APERTO 2. REGOLAZIONE RETROILLUMINAZIONE 1. VALORE OFFSET CONVERTITORE Fn 2 APERTO 2. TEST TASTIERA Fn 3 IMPOSTAZIONE SCALA VENDITORE(BLOCCATO) Fn 4 CALIBRAZIONE LINEARITA’ VENDITORE(BLOCCATO) Fn 5 FUNZIONE D’INSEGUIMENTO ZERO... -
Page 34: Controllo Lcd, Versione Sw E Regolazione Retroilluminazione [Fn1]
visualizzazione del menu (“Fn1” - Controllo LCD e Informazioni Versione SW). Navigazione nei Menu – Scorrere le funzioni nel menù principale con i tasti TARE(→) e MR(↓), i menu secondari con ZERO(↑) e MR(↓). Modifica Delle Impostazioni – Per selezionare le impostazioni desiderate, premere MODE(ENT). Uscita Dai Menu –... -
Page 35: Impostazione Scala [Fn3]
4.4 Impostazione scala [Fn3] ATTENZIONE !!! Questa funzione è impostata dal fabbricante e non può essere modificata dall’ utente. 4.5 Calibrazione Linearità [Fn4] ATTENZIONE !!! Questa funzione è impostata dal fabbricante e non può essere modificata dall’ utente. 4.6 Funzione d’inseguimento zero [Fn5] ATTENZIONE !!! Questa funzione è... -
Page 36: Timer Retroilluminazione Display [Fn8]
m. Premere MODE(ENT) per confermare e uscire dalla funzione e il display visualizzerà la funzione “Fn8”. n. Premere MODE(ENT) per entrare nella prossima funzione,oppure premere ZERO(↑) per uscire. Premendo ZERO(↑), il display visualizzerà la dicitura “SAVE” se sono stati modificati dei parametri;... -
Page 37: Tara Continua/Automatica [Fn10]
4.11 Tara continua/automatica [Fn10] Con questa funzione l’utente può selezionare se abilitare/disabilitare la funzione di auto tara della prima pesata o delle pesate consecutive sul piatto. g. La bilancia è spenta. h. Tenere premuto il tasto TARE(→)e premere ON/OFF fino alla visualizzazione del menù “Fn1”. i. - Page 38 parametri; Premere MODE(ENT) per confermare (YES) il salvataggio dei dati o premere ZERO(↑) per non modificare i settaggi precedenti(NO). Terminologia: nonE: nessun dato uscita rS232: dato uscita su RS-232 bAud: baud rate ProtL: protocollo trasmissione trAns: tipo trasmissione ForMt: formato trasmissione 4.12.1 Modalità...
- Page 39 Auto: modalità automatica,il dato viene spedito solo quando il peso risulta stabile. Quando il formato è impostato a “Ser.1”. L’ indicatore spedirà automaticamente la singola pesata quando questa risulta stabile e superiore a 20e; Non supporta la stampa del valore totale. ST, NT, 100.01kg ST, NT,- 100.01kg...
-
Page 40: Impostazione Stampante [Fn12]
4.13 Impostazione stampante [Fn12] Con questa funzione l’utente può selezionare la periferica che si connetterà alla bilancia. h. La bilancia è spenta. i. Tenere premuto il tasto TARE(→)e premere ON/OFF fino alla visualizzazione del menù “Fn1”. j. Premere TARE(→) fino alla visualizzazione di “Fn12”. k. -
Page 41: Impostazione Valore Gravità Fabbricante [Fn20]
q. Premere ZERO(↑) per incrementare o decrementare e TARE(→) per cambiare la cifra lampeggiante, premere MODE(ENT) per confermare ed entrare nel settaggio successivo. r. Sul display compare “M=XX”, premere ZERO(↑) per incrementare e TARE(→) per cambiare la cifra lampeggiante, premere MODE(ENT) per confermare ed entrare nel settaggio successivo. s. -
Page 42: Manutenzione
6. MANUTENZIONE 5.1 Individuazione guasti Sintomo Causa possibile Soluzione Impossibile Bilancia non alimentata Verificare connessioni e tensione accendere la bilancia Scarsa precisione Taratura impropria Eseguire taratura Ambiente non stabile Spostare la bilancia in una posizione adatta Impossibile tarare la Ambiente non stabile Spostare la bilancia in una posizione adatta bilancia Masse di taratura non corrette... -
Page 43: Informazioni Relative All'assistenza
5.3 Informazioni relative all'assistenza Se la sezione”individuazione guasti” non resolve o descrive il tuo problema, contattatare la sede Dini Argeo Srl Dini Argeo Srl, Via della Fisica, 20 - 41042 Spezzano di Fiorano (MO) Tel. 0536-843418, Fax 0536-843521, E-Mail: info@diniargeo.com... -
Page 44: Dati Tecnici
7. DATI TECNICI 6.1 Generali Cifre LCD 5+1/2 Limite Zero ±10% del massimo Accensione Limite Zero ±2% del massimo Limite Tara Tara illimitata Dim. Piatto 230 x 250mm con inserto in acciaio inox Alimentazione Adattatore Rete: AC100~240V, DC9V/0.6A Batteria ricaricabile interna: 6V/4Ah Temperatura C / 40 C (14... -
Page 45: Dichiarazione Di Conformita
La garanzia sulle celle di carico esclude i danni da urti e sovraccarichi. TIMBRO CENTRO ASSISTENZA AUTORIZZATO BIS S.r.l. Via Trieste, 31 20080 Bubbiano MI – Italia Tel.: +39 02 90834207...
Need help?
Do you have a question about the HSW and is the answer not in the manual?
Questions and answers