Table of Contents
Advertisement
Quick Links
Advertisement
Table of Contents

Related Manuals for Nastec HMA Series


Summary of Contents for Nastec HMA Series
- Page 1 Operating manual manHMA_eng_00...
-
Page 2: Table Of Contents
Index 1. Introduction to HMA ................................. 3 2. Safety Instructions ................................4 3. Technical Characteristics ..............................5 3.1 Weight and dimensions ................................5 4. Electric wiring ..................................6 4.1 Protections ....................................8 4.2 Electromagnetic compliance ..............................8 HMA installation ................................9 6. -
Page 3: Introduction To Hma
1. Introduction to HMA HMA is an electronic device for switching between power sources that integrates multiple functions: Automatic power source management: HMA, combined with any MultiPower “HMA ready” device, switches between AC power (mains or generator) and DC power (photovoltaic panels) completely automatically, based on the programmed logic. -
Page 4: Safety Instructions
2. Safety Instructions The manufacturer strongly suggests carefully reading this operation manual before using and installing its products Any operation (installation, maintenance and repair) must be carried out by trained, skilled, and qualified personnel. Failure to observe and follow the instructions in this manual may result in dangerous and potentially lethal electric shock. Pay attention to all standard safety and accident prevention regulations The device must be connected to both power supply (DC: photovoltaic panels and AC: grid or generator) via a switch to ensure the complete disconnection... -
Page 5: Technical Characteristics
3. Technical Characteristics Model I max Compatibility 4HS MP SUND HMA 218 90-400 1 x 9 0 - 2 6 5 18 A MIDA Solar 203-207 MP VS 218 MP VS 212 MP HMA 430 190-850 3 x 1 9 0 - 5 2 0 30 A VS 409-430 MP HMA 485... -
Page 6: Electric Wiring
4. Electric wiring HMA 218 AC input DC input AC/DC output P.E., T1, T2 +, -, P.E. F1+, F2-, P.E. It is necessary to respect the It is necessary to respect the polarity. polarity. HMA 430 AC input DC input AC/DC output P.E., T1, T2, T3 +, -, P.E. - Page 7 Control board Analog inputs (10 or 15 Vdc): Digital outputs: RS485 for COMBO with AN1: 4-20 mA device to be controlled: Power source signal relay: AN2: 4-20 mA NO1, COM1: closed contact with AC power supply AN3: 4-20 mA / 0 - 10 Vdc (settable ...
-
Page 8: Protections
Communication with HMA Ready device The communication between the HMA and the HMA ready device that is intended to be powered is made via serial port RS485 COMBO. It is enough to use a three wire cable with a minimum section of 0.5 mm2 connected to the terminals S1 +, S1-,G. 4.1 Protections The protections required upstream HMA depend on the type of installation, and local regulations. -
Page 9: Hma Installation
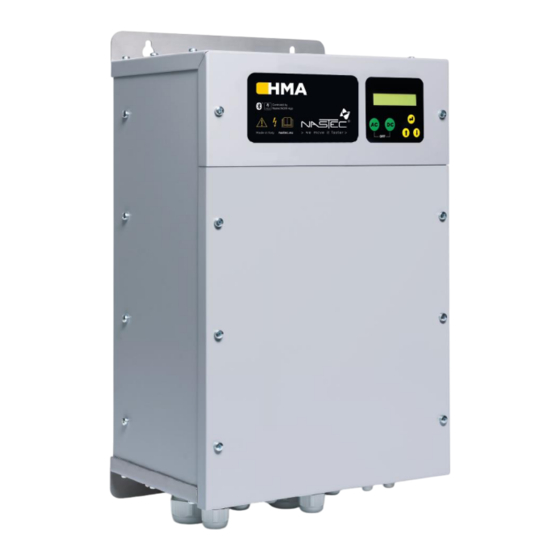
5. HMA installation HMA can be installed on the wall following the holes shown in the drawing. The IP54 protection degree (NEMA 12) allows installation even in humid and dusty environments. However, it is recommended to avoid direct exposure to atmospheric agents and sunlight. -
Page 10: Hma Use And Programming
6. HMA Use and Programming HMA software is extremely simple to use, but allows a wide variety of parameters to be set for ideal system calibration. Setting Parameters is protected by password: 1: Installer level (MENU’ CONTROL PARAMETERS, MENU’ IN/OUT PARAMETERS, MENU’ CONNECTIVITY PARAM.) A password is required for this level;... -
Page 11: Initial View
Time setting. Current Time XXXXX XX h : XX m Bluetooth communication enabling. BTLE Connection ON/OFF Once the Setting procedure is completed you will get this indication on the INITIAL SETUP display; setting parameters are recorded. These parameters can be set up individually in the menu. -
Page 12: Menu View
6.4 Menu view Pressing the ENTER key in correspondence with [MENU ’/ ENT to access] in the initial display accesses the menù. To exit the menu display and return to the initial display, press one of AC or DC buttons. Installer password required to enter level 1 (default 001) MENU’... -
Page 13: In/Out Parameters
Parameter Default Description Irradiation value for the exchange DC Start Thresh. from AC to DC supply. XXXX [W/m2] Without a solarimeter installed, the HMA will attempt to restart in DC based on this parameter, doubling the DC Start Delay ... -
Page 14: Connectivity Parameters
Parameter Default Description Digital input 3 can be connected to the alarm signal of the generator. Digital input 3 N.O. N.O. / N.C. Digital input 4 Digital input 4 can be connected to the signal of lack of fuel of the N.O. -
Page 15: Protections And Alarms
7. Protections and alarms Anytime a protection occurs a blinking message is displayed together with an audible alarm; on STATUS in the initial view, the protection is displayed; by pressing AC or DC button, only from this position (STATUS) in the initial view, is it possible to try to reset the alarm;... - Page 16 Check that the push-button panel is not accidentally pressed Call the assistance service A keyboard button has been KEYBOARD FAULT pressed for more than 120 seconds Check the generator start signal wiring. GENERAT. TIMEOUT Check the AC power supply wiring. Check the correct functioning of the generator.
- Page 17 NOTE...
- Page 20 Copyright NASTEC srl Nastec reserves the right to modify without previous notice any technical information contained in this document. Nastec srl, Via della Tecnica, 8, 36024, Mossano, Vicenza, Italy, Tel. +39 0444 886289, Fax +39 0444 776099, www.nastec.eu, info@nastec.eu...
Need help?
Do you have a question about the HMA Series and is the answer not in the manual?
Questions and answers