Table of Contents
Advertisement
Available languages
Available languages
Advertisement
Chapters
Table of Contents

Related Manuals for Beko OIM 22301


Summary of Contents for Beko OIM 22301
- Page 1 BUILT-IN OVEN OIM 22301 ELEKTRO-EINBAUHERDE FOUR ENCASTRABLES...
- Page 2 Please read these instructions before installation or using your appliance! Dear Customer, By purchasing this product you have chosen an appliance of advanced technology and high quality. The appliance was produced in modern facilities which meet all environmental standards. The instructions will help you to operate the appliance quickly and safely.
-
Page 3: Table Of Contents
Table of Contents First cleaning of the appliance....15 Q GENERAL INFORMATION..4 Initial heating........15 Overview..........4 3 HOW TO OPERATE THE OVEN 16 Technical Data........5 General information on baking, roasting Accessories supplied with the unit..6 and grilling........16 SAFETY INSTRUCTIONS..7 How to use the electric oven.... -
Page 4: Q General Information
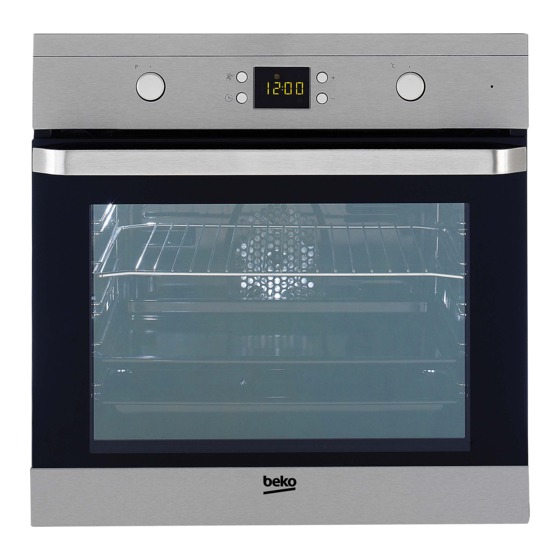
GENERAL INFORMATION Overview Control panel Shelf positions Wire shelf Top heating element Lamp Tray Handle Fan motor (behind steel plate) Door Function knob Thermostat knob Digital timer Thermostat lamp 4| EN... -
Page 5: Technical Data
Technical Data Voltage/frequency 220-240 V ~ 50 Hz Total electric consumption 2.5 kW Fuse protection min. 16 A Cable type / cross section H05W-FG 1,5 mm^ Cable length max. 2 m Outer dimensions (height/width/depth) 595 mm/594 mm/567 mm Installation dimensions (height/width/depth) **590 or 600 mm/560 mm/min. -
Page 6: Accessories Supplied With The Unit
Wire shelf Accessories supplied with the Can be used for roasting and as deposit for unit baking, roasting and casserole dishes. Important Accessories supplied can vary depending on the product model. All the accessories described in the user manual may not exist on your product. -
Page 7: Safety Instructions
SAFETY INSTRUCTIONS appliance are obtained under Explanation of safety laboratory conditions as per relevant instructions standards. These values may vary according to the usage of the appliance and ambient conditions. The following types of safety instructions and information are used in this manual. This appliance is not intended for use They can be distinguished by the symbol by persons (including children) with... -
Page 8: Safety For Children
sections of the oven, heating elements Safety when working with etc. Keep children away! electricity Always use heat-resistant gloves when putting or removing the dishes • Any work on electric equipment and into/from your oven. systems may only be carried out by authorized qualified persons. -
Page 9: Old Equipment
Old equipment Future transportation NOTICE Do not place other items on the top of the appliance. The appliance This appliance bears the selective sorting must be transported upright. symbol for waste electrical and electronic Store the appliance's original box and equipment (WEEE). -
Page 10: Installation
INSTALLATION Surfaces, synthetic laminates and Before installation adhesives used must be heat resistant The appliance is intended for installation in (100 °C minimum). commercially available kitchen cabinets. A Kitchen cabinets must be set level and safety distance must be left between the fixed. -
Page 11: Installation And Connection
Carry the appliance with at least two min. persons. Installation and connection Use the slots or wire handles located NOTICE at both sides to move the appliance. Material damage! The door handle must not be used NOTICE for lifting or moving the appliance. If the appliance has wire handles, push the handles back into the For installation the appliance must be... - Page 12 Connection to the mains supply DANGER Risk of electric shock! Important This appiiance must be earthed! Before starting any work on the Our company shall not held electrical installation, please responsible for any damage disconnect the appliance from the caused by using the appliance mains supply.
- Page 13 Installation For equipment with a cooiing fan 1. Slide the oven through the cabinet aperture, align and secure. Fix your oven with the 2 screws as indicated in the figure. Final check 1. Connect the appliance to the mains Control panel supply and switch on the mains supply.
-
Page 14: Q Preparation
PREPARATION After switching on the oven for the first Tips for saving energy time, adjust the current time with keys 5 and 6. The following tips will help you to use your appliance in an ecological way and to save energy: •... -
Page 15: First Cleaning Of The Appliance
Initial heating Important Current time settings are cancelled WARNING in case of power failure and will Hot surfaces may cause burns! need to be set again. Do not touch the hot surfaces of the appliance. Use oven gloves. Changing the time of the day Keep children away from the appliance. -
Page 16: How To Operate The Oven
HOW TO OPERATE THE OVEN onions) are particularly suited for being General information on baking, grilled. roasting and grilling • Distribute the pieces to be grilled on the wire shelf or the wire shelf on tray DANGER in a way that they should not exceed Risk of scalding by hot steam! the heater dimensions, and locate them. -
Page 17: Operating Modes
» To reset, push in the knob upon completion of your adjustment. Bottom heat Only bottom heat is on. Is Select temperature and operating mode particularly suitable for 1. Set thermostat knob to the desired dishes, such as pizza, which temperature. -
Page 18: How To Operate The Oven Timer
Surface grill The large grill (under the oven Important roof) is in operation. Suitable The maximum time to be set for for grilling larger quantities. the end of the cooking process is • Put big or medium-sized 23 hours and 59 minutes. In case portions in correct shelf of power cut, program will be position under the grill... -
Page 19: Cooking Times Table
of cooking time symbol (3) will disappear » Cooking symbol shall be on (will be displayed continuously) after cooking time as soon as the cooking has started. is set. 5. Place your dish in the oven. 3. Place your dish in the oven. 6. - Page 20 Food Cooking level Rack position Temperature Cooking time number (min.) (approx.) Sponge cake One level 5... 10 □ 2 levels 1 -5 20 .. .30 Cookies One level 25 .. .30 □ 2 levels 1 -5 170... 190 30.. .40 3 levels 1-3-5 35..
-
Page 21: How To Operate The Grill
» Since using a lid during cooking will » Increase the temperature some 10 °C and decrease the cooking time. keep the juice of the dish in the pan, cook your vegetable dishes in a pan with a lid » Dampen the layers of dough with a instead of a tray. -
Page 22: How To Use The Alarm Clock
» Alarm symbol will be on (will be How to use the alarm clock displayed continuously) after alarm time is set, and the alarm time will be displayed. As soon as the defined period of time has 3. After the alarm time is finished, alarm expired, the alarm clock will emit a signal. -
Page 23: Maintenance And Care
MAINTENANCE AND CARE Cleaning the control panel General information NOTICE DANGER Damage of the control panel! Risk of electric shock! Do not remove the control knobs Switch off the electricity before for control panel cleaning. cleaning appliance to avoid an Clean control panel and control knobs. -
Page 24: Removal Of Oven Door
NOTICE Removal of oven door Steps carried out during removing process should be performed in 1. Open the front door. reverse order (steps 4, 3, 2 and 1) to reattach the door. Do not forget 2. Open the clips at the hinge housing on to close the clips at the hinge the right and left hand sides of the front housing when reinstalling the door. -
Page 25: Troubleshooting
TROUBLESHOOTING DANGER Normal operating conditions Risk of electric shock, short • Smoke and smell may emit for a circuit or fire by unprofessional couple of hours during the first repairs! operation. Repairs on the appliance must be • It is normal that steam escapes during carried out by an approved service operation. - Page 26 Bitte lesen Sie diese Anleitung vor der Installation Ihres Gerätes gut durch! Sehr geehrte Kundin, sehr geehrter Kunde, mit dem Kauf dieses Gerätes haben Sie sich für hochwertige Technik und ausgereifte Qualität entschieden. Das Gerät wurde in modernen und umweltgerechten Be trieben produziert.
- Page 27 Inhaltsverzeichnis Erstreinigung des Gerätes....15 Q ALLGEMEINE INF0RMATI0NEN4 Erstaufheizung........15 Geräteübersicht........4 3 BEDIENUNG BACKOFEN..16 Technische Daten........5 Allgemeine Hinweise zum Backen, Braten Mitgeliefertes Zubehör......6 und Grillen........16 3 SICHERHEITSHINWEISE..7 Elektrischen Backofen bedienen..16 Erklärung der Sicherheitshinweise..7 Betriebsarten........17 Grundlegende Sicherheitshinweise..7 Zeitschaltuhr für Backofen bedienen..18 Wenn Kinder in der Nähe sind....8 Gartabelle..........
-
Page 28: Geräteübersicht
ALLGEMEINE INFORMATIONEN Geräteübersicht Bedienfeld Einschubpositionen Rost Oberes Heizelement Blech Lampe Griff Ventilator (hinter Abdeckung) Tür Funktionswähler Temperaturwähler Digitaltimer Thermostat-Leuchte 4| DE... -
Page 29: Technische Daten
Technische Daten Spannung/Frequenz 220-240 V ~ 50 Hz Leistungsaufnahme gesamt 2.5 kW Absicherung Min. 16A Kabeltyp/Kabelquerschnitt H05W-FG 3 x1,5 mm'' max. 2 m Kabellänge Außenmaße (Höhe/Breite/Tiefe) 595 mm/594 mm/567 mm Einbaumaße (Höhe/Breite/Tiefe) **590 oder 600 mm/560 mm/Min. 550 Hauptofen Multifunktionsbackofen Energieeffizienzklasse * Innenbeleuchtung 15/25 W... -
Page 30: Mitgeliefertes Zubehör
Grillrost Mitaeliefertes Zubehör Zum Grillen und als Ablage für Back-, Brat- und Auflaufformen geeignet. Wichtig Je nach Produktmodell wird even tuell unterschiedliches Zubehör mitgeliefert. Daher kann es ver kommen, dass in dieser Anleitung erwähntes Zubehör bei Ihrem Mo dell nicht vorhanden ist. Backblech Für Backwaren, Tiefkühlgerichte und große Braten geeignet. -
Page 31: Sicherheitshinweise
SICHERHEITSHINWEISE der Veranschaulichung an und müssen Erklärung der Sicherheitshinwei nicht exakt mit Ihrem Produkt überein stimmen. Am Produkt oder in der be gleitenden Dokumentation angegebe ne Werte wurden gemäß zutreffender ln dieser Anleitung werden die folgenden Richtlinien unter Laborbedingungen Arten von Sicherheitshinweisen und Infor ermittelt. -
Page 32: Wenn Kinder In Der Nähe Sind
Vergewissern Sie sich, dass sich keine ferngehalten werden, bis das Gerät leicht enflammbaren Gegenstände ne abgekühlt ist. ben dem Gerät befinden, da sich die • Das Verpackungsmaterial kann für Seitenteile im Betrieb erwärmen. Kinder gefährlich werden. Bewahren Backofenbleche, Geschirr oder Alufolie Sie Verpackungsmaterial an einem Ort nicht direkt auf den Backofenboden auf, der nicht von Kindern erreicht... -
Page 33: Entsorgung
Für Schäden, die durch unsachgemäßen Nicht in den Sammel- und Sortierungspro Gebrauch oder falsche Bedienung verur zess eingeschlossene Elektronikgeräte sind sacht werden, haftet der Hersteller nicht. durch Vorhandensein gefährlicher Sub stanzen potenziell schädlich für Umwelt und Gesundheit. Entsorgung Transport Verpackung HINWEIS GEFAHR Keine sonstigen Gegenstände auf... -
Page 34: Installation
INSTALLATION Vor der Installation Küchenmöbel müssen waagerecht ausgerichtet und fixiert sein. Das Gerät ist für den Einbau in handelsüb Befindet sich unter dem Backofen eine liche Küchenmöbel vorgesehen. Zwischen Schublade, muss zwischen Backofen Gerät und angrenzenden Küchenwänden und Schublade ein Trennboden einge und -möbel muss ein Sicherheitsabstand setzt werden. -
Page 35: Einbauen Und Anschließen
treffenden Vorschriften zur Gas- * Min. und/oder Elektroinstallation erfolgen. Einbauen und Anschließen Das Gerät mit mindestens zwei Perso HINWEIS nen tragen. Sachschaden! Der Türgriff darf nicht zum Anhe Zum Tragen des Produktes benutzen ben oder Bewegen des Gerätes Sie die Vertiefungen oder Drahtgriffe missbraucht werden. - Page 36 nähme entsprechen; siehe Technische HINWEIS Daten, Seite 5. Bei Produkten mit Drahtgriffen schieben Sie die Griffe nach dem GEFAHR Transport des Produktes wieder in Stromschlaggefahr! die Seitenwände zurück. Trennen Sie das Gerät von der Stromversorgung, bevor Sie an der Anschließen an das Stromnetz Elektroinstallation arbeiten.
- Page 37 Einbauen Bei Geräten mit Lüfter Achten Sie darauf, dass die Leitung nicht bricht und nicht gequetscht wird, wenn Sie den Ofen in die Aussparung schieben, ausrichten und fixieren. Fixieren Sie den Ofen wie in der Abbildung gezeigt mit 2 Schrauben. Lüfter Endkontroile Bedienblende...
-
Page 38: Q Vorbereitungen
VORBEREITUNGEN Nach dem ersten Einschalten stellen Sie Enerqie-Spartipps die richtige Zeit mit den Tasten 5 und 6 ein. Mit den folgenden Hinweisen nutzen Sie Ihr Gerät um weit bewusst und energiesparend: • Verwenden Sie am besten dunkles oder emailliertes Kochgeschirr - dies leitet die Wärme besser. -
Page 39: Erstreinigung Des Gerätes
Uhrzeit ändern So ändern Sie die Uhrzeiteinstellung Ihres Wichtig Ofens; Beim ersten Auf heizen des Ofens kann es zu Rauch- und Geruchs 1. Mit der Taste 11 aktivieren Sie das entwicklung kommen. Achten Sie Aktuelle Zeit-Symbol 9. auf gute Belüftung. 2. -
Page 40: Bedienung Backofen
BEDIENUNG BACKOFEN aus. Flache Stücke, Spieße und Würstchen, Allgemeine Hinweise zum Ba aber auch wasserreiche Gemüse (wie To cken, Braten und Grillen maten und Zwiebeln) eignen sich beson ders gut zum Grillen. GEFAHR • Grillgut so auf dem Grillrost (mit oder Verbrühungsgefahr durch heißen ohne untergelegtem Backblech) unter Dampf! -
Page 41: Betriebsarten
» Nach dem Beenden des backens brin gen Sie den knöpf auf 0 und drücken Sie Unterhitze den knöpf ins Gehäuse. Nur die Unterhitze ist in Be Temperatur und Betriebsart einstellen trieb. Besonders für Gerichte wie Pizza geeignet, die mit 1. -
Page 42: Zeitschaltuhr Für Backofen Bedienen
"3D"-Funktion Zeitschaltuhr für Backofen be Ober-, Unterhitze und Ring dienen heizung mit Ventilator (in der Rückwand) sind in Betrieb. Das Gargut wird gleichmäßig und schnell von allen Seiten gegart. Nur ein Blech ver wenden. Flächengrill Der große Grill (unter der Backofendecke) ist in Betrieb. - Page 43 HINWEIS Wichtig » Die Garzeit wird angezeigt, sobald Wenn Sie den Alarm durch Drücken das Gerät arbeitet. einer beliebigen Taste abschalten, schaltet sich der Ofen wieder ein. Vollautomatik-Betrieb einschalten Wenn Sie nach Abschluss des In diesem Betriebsmodus können Sie fest Alarms eine beliebige Taste drü...
-
Page 44: Gartabelle
Backen und Braten Gartabelle Wichtig » Wichtig Einschubebene 1 ist die unterste Die angegebenen Werte wurden im Ebene im Backofen. Labor ermittelt. Die für Sie richti gen Werte können davon abwei chen. Einschubposition Temperatur (°C) Garzelt (min.) Lebensmittel Anzahl Einschübe (ca.) Blechkuchen Ein Einschub... -
Page 45: Grill Bedienen
Einschubposition Temperatur (°C) Garzeit (min.) Lebensmittel Anzahl Einschübe (ca.) Ein Einschub 20 ... 30 Wenn Sie mit zwei Biechen gleichzeitig arbeiten, wählen Sie cten oberen Einschub für cfas normale Blech, den unteren Einschub für das Backblech. » Wenn vorgeheizt werden muss, lassen »... -
Page 46: Garzeitentabelle Zum Grillen
Garzeitentabelle zum Grillen Elektrischer Grill Griiidauer (ca.) Speise Einschubebene Fisch 4...5 20...25 Min. Hühnerkiein 4...5 25...35 Min. Lammkoteietts 4...5 20...25 Min. Rinderbraten 4...5 25...30 Min. * Kaibskoteletts 4...5 25...30 Min. * je nach Dicke 2. Stellen Sie die Alarmzeit mit den Tasten Kurzzeitwecker bedienen 5 und 6 ein. -
Page 47: Pflege Und Wartung
PFLEGE UND WARTUNG Bedienblende reinigen Allgemeine Pfleqehinweise HINWEIS GEFAHR Beschädigung der Bedienblende! Stromschlaggefahr! Zum Reinigen der Bedienblende Trennen Sie das Gerät vor dem die Knöpfe nicht abziehen. Reinigen von der Stromversor Bedienblende und Knöpfe reinigen. gung, damit es nicht zu Strom schlägen kommt. -
Page 48: Backofentür Ausbauen
Backofentür ausbauen Backofenlampe auswechseln 1. öffnen Sie die Fronttür. GEFAHR Verbrennungsgefahr durch heiße 2. - Öffnen Sie die Clips am Scharnierge Oberflächen! häuse links und rechts der Fronttür, in dem Sie sie wie in der Abbildung ge Vor dem Auswechsein der Lampe zeigt nach unten drücken. -
Page 49: Q Störungen Beheben
STORUNGEN BEHEBEN Normale Betriebseigenschaften GEFAHR • Bei der ersten Inbetriebnahme kann es Stromschlag-, Kurzschluss-, über mehrere Stunden zu Rauch- und Feuergefahr durch nicht fachge Geruchsentwicklung kommen. rechte Reparatur! • Während des Betriebs ist ein Dampf Das Gerät darf nur durch zugelas austritt normal. - Page 50 Veuillez lire ces instructions avant d'installer ou d'utiliser votre appareil! Chère cliente, cher client, Avec ce produit, vous avez choisi un appareil de haute qualité et de technologie avancée. L'appareil a été fabriqué dans des entreprises modernes conformes aux normes environnementales. Ces instructions vous aideront à...
- Page 51 Table des matières n GÉNÉRALITÉS........ 4 Premier nettoyage de l'appareil......15 Première cuisson............15 Vue d'ensemble............4 □ UTILISATION DU FOUR....16 Données techniques..........5 Informations générales concernant la Accessoires fournis avec l'appareil......6 pâtisserie, la rôtisserie et les grillades16 3 CONSIGNES DE SÉCURITÉ...7 Utilisation du four électrique........16 Explications des consignes de sécurité..? Modes de cuisson...........17...
-
Page 52: Généralités
GENERALITES Vue d’ensemble Bandeau de commande Positions des gradins Elément chauffant supérieur Grille Lèchefrite Ampoule Moteur du ventilateur (derrière la Poignée Porte plaque en acier) Manette des fonctions Manette de thermostat Minuteur numérique Lampe de thermostat 4|FR... - Page 53 Données techniaues Tension/fréquence 220-240 V - 50 Hz Consommation d'énergie totale 2.5 kW Protection par fusible min. 16 A Type de câble / section transversale H05VV-FG 3 x 1 , 5 m m ' ^ Longueur de câble max. 2 m 595 mm/594 mm/567 mm Dimensions extérieures (hau- teur/longueur/profondeur)
-
Page 54: Accessoires Fournis Avec L'appareil
Accessoires fournis avec Tappa- Grille reil Peut être utilisée pour rôtir et comme sup port pour les plats de cuisson et casseroles. Important Les accessoires fournis peuvent varier selon le modèle du produit. Tous les accessoires décrits dans le manuel d’utilisation peuvent ne pas faire partie de votre produit. -
Page 55: Consignes De Sécurité
CONSIGNES DE SECURITE ratoires conformément aux normes Explications des consignes de correspondantes. Ces valeurs peuvent sécurité varier en fonction des conditions envi ronnementales et d'utilisation du pro duit. Les consignes et informations de sécurité suivantes sont utilisées dans ce manuel. Cet appareil n’est pas destiné... -
Page 56: Sécurité Des Enfants
mulation de chaleur pourrait endom asseoir. Cela pourrait provoquer le mager le fond du four. basculement de l'appareil ou endom mager les charnières de la porte. • Le produit peut être très chaud pen dant son utilisation. Ne touchez jamais Sécurité... -
Page 57: Ancien Équipement
Déplacement ultérieur pièces de remballage en respectant les normes écologiques. Cela permet de pro AVIS téger l'environnement et d'économiser de Ne posez pas d’autres objets sur précieuses matières premières. l’appareil. L’appareil doit être transporté en position debout. Ancien équipement Rangez l’appareil dans son emballage d’origine et transportez-le dans son carton d'origine. -
Page 58: Installation
INSTALLATION Avant rinstallation Les surfaces, les feuillez laminées synthétiques et les adhésifs doivent ré L’appareil est destiné à être installé dans sister à la chaleur (jusqu'à 100 °C min.) les meubles de cuisines disponibles dans le Les meubles de cuisine doivent être commerce. -
Page 59: Installation Et Branchement
conformément aux réglementations en matière de gaz et d’électricité en vi Installation et branchement gueur dans votre localité. AVIS Transportez l'appareil avec au mini Dégâts matériels ! mum deux personnes. La poignée de la porte ne doit pas être utilisée pour soulever ou dé Veuillez utiliser les fentes ou les poi... - Page 60 techniques et à la consommation éner AVIS gétique ; consultez D onnées techni Si votre appareil est doté de poi ques, page 5. gnées métalliques, veuillez les repousser à l'intérieur des parois DANGER latérales après avoir déplacé le Risque d'éiectrocution ! produit.
- Page 61 Pour un appareil muni d'un ventilateur • Le câble Vert/Jaune doit être connecté à la ligne de terre (E). Installation 1. En empêchant la rupture et le coince ment du câble d'alimentation, faites coulisser le four dans le trou du meuble de cuisine, alignez-le et fixez-le.
-
Page 62: Préparations
PREPARATIONS Conseils pour économiser i’énerqie Les conseils suivants vous permettront d'utiliser votre appareil de façon écologique et d'économiser ainsi de l'énergie: • Utilisez des couvercles de couleur obscure et recouverts d'émail car la transmission de chaleur sera améliorée. • Lorsque vous cuisinez, lancez un pré Manette de programme chauffage si cela est conseillé... -
Page 63: Premier Nettoyage De L'appareil
Modification de l'heure • ^ Important Pour modifier une heure prédéfinie de votre .U II se peut qu’une odeur et de la four; fumée se dégagent au cours de la 1. Appuyez sur la touche 11 pour activer première utilisation. l'icône de l'heure 9. -
Page 64: Utilisation Du Four
UTILISATION DU FOUR exemple les tomates et les oignons, sont Informations générales concer particulièrement adaptés à cette cuisson. nant la pâtisserie, la rôtisserie et • Distribuez les pièces à griller sur la ies qriiiades grille ou sur la grille à rôtir sur la plaque, de manière à... -
Page 65: Modes De Cuisson
2. Réglez la manette des fonctions sur le mode de fonctionnement souhaité. Eiéments supérieur et inférieur avec » Le four chauffe jusqu'à la température circuiation d'air désirée puis il maintient cette température. — Les éléments supérieur et Au cours de la chauffe, le témoin de tempé inférieur et le ventilateur (dans rature est allumé. -
Page 66: Utilisation Du Minuteur Du Four
Grill de surface Réglage de la luminosité de l'écran Le grand grill (sous le plafond Volume de l'alarme du four) est en marche. Adap Heure actuelle té pour les grillades de gran Verrouillage des touches des quantités. Touche de réglage •... - Page 67 Pour l'heure de fin de cuisson, appuyez 1. Appuyez sur la touche jusqu'à ce que le symbole de la durée de cuisson sur la touche jusqu'à ce que le sym bole d'heure de fin de cuisson s'affi s'affiche. che. Réglez la durée de cuisson avec les Réglez l'heure de fin de cuisson avec touches 5 et 6.
- Page 68 Cuisson au four et rôtisserie________ Tableau des Temps de cuisson (environ) Important plus 1J Le niveau 1 est le niveau le Important du four. Les valeurs spécifiées ont été définies en laboratoire. Les valeurs qui vous seront adaptées peuvent différer de ces valeurs. Position de la Aliments Niveau de cuisson...
- Page 69 Position de la Aliments Niveau de cuisson Temperature Temps de grille cuisson (min.) (environ) Un niveau 20 ...30 Lors de la cuisson avec deux plaques simultanées, placez la plaque de four sur la partie supérieure et la plaque de pâtisserie sur la partie inférieure. »...
-
Page 70: Utilisation Du Grill
utilisation du grill 2. Préchauffez le grill pendant environ 5 AVERTISSEMENT minutes si nécessaire. Les surfaces chaudes peuvent brûler ! » La lampe du thermostat s'allume. Fermez la porte du four pendant Arrêt du grill les grillades. 1. Tournez la manette de commande du Allumage du grill grill sur la position arrêt (haut). -
Page 71: Comment Utiliser L'alarme
» Le symbole de l'alarme doit apparaître Comment utiliser l'alarme (affiché en continu) lorsque la durée de l'alarme a été définie, et la durée de A la fin de la période définie, l'alarme émet l'alarme doit s'afficher. un signal. L'alarme n'a aucune influence sur Lorsque la durée de l'alarme est écou... -
Page 72: Maintenance Et Entretien24
MAINTENANCE ET ENTRETIEN Nettoyage du bandeau de com Généralités mande DANGER AVIS Risque d'électrocution ! Dégâts du bandeau de com Coupez l'électricité avant de net mande ! toyer l'appareil pour éviter tout Ne retirez pas les manettes de risque d'électrocution. commande pour nettoyer le ban... -
Page 73: Démontage De La Porte Du Four
Démontage de la porte du four Remplacer l’ampoule du four DANGER Ouvrez la porte avant. Les surfaces chaudes peuvent brûler ! Ouvrez les clips sur le logement de la charnière sur les côtés droit et gauche Vérifiez que l'appareil est éteint et de la porte avant en faisant pression sur qu'il a refroidi pour éviter tout ris... -
Page 74: Remplacer L'ampoule Du Four
RECHERCHE ET RESOLUTION DES PANNES Conditions de fonctionnement normales DANGER • Une odeur et de la fumée peuvent se Les réparations effectuées par dégager pendant quelques heures des personnes non profession cours de la première utilisation. nelles vous exposent à un risque •... - Page 75 285.4404.68/R.AD/23.03.2011/6-1...
Need help?
Do you have a question about the OIM 22301 and is the answer not in the manual?
Questions and answers